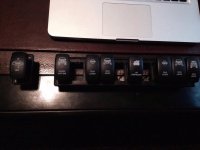
I ordered enough parts to build two AWESOME PODS from waytekwire.com. I didn't buy the $82 crimper, I just stuck to the cheeper one ($22).
http://www.waytekwire.com/item/533/CRIMPER-SEALED-METRI-PACK/
I found the 50A circuit breakers for the AWESOME PODS on eBay for $10/ea
http://www.ebay.com/itm/INLINE-AUTO...WG-/271244959400?ssPageName=ADME:L:OC:US:3160 I liked the inline ones that didn't require crimps to be added, they lock in with a set screw. I plan to soldier the ends before I tighten the set screws.
The red and black end's to cover the 1/4 inch terminals on the back of the AWESOME PODS are from
http://www.vteworld.com/content/termins/200Series/html/212Series/212Series.php It's the 212 series. Part numbers are 212N2V02 (Red) and 212N2V14 (black). There is a minimum order of $25 from them. I thought ahead and ordered a few extra for WAL friends. Happy to ship some if you will pay the shipping. They were $.46 EA.
I tore out most of my wiring in the "Doc" (my jeeps name since it has cost as much as therapy but I have gotten much better stress relief out of the build). I rewired my winch controller to inside my engine compartment (and added a switch to the inside of the cab) and I am planning to add the 300A circuit breaker to the feed line for the winch. I hated the fact that the #2 wire would be exposed on the circuit breaker. When I searched the rubber boots for the AWESOME PODS I tried to find some to cover the terminals on the 300 A breaker too. To my surprise, the same sones could be used:clap2:. The 300A circuit breaker was off of Amazon for $15.54 with PRIME shipping.
http://www.amazon.com/gp/product/B001RS4YOM/ref=oh_aui_detailpage_o08_s00?ie=UTF8&psc=1
I hope this helps some others. Again, happy to ship the small terminal covers to a few.....
Steve


") Thankfully you only have 7 :thumb:
Thankfully you only have 7 :thumb:


