You are using an out of date browser. It may not display this or other websites correctly.
You should upgrade or use an alternative browser.
You should upgrade or use an alternative browser.
Ball Joint Write Up
- Thread starter Smokumace
- Start date
RamP
Member
OverlanderJK
Resident Smartass
It's pretty easy.
1. Take the wheel/tire off
2. Take the axle nut off with a 35(?)mm socket. Easiest to put it in 4wd so the axle doesn't spin.
3. Take off the caliper with 21mm socket and try to leave it connect to the rotor so it'll be easier to install
4. Pull the axle shaft
5. Remove the abs sensor with a number 5 hex head
6. Remove the 3 12 point 13mm bolts holding on the hub on
7. Pull off the hub off
8. Remove the two nuts holding on the knuckle to the ball joints
9. With a pickle fork or a dead blow remove the knuckle being carful not to let it fall. When it's loose twist it and set it on a bucket
10. Remove upper ball joint
11. Remove lower ball joint
12. Install lower making sure to use anti seize and install the zerk fitting facing forward before pressing in
13. Install the upper
14-21. Reverse the steps starting at 9
22. Install the zerk fitting for the upper ball joint
23. Put the wheel and tire back on
Do the other side. That's a quick run down. Hope it helps.
MTG
Caught the Bug
It's pretty easy.
1. Take the wheel/tire off
2. Take the axle nut off with a 35(?)mm socket. Easiest to put it in 4wd so the axle doesn't spin.
3. Take off the caliper with 21mm socket and try to leave it connect to the rotor so it'll be easier to install
4. Pull the axle shaft
5. Remove the abs sensor with a number 5 hex head
6. Remove the 3 12 point 13mm bolts holding on the hub on
7. Pull off the hub off
8. Remove the two nuts holding on the knuckle to the ball joints
9. With a pickle fork or a dead blow remove the knuckle being carful not to let it fall. When it's loose twist it and set it on a bucket
10. Remove upper ball joint
11. Remove lower ball joint
12. Install lower making sure to use anti seize and install the zerk fitting facing forward before pressing in
13. Install the upper
14-21. Reverse the steps starting at 9
22. Install the zerk fitting for the upper ball joint
23. Put the wheel and tire back on
Do the other side. That's a quick run down. Hope it helps.
You can skip step 2. And it's a 36.
OverlanderJK
Resident Smartass
You can skip step 2. And it's a 36.
How? Pull the shaft connected to the rotor and the caliper? My brake lines are six feet long.
MTG
Caught the Bug
How? Pull the shaft connected to the rotor and the caliper? My brake lines are six feet long.
Take the brake caliper off, take the rotor off, pull the entire shaft out.
Why do you have six foot long brake lines? And how is that relevant to your ball joints?
OverlanderJK
Resident Smartass
Take the brake caliper off, take the rotor off, pull the entire shaft out.
Why do you have six foot long brake lines? And how is that relevant to your ball joints?
Ah ok I see what your saying. I like to leave the caliper and rotor connected so I don't have to mess with it. It's tight getting the caliper back on the rotor.
ERAUGrad04
Caught the Bug
Having never done a set of ball joints before, those videos were super helpful. I followed along with a few exceptions:
- Not sure why he separated the hub from the axle. Just remove the three bolts holding the carrier to the hub and pull the axle and hub assembly out as one unit.
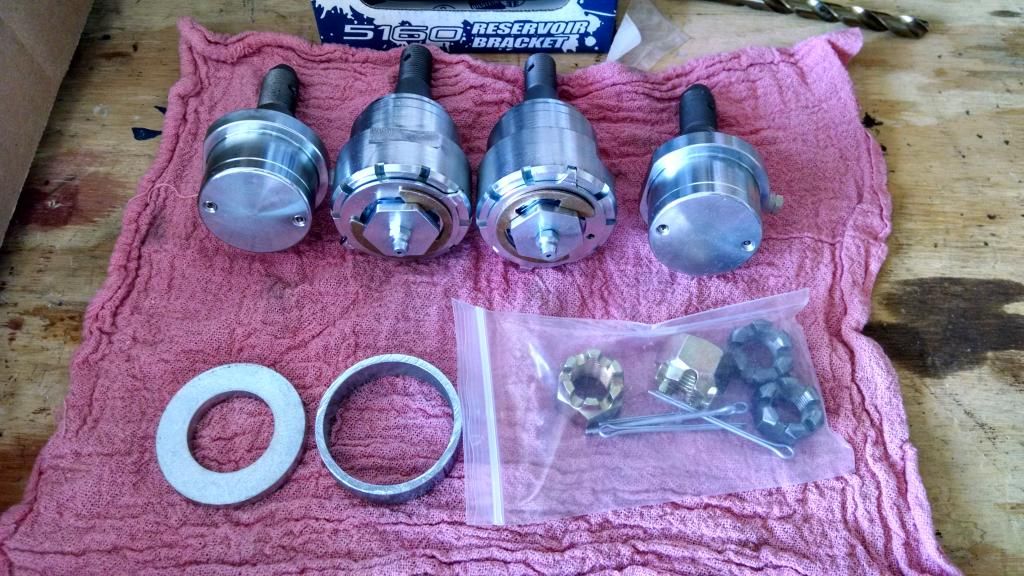
- I picked up the OTC Ball Joint Press along with the Dana adapter kit. Made for a super simple setup and saved a lot of time.
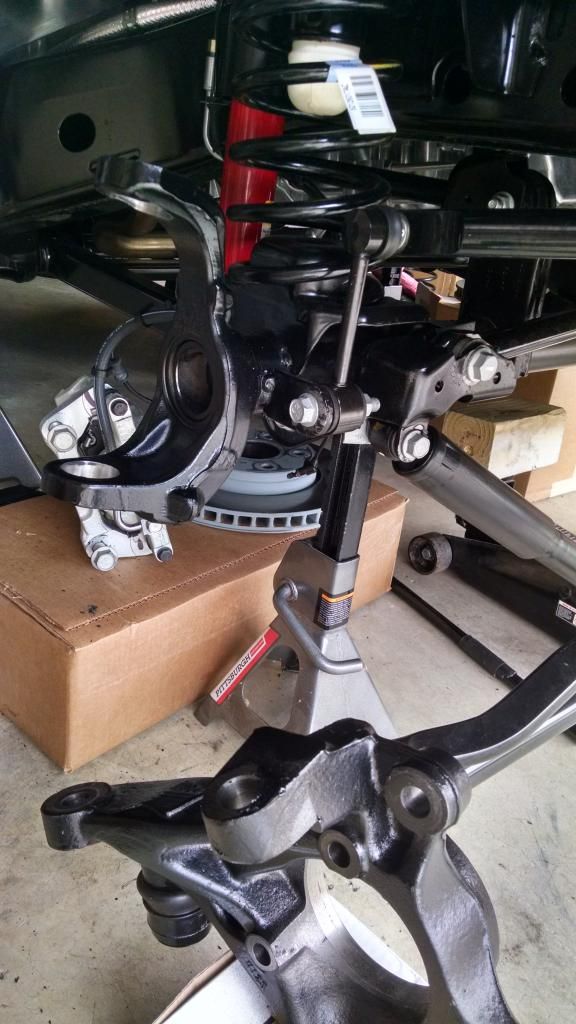
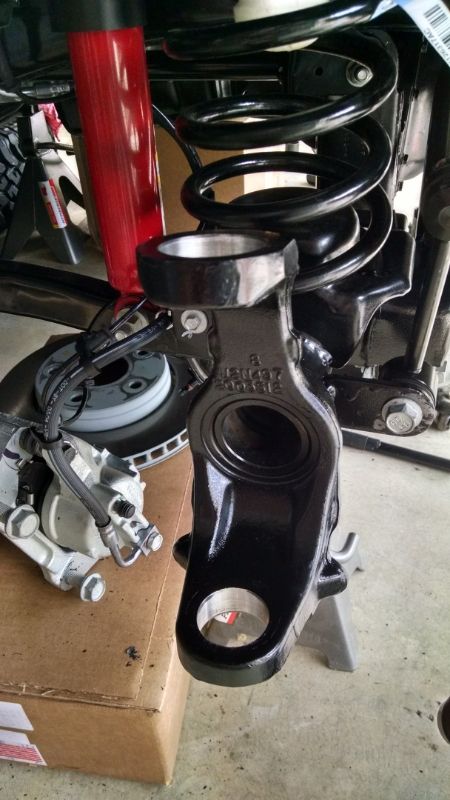
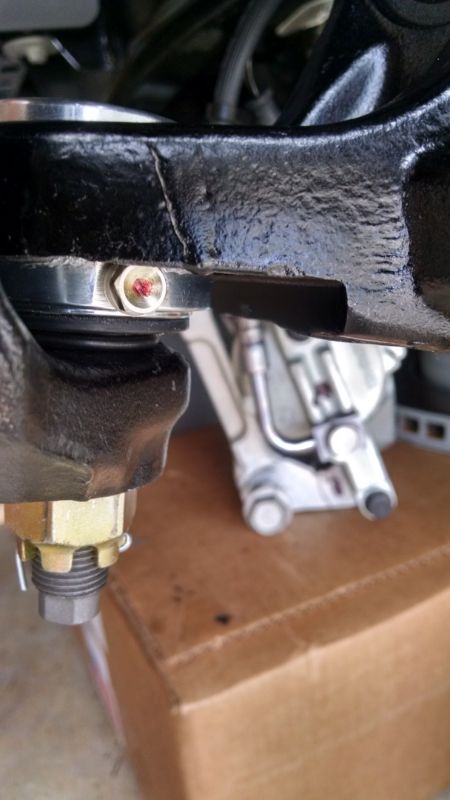
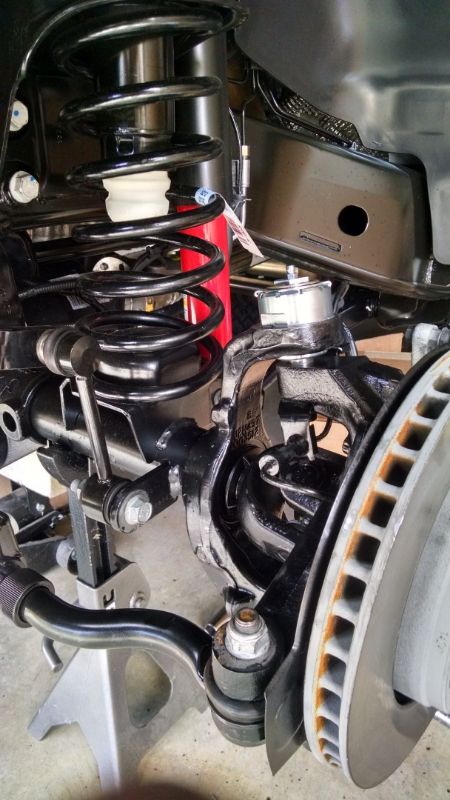
I might recommend taking a few pictures of everything before you pull it all apart. I spent a few minutes figuring out the orientation of the dust shield and a picture would have saved me a bit of time. Also, be very gentle with the speed sensors. You will have to pull the sensors out and they are prone to breakage.
Just a few pictures from my install (installed prior to lift):


Good luck and have fun with the install!
ERAU
MTG
Caught the Bug
Ah ok I see what your saying. I like to leave the caliper and rotor connected so I don't have to mess with it. It's tight getting the caliper back on the rotor.
You can leave it on this way too. Or you can stop being a pussy and just squeeze the brake pads a little and give yourself some room.
OverlanderJK
Resident Smartass
Having never done a set of ball joints before, those videos were super helpful. I followed along with a few exceptions:
- Not sure why he separated the hub from the axle. Just remove the three bolts holding the carrier to the hub and pull the axle and hub assembly out as one unit.
- I picked up the OTC Ball Joint Press along with the Dana adapter kit. Made for a super simple setup and saved a lot of time.
I might recommend taking a few pictures of everything before you pull it all apart. I spent a few minutes figuring out the orientation of the dust shield and a picture would have saved me a bit of time. Also, be very gentle with the speed sensors. You will have to pull the sensors out and they are prone to breakage.
Just a few pictures from my install (installed prior to lift):
Good luck and have fun with the install!
ERAU
The axle shaft isn't connected to the hub. They fit tight but they are not connected.
OverlanderJK
Resident Smartass
You can leave it on this way too. Or you can stop being a pussy and just squeeze the brake pads a little and give yourself some room.
 ......
MTG
Caught the Bug
I'm so glad I sent that picture to you. I know how much you love using it. :cheesy:
ERAUGrad04
Caught the Bug
The axle shaft isn't connected to the hub. They fit tight but they are not connected.
Sorry, meant to say axle connected to the carrier (via the large a$$ axle nut). Either way, in my case I did not remove the axle nut and pulled the axle out with the carrier still attached.
OverlanderJK
Resident Smartass
Sorry, meant to say axle connected to the carrier (via the large a$$ axle nut). Either way, in my case I did not remove the axle nut and pulled the axle out with the carrier still attached.
The rotor you mean? That's what MTG said. I prefer to remove everything and put new lock tight on and check everything.
GCM 2
New member
I'm so glad I sent that picture to you. I know how much you love using it. :cheesy:
I know right? I saved it to my photo stream the first time you ever used it.......but I have never gotten the chance to post it. Now it is simply a no brainer, Adam uses that meme here and no one else
MTG
Caught the Bug
I know right? I saved it to my photo stream the first time you ever used it.......but I have never gotten the chance to post it. Now it is simply a no brainer, Adam uses that meme here and no one else
It's like his calling card of sorts. Kids got to have something I guess. :idontknow:
OverlanderJK
Resident Smartass
I know right? I saved it to my photo stream the first time you ever used it.......but I have never gotten the chance to post it. Now it is simply a no brainer, Adam uses that meme here and no one else
 .....
.....