You are using an out of date browser. It may not display this or other websites correctly.
You should upgrade or use an alternative browser.
You should upgrade or use an alternative browser.
Poison Spyder cage install
- Thread starter mrmike
- Start date
:worthless:
I know it man. But I have no way to do much until I get home tonight...got to work to pay for all these upgrades.
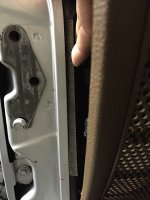
Here is one I was able to shoot this morning. Clearly the bar sticks way out and can tilt back an forth or top to bottom depending on where it sits o the adhesive stuff. Will get back to it after work.

mudmobeeler
Caught the Bug
Would it be possible to run bolts all the way through and put nuts on the back side? Maybe then you could suck it down enough to not move and solve the issue of it not being tapped as well.
Edit- Nevermind, it probably be too much of a pain on the backside with cage actually in place. I havent installed one yet so wasn't sure. Looked at first picture again.
Edit- Nevermind, it probably be too much of a pain on the backside with cage actually in place. I havent installed one yet so wasn't sure. Looked at first picture again.
Last edited:
Question.
Once you have installed the A pillar cage and screwed the bolts in, torqued them down all the way, wouldn't that take care of your issue?
Man-strength.
Yes, that is the one part that can have many complications. In theory everything else is a matter of the tubes lining up.
The driver side should be good now. Will tap the plate and bolt it up so I can still the floor mount holes.
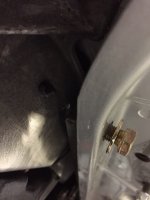
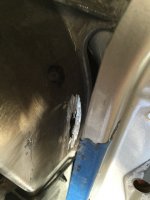
Passenger side sucks. Way tighter to work on. I can get the plate to slip in between but it his the metal dash structure. You can see in my pic where the plate has marked the dash structure. So either eat at the dash or eat at the bar. I'm going to try the spacer bar first. I think this is where PS is planning on shrinking the plate in order to eliminate the interference.

M_Savage
Caught the Bug
Here's a photo of the passenger side fitted up.
View attachment 107013
this looks real nice! :thumb: i like that you painted the dash bar black! looks really clean
Sharkey
Word Ninja
This install looks a lot like the OR-Fab but without the instructions. With the OR-Fab, I had to cut out the bump on the passenger dash structure somewhat like you have now done. Actually, I had to cut out a lot more than you have cut. The trick is to NOT cut through the wiring harness that is right behind that structure. You may need to do the same to get enough play to line up all of the holes. I used a sawzall and almost cut the harness by accident, but the result was the cage fit very well. If I had to do it again I would probably use a small hand saw to have more control. It would take more effort, but the chances of catching the harness would be much lower.
Last edited:
This install looks a lot like the OR-Fab but without the instructions. With the OR-Fab, I had to cut out the bump on the passenger dash structure somewhat like you have now done. Actually, I had to cut out a lot more than you have cut. The trick is to NOT cut through the wiring harness that is right behind that structure. You may need to do the same to get enough play to line up all of the holes. I used a sawzall and almost cut the harness by accident, but the result was the cage fit very well. If I had to do it again I would probably use a small hand saw to have more control. It would take more effort, but the chances of catching the harness would be much lower.
I used a dremel with a die grinding type bit. Made a hell of a mess, :doh: until I realized use a shop vac when grinding and there is not mess to clean up.
Anyone have the template or can measure the rock hard hole locations for me. Index of the little notch on the door jamb which is what I did for PS. Also how far in from the edge are they?
I'm so pissed at this point I may buy a rock hard. Just need to see if my holes will be at all useful.
I'm so pissed at this point I may buy a rock hard. Just need to see if my holes will be at all useful.
10frank9
Web Wheeler
this looks real nice! :thumb: i like that you painted the dash bar black! looks really clean
Thank you I appreciate that. :thumb:
What's the hang up? Is it still the dash? You can take quite a bit of that substructure out. I don't have the ability to give you the rock hard measurements but I would be very surprised if the holes lines up.
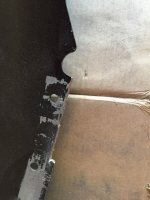
The holes in the door jamb don't line up at all with the plate. They are too low. Only way to get close is to take out the spacers that are supposed to go under the a-pillar foot. Its partially my fault as I had the spacer bar a little crooked. So the top hole is more off then the others. I would have to remove a fair amount of material to get it lined up. Only other way to lower the plate is to pull the foot further in. But still need to work the holes quite a bit.
The other issue is I am finding out that the lack of the cage tying into the windshield / factor a-pillar is that you end up with wind noise. The only thing left holding the windshield up are the two front pates. So If I stick with it I am going to need some plates fabbed up to tie it all together.
The nice thing about the rock hard is that the a pillar plate hangs from the factor a-pillar so there is more of a fixed target. That said you can, and I am sure I would, still mis drill the holes for that too.
cozdude
Guy with a Red 2-Door
Just spoke with PS. I have the wrong year cage! Some how I was sent a 2007-2010 version. Holes are different! PS is stand up on customer service. They are swapping me for a new cage.
To Be Continued...
well damn. i hope you didnt do all of the shaving and stuff for nothing. if so that stinks :/ glad they are sending you a new cage. are they going to reemburse you for the money you spent on powder coat as well?


