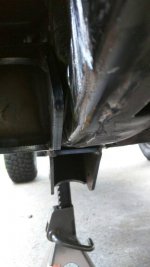
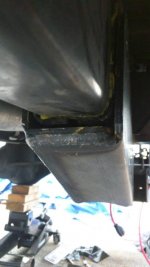
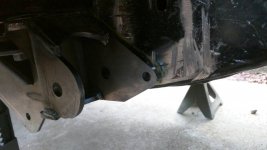
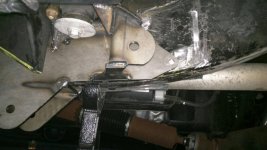
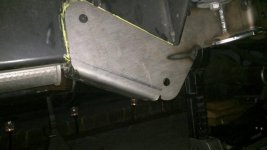
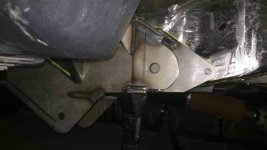
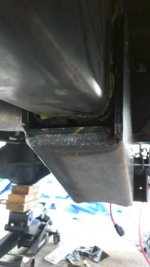
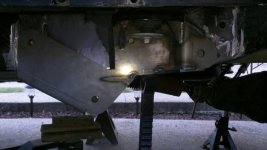
Hey everyone this is my first post, I been watching wayalife YouTube for the past few months. I'm a diy type.. After 8 hours and a angle grinder/reciprocating saw I manage to cut and grind the driver side rear arms..now I don't know if I'm placing the bracket properly into the bracket. Any advice will be appreciated...
You are using an out of date browser. It may not display this or other websites correctly.
You should upgrade or use an alternative browser.
You should upgrade or use an alternative browser.
Evo mfg long arm bolt on kit help
- Thread starter ralfman5
- Start date
nmwranglerx
Caught the Bug
Hey everyone this is my first post, I been watching wayalife YouTube for the past few months. I'm a diy type.. After 8 hours and a angle grinder/reciprocating saw I manage to cut and grind the driver side rear arms..now I don't know if I'm placing the bracket properly into the bracket. Any advice will be appreciated...
Welcome to Wayalife. It looks pretty good to me but kinda hard to tell with those pics. If you could step back a little to get a wider angle and include more in the picture, I could tell you with more certainty
Tree Frog
Member
Hey brother Ralfman5,
Man have you got your work cut out for you. Kudos for doing it yourself.
I just got done a week or so ago with my install of the Double D Pro (EVO long arms and King coil-overs.)
The rear brackets index off of the body to frame mount's. So if you can bolt them up to the body mounts then they are where they need to be.
The fronts index off the cross member and the control arm bracket that is left after cutting off everything else.
Are you planning on welding them on? I have heard it is much easier to weld them on than to drill all the bolt holes needed. It was for me. On the front brackets I bolted them in with the cross member bolts and the one tab left from the front lower control arm and welded where I could. You cant really get a lot of weld on the front brackets.
So welcome to WAYALIFE and if I can help you please let me know.
This website is the best and these guys will help you better than you could ever imagine.
Good luck with your build and don't be shy.
Hey brother Ralfman5,
Man have you got your work cut out for you. Kudos for doing it yourself.
I just got done a week or so ago with my install of the Double D Pro (EVO long arms and King coil-overs.)
The rear brackets index off of the body to frame mount's. So if you can bolt them up to the body mounts then they are where they need to be.
The fronts index off the cross member and the control arm bracket that is left after cutting off everything else.
Are you planning on welding them on? I have heard it is much easier to weld them on than to drill all the bolt holes needed. It was for me. On the front brackets I bolted them in with the cross member bolts and the one tab left from the front lower control arm and welded where I could. You cant really get a lot of weld on the front brackets.
So welcome to WAYALIFE and if I can help you please let me know.
This website is the best and these guys will help you better than you could ever imagine.
Good luck with your build and don't be shy.
Tree Frog nailed it. Without being there in person, things look good in your pictures.
I know they are a PITA, but you will be so happy with them. The only piece of advice I will give you is... Go buy some more sawzall blades!!! 8 hrs on one bracket is WAY too much time!!!
nmwranglerx
Caught the Bug
Here it goes
Looks correct to me. Good info from Tree Frog's post. I had mine installed by EVO. I highly respect someone who tackles this job on their own. Good luck.
Thank you guys for the advice...I'm hoping my neighbor welds them for me..I got the bracket on the body mount...I do see a little bit of spacing on the bottom between bracket and frame..let me know if this is fine?
Put the jack under it to suck it up tight. If you look close, there is a lower frame piece that it comes in contact with. The front piece is higher, so it looks like a bigger gap. It's fine. I just double beaded it to fill that gap
Tree Frog
Member
I don't know if I said his before or not but a big Thank You to who ever suggested a sawsall for cutting off the brackets. The side grinders were great for some stuff and a lot faster with the cut of blades, but the sawsall allowed you to get in and cut off the bulk of the stuff a lot quicker. Get some longer ones as well as the shorter ones.
8 hours is a bit much for one bracket but this may have been all total with disassembly time factored in. I could spend an hour just looking at it and thinking about every step to make sure I was not messing up. :doh:
All total it took me about 7 weeks total. This was working on it for 45 minutes or so before work, 45 or so at lunch and 2-3 hours at night. Then at least 8 hours both days on the weekends.
I was quoted I believe 24 hours for a shop to do the long arms. (wish somebody that had it done at a shop would clue us in on time and cost) I want to say like 3600.
There was a point I was really wishing I had paid somebody else to do it. In fact I recommended it to others after doing it myself.
Actually enjoy working on stuff, welding, fabricating, wrenching. There are times I think I like it better than driving.
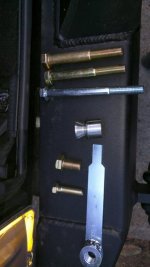
Now I have to drill the holes before welding..which holes should I drill and what drill size, and which bolt goes where?? The instructions included are terrible. Thank you guys...this is turning into a write up...
Attachments
ERAUGrad04
Caught the Bug
OK, slight thread drift but I think relevant....
Planning this same long arm kit in the spring and was curious about welding vs. bolting. I am planning to weld, but if that's the case, is it still necessary to drill the holes and bolt everything too?
Planning this same long arm kit in the spring and was curious about welding vs. bolting. I am planning to weld, but if that's the case, is it still necessary to drill the holes and bolt everything too?
Panda
New member
Now I have to drill the holes before welding..which holes should I drill and what drill size, and which bolt goes where?? The instructions included are terrible. Thank you guys...this is turning into a write up...
The 1/2 inch bolts go through the frame the little one is 5/16 through the rear of the bracket the rest should be your control arm bolts
Tree Frog
Member
Hey ERAUGrad04
On the front bracket there are bolts that come through the cross member and then through the bracket. These bolts will index the bracket very well. You will also leave a chunk of the old front lower bracket hanging down and a bolt will go through the new bracket to this old bracket as well.
Then I welded everything I could. Clean all the paint and powder coat off and burn it in hot. To me it kind of seemed like I would have liked a little more stuff to weld together in the front but I really doubt it will go anyplace.
In the rear you will need to drill one hole for the upper control arm. The bracket will index off the body mounts and you can weld full perimeter on this bracket. It will take a LOT of weld and this one I feel real good that it is not going anyplace.
So in short no you will not need to drill many holes if you want to weld it on.
EVO recommends all brackets be welded on. Now as of yet I did not weld my axel track bar brackets on. They bolt on pretty solid, however EVO also recommends these be welded on.
Not too long ago there was a thread about welding on track bar brackets VS bolting them on. Reason I am waiting is at some point I plan on going to some real axel sets.
However if these brackets come loose then they will get welded on as well.
I have a lot of photos and can take plenty more if any body has any questions.
ERAUGrad04
Caught the Bug
Hey ERAUGrad04
On the front bracket there are bolts that come through the cross member and then through the bracket. These bolts will index the bracket very well. You will also leave a chunk of the old front lower bracket hanging down and a bolt will go through the new bracket to this old bracket as well.
Then I welded everything I could. Clean all the paint and powder coat off and burn it in hot. To me it kind of seemed like I would have liked a little more stuff to weld together in the front but I really doubt it will go anyplace.
In the rear you will need to drill one hole for the upper control arm. The bracket will index off the body mounts and you can weld full perimeter on this bracket. It will take a LOT of weld and this one I feel real good that it is not going anyplace.
So in short no you will not need to drill many holes if you want to weld it on.
EVO recommends all brackets be welded on. Now as of yet I did not weld my axel track bar brackets on. They bolt on pretty solid, however EVO also recommends these be welded on.
Not too long ago there was a thread about welding on track bar brackets VS bolting them on. Reason I am waiting is at some point I plan on going to some real axel sets.
However if these brackets come loose then they will get welded on as well.
I have a lot of photos and can take plenty more if any body has any questions.
^^^ And this is why I love this site! Awesome explanation!
Thanks TF!
Hey ERAUGrad04
On the front bracket there are bolts that come through the cross member and then through the bracket. These bolts will index the bracket very well. You will also leave a chunk of the old front lower bracket hanging down and a bolt will go through the new bracket to this old bracket as well.
Then I welded everything I could. Clean all the paint and powder coat off and burn it in hot. To me it kind of seemed like I would have liked a little more stuff to weld together in the front but I really doubt it will go anyplace.
In the rear you will need to drill one hole for the upper control arm. The bracket will index off the body mounts and you can weld full perimeter on this bracket. It will take a LOT of weld and this one I feel real good that it is not going anyplace.
So in short no you will not need to drill many holes if you want to weld it on.
EVO recommends all brackets be welded on. Now as of yet I did not weld my axel track bar brackets on. They bolt on pretty solid, however EVO also recommends these be welded on.
Not too long ago there was a thread about welding on track bar brackets VS bolting them on. Reason I am waiting is at some point I plan on going to some real axel sets.
However if these brackets come loose then they will get welded on as well.
I have a lot of photos and can take plenty more if any body has any questions.
Hey, can you send me some pictures of the brackets.. It came with so many bolts,I dont know what goes where..
Tree Frog
Member
Yeah the bolts can get a little overwhelming. Best thing to do is separate them all out. The long 1/2 bolts are for bolting the brackets to the frame. The long 9/16 bolts are going to be your control arm bolts. The flag nuts will go up inside your frame as you cant get a wrench in there. (Here is a secret, Bend the flag away from the nuts flat face a little bit. like 15 degrees or so. Then use a pair of hemostats to hold the end until you get it started.)
If you just take your time and use the bolts as you need/ come to them it is not so overwhelming.
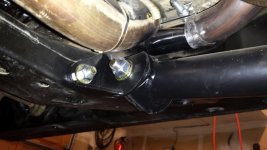
I used the long silver bolts for the cross member to front bracket as they were the perfect length and they were not needed anyplace else. Only thing was they are grade 5's and the factory bolts are 10.9's
Kind of plan on replacing these sometime.
The 4 little things that kind of look like chess pieces are called Misalignments and they will go in the front upper control arm where the ball socket is. They may need a slight tap from a soft faced mallet placed down on like a block of wood. Due to 1 bracket being kind of tight I had to take a few thousandths off of one of them to get the arm to go in smoothly.
For some reason it is kind of easy to get these front upper arms turned over and you will only discover it when you have everything together and realize "hey these will hit the frame if they move up" (ask me how I know):doh: So really pay attention to the direction stuff goes on.
Oh and whatever you do be sure you don't weld the front bracket to the cross member. You have to be able to remove it later on if your trans needs service. (I caught myself on that one at the last minutes-almost a whoopsie)
As you are working on brackets I will post up what I have. My front brackets are now covered with a modified EVO pro tek skid system and the rears are covered up some with a Poison Spyder Brawler rocker.
These photos were taken before I was done and I have changed some stuff since they were taken. (bumpstops, hose routing and various other small things that wont affect you.)
View of rear bracket with arms on.
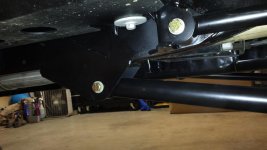
Rear bracket and arms
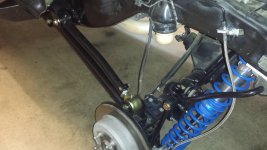
Some views of the front bracket and arms
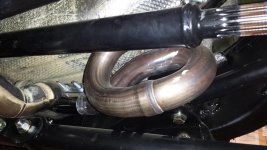
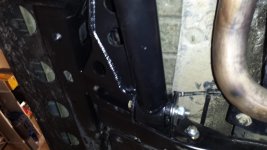
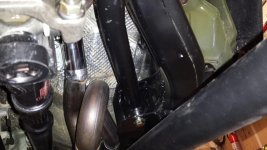
If you just take your time and use the bolts as you need/ come to them it is not so overwhelming.
I used the long silver bolts for the cross member to front bracket as they were the perfect length and they were not needed anyplace else. Only thing was they are grade 5's and the factory bolts are 10.9's
Kind of plan on replacing these sometime.
The 4 little things that kind of look like chess pieces are called Misalignments and they will go in the front upper control arm where the ball socket is. They may need a slight tap from a soft faced mallet placed down on like a block of wood. Due to 1 bracket being kind of tight I had to take a few thousandths off of one of them to get the arm to go in smoothly.
For some reason it is kind of easy to get these front upper arms turned over and you will only discover it when you have everything together and realize "hey these will hit the frame if they move up" (ask me how I know):doh: So really pay attention to the direction stuff goes on.
Oh and whatever you do be sure you don't weld the front bracket to the cross member. You have to be able to remove it later on if your trans needs service. (I caught myself on that one at the last minutes-almost a whoopsie)
As you are working on brackets I will post up what I have. My front brackets are now covered with a modified EVO pro tek skid system and the rears are covered up some with a Poison Spyder Brawler rocker.
These photos were taken before I was done and I have changed some stuff since they were taken. (bumpstops, hose routing and various other small things that wont affect you.)
View of rear bracket with arms on.

Rear bracket and arms

Some views of the front bracket and arms


Looks Great. I just read an article in JP Magazine on this same kit and had previously been researching long arm kits for some time. I hope to buy the EVO kit this spring and install myself. It's great to see someone else doing it and the helpful knowledge on this site. I am not shy about wrenching at all and will probably weld most my own brackets. One thing to keep in mind on your cutting, especially with a sawzall, is to use a higher TPI blade and cut with slow rpm's. If you try to cut too fast it will overheat the blade and strip the teeth off. This is officially my first post so I'll send out a WAL Wave!!! :standing wave:

