WxNerd2015's Never Ending Build

WxNerd2015

New member
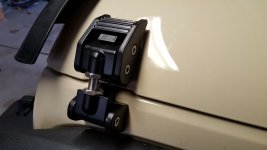
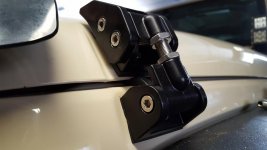
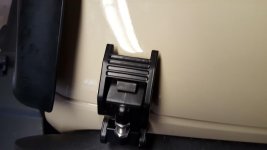
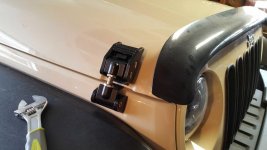
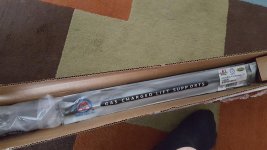
Hood latch kit is awesome. Looks great, works great. You'll love them! Really interested in how the hood lift kit installs and works out. I have been eyeing this for a bit and wondered if it was worth getting.

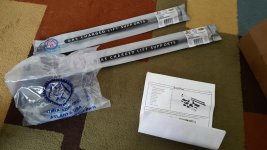
Glad to hear! I am super excited after receiving em! They are heavier and more solid than I thought and are going to look awesome! Plus I am so happy to get rid of the hood flutter! I will definitely post up all after both are installed! I finally got tired after not being tall enough to get the hood high enough to get he prop bar to hold. I have to do this shuffle around the corner after I have popped the prop bar loose and lift the hood from the side to finally get the prop in, I am hoping this will be soooo much nice! And I can stop fighting to get the hood open!

I did pick the kit from Extreme Terrain as it was the newer kit, same part # though that had an additional bracket to mount the lower part of the strut compared to all the other sights I saw, and I liked this design a slight bit better than mounting it straight to the lower opened hole. I think the angle gets a bit better for when it's closed! Either way, i will report back on how it goes!
 

WxNerd2015

New member
Hood Flutter Gone!

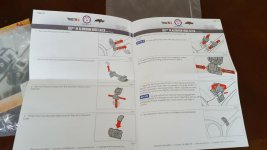
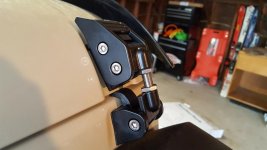
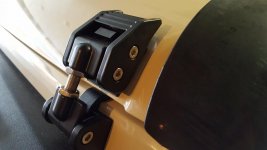
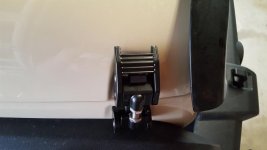
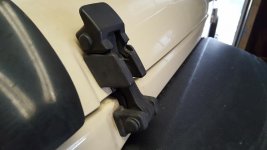
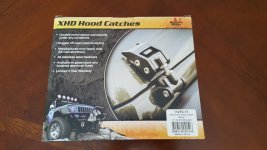
Yesterday I managed to have an hour free and decided I would get the Rugged Ridge HD Aluminum Hood Catch system installed on the Jeep! My overall impression was the the installation was rather straight forward and simple, and the hinges were definitely much heavier than I expected and high quality. I was surprised to see that, the little rubber bumper that goes between the hood and fender where the hood closes, was included in the kit and I didn't have to pull off the factory one. I was disappointed however with the fact that the kit came with washers, but no where in the directions does it mention to install them, nor is it even listed in the parts list I believe (however the latter I could have missed). I know that it should have been rather obvious to add the washers onto the bolts since the factory ones that came out had washers and the bolts which were already threaded onto the hinges did not, but I would have liked that explicitly stated, and I had to uninstall some parts when I realized this and add the washers back in. Not a big deal, and shouldn't have needed to be expressed, however, still would have been nice to have in the directions as a reminder. Other plused here that the directions were straight forward and there was no reuse of factory parts, all parts were new and either stainless steel or HD aluminum and the gaskets that go between the metal were really nice as well.

An additional disclaimer before I get into the write-up...make sure that you have plenty of extension and joint options for you sockets to be able to play with some combinations to get the right set up to get to the bolts on the inner fenders. I had all of my stuff out to get the right options. Also, instead of using the allen wrenches like I did, if you have a bit that you could get into a socket, that would work MUCH better and be a lot easier! And lastly, it helps greatly, especially with the passenger side, to remove the grill to give you better sight lines and more access into the bolts inside the fender.

So enough with the disclaimers and impressions, and I already gave ya a link to the product in a previous post, so we will dive into the in installation now. I started off with using this video from Trailrecon to help with the initial flow and to supplement the directions, as it is a great video, and the extra perspective never hurts!


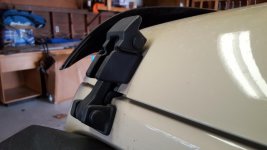
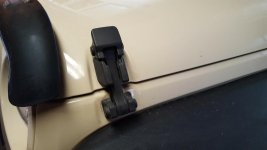
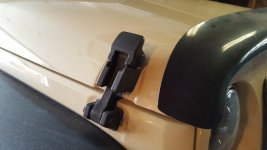
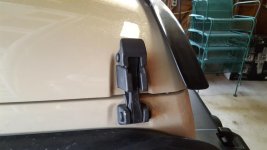
So here are some before pics with the stock latches:
20170326_141833.jpg
20170326_141840.jpg
20170326_141829.jpg
20170326_141846.jpg
20170326_141849.jpg

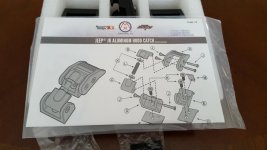
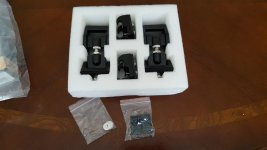
Here are the contents of the kit as well. You receive the latches (upper and lower parts), New bumpers to attach to the lower pieces, washers for all the bolts, and the rest of the hardware needed for installation.
20170326_140938.jpg
20170326_141012.jpg
20170326_141017.jpg
20170326_141102.jpg

First step was to remove the factory latches, so i started with the upper part of the latch on the drivers side attached to the hood. I used a 10mm deep socket and wrench to remove the two bolts holding that latch to the hood. Once the bolts were removed, the upper part of the latch slide straight out of the holes.

I then grabbed some cleaner and go in behind that bracket really good making sure it was spotless, as I don't plan on getting back into that area to clean for a while!

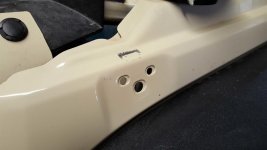
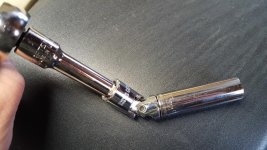
I then moved onto the driver side fender bolt. There is only one in the middle of the bracket, but it is very hard to get to. i first removed the grill from the Jeep, as this gave me some additional sight lines and clearances to get into where i needed to, but just try through any openings you can to get the right angle you need on the bolt. I had to come in from near the radiator cap fish through and opening on the driver's side. I needed a 13 mm deep socket, a long extension, and a joint on the extension. Once that nut is removed, you can slight the bracket straight out of the fender and I recommend cleaning here too.
20170326_143711_resized.jpg
20170326_143722_resized.jpg

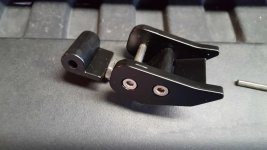
With that removed, it's now time to grab your new hood latch and start installing. You first need to remove the latch and arm from the base of the latch (the part the attaches to the fender) as the flat allen head screw that you need to tighten is located underneath that. To remove the arm, grab two allen wrenches and loosen the base and completely remove the bearing. Your latch will look like this:
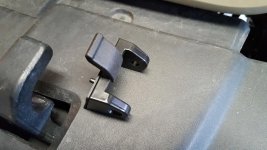
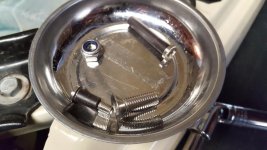
20170326_143746_resized.jpg
20170326_143750.jpg
20170326_143754_resized.jpg

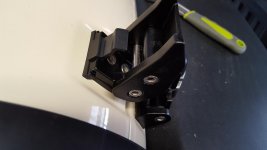
Next, line the base of the latch up with the bolt hole and 2 mounting holes in the fender in place the latch where it needs to go. Grab you locking nut, and one of the 2 bigger provided washers and thread those on to the bolt inside the fender. Be very careful not to drop these! And once those are threaded on, fish your wrench with various joints and extensions back into the fender to hold the nut and tighten the bolt on the outside with an allen wrench or a bit and socket. When finished, it will look like this:
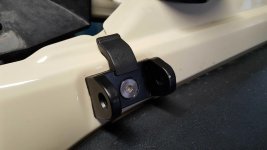
20170326_144837_resized.jpg

These are the tools needed for that part:
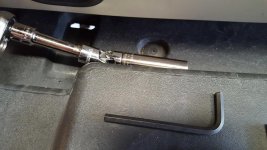
20170326_144841_resized.jpg

Now, move back to the hood, and attaching the upper mount. This is done using a 10mm socket and the same allen wrench used above. grab 2 of the 4 smaller washers and thread both on to the inner part of the hood while holding the bracket in proper place. This bracket liked to rotation slightly on me, and the gasket underneath was slightly off so I have a few times of tightening and loosening the nuts to get the bracket and gasket just right. This I recommend holding the bolt with the allen head and tighten using the socket wrench, it goes much easier and faster.
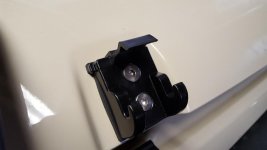
20170326_151509.jpg

With that attached, you can also reattach the latch to the lower bracket too but reinserting the ends through the latch and mount and tightening down. Your product will not look like this:
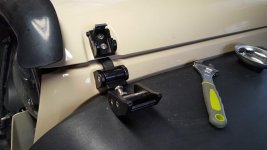
20170326_151512_resized.jpg
 

WxNerd2015

New member
Hood Flutter Gone! Part 2!

From here, you are now ready to make the file adjustments on your latch. Loosen the jam nuts (the nuts just above the lower mount and below the upper part of the latch. Try to attach the latch to the mount on the hood, if it is too tight or you can't, twist the upper part of the latch around once counter clockwise and try again. If the latch is too loose, go ahead and rotate the latch clockwise to tighten it up. Once you reach the desired level and you can latch your hood securely but there it's too much pressure or force needed to close the latch, tighten both jam nuts back up, and you are done with that latch!

20170326_151519.jpg
20170326_155453.jpg
20170326_151526.jpg
20170326_155455.jpg

Now you can move to the other side and repeat the same process! For this side, the only thing that I had to do differently was the extensions and joints on the wrench to get to the bolt inside the fender. For the passenger side, I needed to use a long and medium extension with a joint on the end and a regular 13mm socket attached and I came from underneath most of the components there and behind the headlight and their was a small gap to get the socket on properly. Just be patient and find the way that works for you to get to those bolts, you will find a way. But besides that part, everything else was done exactly the same.

20170326_155430_resized.jpg
20170326_155440.jpg
20170326_155436.jpg
20170326_155443.jpg

i am very happy with the look of these latches, they are very rugged and the contour is nice to the hood. I am also happy with the powder coating on the latches, as well as how solid these latches feel. and I can definitely tell that hood flutter is a thing of the past. I ran the Jeep up to 75 for a quick test drive and the hood did not budge once. I think this is a great product and I highly recommend it. Let me know if you have any further questions on the install or anything like that and I will do my best to answer!

20170326_160133_resized.jpg
 

WxNerd2015

New member
Big Upgrades (CB, sPod, and OBA)

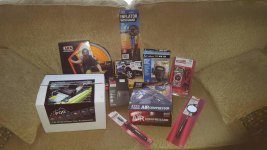
First off, here's the load of stuff again that I got for christmas again! With the highlights being the Compressor, the sPod, and the new CB!

20161227_143746_resized.jpg

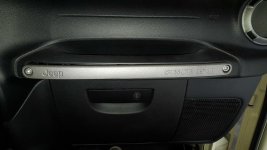
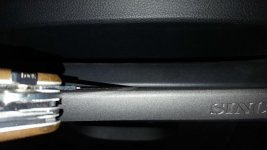
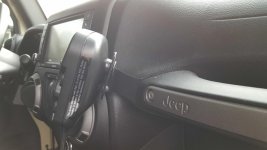
So, we will dive right in here! First step was to go ahead and install the CB mount/mic bracket to the passenger side dash handle. Start by removing the silver insert on the passenger side of the dash handle using a knife or trim removal tool, or something similar. For me, I used my pocket knife.

20170113_102715_resized.jpg
20170113_102747_resized.jpg
20170113_102800_resized.jpg

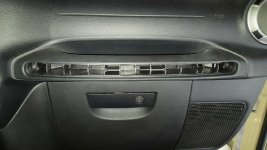
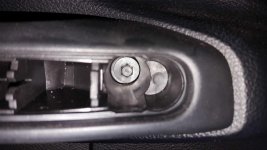
With that removed, locate the 2 bolts holding handle piece on located at the outside ends of the handle. And proceed to remove these.

20170113_102814_resized.jpg

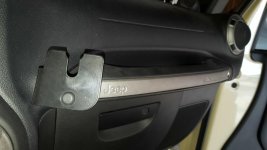
The kit comes with a spacer for the passenger side of the handle, and the plate where the CB will mount for the driver side, to keep the handle even on both sides. So line up the proper plate/mount on each side and hold the handle back up to hold them in place. Grab the bolts and tighten them back into place. As a side note though, you do need to hold both of the plates that go behind the handle as they like to rotate since there is only one attachment point and they have a slight adjustment behind the handles too, so when tightening, you may need to tighten and loosen a few times on each bolt to get them exactly right, but when mounted and tighten in, it'll look like this!

20170113_102731_resized.jpg
20170113_103638_resized.jpg
20170113_103651_resized.jpg
20170113_103644_resized.jpg
20170113_103633_resized.jpg

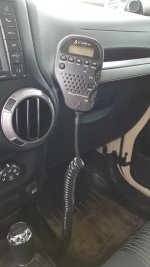
Lastly, just line up your handle insert (The silver plastic piece) and snap it in! That's all you need to mount the CB Mic Mount! This is a great mount for the Cobra 75 WX radio, or if you need a good spot to hold you mic, this is a perfect spot for it in the Wrangler!

20170113_103717_resized.jpg
20170113_103734_resized.jpg
20170113_103739_resized.jpg
 

AZ Explorer

Caught the Bug
Word to the wise, you have a lot of nice goodies, but DO NOT post any installs or reviews on that S-POD on this site. I can promise no good will come of it. That being said, the rest of your stuff looks like it'll be alright. Really interested on how the CB works for you. I asked another member about his and he liked it, but hadn't fully tuned it and so expected better results as far as distance and clarity are concerned one that was done.
 

WxNerd2015

New member
Word to the wise, you have a lot of nice goodies, but DO NOT post any installs or reviews on that S-POD on this site. I can promise no good will come of it. That being said, the rest of your stuff looks like it'll be alright. Really interested on how the CB works for you. I asked another member about his and he liked it, but hadn't fully tuned it and so expected better results as far as distance and clarity are concerned one that was done.

Noted, I know sPod does not have the "best of standings" here on this site ;) I didn't plan too much write up it, as that is pretty well documented other places, and besides, the installation is fairly simple too. But I will have a few pics at least as I am not promoting anything just showing what I used and covering my build! Thanks for the heads up/reminder though!
 

WxNerd2015

New member
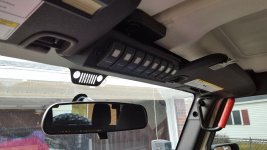
To continue with the installations. I next had to remove the current CB setup that I had above the mirror. This required removing the visors, the GraBars, the Upper plastic corners on the windshield on the inside, as well as the upper piece along the top edge of the windshield. I ran the wiring down the passenger side and around for the CB, so as I pulled all that out, I removed pieces I needed for installation too. You can see in a previous post how the radio was installed, and I just reversed that down to the antenna wire.

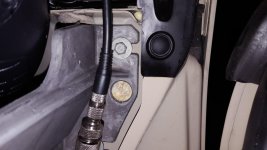
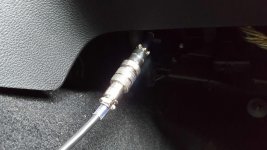
So with all those pieces removed, I moved to installing the CB Radio. First up was to route the antenna cable down the passenger side A-post and to the floorboard in the passenger side by removing the panel on the side of the dashboard. And with that off route the CB antenna cable into the glove box area and grab the controller box for the CB.

Plug the Antenna Cable in, and find a good spot to mount the controller box. For me, I mounted it on the bar just below the glove box through the glove box compartment. I will eventually go back and remount this a bit better, however for the mount, the zip ties are holding with no issue. And I could only find multicolored zip ties at the store, so this will definitely be some colorful wiring!

20170227_162117.jpg

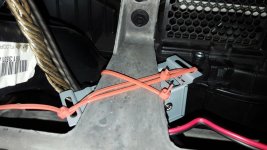
Once that is mounted, figure out where you want to run the power and ground wires (Red and Black wires) through the inside and how to get them power. For me, I am going to use the sPod for power, so I needed to get the power and ground into the engine compartment. So I started by routing the power and ground wires along the bottom edge of the passenger side speaker box and to the side of the dashboard. I then, with the side panel removed I found a route through the firewall and into the engine compartment as a foam filled hole in the upper portion of the opening.

20170116_170248.jpg

What is needed to get through this hole is to poke a hole with a screwdriver, coat hanger, or anything similar to make a hole for your wiring. When it's through, it will come out in this area of the engine compartment:

20170116_170302.jpg

This was extremely difficult to get through, because there is a very small margin or error coming through this hole, and took me an hour and a half to get the right angle going through the hole to actually get it to come through the other side and not hit anything. But it is still one of the best spots if this is your method on this side. I then spliced on some more wire to get to the driver's side of the engine compartment, and ran it through the hole opening in the fender.

20170227_162322.jpg
20170227_162326_resized.jpg

This location has held up pretty good so far, but you do need to be careful of the angle there and on a sharper metal edge. But for my purposes, I now have a hood lift kit which needs this hole, so I will have to rerun this wire. But once you have the power and ground through, I ran the wires across the firewall and connected to the sPod.

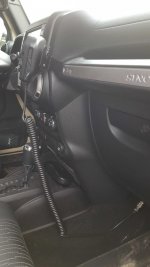
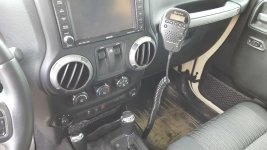
The last step here is attach the radio/mic itself. I ran the cable to connect the radio down out of the glove box compartment and underneath the dashboard. So just simply connect your radio to the connector and hang it on the mic mount installed in the previous step, and you are done! Just have to turn it on to check it and make sure all works!

20170227_162055_resized.jpg
20170227_162019_resized.jpg
20170227_162046_resized.jpg
20170227_162049_resized.jpg
20170227_162015_resized.jpg

I am extremely pleased with this setup, and am very happy with the radio! Much more compact, in a better position, and I still get my weather radio that I love! I think the sound on it is plenty loud enough for me to hear it fine, and after 3 months at least of running it every time I am in the Jeep, it has worked quite well and had zero issues to me. Also, the reception is pretty good too! I am very happy as well to not have a radio hitting the rearview mirror and no concern of the button on the back falling and hitting the passenger, as the button broke on the other radio and had to improvise a washer et up there. Either way though, very happy with the new set up and highly recommend it!
 

WxNerd2015

New member
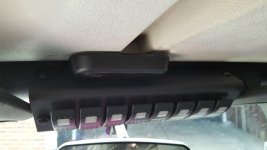
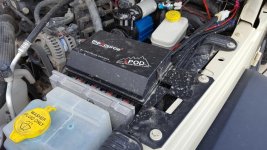
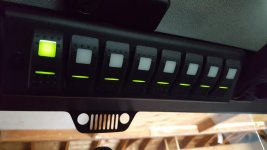
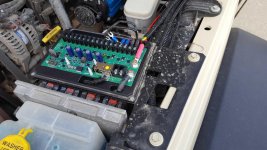
Next was the sPod installation, and as I know the standing here, I will skip most of these parts. I have more written about the installation, so if you are interested in any parts, let me know, otherwise, I will just leave a few pics! The installation is straight forward and the directions are very good for it. Some other options for these switch systems could be the Switch Pros or the Trail Rocker, or you could make your own too! But here's some pics!

20170227_161953.jpg
20170227_162004_resized.jpg
20170227_162225_resized.jpg
20170227_162245_resized.jpg
20170227_162823.jpg
 

WxNerd2015

New member
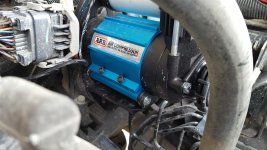
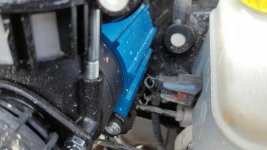
Lastly, I hooked up the air compressor. Most of the hook up for this I did outside the Jeep. And just to mention, the writeup that was on Wayalife here was extremely helpful and I relied heavily on it!
http://wayalife.com/showthread.php?8136-ARB-High-Output-On-Board-Air-Compressor-Under-the-Hood-JK-Installation-Write-Up

So first, I installed the 3 way splitter that came with the tire fill kit so I could attach the pressure cutoff switch as well as the quick chuck connector. You first have to pull out the plug on the side of the manifold, then add some pipe tape to the fittings before screwing them in. Then go ahead and do the same thing for the quick chuck connector and the pressure switch too.

Next, attach the compressor to the bracket. I needed an extra set of hands to hold some of the screws in place while I started to tighten the nuts. It is much harder to attach those once the bracket is in the Jeep, but can be done there as well.

Next step was to get the compressor into the Jeep. So you need to find the brake booster in the driver's side part of the engine bay up on the firewall. Locate the 2 nuts on the brake booster, and remove both using a 12 mm wrench or socket. I used a ratcheting box wrench.

Go ahead and finagle the compressor and bracket on the studs for the brake booster, which will take some patients and work to get it in the proper position, but it will get there! And once the bracket is on the studs, go ahead and tighten the nuts back down to secure it.

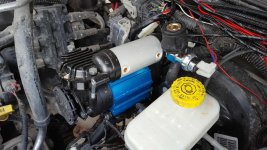
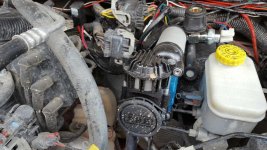
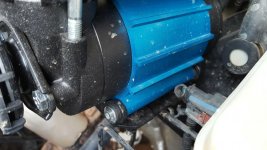
The compressor will look like this in the Jeep now:

20170227_162304_resized.jpg
20170227_162353_resized.jpg
20170227_162308_resized.jpg
20170227_162401_resized.jpg
20170227_162416_resized.jpg
20170227_162421_resized.jpg

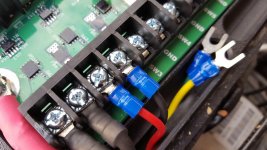
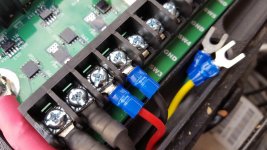
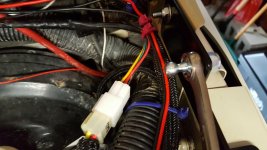
With the compressor mounted, the last step is to hook up all the electrical connections. I was attaching it to the sPod, so part of the wiring harness to the connector to the compressor was not needed, and just a small adapter was all that was needed in it's place. Attach the red and blue 90 degree connectors to the pressure switch, attach the group of 4 wires (red, black, green, and yellow) to the sPod adapter harness (if you weren't using an sPod or switch pros or trail rocker module, these 4 wires would be run through the firewall to a switch in the cab). Then attach the red and black ends of the sPod adapter to the sPod to the switch and ground spaces in the sPod. And for me, the green and yellow are just left off as I do not have air lockers to attach those to right now. And lastly, run the positive, negative, and ground cables from the compressor harness across the harness attached to the firewall over to the battery and connect them, along with mounting the ground on to one of the body ground mounts.

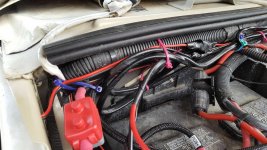
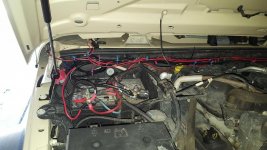
In the pictures below, you can see the connections for the CB and the Compressor to the sPod, and eventually I will transfer over the off road lights on to the sPod connection as well. But currently only the first two switches are used.

20170227_162245_resized.jpg
20170227_162239_resized.jpg
 

WxNerd2015

New member
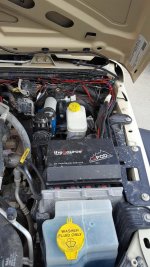
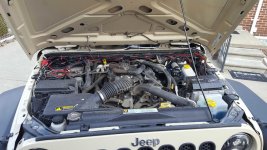
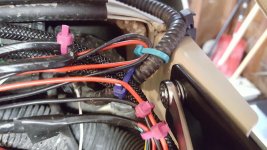
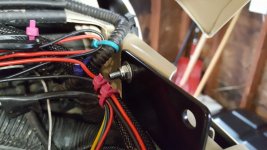
And here's shots of the final view of the engine compartment with everything installed:

20170227_162314_resized.jpg
20170227_162333_resized.jpg

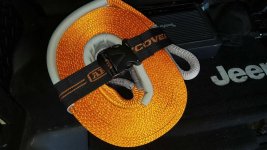
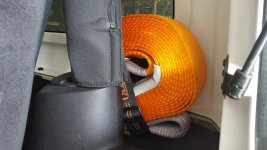
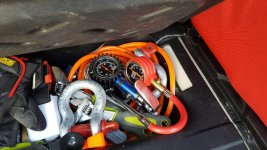
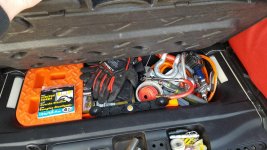
Additionally, I also redid where some of my extras in the Jeep are stored. I got a snatch strap, and that is stored up next to the roll bar in the back. And I also took out the small portable air compressor and gave that to my fiance and placed all the air house line and fittings in the back under the floor.

20170113_113053_resized.jpg
20170113_113113_resized.jpg
20170113_113128_resized.jpg
20170227_162557_resized.jpg
20170227_162652_resized.jpg

Also, I would like to apologize for the lack of pictures at some points, as well as the less than par writeups for some of these installs, but I know there are already some very good writeups for these installs, and it was done in so many parts for me, that I got going and completely forgot to fully document. If you have any questions, or there are things that I missed, please ask or let me know!
 

AZ Explorer

Caught the Bug
I think you've helped me decide, That really is the best CB for me. Keeps out the clutter and I also really like the weather bands. Glad you've had such a good experience so far with it.
 

WxNerd2015

New member
I think you've helped me decide, That really is the best CB for me. Keeps out the clutter and I also really like the weather bands. Glad you've had such a good experience so far with it.

Glad I could help! Hope it works out well for you! I am very happy with it!
 

WxNerd2015

New member
No More Hood Prop!

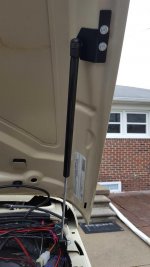
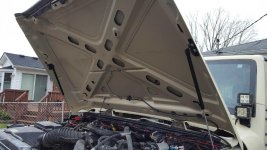
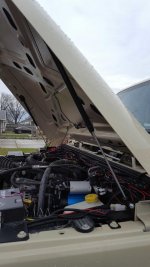
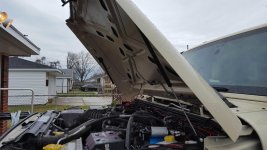
Once again, I have another modification done! Been a productive few weeks with the Jeep! This was a fairly simple installation, however one part was extremely difficult to get right. It was a simple step, but complicated to get it right. Ultimately though, I am very happy with the Hood Lift kit, and love not having to grab the hood prop to hold the hood open now! It just lifts itself up.

Also, before I start I will also highlight, that there are 2 different hood lift kits from Rugged Ridge, but they have the same part number. The one I got was from Extreme Terrain, and is also the updated version straight from Rugged Ridge. The updated version has the bracket that attaches the lower stud to the body, where the older version attaches the lower stud directly to the body. I preferred the bracket option as I believe it provided a bit more strength there and made the angle of the strut a bit better for force exerted. In no way is this a scientific analysis, just my feelings on it. Either way, it is a very convenient and nice kit from Rugged Ridge at a good price!

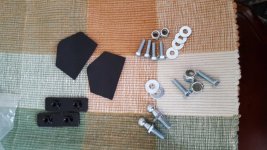
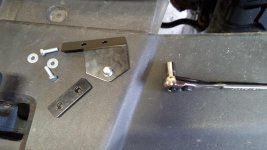
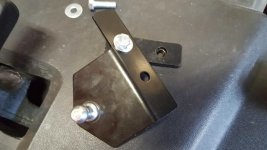
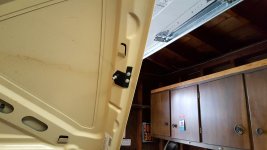
First off, Here are some pics of the kit unboxed. It came wit hate two struts, 2 lower mounting brackets, 2 upper mounting brackets, 2 nut plates, and the rest of the necessary hardware for attaching to the Jeep.

20170327_162550_resized.jpg
20170327_162627_resized.jpg
20170327_163341_resized.jpg

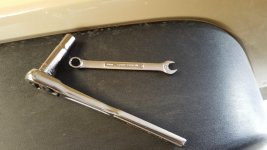
First up, you need to grab a 10 mm and 13 mm socket, as well as a 10 mm and 13 mm wrench.

20170327_165216_resized.jpg
20170327_165944_resized.jpg

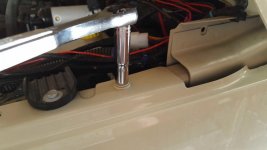
Go ahead and grab your 10 mm socket and remove the 10 mm bolt attached to the fender closest to the firewall

20170327_163537_resized.jpg

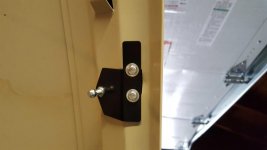
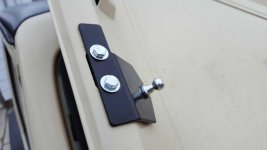
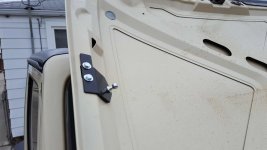
Grab you bracket, and line of the hole in the tab with that hole, and so that the main body of your bracket goes inside the body panel. Then go ahead and grab your nut that was in the body and loosely tighten it down, allowing the bracket to still move slightly. Now grab one of your 2 M6 bolts, and 2 of the M6 washers, and 1 M6 nut to attach the rest of the bracket to the Jeep. Line the further back hole on the bracket up with the hole in the body and insert your bolt from the outside utilizing 1 washer, and attach the other washer and nut from the inside. Grab your 10 mm wrench and socket and tighten down.

20170327_165515_resized.jpg
20170327_165929_resized.jpg
20170327_165931_resized.jpg

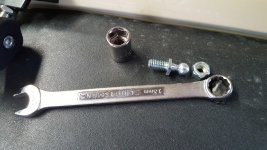
Once that nut and bolt are tightened, finish tightening the body bolt as well and make sure the bracket is secure. Once that is done, there is one hole left in the bracket, that is for the lower ball stud for the strut. Grab the lower ball stud bolt and the corresponding nut. insert the threaded side of the ball stud from the inside portion of the Jeep so the ball is facing in, and thread the nut from the other side. Grab the 13 mm socket and wrench and tighten down.

20170327_170017_resized.jpg
20170327_170231_resized.jpg
20170327_170237_resized.jpg
20170327_170233_resized.jpg
20170327_170239_resized.jpg
 

catahoula

Caught the Bug
I do not know If I have commented on your build. I really like it so far. You, WJCO and desert runner has got me sold on the 295's.
 

WxNerd2015

New member
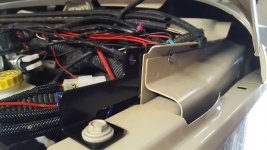
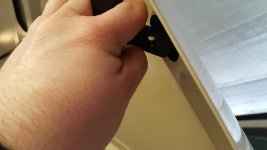
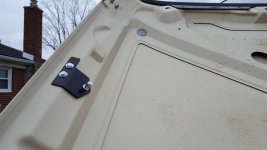
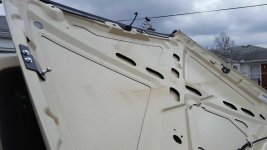
With that bracket attached, go ahead and move to the passenger side following the exact same steps, and you will have both lower brackets attached. (For the passenger side, I had to remove some wiring I had run through that hole, but that was the only extra step I had) You can now move to the upper brackets, and these mount in existing holes in the hood using a bracket and nut plate. First, take the cover off the adhesive backing on the gasket and stick the gasket to the on the back of the upper bracket. Then, make sure you have these pieces.

20170327_171105_resized.jpg

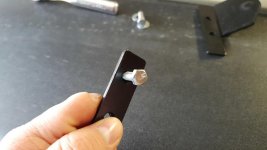
The first step of the upper bracket is to get the nut plate into the hole. Now, Rugged Ridge recommends using the method pictured below to "fish" the nut plate into the hole and not drop it.

20170327_171133_resized.jpg
20170327_171213_resized.jpg

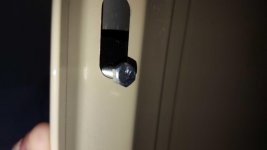
I struggled with this for a while as it was an extremely tight fit to get the nut plate in the hole and rotate all the bracketry exactly where it needed to go, but the end result ended up looking like this!

20170327_173145_resized.jpg
20170327_173150_resized.jpg

On the passenger side however, I ready someone else's write-up on this installation, and tried their method for getting the nut plate in, and it went much easier. The method that I tried was inserting a bolt just into the nut plate, not the bracket itself, like seen below.

20170327_173207_resized.jpg
20170327_173235_resized.jpg

Once the nut plate is in the hole, you can allow it to hang, and grab your bracket. Thread a nut and washer through the other hole and hand tighten. Then remove the initial bolt, and thread it through the bracket with a washer too, and tighten down. If you are going to get this kit and do this install, I highly recommend the latter method! It will make your life much easier! The final result on the passenger side appears as below.

20170327_174415_resized.jpg
20170327_174418_resized.jpg
20170327_174420_resized.jpg
20170327_174424_resized.jpg

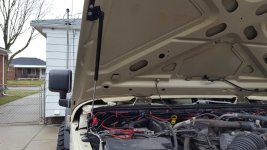
The last step now is to grab your struts, and snap them onto the ball mounts. Make sure the larger diameter part is snapped in at the top and smaller diameter at the bottom. And there ya have it! You no longer need to use the annoying hood prop and it won't get in the way anymore!

20170403_154051_resized.jpg
20170403_154056_resized.jpg
20170403_154106_resized.jpg
20170403_154101_resized.jpg
20170403_154108_resized.jpg

I will post a video of the hood lift system working soon too. So stay tuned for that! But I am very happy with it, and it functions quite well!
 

WxNerd2015

New member
I do not know If I have commented on your build. I really like it so far. You, WJCO and desert runner has got me sold on the 295's.

Thanks! Appreciate that! Glad ya like it! There will definitely be more to come! Yeah, those 295s have made me really happy! I think they are a great combo on the 2 Door for sure, but it keeps a bit more drivability since it's not all the way to 35s! But still gets plenty of rubber there to get the right look! And I have not been disappointed by them yet! I highly recommend! And those STT Pros and just amazing with how quite they are, how well they handle on road, and the level of grip they have off road! I am very pleased!
 

WxNerd2015

New member
Marker Light Mod!

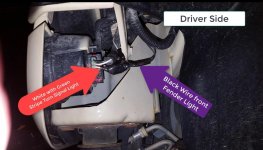
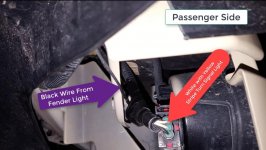
Hey Guys, just another quick update! i did the Marker Light Mod on my Jeep last night! I know that this is well known throughout the JK community so no need for too much detail, but man is it simple, and make the Jeep the way it should have come from the factory. All you have to do is cut the Black wire from the Side Marker Light in the flare (And cut as close to the connector plug up inside the body as you can, not by the light), then locate the wire on the opposite side of the turn signal connector from the Black wire (so driver side is white with green stripe and passenger side is white with Yellow on my 11 JK) and splice the Black wire (the part that still runs to the light to turn signal wire wire. Simple as that! Here are a couple of diagrams showing my work:

Driver Side.jpg
Passenger Side.jpg

And I also put together a short video showing the lights functioning in all different scenarios:


Overall, I am very happy with how this turned out, and it works great! I highly recommend it! And hey, it's another reason to go work on the Jeep! AND it's free! What's better? Haha! :wings: Anyways, enjoy the short clip, and more write-ups to come so stay tuned!
 

WxNerd2015

New member
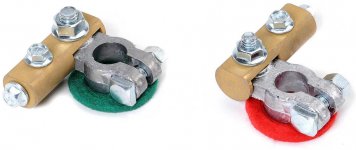
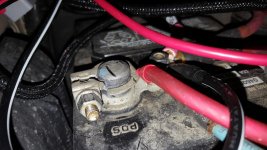
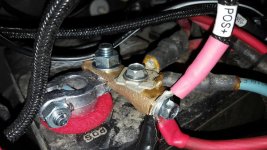
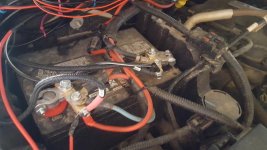
Yesterday I my new battery terminal leads came in so i was able to install them real quick after work! Over the weekend, I had noticed that my positive battery terminal lead was almost completely cracked, and I did not want to have a battery issue because of a broken terminal, but not quite sure how it cracked like that as I never remove or touch the lead, just the bolt to connect wires too on the top. I guess they are just a cheap piece that was used here. But anyways, I order the JK HD terminal leads from Quadratec for the '07-'11 JKs, and man are they nice! They weigh considerably more than I expected and are completely solid! So I should no longer have any issues with em!

Quadratec JK-HDBT Extreme Duty Battery Terminals for 07-11 Jeep Wrangler and Wrangler Unlimted JK

133117.jpg

Changing the leads was actually more simple than I thought, and only took me about 15-20 minutes. Here's a few before shots highlighting the broken/cracked positive terminal:

20170412_154200_resized.jpg
20170412_154208_resized.jpg

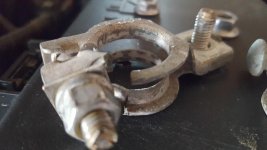
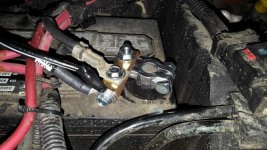
If you look just to the right of the nut, up against the terminal, you can see the cracked piece.

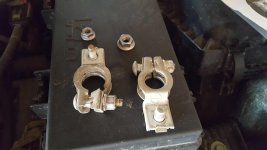
Start off by first disconnecting any wires from negative battery terminal lead, and then remove the terminal lead itself from the terminal. Then do the same process on the positive lead. And make sure you remember where everything goes for reassembly! For removal, I needed a socket wrench and a 10 mm and 12 mm socket. Here's what the leads look like removed from anything:

20170412_155026_resized.jpg
20170412_155032_resized.jpg

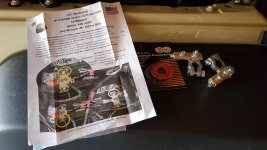
As you can now see a bit easier, that positive thread was only holding on by a few mms on the bottom ring...not good! Anyways, So i opened up the new kit, and this is what the contents looked like:

20170412_154557_resized.jpg

Additionally, For installation of the new terminals, I needed a 10 mm, 13 mm, and 14 mm socket and the socket wrench from earlier. You first slide the anti corrosion rings over the terminals, then you place the proper terminal lead on each terminal. The terminal lead with the 3/8s hole goes on the positive lead, and the terminal with the 5/16s hole goes on the negative. I wish these terminals would have been labeled or color coded to make this step a bit easier, because that is such a small different that it is hard to tell, but obviously, the smaller lead would not fit over the larger terminal at all, so you can figure it out.

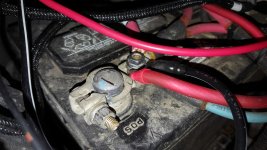
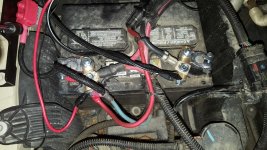
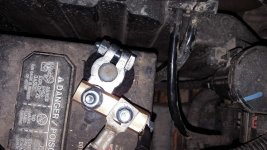
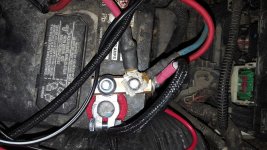
Start with the Positive lead. Slide the lead over the terminal and tighten the clamp down to the terminal. Then go ahead and attach the vehicles power cables (red and green) to the 10mm bolt on the top of the terminal lead. Then attach any positive accessory wires to the end of the terminal lead with the 10mm bolt as well. Then follow the same steps for the negative terminal. The final product looks like this:
20170412_161841_resized.jpg
20170412_161828_resized.jpg
20170412_161821_resized.jpg
20170412_161812_resized.jpg
20170412_161803_resized.jpg
20170412_161753_resized.jpg
20170412_161851_resized.jpg

Overall, I am happy with the new leads and feel much more comfortable that these will last for a long time and have no issues. There is a version for the '12-'17 version of the JK too if anyone is interested in these. But I believe that I would recommend these, and at the very least, make sure you check your terminal leads, as these seems like a pretty weak part that came stock on the JK. It's a small thing, but if that would have broken, it could have caused a big issues, so I am glad I caught it when I did! Anyways, if there are any questions on this, let me know! I have not seen a lot of info on JK battery terminal leads, so doesn't seem like a common issue, but nontheless, wanted to share my info! Stay tuned for more!
 
Top Bottom