You are using an out of date browser. It may not display this or other websites correctly.
You should upgrade or use an alternative browser.
You should upgrade or use an alternative browser.
Factory JK D44 Rubicon E-Locker Wiring
- Thread starter matt
- Start date
TacticalTortuga
New member
Thanks for all the great info! Just to clarify, the indicator plug with 2 wires, one from switch as shown in diagram and other to ground? Or is it one from switch and one from fused 12v power? Locker activation plug should be wire from switch and ground? Thanks!
Clark Collins
New member
locker engaged indicator light
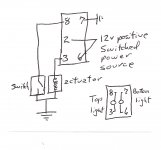
I don't know what all has been going on with this thread, but here is the info on the "locked" indicator light wiring. If your locker switch has a separate indicator light to show when the locker is actually engaged there should be 12v power to that light (at the switch terminal 3 when the switch makes the connection between terminal 2 & 3 to energize the locker actuator) with a wire from terminal 8 going to one of the axle leads going to the plunger switch that is activated when the locker actually locks. The other lead from that plunger goes to ground completing the circuit from that light to ground when actually locked. The bottom light is on all the time to illuminate the locker switch for nighttime operation. If you have no second light (top light) at the switch you don't wire anything to the indicator plunger switch. It is not necessary to actuate the locker, as a simple toggle switch supplying 12v power to the actuator would accomplish that.
I don't know what all has been going on with this thread, but here is the info on the "locked" indicator light wiring. If your locker switch has a separate indicator light to show when the locker is actually engaged there should be 12v power to that light (at the switch terminal 3 when the switch makes the connection between terminal 2 & 3 to energize the locker actuator) with a wire from terminal 8 going to one of the axle leads going to the plunger switch that is activated when the locker actually locks. The other lead from that plunger goes to ground completing the circuit from that light to ground when actually locked. The bottom light is on all the time to illuminate the locker switch for nighttime operation. If you have no second light (top light) at the switch you don't wire anything to the indicator plunger switch. It is not necessary to actuate the locker, as a simple toggle switch supplying 12v power to the actuator would accomplish that.
Attachments
TacticalTortuga
New member
Thanks that's exactly what I needed. Just wanted to confirm that power would come from switch and didn't need separate hot wire run which seemed way overkill. Indicator light turned is just turned on when circuit becomes complete to ground upon engagement of locker right?
Sent from my iPhone using WAYALIFE mobile app
Sent from my iPhone using WAYALIFE mobile app
Clark Collins
New member
Right!! That's how it works.
Love this write up! I just purchased j8 crate 44's 4:10's... Gonna follow this guide.
One question, the contra switch website seems to be gone, which switches are appropriate for this?
Sent from my iPhone using WAYALIFE mobile app
One question, the contra switch website seems to be gone, which switches are appropriate for this?
Sent from my iPhone using WAYALIFE mobile app
Here is a site for switches.
http://www.otrattw.net/home.php
Im getting ready to install those same axles.
Chris
http://www.otrattw.net/home.php
Im getting ready to install those same axles.
Chris
Love this write up! I just purchased j8 crate 44's 4:10's... Gonna follow this guide.
One question, the contra switch website seems to be gone, which switches are appropriate for this?
Sent from my iPhone using WAYALIFE mobile app
Here are the Mopar part numbers for the locker and the locker sensor if your swapping to Rubicon axles with elockers.
68148098AA is for the locker.
05017117AA is for the sensor.
Chris
What is the 05017117AA sensor?
I know 68148098AA is the wire harness, ordered one last night..
Sent from my iPhone using WAYALIFE mobile app
On the axles there are two plugs, the one at the top is 68148098AA, that locks the locker, the one at the bottom 05017117AA is the sensor that can be wired to a switch LED or LED to show you when the locker is engaged. If you have a locker in the front and rear axle you will need 2 68148098AA (one for front and one for rear) and 2 05017117AA (one for front and one for the rear). Hope that helps.
Chris
Chris
What is the 05017117AA sensor?
I know 68148098AA is the wire harness, ordered one last night..
Sent from my iPhone using WAYALIFE mobile app
Last edited:
On the axles there are two plugs, the one at the top is 68148098AA, that locks the locker, the one at the bottom 05017117AA is the sensor that can be wired to a switch LED or LED to show you when the locker is engaged. If you have a locker in the front and rear axle you will need 2 68148098AA (one for front and one for rear) and 2 05017117AA (one for front and one for the rear). Hope that helps.
Chris
I dunno, from what I'm reading the 68148098aa is the entire harness from mopar.. And I don't think mopar sent me drop in axles where I have to break down the axle to put plunger sensors in. You just put a halt to my build, we will see Monday.
Sent from my iPhone using WAYALIFE mobile app
The J8 axles, 410 gears, with elockers there are two plugs,
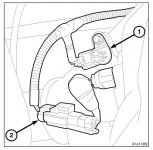
1 is 68148098AA is used to lock the locker
2 is 05017117AA the sensor that you can wire to an LED to see when the locker is locked
if you have a locker in the front and rear you will need 2 68148098AA and if you want to use the sensors to tell when the lockers are locked you will need 2 05017117AA. Google those part numbers.
The J8 axles, 410 gears, with elockers there are two plugs,
View attachment 248792
1 is 68148098AA is used to lock the locker
2 is 05017117AA the sensor that you can wire to an LED to see when the locker is locked
if you have a locker in the front and rear you will need 2 68148098AA and if you want to use the sensors to tell when the lockers are locked you will need 2 05017117AA. Google those part numbers.
Thanks for the redirect Fritcherc, called the place that sold me the crates and they had the harnesses in stock..
2 - 05017117AA
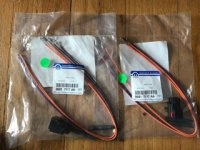
2 - 68158098AA
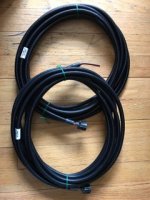
These are stock rubicon D44 plugs. 2 locker actuators and 2 sensor. The 6815's (locker) look to be about 20 feet in length waterproofed and wrapped. The 0501's (sensor) need built. Not sure why they sent 4 wires for each sensor plug, but I'm sure I'll figure it out. Each package cost around 25$, look to spend a little over 100$ to have them shipped.
Sent from my iPhone using WAYALIFE mobile app
Got the axles installed, everything seems to be working fine, next weekend I will do the wiring and install the switches for the lockers. So far so good!:thumb:
I didn't realize you were doing axle swaps too.. got both axles in on mine and waiting on lower control arms to show up tomorrow. Thing is lookin like beast mode!!
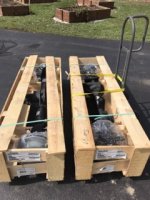
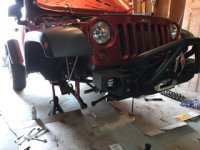
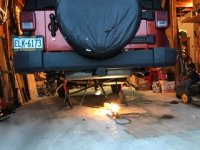
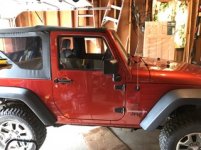
Sent from my iPhone using WAYALIFE mobile app
Yes did the swap this weekend, install went pretty smooth with some help and ratchet straps, lol. Did you install a lift? Why new lower control arms? Just curious.
No lift (already lifted), castor is off and didn't want drop brackets.
Sent from my iPhone using WAYALIFE mobile app


