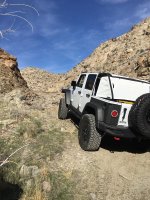
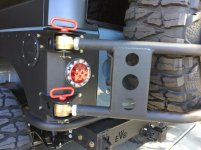
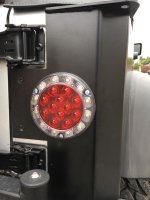
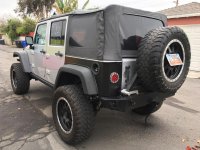
Another vote for Maxxima tail lights. Love mine. Do yourself a favor and pick up a set of red handled hitch pins from Tractor Supply as well. They cost me like $12.
View attachment 242960
Some tips for installing the tire carrier:
Use a good step drill bit to drill the holes for the brackets.
The driver side upper bracket aligns by mounting off of a hole near the gas filler cap that is used to mount the armor. If you already have armor on, you'll need to drill out the nutsert. When you get the first bolt in the driver side upper bracket, make sure it is level and the same distance from the top of the bracket to the top of the armor on both ends of the bracket, mark your holes and drill them out.
Now measure how far it is from the side of the bracket to the edge of the armor at the tailgate. Rememver those measurements, and now mount the passenger upper bracket in
THE EXACT SAME LOCATION USING THOSE MEASUREMENTS FROM THE DRIVER SIDE BRACKET. You only get one shot to get it perfect.
[FONT=Verdana, Arial, Tahoma, Calibri, Geneva, sans-serif]
Mount the two top brackets onto the corners, tighten the bolts, and then with the bottom brackets mounted on the carrier Johnny Joints, bolt the carrier onto the top brackets. Where the lower brackets touch the armor is where you want to mount them. Make sure they are flush and mark the holes for the bottom brackets, and drill the holes.
Mount the lower brackets and tighten all the bolts. Make sure all 4 bracket's bolts are tight. The pinch seam on the inside of the body will likely be in the way of getting the nuts on. If it is, you have the holes drilled close to the perfect spots. You may have to use a long punch and hammer to bend this pinch seam over.
Mount the tire carrier loosely to the passenger side brackets (2 long bolts), do not tighten these bolts yet. Lift the driver side of the tire carrier up and set the joints on top of the driver side mount brackets. Push the upper part of the carrier in, and while holding it in towards the body, crank the passenger side carrier mounting bolts really tight, ridiculously tight. You don't want these bolts to slip, because it will mess up the alingment of your carrier. Make them stupid tight but don't break them. This should leave your LH carrier joints about level with the driver side mount brackets (maybe 1/4" or so higher/lower) when the tire is installed so you just lift it up/push slightly, which makes for nice and easy opening/closing.
To get the carrier to open and close smoothly, you'll have to fine tune the adjustment of the carrier by adjusting the johnny joints. If you have to adjust the passenger side joints, remember to push in on the top of the carrier before tightening the bolts, and remember to torque the bolts extremely tight.
It WILL make a slight knocking sound when you hit bigger bumps due to the hitch pin holes in the LH brackets being a larger diameter that the 1/2" hitch pins that are used, and the joints being slightly smaller than the brackets. I personally don't find it annoying since it RARELY happens on the road, but if you find this annoying, you can fix this by using a cap from a large water jug, sitting in on top of the driver side upper joint, and forcing the pin through the cap and the joint. Don't drill a hole in the cap, you want the extra material to fold down into the joint hole. Close the tire carrier with the cap still on top of the upper joint. It will take up the extra space, tighten up the fit a bit more, and eliminate the knocking noise.
Doing the above made my carrier open and close almost effortlessly. [/FONT]


