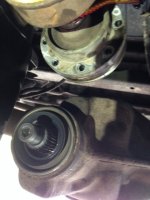
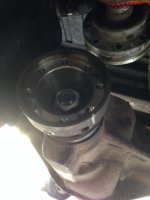
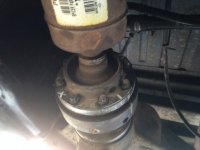
Need Help w/Rear Pinion Seal Replacement

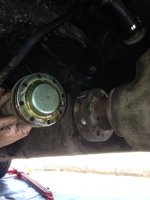
So I noticed a rather large wet spot on the underside of my jeep that I hadn't noticed before.
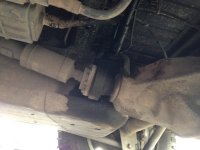
image.jpg

Seems to be the rear pinion seal leaking. Did some searching on this fine site and found out it shouldn't be that difficult to do. So I'm going to do it.

Judging by the parts break down and some reading, it seems simple enough.

Remove the nut (1), washer (2), flange (3), slinger (4) and seal (5).
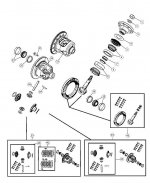
image.jpg

-What size are the drive shaft flange bolts? Re-installation torque?

-What size is the flange retaining nut? Re-installation torque?

-Will I need a puller to get the flange off?

-What the hell is a slinger and should I replace it? (Part 4 on the break down)


I also saw some seepage from the rear diff cover. It would seem like a great time to remove it, clean the gears and re-seal while I'm under. (As a side note, I plan on changing all the fluids in all the components after the big job is finished)

-Anyone want to recommend the best cleaning method/chemicals? My thought is brake cleaner unless there are other seals that might not get along well with brake cleaner.

Lastly, please tell me, from your experiences, what I have missed and what potential pitfalls I should avoid.

Thanks in advance to everyone who might offer up advice or assistance!
 

computeruser6

New member
182485488.jpg
Pinion Seal Removal
182485489.jpg
With transmission in neutral, position vehicle on hoist.
Remove brake component to eliminate drag.
Remove propeller shaft at pinion flange.
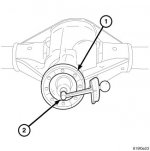
Rotate pinion gear three or four times.
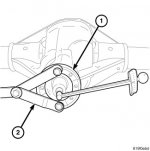
Record pinion torque to rotate (1) with an inch pound torque wrench (2).
182485490.jpg
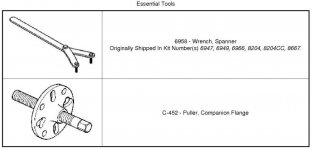
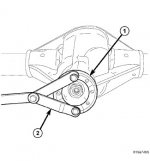
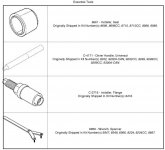
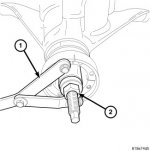
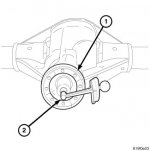
Hold pinion flange (1) with Spanner Wrench (2) and remove pinion nut and washer.
Mark a line across the pinion shaft and flange for installation reference.
182485491.jpg
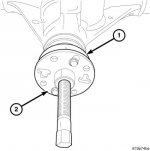
Remove pinion flange (1) with Puller (2).
Remove pinion seal with a seal puller.

Pinion Seal Installation
182485493.jpg
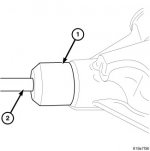
Apply a light coating of gear lubricant on the lip of pinion seal. Install seal with Installer (1) and Handle (2).
182485494.jpg
Install flange on the pinion shaft with the reference marks aligned.
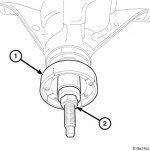
Install flange (1) Installer (2) on pinion shaft.
182485495.jpg
Hold pinion flange with Spanner Wrench (1) and tighten Installer nut (2). Tighten nut to remove all end play.
182485496.jpg
Install pinion washer and a new nut on the pinion gear.
Hold pinion flange (1) with Spanner Wrench (2) and tighten pinion nut to 217 Nm (160 ft. lbs.).

182485497.jpg
Measure pinion torque to rotate (1) inch pound torque wrench (2). Pinion torque to rotate is recorded reading plus 0.56 Nm (5 in. lbs.).
If pinion rotating torque is low. Hold pinion flange with Spanner Wrench and tighten pinion nut in 6.8 Nm (5 ft. lbs.) increments until pinion torque to rotating is achieved.
182485498.jpg
CAUTION: If maximum tightening torque of 271 Nm (200 ft. lbs.) is reached before torque to rotate is achieved, the collapsible spacer may have been damaged. Never loosen pinion gear nut to decrease pinion gear bearing rotating torque and never exceed specified preload torque. Failure to follow these instruction may result in damage.

Install propeller shaft.
Install brake components.

This procedure is from the Service Manual. If I missed a step or something doesn't make sense let me know and I'll double check it. Do you have the stock or an aftermarket driveshaft? The flange bolts on my Coast driveshaft are 8mm. Brake cleaner works fine for cleaning. My piece of advice would be to avoid Royal Purple gear oil. At twenty thousand miles I switched to it. At about 33,000 miles my passenger side rear axle wheel bearing and pinion bearing required replacement. The wheel bearing got so hot after only one mile that touching the hub flange would burn your finger. When the seal and plate was pulled off the rollers just fell out. The shop that rebuilt my differential said that they have seen several differential bearings show up pitted and damaged after the use of Royal Purple and refused to warranty the work if Royal Purple was used again.
 

computeruser6

New member
You could pay about $140 for a CD of the service manual from MOPAR or you could go to a site like alldatadiy.com for a copy of the service manual for about $20 for one year or about $50 for five years of online access. It's nice to have a manual that says exactly what to do, has lots of pictures, and also lists part numbers.
 
Thanks computeruser6. I really appreciate that. I have the stock shaft in still. Looks like my parts will be in tomorrow. Probably going to tackle this next weekend. Need a couple tools my buddy has and he's out of town this weekend.

Thanks for the bump Coz.
 

Rebel JK

New member
Great thread. Been procrastinating on this myself. Looking forward to hearing how it goes, Put up some pics. Thanks computeruser6.
 

TheDuff

New member
Great thread. Been procrastinating on this myself. Looking forward to hearing how it goes, Put up some pics. Thanks computeruser6.

Same here, front pinion and driver tube seal leaking:( and my stupid steering box

Sent from my LG-D800 using WAYALIFE mobile app
 
Pinion Seal-Mission Accomplished

So I got the parts from the dealer yesterday and I went out to Autozone to borrow some tools for the job and get some supplies.
This morning I set up and went to work.

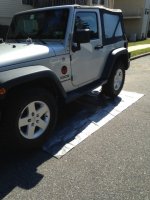
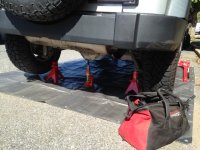
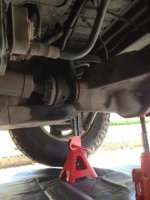
First I swept the street where I was going to work (apartment life:grayno: ) and laid out a tarp so I wouldn't get too filthy. Then I jacked it up and set up my jack stands. I lifted both ends because I wanted to make sure I had enough room to work under her and I also had ambitions of performing a 5 tire rotation (which didn't happen today).

IMG_0471.JPG

IMG_0473.JPG

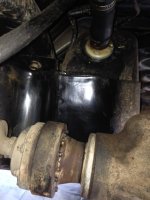
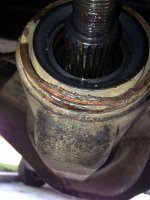
Next I cleaned up the old sludge/dirt mess that had accumulated due to the slinging oil. I used brake cleaner and got it clean enough to be able to see any new leakage if I somehow screwed this up.

IMG_0474.JPG

IMG_0476.JPG

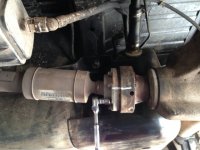
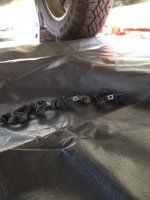
Then I made some witness marks with a paint pen so I could line up the shaft and the adapter when I put things back together. I also marked each of the shaft weights (I think that's what they are. If not then they are some sort of funky washer set up.) with different witness marks and marked the spot on the shaft adapter to match. I set the weights aside along with their respective bolts (3/8") in the holes they came out of. My thought in doing this was that if these indeed were weights, they should go back on in the same location they came from for balance purposes. Likewise for the bolts. Although I think the bolts probably don't matter as much which holes they end up in.

IMG_0478.JPG

IMG_0479.JPG

This is what the end of the shaft looks like. You notice the 2 silvery spots on the shaft that are not thru holes? Opposite of those on the pinion adapter side there are 2 holes. I used a tapered pin punch through those holes, going in from the back toward the front, and tapped the drive shaft out of the adapter. It nests in the adapter about 1/4" deep and I could not just tug the shaft out. It needed some persuasion.

IMG_0483.JPG

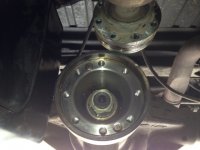
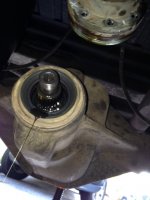
This is the inside of the pinion shaft adapter. You can see the nut that gave me a hernia trying to remove it with a breaker bar.

IMG_0485.JPG

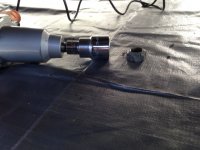
After nearly popping a vessel, I got out the electric impact and removed the pinion nut. 1-5/16" seemed to do it.

IMG_0487.JPG

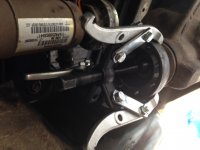
Next I used a 3-jaw 5 ton puller that I borrowed from Autozone and removed the pinion adapter from the shaft. This was tight the entire way off the shaft. It was at this point that I drained the differential because I got ahead of myself and didn't do it first. The oozing oil tipped me off. :doh:

IMG_0489.JPG

This is the view minus the adapter.

IMG_0491.JPG

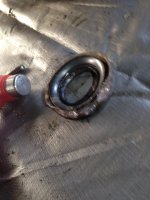
On to the offending part. The reason for this exercise. The rear pinion seal. Up to this point, nothing had gone easy. Why should this be any different? I fought this for 20 minutes. After I peeled back a bit of the lip, I noticed an orange sealant around the inside of the mating surface. After examining the new part, I understand now why. The OEM part comes with a bead of sealant already applied. Nice thought. Much ass pain without a small puller though. So I needed to use a chisel to get under the lip and then I worked at it with a big flat tip until it finally popped out.

IMG_0493.JPG

IMG_0494.JPG

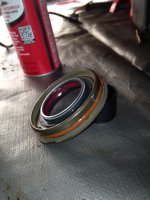
Here is what the replacement seal looks like. You can plainly see the orange sealant around the outside.

IMG_0497.JPG

I installed the new seal by tapping it into place with a dead blow mallet until seated. The red stuff around the inside of the seal is a bit of grease that also comes in place on the new seal.

IMG_0498.JPG

I installed the pinion adapter by seating it down on the shaft with my dead blow mallet until I was able to get the washer and nut threaded. The fit is tight. I didn't want to do this, but I had no choice. This was the only part that made me nervous. After I was able to get some threads started on the nut, I drove it on with my 1/2" ratchet until it seated. Needed to have my daughter jump in and pump the brakes up and hold until I got the final torque.

IMG_0504.JPG

Next, I attached the drive shaft in the alignment that it came off. Re-installed the bolts and weights in their proper locations and German torqued (guten tight) the bolts since I didn't have an inch pound torque wrench. I've got some gorilla hands and retard strength so I feel confident that the shaft will be fine.

IMG_0506.JPG

Lastly, I re-filled the differential and lowered the jeep back to the ground.

Note to self: Engage parking brake and put vehicle in gear PRIOR to lowering from jacks. Being on a slight incline, when I let the front down after letting the back down first, the jeep immediately started creeping downhill headed for my wife's Grand Cherokee. Luckily my daughter heard my mildly panicky cries for her to come out and slap it in gear as I was holding onto my front bumper to keep it from rolling! Life is hard. It's even harder when you're stupid!

Finished the job with a test drive and inspection. After a trip around the block, it seems to be ok. Tomorrow will be the tell tale trip. Freeway to work. I'm feeling confident so far. I think all will be well.

For those who requested a write up- hope this helped.
 

Brewbek

Member
Great write up. Not only were you thinking about the task at hand you were also thinking about taking all the pics for this write up. Hope it all holds tight for you. Thanks. :applaudit:
 

jeeeep

Hooked
nice write up, that pinion nut is tight! I gave up after a couple of hours and found a shop that replaced the seal for me for cheap.
 

cozdude

Guy with a Red 2-Door
Great write up!! very detailed and i like how you took the time to take the pics as you did it! no i know who to call on if i run into this issue :clap2:
 
Update

So I went to work today and made it round trip from north Philly to Middletown, DE with no leaks, unusual noises, vibrations, smells or any other badness! I'm claiming victory! :rock:

Great write up. Not only were you thinking about the task at hand you were also thinking about taking all the pics for this write up. Hope it all holds tight for you. Thanks. :applaudit:

Thanks! I just wanted to write it up as I would want to see it if I had never done the task before.

nice write up, that pinion nut is tight! I gave up after a couple of hours and found a shop that replaced the seal for me for cheap.

Thanks! That nut gave me hell trying to get it off with the breaker bar! It took a few seconds of hammering with the impact before it finally came loose.

Great write up!! very detailed and i like how you took the time to take the pics as you did it! no i know who to call on if i run into this issue :clap2:

Thanks! I'd be happy to watch you work anytime. :D

Seriously, as with anything, the first time through is always the hardest in my opinion. It makes it worth it to be able to say I did it myself. No matter how big or small the project.
 

Rebel JK

New member
Nice work there Frogmech. Thanks for posting up. I know of at least another guy who skipped the "preload" inch pound torque/ recording step. He's had no issues with several thousand miles after replacing his rear yoke/ driveshaft from stock to a coast unit. When I get around to doing mine, will shoot for removing the brakes etc. check rotational torque just to be on the safe side. Another great write up for the diy guys out there! :thumb:
 
Nice work there Frogmech. Thanks for posting up. I know of at least another guy who skipped the "preload" inch pound torque/ recording step. He's had no issues with several thousand miles after replacing his rear yoke/ driveshaft from stock to a coast unit. When I get around to doing mine, will shoot for removing the brakes etc. check rotational torque just to be on the safe side. Another great write up for the diy guys out there! :thumb:

Thanks! Yeah, I didn't forget that torque check step. I just didn't do it. I did forget to mention that I omitted that though. My thought on that is this: the step exists solely to ensure you don't overtorque the pinion nut and smash the spacer. As much as a PITA as it was to get to minimum torque value of 160 ft lbs., I had no fear of over-torque. For what it's worth, I did do a feel check before and after and it felt ok to me. No more binding or more sloppy than before I disassembled it. Scientific or accurate? Hell no! But I'm ok with it and nothing seems wrong so I guess it all worked out:)
 
Got the parts from my local dealership. They have a decent staff in the parts department. I'm not sure if these are available at any part stores because I never looked.
 

H8ROADS

Caught the Bug
This is the inside of the pinion shaft adapter. You can see the nut that gave me a hernia trying to remove it with a breaker bar.

After nearly popping a vessel, I got out the electric impact and removed the pinion nut. 1-5/16" seemed to do it.

Isn't that the truth! I remember the first time I did this years ago I about set my jeep on fire I was so angry trying to remove the damn thing. Finally had to get the impact as well and even it struggled there for a minute or two!

Nice write-up! :rock:
 

Rebel JK

New member
Checked local napa and no luck. Quadratech is listing Crowns for about half dealer prices and seeing as I need to change front and backs i may just goe that route.
 
Top Bottom