Kalums
New member
Ok guys here goes, this is my first write up on any install that I've done.
I bought these from my local "parts supplier" about two weeks ago but as I've said my 2013 JKU has been in the body shop since Thanksgiving weekend. I just got it back on Friday :thumb: So I decided to install these and a set of KC Daylighters.
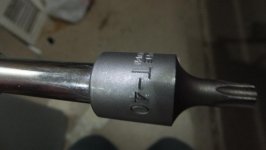
First the only tools you really need are a 3/8" socket wrench, a 1 1/2"-2" extension and a T-40 "star head" or Torx head socket/bit (and of course your new box of brackets). This is my personal preference so if you got a better setup go with what is comfortable.
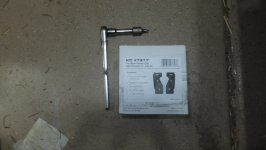
Now in the box you will find 1)The two #7317 brackets, wrapped in two small plastic bags underneath a piece of brown shipping paper (presumably to keep them from getting scratched), two flat "seals" (watch for these they were not in the bottom, they were on the side and i almost threw them away), some pretty useless instructions IMO and a Nice new yellow KC sticker that I personally just gave to one of my 3 year olds to stick in his coloring book.
NOTE: Each bracket has either a P or D stamped into the metal, you can guess what these stand for P=Passenger side, D= Driver side
Once you remove the Torx bolts from your Jeep (making sure to either have spare plastic washers or saving the ones already there)
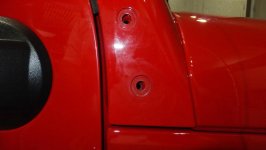
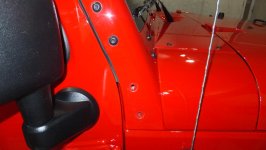
As you can tell I am focusing on the Passenger side, but the process is the same for both sides.
This is what the parts look like laid out.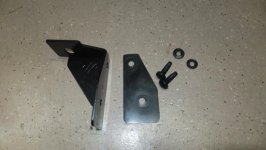
Make sure you place the "seal" or gaskets next the the bracket and then put the washers back on the Torx bolts to prevent leaks.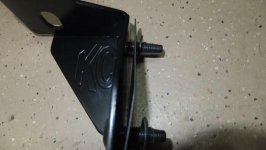
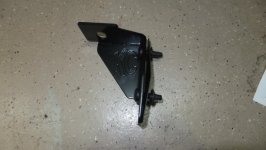
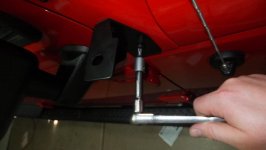
Hand tighten the bolts first, making sure to twist one in a few threads and then the other so as not to break the plastic washers or pinch the gaskets.
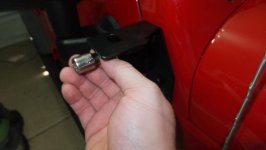
You can then finish by tightening them down with you socket wrench, be careful not to tighten them too much or you can dimple the steel and crack the paint.
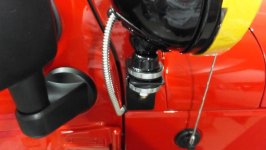
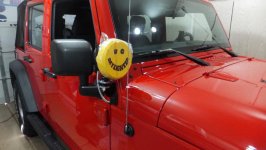
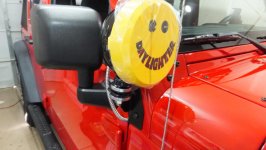
And just as a capstone here are a few pictures of what it looks like with the Daylighter assembly hand tightened down on the bracket.
Thank you for viewing.
P.S. I'm no Eddie or Cindy so my pictures aren't great sorry
Edited for grammer/punctuation
I bought these from my local "parts supplier" about two weeks ago but as I've said my 2013 JKU has been in the body shop since Thanksgiving weekend. I just got it back on Friday :thumb: So I decided to install these and a set of KC Daylighters.
First the only tools you really need are a 3/8" socket wrench, a 1 1/2"-2" extension and a T-40 "star head" or Torx head socket/bit (and of course your new box of brackets). This is my personal preference so if you got a better setup go with what is comfortable.


Now in the box you will find 1)The two #7317 brackets, wrapped in two small plastic bags underneath a piece of brown shipping paper (presumably to keep them from getting scratched), two flat "seals" (watch for these they were not in the bottom, they were on the side and i almost threw them away), some pretty useless instructions IMO and a Nice new yellow KC sticker that I personally just gave to one of my 3 year olds to stick in his coloring book.
NOTE: Each bracket has either a P or D stamped into the metal, you can guess what these stand for P=Passenger side, D= Driver side
Once you remove the Torx bolts from your Jeep (making sure to either have spare plastic washers or saving the ones already there)


As you can tell I am focusing on the Passenger side, but the process is the same for both sides.
This is what the parts look like laid out.

Make sure you place the "seal" or gaskets next the the bracket and then put the washers back on the Torx bolts to prevent leaks.


Hand tighten the bolts first, making sure to twist one in a few threads and then the other so as not to break the plastic washers or pinch the gaskets.

You can then finish by tightening them down with you socket wrench, be careful not to tighten them too much or you can dimple the steel and crack the paint.

And just as a capstone here are a few pictures of what it looks like with the Daylighter assembly hand tightened down on the bracket.


Thank you for viewing.
P.S. I'm no Eddie or Cindy
Edited for grammer/punctuation
Last edited:

