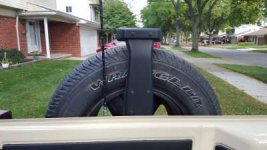
WxNerd2015
New member
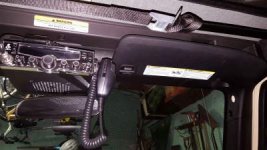
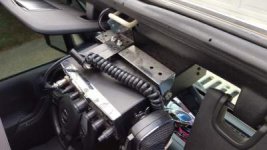
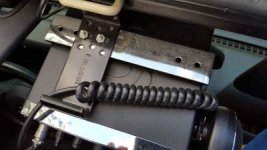
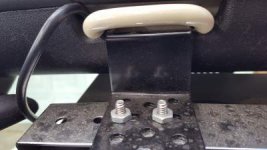
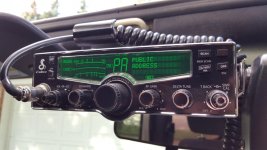
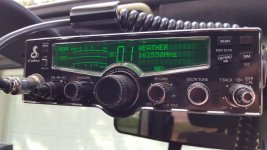
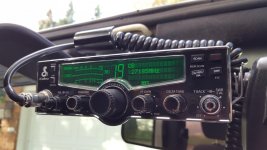
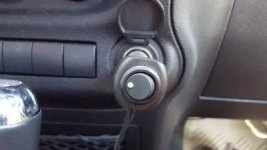
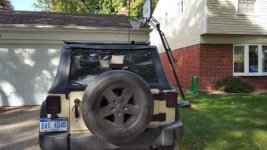
As promised, here is a more detailed write up on the installation of the Rugged Ridge CB Radio and Antenna Mounting Kit, as well as the radio and antenna themselves, with pictures.
So this was, in fact, the first modification to my Jeep. I had a CB from my truck as well as 2 antennas lying around, and I loved having the radio in my truck, plus, I just think it is cool! So this was a must for me to get into my Jeep, and besides, I had almost everything that I needed just laying around anyways! So I went on eBay and from this CB installation kit, with antenna mount and radio mount all in one, for around $40, which isn't too bad and I was happy to spend!
Jeep Wrangler JK 07 14 New CB Radio Antenna Mount Kit 11503 96 | eBay
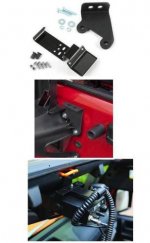
This kit that I purchased was something like that above! So the kit came within a few days, and the installation was done on the following weekend! Total install time was probably around 3-4 hours of actually working and figuring out how and wear to run the actual wires for the entire system, not counting any parts runs to the store, but it was installed within an afternoon!
Installation:
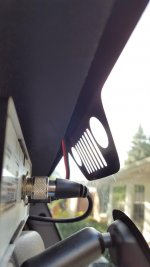
1. Since the kit only comes, as you can see, with the brackets, you will need to still get all the wires and connections needed for the antenna and a power source for the radio. Now I had already had my radio installed, so I had had most of these to begin with. So I disassembled my previous antenna mount to harvest the antenna connection to install on the tailgate mount. This is what the mount for my truck looked like:
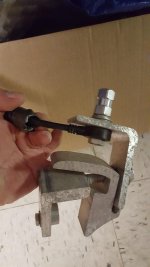
This was fairly simple as it was just unscrewing the connector on the top (which is the left side in the picture, and the wire attached on the bottom (the black wire attached) and all the hardware you need just slides out of the whole and you are goo to go to install it into your new Tailgate mount.
2. Just repeat the steps from my removal in reverse order to reinstall. Therefore, Line the bottom connection (the black wire) up directly beneath the opening in which you want the antenna to be.
***Make sure it is centered as the whole is not a tight fit so a perfectly centered install will make it much more secured and stable, and in my opinoin, I just like to do it right!***
3. Once lined up, insert the washer and the connector on the top of the mounting bracket and thread into the black antenna wire's connector that you have lined up beneath the hole on the mount.
4. Go ahead and tighten your connector down until your are confident it is tight and feel secure with the connection.
5. Go ahead and remove you spare tire from the tailgate.
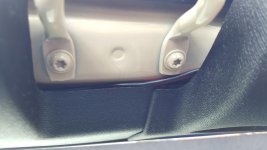
6. Once the spare is removed, go ahead and remove the the upper passenger side bolts (there should be 2) which hold the spare tire carrier to the tailgate. Here is the location which can be seen by where the mount is located:
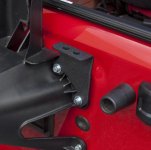
7. Once those bolts are removed, discard the bolts as the kit provides new longer bolts to account for the mount being on the tailgate.
***Side note, when I installed my tailgate mount, I had to redo steps 2-4 as I originally placed the antenna in the outer whole, but when I reinstalled the spare tire, I found that the mount was actually slightly inside the rim. And having the stiffer fiberglass Firestick antenna, i could not really bend the antenna to get it in the mount and tighten it correctly. So I ended up having to move the antenna mount to the inside mounting location which then allowed for just enough clearance for the antenna to thread properly into the hole and not be bent***
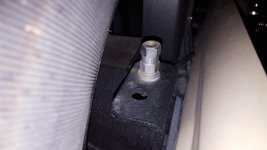
8. Hold the bracket in place and insert your new longer bolts with washers back into the same holes that your pulled the old bolts out of and tighten down your bolts. Make sure both are threaded correctly (not cross threaded or not all the way in the whole, etc.) and are properly tighten as the spare tire mount is pretty important and is also supporting a good amount of weight, so you want to make sure that all is properly secured. Mine looked like this once on:
9. Next step is to decide where you want to run your wire for the antenna into the Jeep. There are many different ways, as the tailgate has built in rubber grommets that you could go through, or follow the wires for the middle brake light, or make your own location, or just run them over the top edge of the tailgate and let the edge of the rear window or tailgate bar seal it off. The method that I chose that suited my needs and made the easiest installation was to run through one of the slots in the tailgate vent directly inside/behind the center of the tire carrier. I just lifted up one of the flaps and feed the coax cable through into the inside of the tailgate.
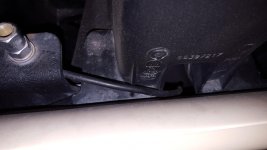
***Side note, I chose this location because when running through the tailgate, there are multiple layers of sheet metal, it is not just going through the front and coming through the back to the inside. The location that I selected was the most bottom, driver hand side vent opening as this was the closest to where the opening on the backside of the tailgate was for the wires running to the 3rd brake light. This allowed me to reach in from the opening in the inside of the tailgate much easier and find the wire to pull through, without too much of a hassle or struggle. Now I am not saying that this is the best location to run the coax for the antenna, but IMO, it was the simplest and easiest to do and it has been installed for almost a year and a half that way and been off roading and storm chasing and all that and have no issues whatsoever.***
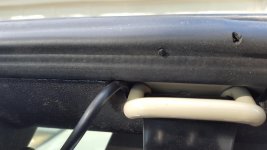
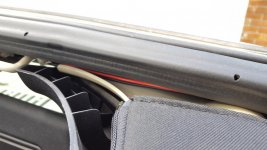
10. Once you have Coax antenna cable fed into the inside of the tailgate, remove the black plastic cover on the inside of the tailgate that runs the width of the tailgate. This is just snapped into the tailgate, no hardware involved. Just carefully pry it off and it will pop off. This will give you access to the innards of the tailgate where the Coax is currently sitting through the same hole that the 3rd brake light wiring is going.
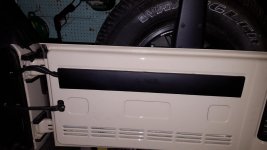
11. With the cover removed, reach into the hold which will be to the further right side in the picture above under the cover and find where your coax cable is sitting in there and pull the coax all the way through the tailgate until there is just a very slight pit of slack left outside. (Just enough so that the wire outside is not hanging there, but nothing is pinched or bent or pulling)
12. Go ahead and install your antenna into the antenna mount. Make sure that it threads in straight, and depending on your preference, tighten. Personally for me, I park my Jeep in a garage so I take the antenna off to go in the garage so I typically on hand tighten, which is plenty tight to hold the antenna securely. But if you would prefer, or the antenna is staying on there permanently, go ahead and once hand tightened, go ahead and give a few twists with a wrench. Then that antenna is not going anywhere!
13. Lastly, to finish off the outside work on the vehicle, go ahead and reinstall your spare tire onto the mount and tighten it down securely.
14. Once the outside is all buttoned up, you will need to run the coax cable inside the vehicle. Line up the coax with the 3rd brake light wiring and zip tie the cable to the wiring across the entire tailgate.
15. Reinstall the black plastic cover over both wires making sure that none are caught or pinched as you snap the cover back into place.
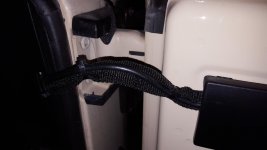
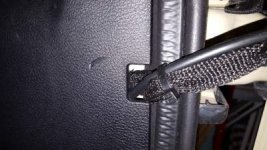
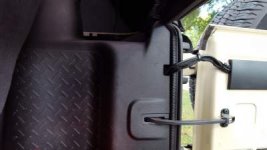
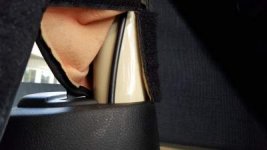
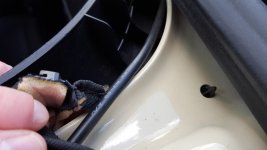
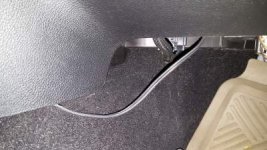
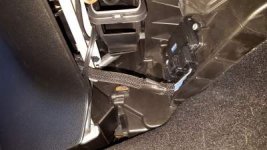
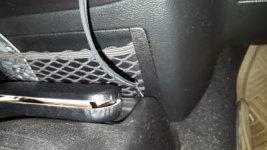
16. Once the tailgate is all buttoned up, you need to decide how the wire will go into the vehicle. Since I had already run the coax cable along the pre-existing wiring, I chose to just continue following that path into the vehicle. I removed the plastic trim in the truck area in the passenger side which gave me access to slight the cable in the existing tailgate catch location where the strap to stop the tailgate and the wiring for the 3rd brake light is run.
So this was, in fact, the first modification to my Jeep. I had a CB from my truck as well as 2 antennas lying around, and I loved having the radio in my truck, plus, I just think it is cool! So this was a must for me to get into my Jeep, and besides, I had almost everything that I needed just laying around anyways! So I went on eBay and from this CB installation kit, with antenna mount and radio mount all in one, for around $40, which isn't too bad and I was happy to spend!
Jeep Wrangler JK 07 14 New CB Radio Antenna Mount Kit 11503 96 | eBay

This kit that I purchased was something like that above! So the kit came within a few days, and the installation was done on the following weekend! Total install time was probably around 3-4 hours of actually working and figuring out how and wear to run the actual wires for the entire system, not counting any parts runs to the store, but it was installed within an afternoon!
Installation:
1. Since the kit only comes, as you can see, with the brackets, you will need to still get all the wires and connections needed for the antenna and a power source for the radio. Now I had already had my radio installed, so I had had most of these to begin with. So I disassembled my previous antenna mount to harvest the antenna connection to install on the tailgate mount. This is what the mount for my truck looked like:

This was fairly simple as it was just unscrewing the connector on the top (which is the left side in the picture, and the wire attached on the bottom (the black wire attached) and all the hardware you need just slides out of the whole and you are goo to go to install it into your new Tailgate mount.
2. Just repeat the steps from my removal in reverse order to reinstall. Therefore, Line the bottom connection (the black wire) up directly beneath the opening in which you want the antenna to be.
***Make sure it is centered as the whole is not a tight fit so a perfectly centered install will make it much more secured and stable, and in my opinoin, I just like to do it right!***
3. Once lined up, insert the washer and the connector on the top of the mounting bracket and thread into the black antenna wire's connector that you have lined up beneath the hole on the mount.
4. Go ahead and tighten your connector down until your are confident it is tight and feel secure with the connection.
5. Go ahead and remove you spare tire from the tailgate.
6. Once the spare is removed, go ahead and remove the the upper passenger side bolts (there should be 2) which hold the spare tire carrier to the tailgate. Here is the location which can be seen by where the mount is located:

7. Once those bolts are removed, discard the bolts as the kit provides new longer bolts to account for the mount being on the tailgate.
***Side note, when I installed my tailgate mount, I had to redo steps 2-4 as I originally placed the antenna in the outer whole, but when I reinstalled the spare tire, I found that the mount was actually slightly inside the rim. And having the stiffer fiberglass Firestick antenna, i could not really bend the antenna to get it in the mount and tighten it correctly. So I ended up having to move the antenna mount to the inside mounting location which then allowed for just enough clearance for the antenna to thread properly into the hole and not be bent***
8. Hold the bracket in place and insert your new longer bolts with washers back into the same holes that your pulled the old bolts out of and tighten down your bolts. Make sure both are threaded correctly (not cross threaded or not all the way in the whole, etc.) and are properly tighten as the spare tire mount is pretty important and is also supporting a good amount of weight, so you want to make sure that all is properly secured. Mine looked like this once on:

9. Next step is to decide where you want to run your wire for the antenna into the Jeep. There are many different ways, as the tailgate has built in rubber grommets that you could go through, or follow the wires for the middle brake light, or make your own location, or just run them over the top edge of the tailgate and let the edge of the rear window or tailgate bar seal it off. The method that I chose that suited my needs and made the easiest installation was to run through one of the slots in the tailgate vent directly inside/behind the center of the tire carrier. I just lifted up one of the flaps and feed the coax cable through into the inside of the tailgate.

***Side note, I chose this location because when running through the tailgate, there are multiple layers of sheet metal, it is not just going through the front and coming through the back to the inside. The location that I selected was the most bottom, driver hand side vent opening as this was the closest to where the opening on the backside of the tailgate was for the wires running to the 3rd brake light. This allowed me to reach in from the opening in the inside of the tailgate much easier and find the wire to pull through, without too much of a hassle or struggle. Now I am not saying that this is the best location to run the coax for the antenna, but IMO, it was the simplest and easiest to do and it has been installed for almost a year and a half that way and been off roading and storm chasing and all that and have no issues whatsoever.***
10. Once you have Coax antenna cable fed into the inside of the tailgate, remove the black plastic cover on the inside of the tailgate that runs the width of the tailgate. This is just snapped into the tailgate, no hardware involved. Just carefully pry it off and it will pop off. This will give you access to the innards of the tailgate where the Coax is currently sitting through the same hole that the 3rd brake light wiring is going.

11. With the cover removed, reach into the hold which will be to the further right side in the picture above under the cover and find where your coax cable is sitting in there and pull the coax all the way through the tailgate until there is just a very slight pit of slack left outside. (Just enough so that the wire outside is not hanging there, but nothing is pinched or bent or pulling)
12. Go ahead and install your antenna into the antenna mount. Make sure that it threads in straight, and depending on your preference, tighten. Personally for me, I park my Jeep in a garage so I take the antenna off to go in the garage so I typically on hand tighten, which is plenty tight to hold the antenna securely. But if you would prefer, or the antenna is staying on there permanently, go ahead and once hand tightened, go ahead and give a few twists with a wrench. Then that antenna is not going anywhere!
13. Lastly, to finish off the outside work on the vehicle, go ahead and reinstall your spare tire onto the mount and tighten it down securely.
14. Once the outside is all buttoned up, you will need to run the coax cable inside the vehicle. Line up the coax with the 3rd brake light wiring and zip tie the cable to the wiring across the entire tailgate.
15. Reinstall the black plastic cover over both wires making sure that none are caught or pinched as you snap the cover back into place.
16. Once the tailgate is all buttoned up, you need to decide how the wire will go into the vehicle. Since I had already run the coax cable along the pre-existing wiring, I chose to just continue following that path into the vehicle. I removed the plastic trim in the truck area in the passenger side which gave me access to slight the cable in the existing tailgate catch location where the strap to stop the tailgate and the wiring for the 3rd brake light is run.

