bob-o12jk
Banned
I just finished installing my EVO corner armor the other day and after posting pics on jkforum everyone keeps asking me if I used a nutsert tool or the bolt and wrench method. I tried the harbor freight tool but it broke on the very first nutsert lol. So I used the bolt and wrench method for installing the nutserts.
This is my first write-up so please bare with me.
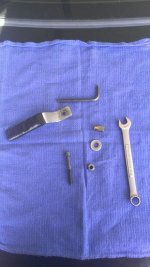
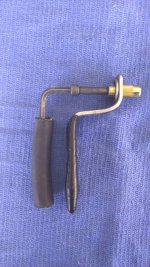
Heres a pic of what you need.
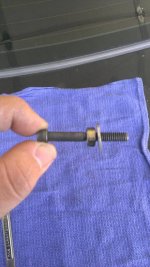
-1 1/4-20 Alan bolt 2 1/4" long
-1 nut and washer for the Alan bolt
- 3/16 Alan wrench
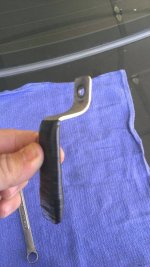
- The "Anvil" is the handle you see. I made it myself with a piece of steel I had laying around. The "Anvil" will not allow the nutsert to "spin" while installing it. I also drilled a 1/4" hole in it just big enough to the allow the Alan bolt to go through it
- 7/16 open-end wrench.
Take the Alan bolt and put the nut on first and then the washer.
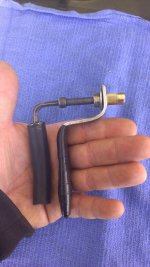
Here's a better pic of the "Anvil". I wrapped the handle part with rubber tape and then electrical tape for some cushion for your hand while installing a million nutserts lol.
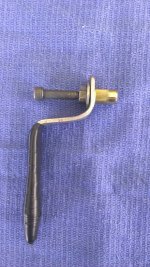
Here's the tool put together
1.Bolt, 2.nut, 3.washer, 4."anvil",5. nutsert.
Then here it is with the Alan wrench and a piece of rubber hose to make it more comfortable when using this homemade tool.
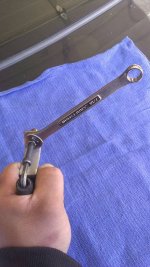
Then you should hold this tool as of it were a pistol or dril
1.Then your ready to start installing these dreaded nutserts. With everything all together, just insert the nutsert into the 3/8 hole that you just drilled into you jeep while trying not to puke or cry because of all the many large holes you just drilled in your perfectly good jeep.
2. Make sure the nutsert is completely flush up against the body
3. Take the 7/16 wrench and start tightening the nut on the Alan bolt (turning it clockwise) while holding the anvil handle and Alan wrench stationary. The first couple of turns are a little hard but it will get easier. For me it took about 10 to 12 half turns for the nutsert to be fully installed, but that can vary so I don't recommend just counting 10 or 12 turns.
You can also feel when it gets harder to turn the 7/16 wrench as if the nut is completely tighten down, that's when I recommend to stop, if u just keep tightening the wrench it will crush the nutsert so you won't be able to install the bolt.
4. Once you feel that the nut is really tight then loosen the nut a few turns and take the alan wrench to loosen the bolt(turn counter-clock wise)
5. Remove the bolt from the freshly installed nutsert. Thread the nut back up to the start of the threads to allow room for the next nutsert to be threaded onto the alan bolt.
6. Repeat all the steps above until you have successfully installed all the nutserts.
Whew! That was kind of hard making this write-up. This is my first one and I did all of it from my phone. I hope it helps all of you that doesnt want to keep going back to harbor freight to replace the cheap nutsert tool or spending $150+ for a real good tool. I spent only a few bucks for the bolt and nut from my local hardware store but you can go to Lowe's or home depot too. This tool I made has held up great, so far I installed my rocker skins, b-pillar skins and the recent EVO corner armor. If any of you have any questions, please feel free to ask, I love helping people and most of the stuff I put on my jeep or tools to install some parts, I made myself. I consider myself a 27 year Korean MaCGyver Lmao (just kidding)
Sent from my EVO using WAYALIFE mobile app
Last edited:

