Evo carrier help please!

RedFox

New member
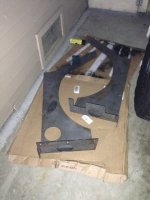
So I got my evo carrier, and my questions are

1- to install the brackets for the carrier, do I need to install nutserts in the hole locations?

2- do I install a nursert where the hole to the right of the gascap hole is located? I know this is an attachment point for the upper driver side bracket, I just don't know if I install a nursert there??

3- what are the long bolts and shouldered bolts for? they are included in the hardware for the builder corners.

4- What's the size drill bit for drilling out the holes?

I know some guys on here have installed the carrier, and I would really appreciate the help!
 

MTG

Caught the Bug
So I got my evo carrier, and my questions are

1- to install the brackets for the carrier, do I need to install nutserts in the hole locations?

2- do I install a nursert where the hole to the right of the gascap hole is located? I know this is an attachment point for the upper driver side bracket, I just don't know if I install a nursert there??

3- what are the long bolts and shouldered bolts for? they are included in the hardware for the builder corners.

4- What's the size drill bit for drilling out the holes?

I know some guys on here have installed the carrier, and I would really appreciate the help!
1--I don't understand the question. The carrier brackets do not use nutserts. They bolt through the tub.

2--no nutsert in this location. It is the starting hole for the carrier. No harm to put one there to help with install, but you'll then have to drill it out.

3--?

4--I want to say 3/8". But check the instructions.

Good luck!
 

RedFox

New member
Thanks guys, the thread was helpful for sure. I'm still counting on evo mfg to email the instructions as a supplement. Gotta say though, this stuff sure is beefy! I can't wait to get it on and post pics
 

RedFox

New member
Cannot wait to see pics!

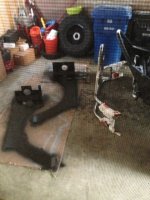
Well, here are a few to begin with. ImageUploadedByWAYALIFE1373704953.072534.jpg
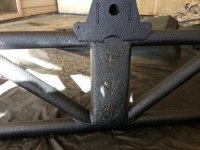
I'm gonna try the install with having painted everything. I don't want to install, remove, paint, and install again. I'm sure it can be done, so we shall see how it comes out. Here is another with my corners painted. I'm raptor lining everything except for the insides of the corners, which are simply being painted flat black. ImageUploadedByWAYALIFE1373705129.086544.jpg
 

biggy

Member
Well, here are a few to begin with. View attachment 39725
I'm gonna try the install with having painted everything. I don't want to install, remove, paint, and install again. I'm sure it can be done, so we shall see how it comes out. Here is another with my corners painted. raptor lining everything except for the insides of the corners, which are simply being painted flat black. View attachment 39726

I think you might regret painting them first. These do not simply bolt on , their is a lot of manipulation of the corners to get them to fit right if you want the gaps to be small. Hope it works out for you.
 
Take your time. It took me a full day by myself.

Get you some clamps to help with the corners. Do not mark all the holes and drill them out at one time. As you bolt the skins down they change position. So do a few, bolt them down, mark a few, so on and so on.

Also EVO is great about answering questions.
 

RedFox

New member
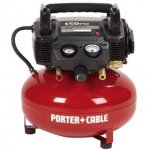
Went ahead and raptor lined the armor and carrier! Came out great, and was easier than I was expecting. For anyone interested in raptor lining their JK, you do not need a heavy duty compressor. I used a porter cable compressor from Home Depot that cost me $100. I could have sprayed my whole tub with it. Held psi just fine.
ImageUploadedByWAYALIFE1374146572.796313.jpg
This is a pic of the compressor I used to spray. Make sure, when using a small compressor such as this one, to use large diameter hose. This allows for more air storage.
ImageUploadedByWAYALIFE1374146931.606706.jpg
 

RedFox

New member
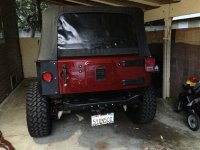
So I got one of the corners in. Being extra careful to not scratch the paint job we took forever to install just one side. The good thing is that we didn't scratch anything, and my gap is small. I will take more pics later, and I will try to finish everything best Sunday
 
Top Bottom