raginkgin1
New member
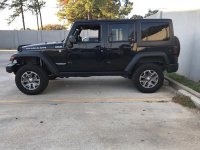
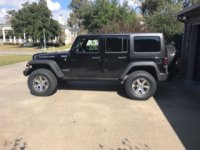
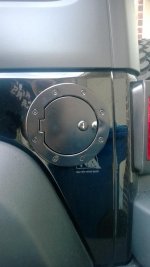
Well its been one year since I purchased Morpheus and figured it was time to start working on "the build". As I looked back on the first year of ownership I must admit that I have spent a lot of time researching and crunching numbers, looking up feedback on mods of all kinds, and getting input from the Wayalife community on the mods I want for Morpheus. Hell it took me almost a year of researching and test driving every package of 2013 and 2014 Jeep JKUs offered before I made the purchase. What I didn't realize is how quickly I would make that first mod that required me to put holes into this very expensive piece of machinery. Less than three months! I started small, but made sure it was a mod that fixed what I didn't like. I didn't like the fact that anyone could access my gas tank, so I added the locking gas take cover from Rugged Ridge.
The fear of making holes in my JKU subsided, so I took the next step and fixed another problem that I notices after taking a drive to East Texas. Wow, that windshield sure does capture a lot of bugs. So in goes four more holes and on goes the Rugged Ridge Bug shield.
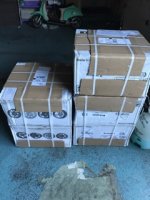
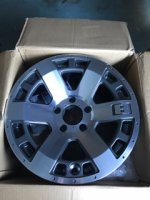
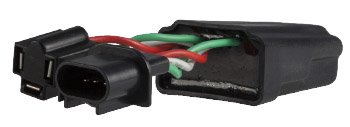
Now onto the next phase of mods. Getting this baby lifted and onto a new set of wheels and reality setting in (The swallowing of the red pill!). Man that's going to cost a lot of money and is going to take me some time to get to my end goal. Better start working on the basics first. Start small and focus on the things that are fixes. Fixes? Oh crap, I forgot how much I hate these factory headlamps. I should make that my first year mod. Look at that, I have a set of Truck-Lite LED headlamps on my list of must haves. Order goes in, Brown Santa shows up, and I experience my first easy mod of installing them. Followed the install video from Youtube, and there are already some very good write ups so no need to list the steps here. But will post pictures in my album in the morning.Would appreciate some ideas of how best to mount the Anti-Flicker Adaptor to prevent it from bouncing around when off roads.
That was easy, so in goes the order for the EVO C Gussets. Figured if I am going to do this over time, I might as well get the foundational work done. Order goes in, Brown Santa shows up. Made sure to check with the local 4X4 shop to see if they could do the installation and for how much. I am on the schedule three weeks from now to get them put on and for $150 each side. They agreed to follow the instructions from EVO Mfg and remove the ball joints so I figured that was a decent price for the work. Will post pictures once completed.
Now to save up for the EVO Double D Long Arm w/High Clearance Kit, King 2.5 shocks, front double throwdown system, and rear double throwdown system.

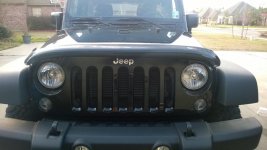
The fear of making holes in my JKU subsided, so I took the next step and fixed another problem that I notices after taking a drive to East Texas. Wow, that windshield sure does capture a lot of bugs. So in goes four more holes and on goes the Rugged Ridge Bug shield.

Now onto the next phase of mods. Getting this baby lifted and onto a new set of wheels and reality setting in (The swallowing of the red pill!). Man that's going to cost a lot of money and is going to take me some time to get to my end goal. Better start working on the basics first. Start small and focus on the things that are fixes. Fixes? Oh crap, I forgot how much I hate these factory headlamps. I should make that my first year mod. Look at that, I have a set of Truck-Lite LED headlamps on my list of must haves. Order goes in, Brown Santa shows up, and I experience my first easy mod of installing them. Followed the install video from Youtube, and there are already some very good write ups so no need to list the steps here. But will post pictures in my album in the morning.Would appreciate some ideas of how best to mount the Anti-Flicker Adaptor to prevent it from bouncing around when off roads.

That was easy, so in goes the order for the EVO C Gussets. Figured if I am going to do this over time, I might as well get the foundational work done. Order goes in, Brown Santa shows up. Made sure to check with the local 4X4 shop to see if they could do the installation and for how much. I am on the schedule three weeks from now to get them put on and for $150 each side. They agreed to follow the instructions from EVO Mfg and remove the ball joints so I figured that was a decent price for the work. Will post pictures once completed.
Now to save up for the EVO Double D Long Arm w/High Clearance Kit, King 2.5 shocks, front double throwdown system, and rear double throwdown system.
Last edited:


