HooksNRounds 2016 Billet Silver JKUR Build Thread

I wanted to get a build thread started before I get to far into my build to document my progress and share my mod excitement, frustrations, successes, and failures with the community as my build progresses. All of you wonderful folks in the community have done a great job covering just about everything that one would want to ask in the JK world, but if my build thread was to give even one other person any ideas or save them from a headache that I encounter throughout my build, then I'm happy to contribute all that I learn along the way.

Base Vehicle:
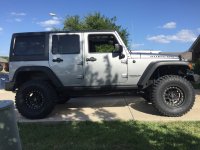
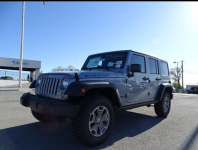
2016 Billet Silver Unlimited Rubicon

Options:
Automatic Trans
Connectivity Group
4.10 Axle Ratio
Hard Top

I have had my share of both manual and auto vehicles and I originally wanted to go with the manual. I test drove both a manual and an auto. After spending a weekend with each, I found that I really preferred the auto over the manual in the JK.
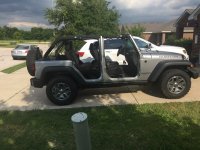
New from the dealership.png
Naked.jpg

The only other option that I really wanted was the dual top group, but since I was a bit too late in the year for my dealer to order the exact build that I wanted, I went ahead and had them locate something that was as close as possible to what I wanted. The only option missing was the dual top, so the first thing I purchased for my Jeep was a Bestop Supertop NX Twill as I prefer the squared off Supertop to the angled Trektop.
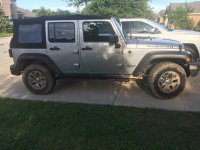
Bestop Supertop Twill.jpg
 
Diy spod

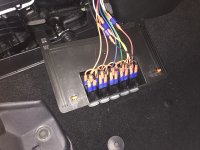
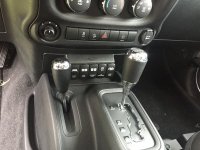
First true mod was a DIY SPOD type relay/fuse panel. Thanks to pvanweelden's thread in the write up section, this was pretty fun and straight forward and turned out great.

Daystar Switch Panel wiring:
Switch Panel Wiring.jpg

Installed switch panel:
Switch Panel Installed.jpg

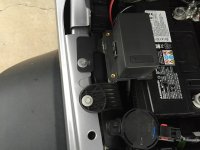
Relay/Fuse Box:
I still have a little bit of cleanup and painting to do on the mount that I fab'd up and still need to add a bit of wire loom under the hood, but it came out pretty clean and very stout
Bussman Panel Mount.jpg
 
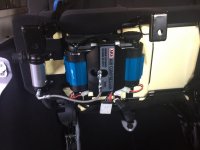
Onboard Air

For my onboard air setup, I went with an ARB Twin air compressor with the manifold kit. While I currently don't really need the manifold for air lockers, I figured I would go ahead and add it in now so that I could make room for it @ my mounting location for future use if I decide to go with air lockers or the new air actuated EVO No Limits down the road. The picture below just shows the unit mounted and mount location (under rear passenger seat). I will get some pics of the wiring next time I need to pull the seat up for anything. ARB Twin Mounted.jpg
 
Seat Covers

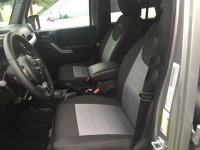
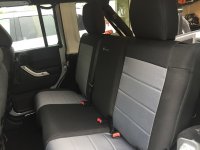
I did a lot of research on seat covers before pulling the trigger on the Bartact seat covers. While expensive, I really liked how well they fit and how well they have held up for people that have reviewed them. I figured these should hold up to anything that my dogs, kids, or myself can throw at them. The graphite color goes well with the billet silver too.

Bartact Front Seat Covers.jpg Bartact Rear Seat Covers.jpg
 
Front and Rear Bumpers

I tackled getting my bumpers installed yesterday to make sure that they fit and I could get any needed modifications done before painting.

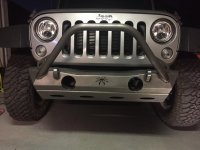
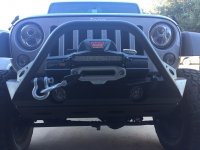
I have had my eye on the Poison Spyder Brawler Lite w/ skid for quite some time while building out my build on paper before buying my Jeep, so that's what I ended up going with.

Poison Spyder Brawler lite w-Skid.jpg


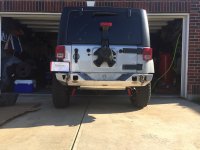
For the rear I went with the JCR Crusader Mid-width. I know JCR does not get a lot of love around here, but I do like the looks of it and the main reason that I went with it is that I really like their adventure tire carrier that goes with it. I'll be sure to post up some pics once I get the bumpers painted up and the tire carrier installed.

JCR Crusader Mid-width rear.jpg
 
Looks like a great start to an awesome build. Nice color :)

Thanks Napalm. I'm trying to get some of these parts on before the Hidden Falls run in October. It seems like a ways out, but life tends to make time fly. Will hopefully get to finish painting bumpers this weekend and then maybe install my lift next weekend.
 
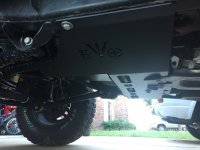
EVO Enforcer 3" w/ King 2.0s and DL Flip

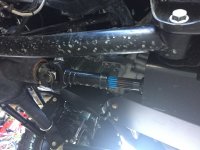
Finished up installing the EVO Enforcer 3" w/ King 2.0s and drag link flip today. Also installed some ATX Cornice 17x9 wheels and some 315/70 17 Cooper STT Pro tires. Lift, drag link flip, and alignment took me about a day and a half installing it solo, but everything was pretty straight forward. I still have to install the Adams front drive shaft I have, but wanted to drive it for a day or two without the front shaft to make sure that I don't feel any type of vibrations before I do so. I figured this would let me know exactly where any vibrations are coming from if I experience any after the DS install. Jeep drives great and I like the new looks.

Enforcer 3.JPG
 
I haven't had much time to jump on the computer (other than work) the last couple months to contribute to the community and update my build thread between wife having surgery, son being home on his pre-deployment leave, work life, and putting a ton of hours in wrenching on the Jeep. I'm finally getting back to a point where I can start jumping back on here and reading all the great info that everyone shares and hopefully i'll be able to contribute some good info as well now that I am getting more familiar with the JKU. I have done quite a bit to the Jeep since my last update and am quite proud of my progress so far. Hoping to get a few more things installed before the Hidden Falls run in a couple weeks. Checkout my latest updates below that I will be adding throughout the evening, and feel free to leave some feedback good or bad.
 
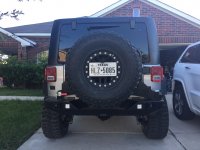
Rear Bumper and Tire Carrier

-JCR Crusader mid width rear bumper
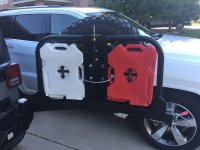
-JCR Adventure tire carrier
-Rotopax 2 gal gas can
-Rotopax 2 gal water can
-Rigid Dually 60° diffuesed lens lights installed in rear bumper
-Poison Spyder Combination LED License Plate Light and 3rd Brake Light
-Poison Spyder rear license plate delete
-License plate mount is homemade
-Firestik SS-3H Heavy Duty Stainless Steel Antenna Spring
-(Not in picture)Firestik (FS-3BK) Black 3' CB Antenna
-FireStik K-1A Push-n-Twist quick disconnect
JCR Crusader Mid Width.jpg JCR Adventure Tire Carrier.jpg
 
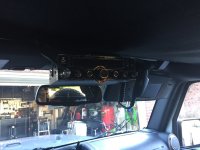
Cobra 29 LX CB

-Cobra 29 LX
-Homemade CB mount

I fabbed up a mount for the CB that bolts in with the center footmans loop and curves around the plastic interior header panel. It worked out pretty good and I didn't have to cut or modify any of the interior to mount it. I thought I snapped a pic of the mount before I buttoned the interior back up, but I can't seem to find it. If there is any interest in it for ideas for anyone looking for install options, let me know and I can probably pull the interior panel off this weekend and take a couple pics.

Cobra 29.jpg
 
Front Bumper and Winch

-Poison Spyder Brawler light front bumper with Skid
-Poison Spyder Zeon winch spacers
-Poison Spyder winch fairlead mount
-Poison Spyder fairlead 10in. light mount
-Rigid SR2 10in diffused light bar
-Warn Zeon 10s
-Warn power interrupt kit
-Warn Zeon winch rope cover
-Stock JK fog lights

Light bar
I went with the diffused light bar as it is mainly used as a work light to light up camp sites or when working on stuff in the dark. I don't go bombing through the desert or anything, so I figured any other configuration would be a waste for me.

Winch wiring and install
I wired up the winch using the Warn power interrupt kit and ran the trigger wire of the solenoid to my switch pod in the cab. The switch pod in the cab only receives power with the ignition on. I went this route to keep unruly street tuffs from being able to power up the winch while i'm not around :). I had to mount the Warn fairlead upside down due to interference with the light bar mount. Looks a bit off when you look close, but it works fine and the money saved was able to be thrown into other parts.

Poison Spyder Brawler lite.jpg
 

Draconianwinter

New member
Very nice looking jeep. Love that front bumper. It's the same one I put on mine this past weekend along with a warn vr10000 winch. Wanted a zeon for the looks of them but wanted a 10k lbs winch also. Just couldn't justify the lager price tag for the looks of it though, maybe later after I get the rest of the needed items. Lol.
 
Thanks guys. I'm hoping to get my LOD sliders and dynatrac ball joints in before the Hidden Falls run in a couple weeks, and if I can get around to doing the ball joints, i'll go ahead and weld in my evo c gussets.
 

Regolith

Member
Any word of advice on the rear bumper/adventure carrier install? How do you like them and how are they holding up? Any rattles or quirks? I just ordered mine on Black Friday.

Build looks great btw.


Sent from my iPhone using WAYALIFE mobile app
 
Bumper and tire carrier have been holding up fine. I did have one squeak/chirp that was occurring whenever I would hit rough roads or off-road. It was being caused by the ubolt of the latch rubbing on part of the piece that the latch latches to. I pulled the ubolt off and bent it at a bit steeper angle to fix the issue.

As far as advice goes, I would recommend that you install the whole bumper and carrier before you paint or powder coat and make sure everything fits as it should including drilling all holes and installing Rotopax, then pull back apart and paint. My install went pretty smooth except for setting up the rotopax. I had to elongate the holes in the big JCR bracket that the rotopax mounts install on to get the 2 gallon rotopax cans to fit properly within the tire carrier tubing.
 
Top Bottom