NOPULP13
New member
Well it is that time of the year again hardtop has to come off! I did this write up step by step to help those out who want to tackle this yourself its very easy and cost effective!
Well after having three different wranglers with three different hardtops, I knew with my brand new JK I needed something better. Hardtops take up a lot of space, are very valuable, as well as difficult to move around. I have found many of these for sale through various vendors costing anywhere from $150.00-$500.00. I simply could not bring myself to spend that much money, since I don’t have a garage and only a shed the option of a hardtop lift/hoist was out of the question for me. With a quick run to your local Lowes/Home Depot you can build one of these hardtop dollies for less than $80 and in about an hour. This write up is to show you just how simple it is to do by yourself with pictures every step of the way.
List of Tools needed:
-Cordless/electric drill – with Philips Bit as well as a 5/32 Bit
-Power saw/Hand saw ( I tipped the worker at Lowes to cut the pieces to length at the store )
-Utility Knife/Scissors
-1 Ratchet Strap
- Staple gun with staples
- Level
- Marker
-Tape Measurer
List of Materials:
ONE - Area Rug – I believe the one I got was 5’ x 10’ for $20
FOUR - Swivel wheels – I used 2.5” for this build, however will be upgrading to 4” next summer due to uneven pavement on the sidewalk it should make it easier to roll over tough terrain, besides we are jeep guys we lift and put bigger tires on everything! Also locking wheels are preferred so it will not roll away
TWO- 2 “ Eye Bolts
ONE - Box of 2 ½ “ Wood Screws – You’ll need about 20 or so and in case you drop any you have extra
EIGHT – ½ “ Wood Screws
TWO - 1 ½ “ Wood Screws
SIX – Lengths of 2 x 4 cut to 6 inches
ONE – Length of 1 x 2 cut to 59 inches
TWO – Lengths of 2 x 4 cut to 30 inches
TWO – Lengths of 2 x 4 cut to 59 inches
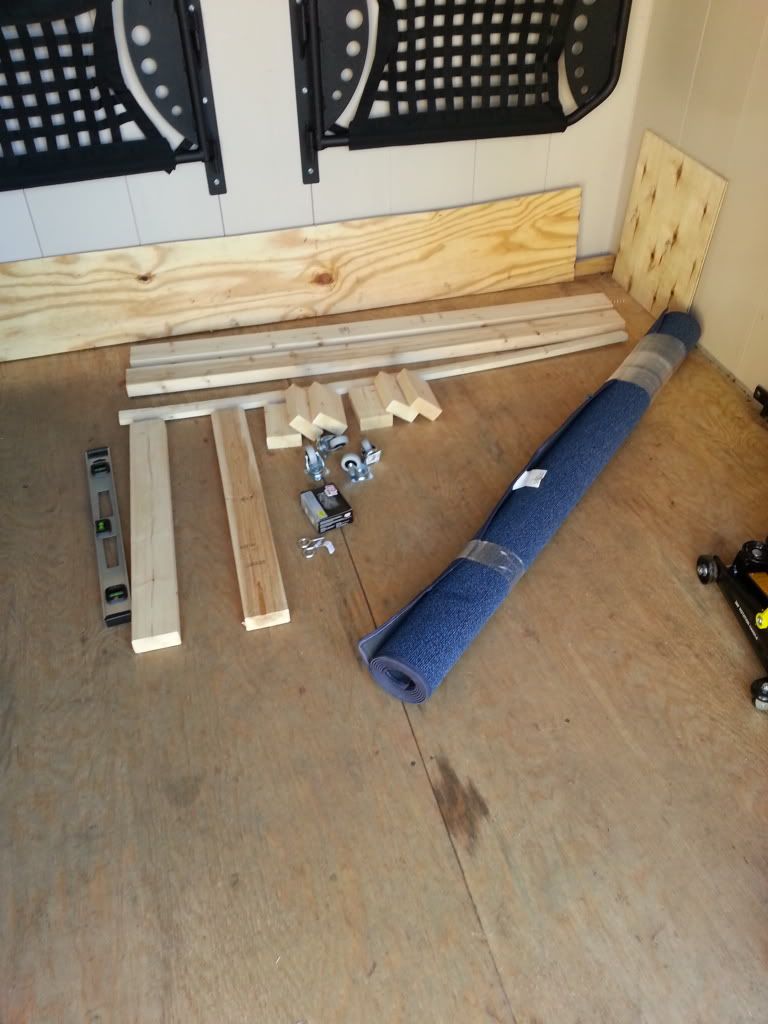
So once you bring all that home and lay it down, this is what it should look like. Now I tipped the employee at Lowes to cut the wood to lengths for me and this cut out a lot of the time needed to cut it up and measure it out.
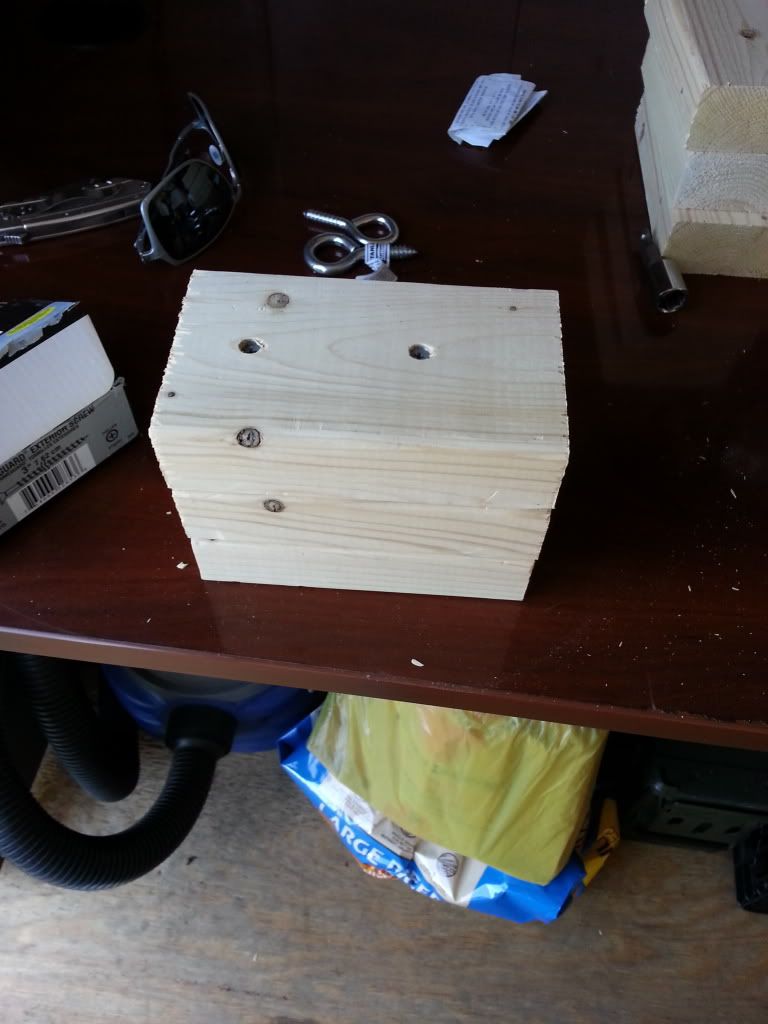
Now grab the Six 6 inch lengths of 2x4 we had cut, stack two of them on top of each other and drill them together using 2 of the 3 inch wood screws, then place a third on top of that and drill that one also to. It will look like this.
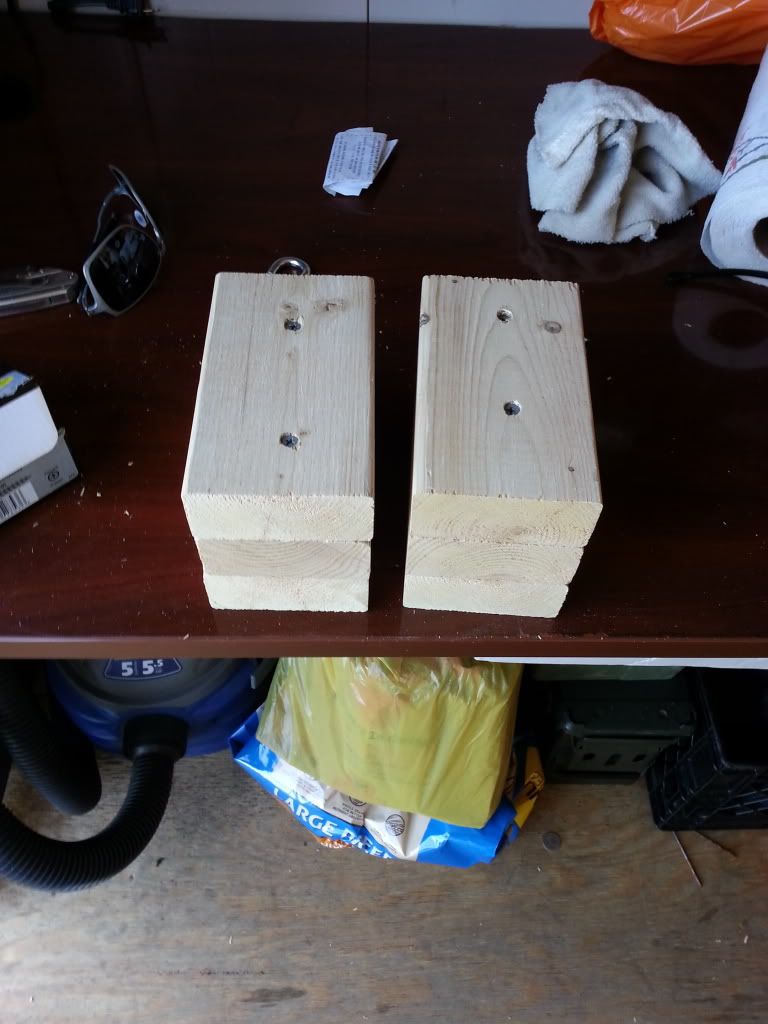
Repeat this once again so you end up with two stacks of 6 inch 2x4 screwed together
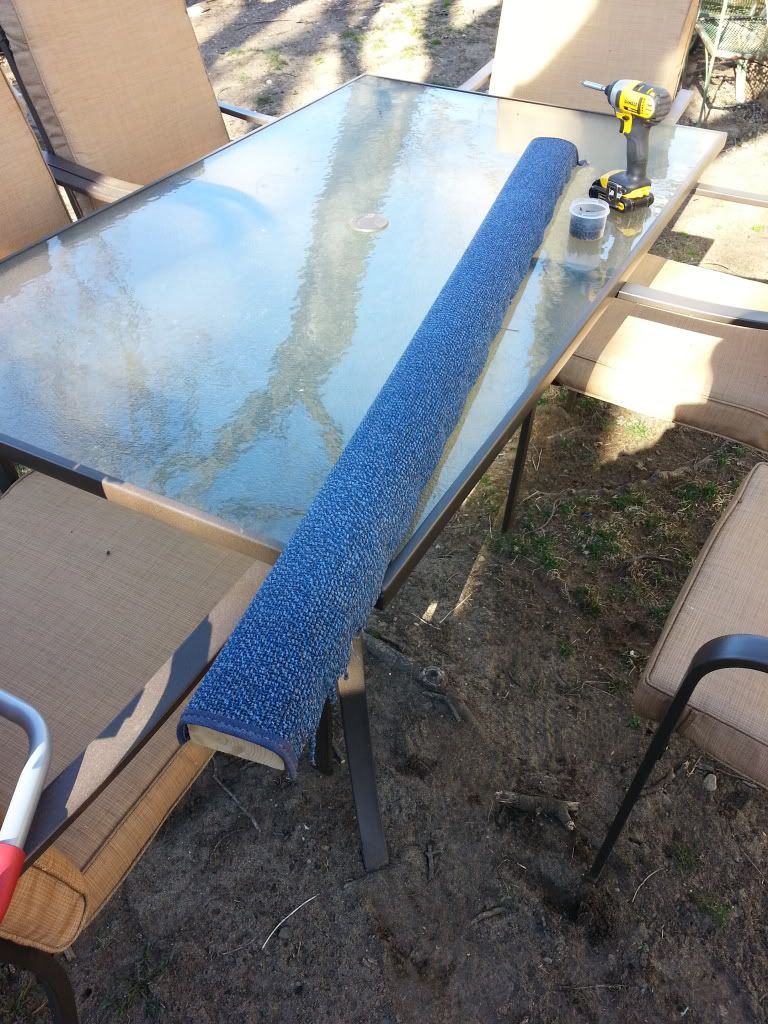
Now roll out that carpet we got face down onto the floor or any level surface, and grab one of the 59 inch 2x4 planks and slide it on the carpet and leave about an extra 2 inches on the end of the carpet. Using the Utility knife cut the carpet at the side of the 2x4 nearest you and be careful not to cut yourself and hold the 2x4 straight. If you have a friend nearby ask them to put their foot on it, but again I did this by myself and it isn’t hard just be patient and watch what you are doing.
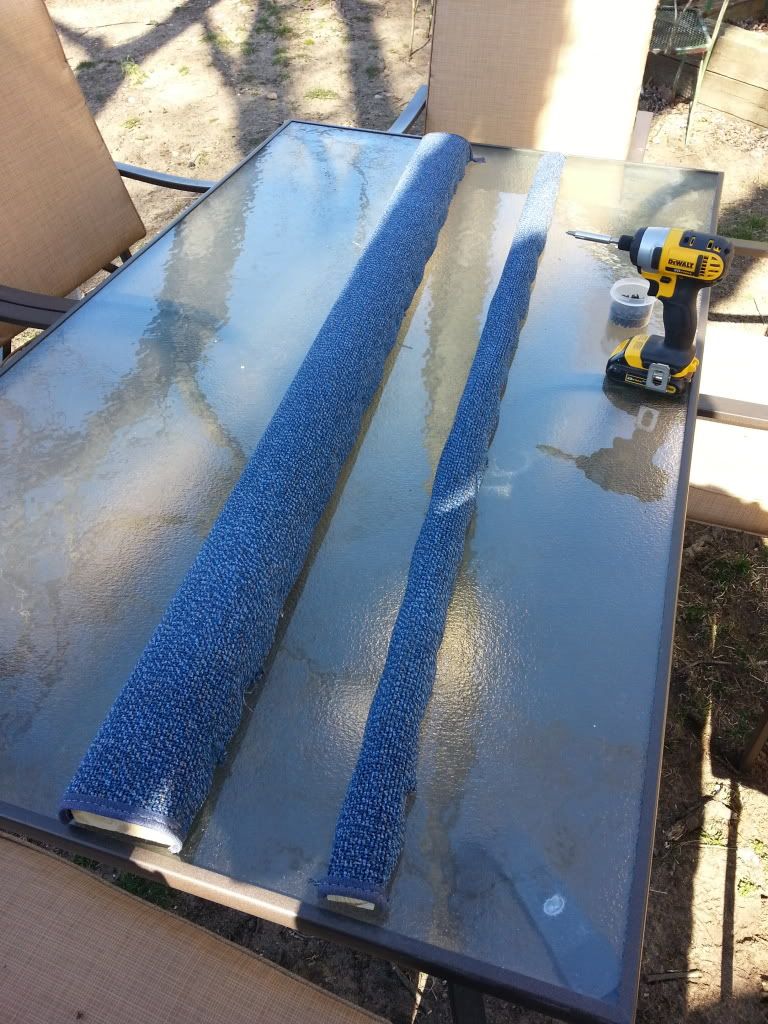
Now do this again but using the 59 inch length of 1x2 and leave about an inch of material from the first cut you made down, cut straight across following the 1x2 as a guide, once again I cannot stress this enough watch your hands when using the utility knife they are unforgiving.
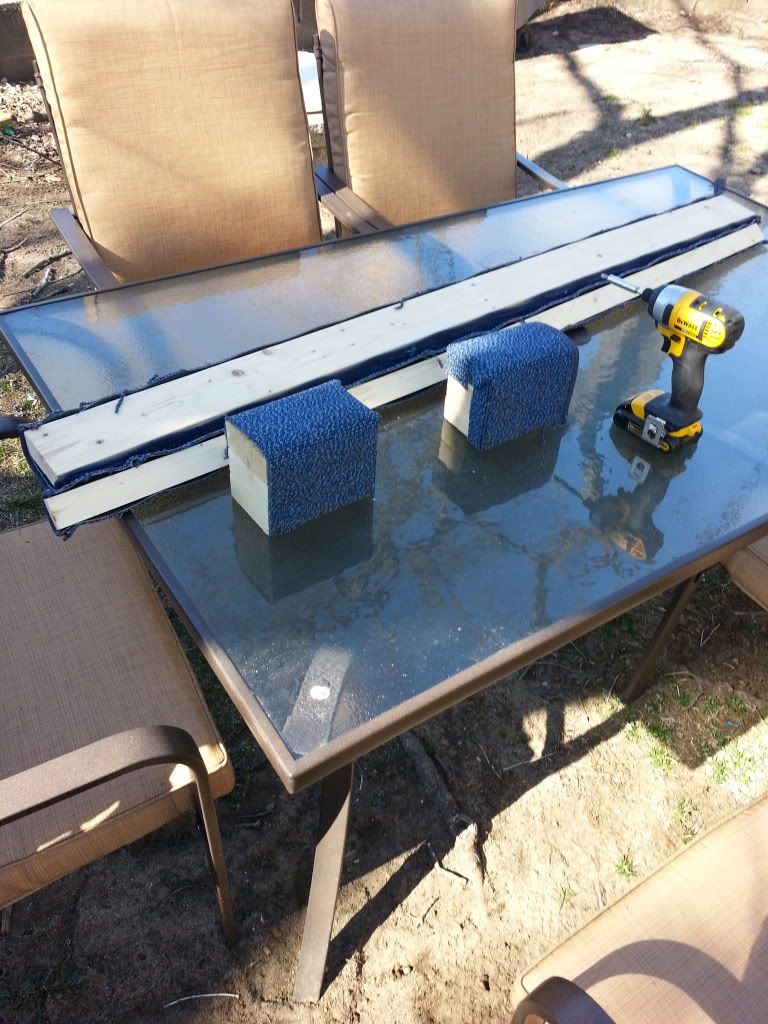
Next lay those 2 blocks of 3 6” 2x4 on the same facedown carpet and cut the carpet once again leaving about 2 inches of carpet left around them while cutting, now cut straight down the two lengths of carpet around the blocks but don’t cut across yet, slide each of the blocks down the carpet about 3 inches and use them as a guide to cut straight down again then across. We are leaving the extra lengths around all of these pieces so we can staple the carpet to them and avoid any staples coming into contact with the hard top I stapled everything on the sides and backs of the wood to insure this.
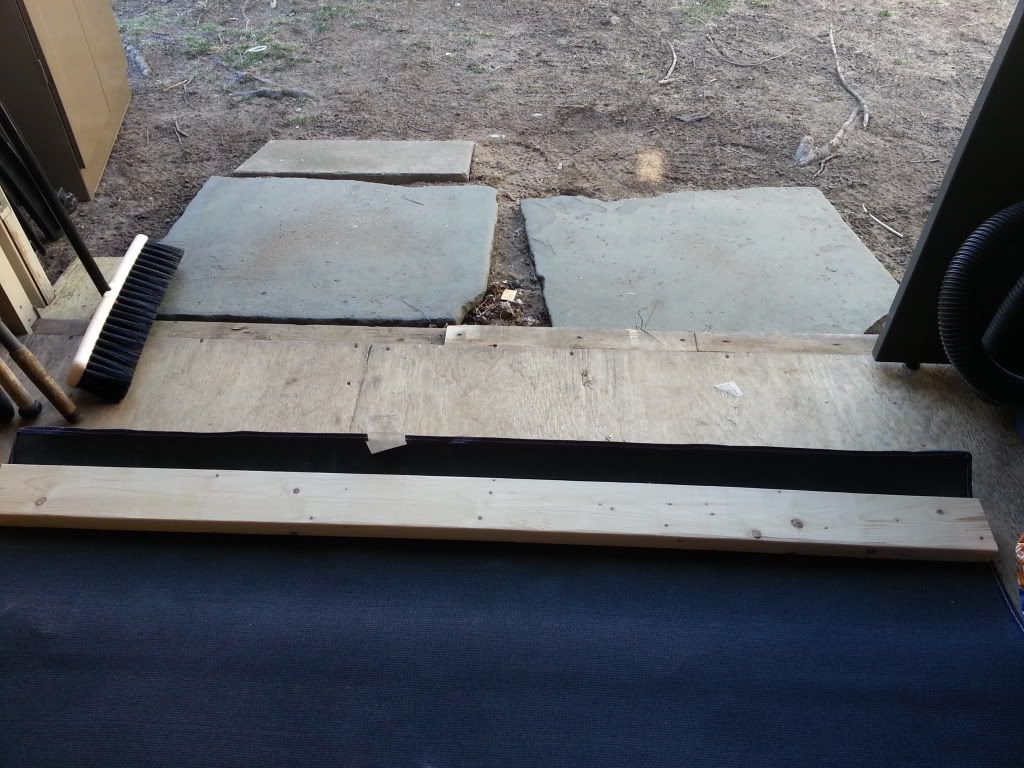
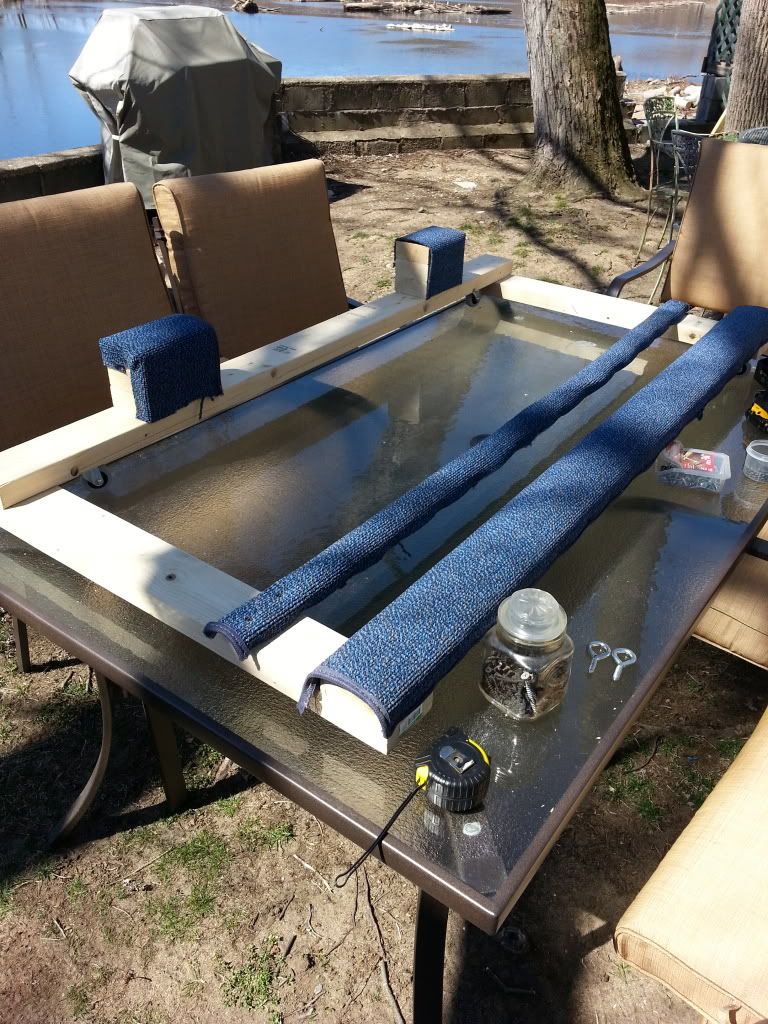
Next bring these pieces of wood and carpet you just cut over to your work bench , limited space means my work bench was my outdoor table, now with the carpet still face down grab the 59” 2x4 and staple the carpet to the thinner sides of the wood, down both lengths leaving the center with a slight bulge or air pocket inside, I did not staple anywhere near this air pocket as I did not want to have any staples touching the hard top.
Repeat this with the 59” piece of 1x2
Next is to wrap the blocks we made first with the carpet, now I let the extra carpet hang over the top as well as just the outside facing sides of these blocks because I didn’t see the hardtop possibly making contact anywhere on the inside of the blocks and this gave it a clean look.
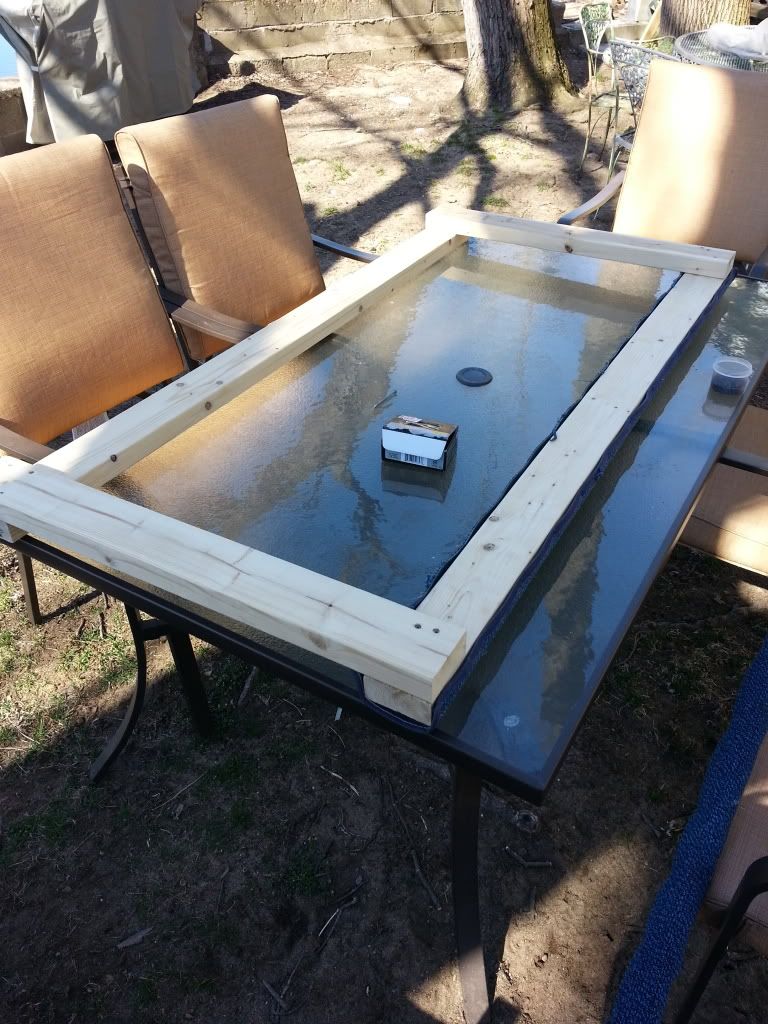
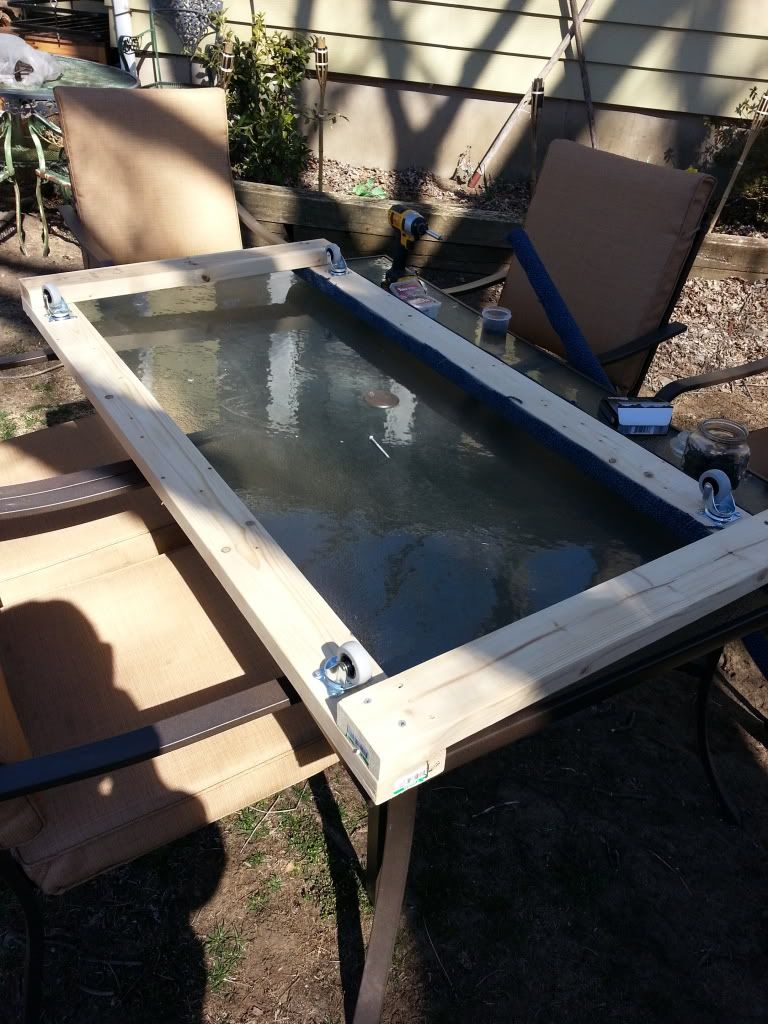
Now remove all of that from the table or work bench except for the 59” length of 4x2 and place it face down with the carpet side touching the table, grab the other 59” length of 4x2 with no carpet and lay it on the table square to the carpeted side at 30” apart. Now grab those two 30” cuts of 4x2 and lay them on top of the two face down 59” planks and drill the pilot holes and drill them into place, make sure they are square and use two 2 ½” screws on each corner, should look like this.
Now place the swivel wheels on the lengths of 59” planks about an inch away from the 30” sides and give them a spin to make sure they do not make contact with any of the sides and they will spin freely. Proceed to drill them into place using four of the ½ inch screws each.Now for this I was experimenting with the 2” swivel wheels due to my rough driveway and side walk I will be changing these out for bigger maybe 4” wheels later on to make it easier but on nice paved cement or asphalt the 2” wheels will work fine.
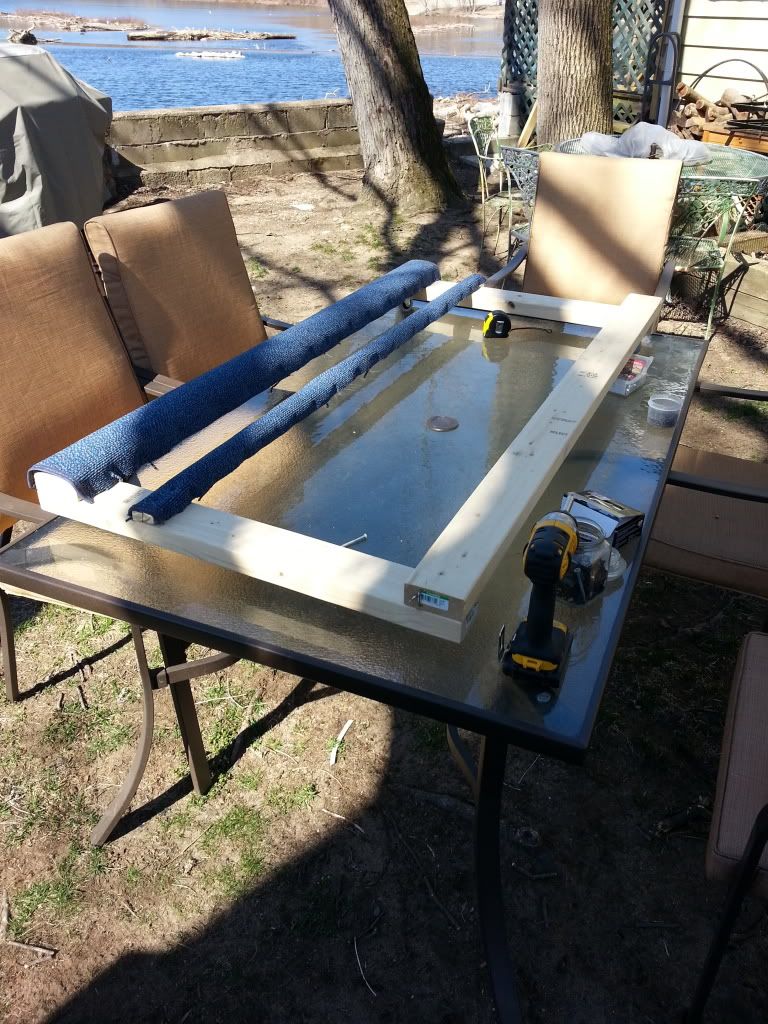
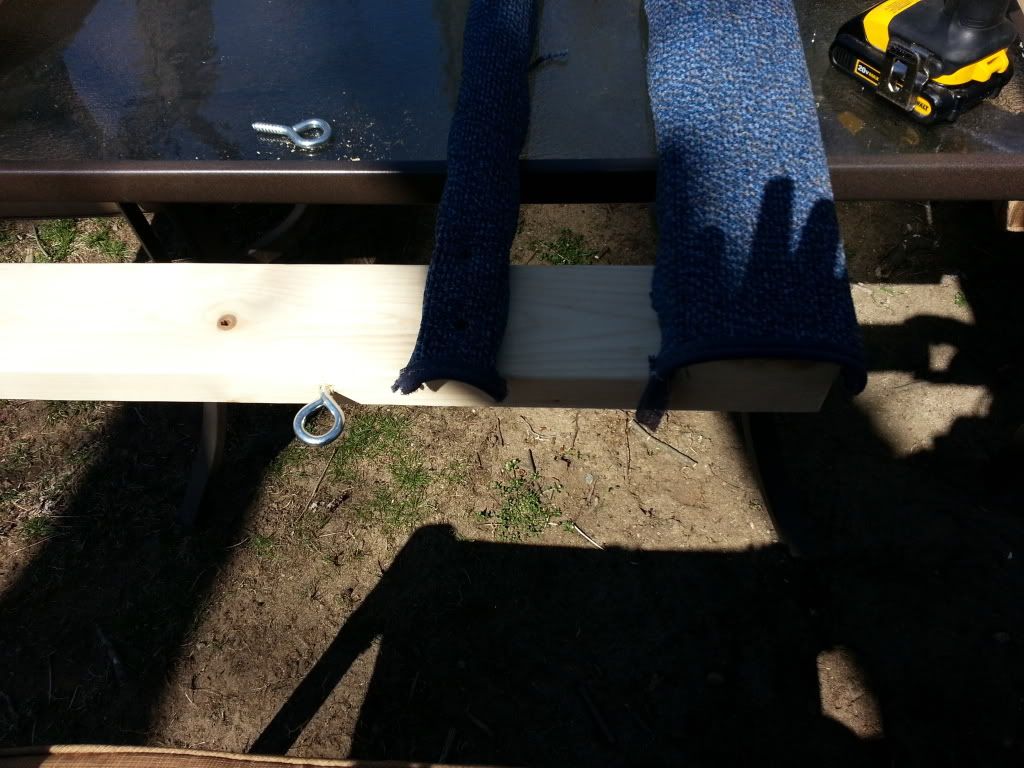
Now flip the dolly over and measure 9 ½ inches from the carpeted side of the dolly towards the opposite side and screw down the 59” length of carpeted 1x2, be sure to drill the 5/32 pilot hole first as this 1x2 likes to split and use one ½ inch screw on either side.
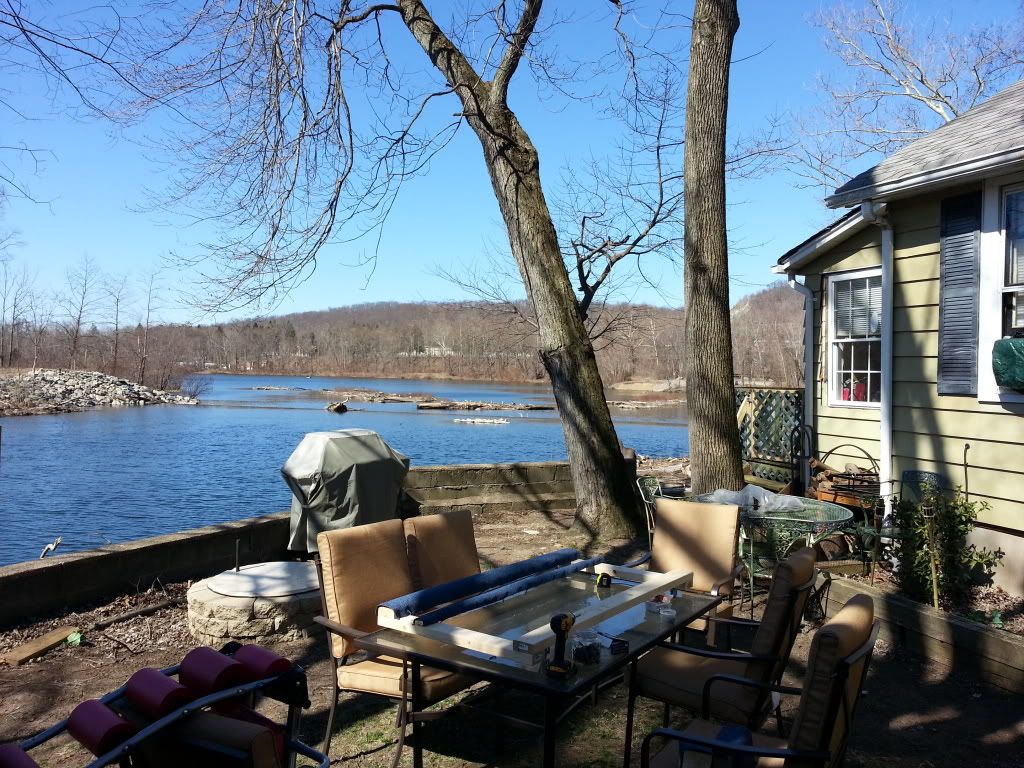
Next step admire the view and take a sip of beer, this is what I enjoy doing most with this project but don’t take too long as you will want to finish quickly and test it out! Your almost done!
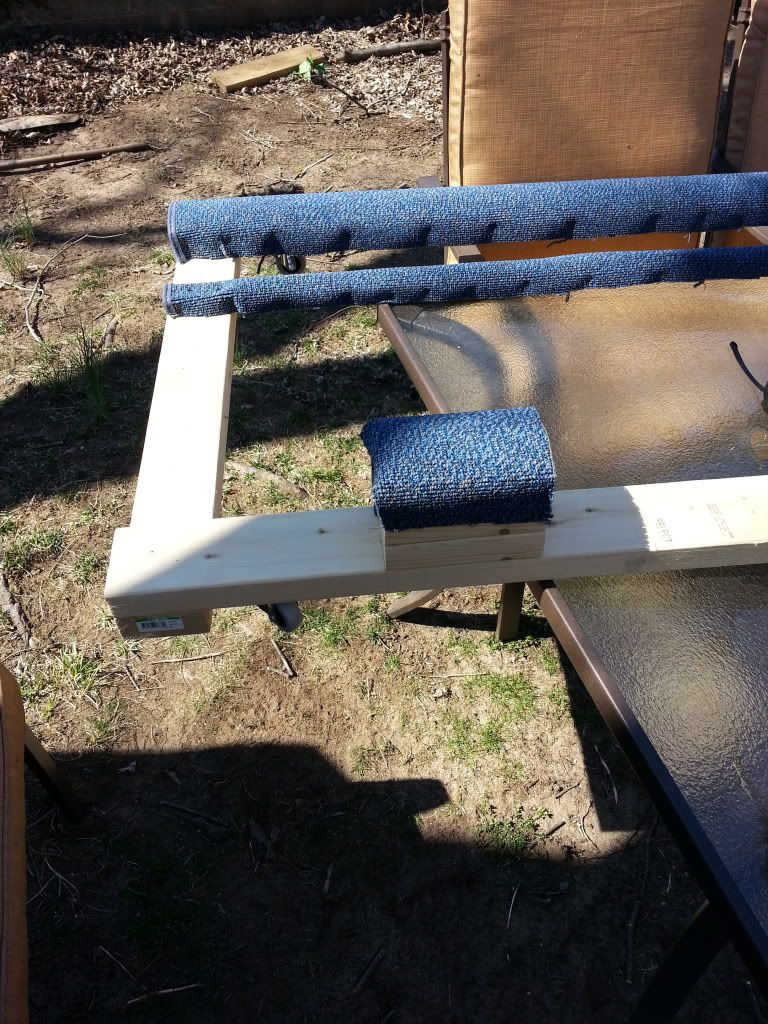
Now on the 59” length of 2x4 with no carpet measure 10 1/2” from the outside in and mark the spot and be sure to mark it on the bottom also, at that 10 ½" mark place one of the carpeted blocks we made with the wrap around carpet facing the 2 lengths with carpet screwed to the other side. Now get under the dolly and drill the blocks in place from the bottom up be sure to not hit the screws you had used to create those blocks and repeat on the opposite side.
Almost there, now measure on the 30” sides about a foot down from the carpeted end and mark the spot on both 30” sides of the dolly and drill a pilot hole on both, now using the 2” Eyebolts screw them into both sides like this.
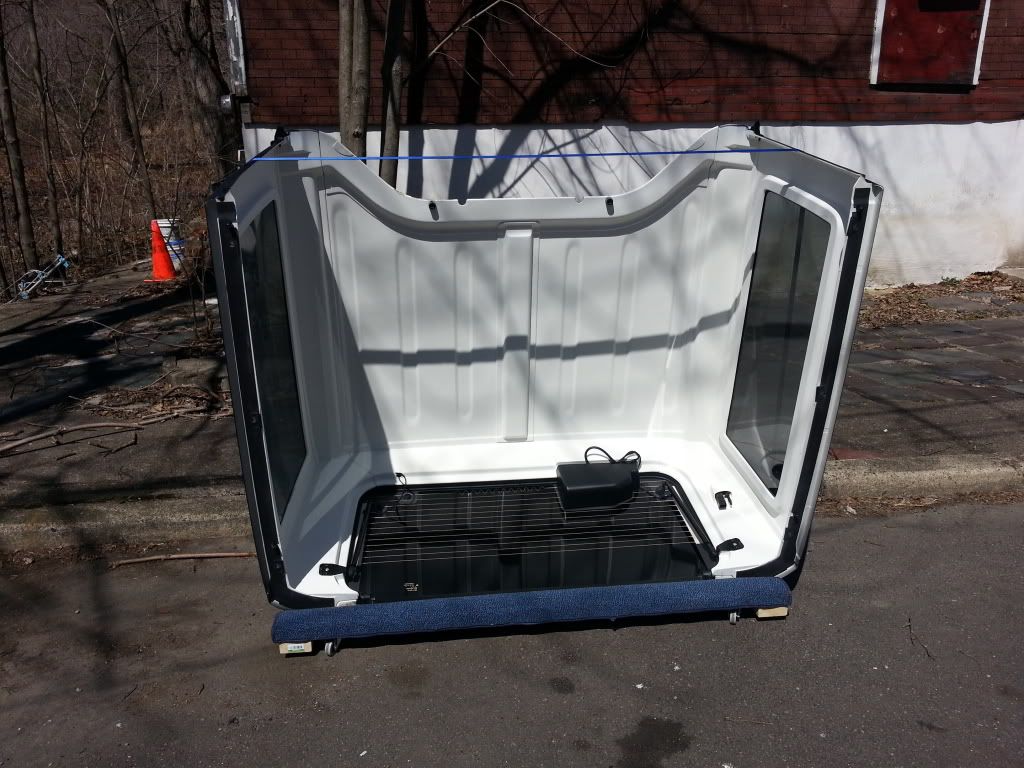
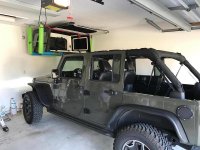
Your finished now remove your top

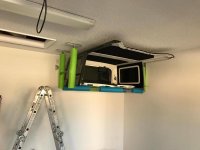
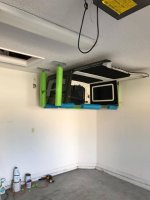
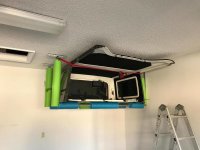
Lay the top with the bottom of the top laying in between the two carpeted lengths of wood resting the top of the hard top on the carpeted blocks
For added safety and security I secured the ratchet strap to each side of the dolly and strapped the hard top down so it wouldn’t move during the rough transport and during storage.
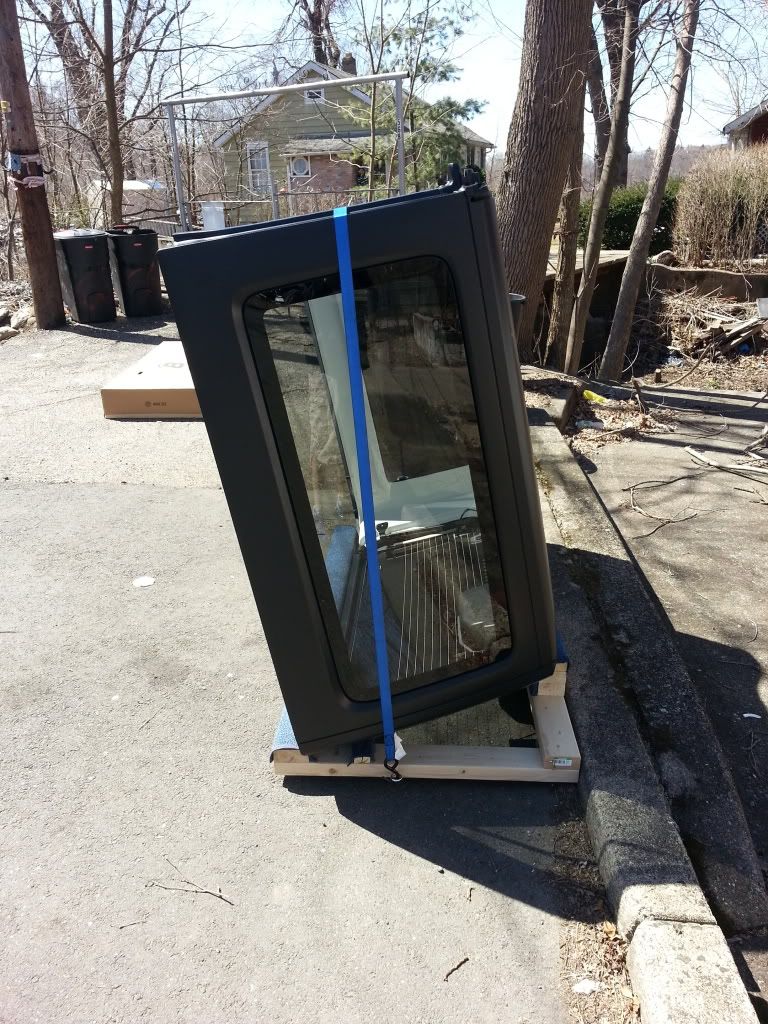
Hope this write up with pics helps explain everything better and could save people a lot of coin.
Enjoy being topless! :standing wave:
List of Tools needed:
-Cordless/electric drill – with Philips Bit as well as a 5/32 Bit
-Power saw/Hand saw ( I tipped the worker at Lowes to cut the pieces to length at the store )
-Utility Knife/Scissors
-1 Ratchet Strap
- Staple gun with staples
- Level
- Marker
-Tape Measurer
List of Materials:
ONE - Area Rug – I believe the one I got was 5’ x 10’ for $20
FOUR - Swivel wheels – I used 2.5” for this build, however will be upgrading to 4” next summer due to uneven pavement on the sidewalk it should make it easier to roll over tough terrain, besides we are jeep guys we lift and put bigger tires on everything! Also locking wheels are preferred so it will not roll away
TWO- 2 “ Eye Bolts
ONE - Box of 2 ½ “ Wood Screws – You’ll need about 20 or so and in case you drop any you have extra
EIGHT – ½ “ Wood Screws
TWO - 1 ½ “ Wood Screws
SIX – Lengths of 2 x 4 cut to 6 inches
ONE – Length of 1 x 2 cut to 59 inches
TWO – Lengths of 2 x 4 cut to 30 inches
TWO – Lengths of 2 x 4 cut to 59 inches
So once you bring all that home and lay it down, this is what it should look like. Now I tipped the employee at Lowes to cut the wood to lengths for me and this cut out a lot of the time needed to cut it up and measure it out.

Now grab the Six 6 inch lengths of 2x4 we had cut, stack two of them on top of each other and drill them together using 2 of the 3 inch wood screws, then place a third on top of that and drill that one also to. It will look like this.

Repeat this once again so you end up with two stacks of 6 inch 2x4 screwed together

Now roll out that carpet we got face down onto the floor or any level surface, and grab one of the 59 inch 2x4 planks and slide it on the carpet and leave about an extra 2 inches on the end of the carpet. Using the Utility knife cut the carpet at the side of the 2x4 nearest you and be careful not to cut yourself and hold the 2x4 straight. If you have a friend nearby ask them to put their foot on it, but again I did this by myself and it isn’t hard just be patient and watch what you are doing.

Now do this again but using the 59 inch length of 1x2 and leave about an inch of material from the first cut you made down, cut straight across following the 1x2 as a guide, once again I cannot stress this enough watch your hands when using the utility knife they are unforgiving.
Next lay those 2 blocks of 3 6” 2x4 on the same facedown carpet and cut the carpet once again leaving about 2 inches of carpet left around them while cutting, now cut straight down the two lengths of carpet around the blocks but don’t cut across yet, slide each of the blocks down the carpet about 3 inches and use them as a guide to cut straight down again then across. We are leaving the extra lengths around all of these pieces so we can staple the carpet to them and avoid any staples coming into contact with the hard top I stapled everything on the sides and backs of the wood to insure this.
Next bring these pieces of wood and carpet you just cut over to your work bench , limited space means my work bench was my outdoor table, now with the carpet still face down grab the 59” 2x4 and staple the carpet to the thinner sides of the wood, down both lengths leaving the center with a slight bulge or air pocket inside, I did not staple anywhere near this air pocket as I did not want to have any staples touching the hard top.

Repeat this with the 59” piece of 1x2

Next is to wrap the blocks we made first with the carpet, now I let the extra carpet hang over the top as well as just the outside facing sides of these blocks because I didn’t see the hardtop possibly making contact anywhere on the inside of the blocks and this gave it a clean look.

Now remove all of that from the table or work bench except for the 59” length of 4x2 and place it face down with the carpet side touching the table, grab the other 59” length of 4x2 with no carpet and lay it on the table square to the carpeted side at 30” apart. Now grab those two 30” cuts of 4x2 and lay them on top of the two face down 59” planks and drill the pilot holes and drill them into place, make sure they are square and use two 2 ½” screws on each corner, should look like this.

Now place the swivel wheels on the lengths of 59” planks about an inch away from the 30” sides and give them a spin to make sure they do not make contact with any of the sides and they will spin freely. Proceed to drill them into place using four of the ½ inch screws each.Now for this I was experimenting with the 2” swivel wheels due to my rough driveway and side walk I will be changing these out for bigger maybe 4” wheels later on to make it easier but on nice paved cement or asphalt the 2” wheels will work fine.

Now flip the dolly over and measure 9 ½ inches from the carpeted side of the dolly towards the opposite side and screw down the 59” length of carpeted 1x2, be sure to drill the 5/32 pilot hole first as this 1x2 likes to split and use one ½ inch screw on either side.

Next step admire the view and take a sip of beer, this is what I enjoy doing most with this project but don’t take too long as you will want to finish quickly and test it out! Your almost done!

Now on the 59” length of 2x4 with no carpet measure 10 1/2” from the outside in and mark the spot and be sure to mark it on the bottom also, at that 10 ½" mark place one of the carpeted blocks we made with the wrap around carpet facing the 2 lengths with carpet screwed to the other side. Now get under the dolly and drill the blocks in place from the bottom up be sure to not hit the screws you had used to create those blocks and repeat on the opposite side.


Almost there, now measure on the 30” sides about a foot down from the carpeted end and mark the spot on both 30” sides of the dolly and drill a pilot hole on both, now using the 2” Eyebolts screw them into both sides like this.

Your finished now remove your top

Lay the top with the bottom of the top laying in between the two carpeted lengths of wood resting the top of the hard top on the carpeted blocks

For added safety and security I secured the ratchet strap to each side of the dolly and strapped the hard top down so it wouldn’t move during the rough transport and during storage.

Hope this write up with pics helps explain everything better and could save people a lot of coin.
Enjoy being topless! :standing wave:
Last edited:
")


 Yeah, if you're ever back in town, give me a shout!