You are using an out of date browser. It may not display this or other websites correctly.
You should upgrade or use an alternative browser.
You should upgrade or use an alternative browser.
Sceep built
- Thread starter MacManInfi
- Start date
VeruGE*144
Caught the Bug
Damn!!!! You are my hero, when I grow up I want to be just like you [emoji12].
That is awesome thank you very much for sharing with us [emoji106][emoji106][emoji106][emoji106][emoji106] great job!!
Sent from my iPhone using WAYALIFE mobile app
That is awesome thank you very much for sharing with us [emoji106][emoji106][emoji106][emoji106][emoji106] great job!!
Sent from my iPhone using WAYALIFE mobile app
2007 JKU CANADA
Hooked
Great work. I like all the little things you have done to make it look like it was made for your Sceep. :thumb:
Labricon
Caught the Bug
Can only add another WOW to the list of kudos on a great build[emoji106]
Sent from my iPhone using WAYALIFE mobile app
Sent from my iPhone using WAYALIFE mobile app
Holy hell - that's pretty badass! Great job [emoji1303]
Sent from my iPhone using WAYALIFE mobile app
Sent from my iPhone using WAYALIFE mobile app
enfielded0405
New member
MacManInfi
New member
I realized this morning there are lots of odds and ends that aren't pictured. Things like installing the Vintage air heater, fabbing the new Scout engine compartment sheet metal to line up with the wider Jeep chassis, etc. but since I didn't catch pictures of those things, they got skipped.
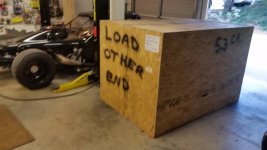
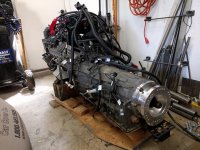
Bought a 2010 Chevy Silverado motor and transmission on ebay. Came with the wiring harness, ECU, gas pedal, O2 sensors, accessories, etc. Came in an awfully big box! You can see the Jeep transfer case adapter mounted on the back of the 6L80E transmission.
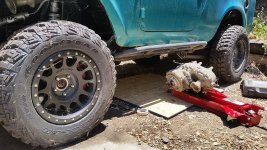
Started removing the Jeep drivetrain in preparation for the conversion.
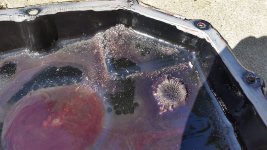
Pulled the transmission oil pan and found evidence of bad things happening.
Old engine is out. New motor mounts are welded in.
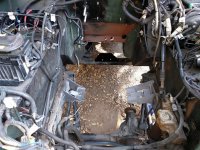
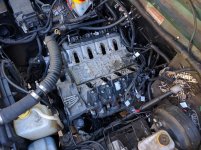
New motor going in. Fits good.
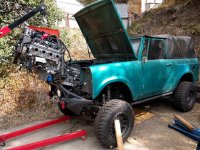
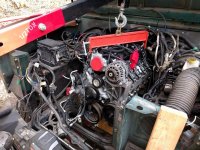
Bought a 2010 Chevy Silverado motor and transmission on ebay. Came with the wiring harness, ECU, gas pedal, O2 sensors, accessories, etc. Came in an awfully big box! You can see the Jeep transfer case adapter mounted on the back of the 6L80E transmission.


Started removing the Jeep drivetrain in preparation for the conversion.

Pulled the transmission oil pan and found evidence of bad things happening.

Old engine is out. New motor mounts are welded in.

New motor going in. Fits good.


MacManInfi
New member
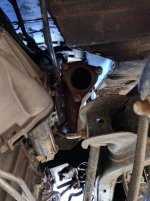
Had to notch the firewall to clear the exhaust manifolds. Later I found you can buy LS conversion headers and manifolds that hug the motor and have a more central exhaust dump location which would have eliminated the need to modify the firewall. If I ever do another LS swap, I'll do more digging before I start cutting!

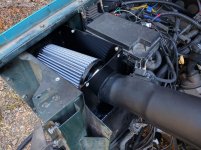
Fabbed my own cold air box. This is with the lid removed obviously. I am using a K&N cold air intake for a Silverado, modified a bit to fit the Scout.
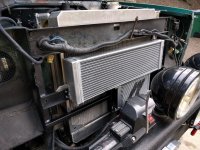
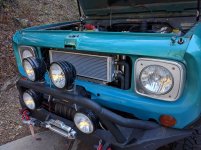
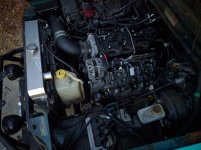
Putting the front end of the Scout back together. Much less room between the engine pulleys and the radiator reservoir.
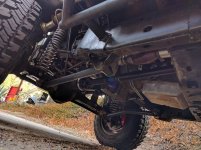
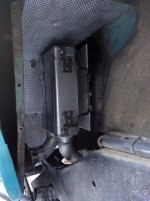
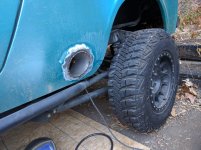
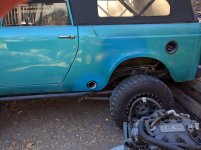
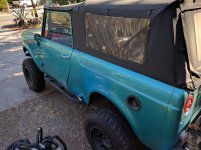
Now I'm fabbing exhaust. I bought an exhaust kit from Summit that is a bunch of straight pipe and bent pipe. You cut it up and weld together whatever you need. Rather than merging the left and right side exhaust into a single pipe and running it where the original Jeep exhaust routes, I had enough room between the Jeep chassis and the Scout body to run the exhaust high up and into the side compartments that used to house the Scout fuel tanks. I ordered some Spintech mufflers with enter/exit holes on the same side (similar to what is used on older Corvettes,) and dump the exhaust out of the fenders before the rear tires (exhaust exits on both sides.) This means I don't have to try to clear the rear axle. The exhaust tips are 3" diameter, so I bought some 4" pipe to line the hold in the rear quarter panel.


Fabbed my own cold air box. This is with the lid removed obviously. I am using a K&N cold air intake for a Silverado, modified a bit to fit the Scout.

Putting the front end of the Scout back together. Much less room between the engine pulleys and the radiator reservoir.

Now I'm fabbing exhaust. I bought an exhaust kit from Summit that is a bunch of straight pipe and bent pipe. You cut it up and weld together whatever you need. Rather than merging the left and right side exhaust into a single pipe and running it where the original Jeep exhaust routes, I had enough room between the Jeep chassis and the Scout body to run the exhaust high up and into the side compartments that used to house the Scout fuel tanks. I ordered some Spintech mufflers with enter/exit holes on the same side (similar to what is used on older Corvettes,) and dump the exhaust out of the fenders before the rear tires (exhaust exits on both sides.) This means I don't have to try to clear the rear axle. The exhaust tips are 3" diameter, so I bought some 4" pipe to line the hold in the rear quarter panel.


DannyD
New member
MacManInfi
New member
MacManInfi
New member
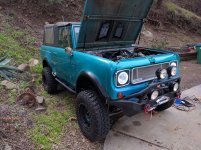
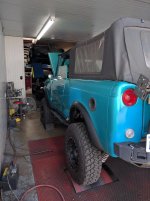
Got it all reassembled and had it dyno tuned.
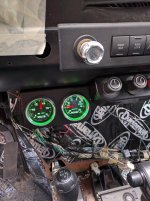
I still had a big hole in the dash that was cut out to make room for the Jeep gauges. Needed to incorporate them into the Scout dash better and decided to make a fiberglass gauge hood. First I bridged the gap with masking tape. Sort of used it to create the mold. Sprayed the masking tape with mold release spray (a wax) and covered with fiberglass.
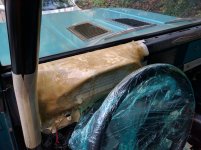
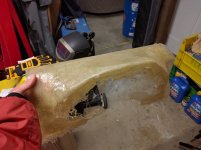
Trimmed off the fiberglass edges and used body filler to smooth out the fiberglass.
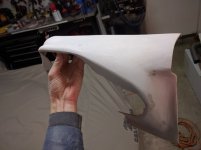
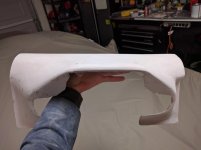
Painted it semi-gloss black with a rattle can, drilled four holes for sheetmetal screws and installed. Super happy with the result.
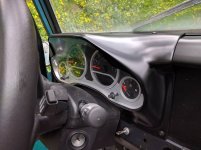
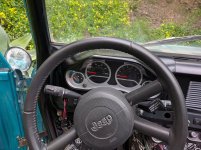
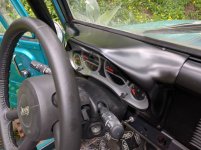


I still had a big hole in the dash that was cut out to make room for the Jeep gauges. Needed to incorporate them into the Scout dash better and decided to make a fiberglass gauge hood. First I bridged the gap with masking tape. Sort of used it to create the mold. Sprayed the masking tape with mold release spray (a wax) and covered with fiberglass.


Trimmed off the fiberglass edges and used body filler to smooth out the fiberglass.


Painted it semi-gloss black with a rattle can, drilled four holes for sheetmetal screws and installed. Super happy with the result.


JeepJeep75
New member
I've never seen a muffler tucked away into a spot like that. That is such a good use of that space!! And the exhaust tips coming out the side of the panel are so trick!! Outstanding work sir!! [emoji106]
Sent from my iPhone using WAYALIFE mobile app
Sent from my iPhone using WAYALIFE mobile app
MacManInfi
New member
Now that the mechanicals were solid, I turned my attention to the body. I was temporarily patching the paint with some ballpark-ish spray paint from Home Depot. The paint didn't match and I knew at the end of the day I'd be looking at a total respray. The body is ridden with bondo though. The Scout has a salvage title, apparently found abandoned in the woods. The body panels must have all been beaten up by kids or maybe it was actually trailed that hard and put away wet. The body lines aren't straight and I felt like any reputable paint shop was going to want to do thousands of dollars of body work and ultimately it just isn't worth it. The Scout isn't pretty. It's not a show truck. It gets used and abused. I had a 1972 DeTomaso Pantera that I built up to be a show car and it was so nice that I didn't want to do anything with it. The Scout needs to always be a driver.
So I started thinking about spraying the body in bed liner. I know a bed liner'd body is controversial, but I'm building this thing for me. And if bed liner means the miles of bondo can't be seen and I can drive through branches and not worry about my nice new paint job, seemed like a win for me. But... there were large cracks in the paint where the bondo was thickest. If those bits weren't repaired, I felt like the bed liner would be at risk. So I started digging into the bits that were the worst.
First up was the right side of the nose piece. The shape was all wrong and as I sanded, the gap between the nose and fender was over half an inch large. And it's a complex piece. Couldn't bend it back. I was able to find a used nose piece on ebay that I pull patch panels from. Cut out the old stuff and weld in the new stuff.
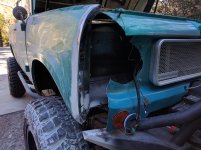
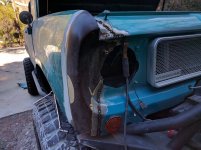
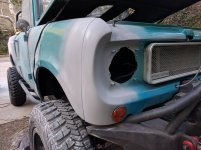
Next was the right rear quarter panel. Ugh. Starts with a crack and as you start sanding you realize how bad it can be under there. And yeah, that's a screw holding the panels together since the spot welds were broken.
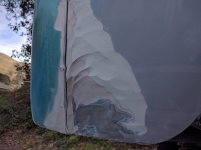
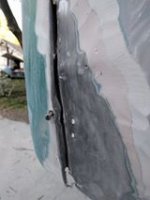
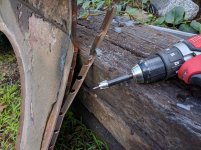
Used fender from ebay and a spot weld cutter that worked awesome for about 20 spot welds, then was too dull to use.
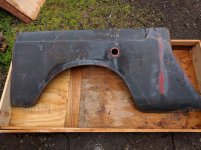
Cut out the worse bits of the Scout rear fender and used the cut out piece as a template to mark up the used panel.
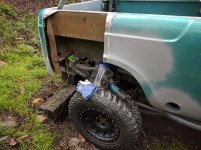
Discovered the right rear tail light sections were trash. Look at those holes in the sheet metal with bondo squished out of them! eeek! The deeper you dig, the worse it gets.
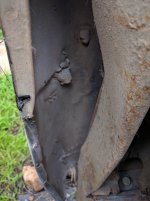
So I started thinking about spraying the body in bed liner. I know a bed liner'd body is controversial, but I'm building this thing for me. And if bed liner means the miles of bondo can't be seen and I can drive through branches and not worry about my nice new paint job, seemed like a win for me. But... there were large cracks in the paint where the bondo was thickest. If those bits weren't repaired, I felt like the bed liner would be at risk. So I started digging into the bits that were the worst.
First up was the right side of the nose piece. The shape was all wrong and as I sanded, the gap between the nose and fender was over half an inch large. And it's a complex piece. Couldn't bend it back. I was able to find a used nose piece on ebay that I pull patch panels from. Cut out the old stuff and weld in the new stuff.


Next was the right rear quarter panel. Ugh. Starts with a crack and as you start sanding you realize how bad it can be under there. And yeah, that's a screw holding the panels together since the spot welds were broken.


Used fender from ebay and a spot weld cutter that worked awesome for about 20 spot welds, then was too dull to use.


Cut out the worse bits of the Scout rear fender and used the cut out piece as a template to mark up the used panel.

Discovered the right rear tail light sections were trash. Look at those holes in the sheet metal with bondo squished out of them! eeek! The deeper you dig, the worse it gets.

Last edited:
MacManInfi
New member
I've never seen a muffler tucked away into a spot like that. That is such a good use of that space!! And the exhaust tips coming out the side of the panel are so trick!! Outstanding work sir!! [emoji106]
Sent from my iPhone using WAYALIFE mobile app
Thank you!!! It was definitely one of those "AHA!" moments that was risky, but really paid off.
MacManInfi
New member
The tail light section is nearly impossible to find used. I bought one, but it was so rust that only the top section was salvageable. Time to learn how to form sheetmetal. Here is the rusty piece (you can see the bare metal cut separating the top section) compared to a piece of sheet metal that I used a metal shrinker on to get the basic form.
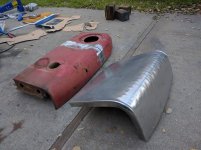
And here is what I wound up with after shaping more with a plastic hammer and sand bag and then an English wheel. Welded it to the top section and tack welded into place.
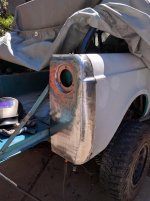
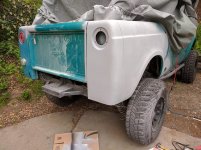
I also patched the antenna hole, door lock holes and other bits and pieces. Looks pretty rough here but it's much better underneath.
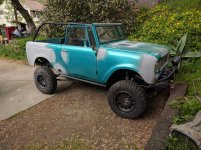
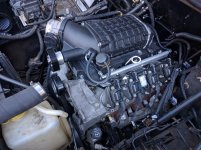
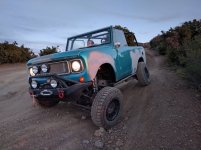
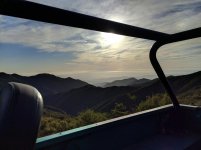
Was now ready for the bed liner, but wanted to take it out for one last drive, and it's first offroad adventure with the supercharger added.

And here is what I wound up with after shaping more with a plastic hammer and sand bag and then an English wheel. Welded it to the top section and tack welded into place.


I also patched the antenna hole, door lock holes and other bits and pieces. Looks pretty rough here but it's much better underneath.

Was now ready for the bed liner, but wanted to take it out for one last drive, and it's first offroad adventure with the supercharger added.


