Sceep built

MacManInfi

New member
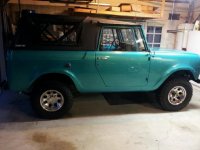
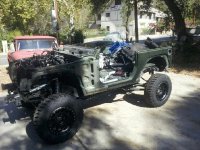
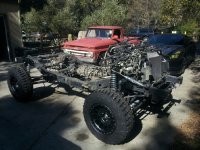
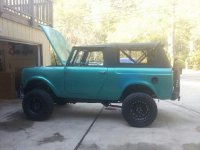
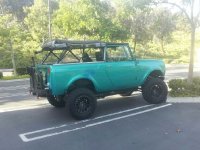
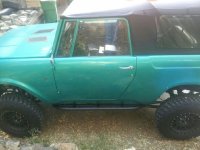
I have a 1969 International Scout which I dropped onto a 2009 Jeep Rubicon chassis. Some of the forum members wanted to see the build pics so I'm digging them up and posting them here. Might take me a while to dig through all the photos and get them added, but it'll still be much faster than the five years it took me to build!

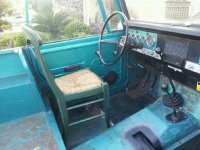
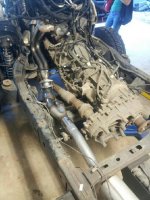
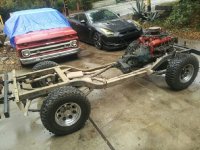
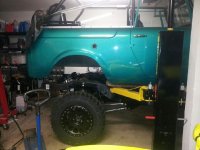
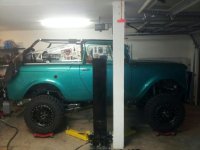
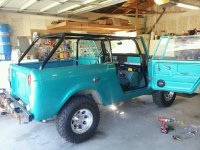
Here are some of the earliest photos I took while working on the Scout. I bought it in 2012 and spent some time and money upgrading what was there. I hadn't though of using a Jeep chassis until 2013, but 2012 was when I built the cage for it, which is still in there but is now tied to the Rubicon frame. That's also when I bought the soft top.

The picture of the kitchen chair is what happens when you've cut out all the seat mounts because you're going to mount the seats on the cage tubing, haven't gotten the cage installed yet but need to move the Scout in and out of the garage. :)

We'll jump to the jeep pics after these.
427137_4068659447207_1360347067_n.jpg 430235_4092674967580_1248525691_2012.jpg 549618_4065114838594_1781278150_n.jpg
 

MattAlpha

Caught the Bug
Sounds very cool!

I'm looking forward to seeing your build pics!


'07 JKUR ... mod'ing never stops...
 

BaddestCross

Active Member
The picture of the kitchen chair is what happens when you've cut out all the seat mounts because you're going to mount the seats on the cage tubing, haven't gotten the cage installed yet but need to move the Scout in and out of the garage. :)

Awesome build! In high school I had an El Camino 454 SS that I ran with a lawn chair and a milk crate until I could afford a new seat. Ahhh the good old days! 😂

Sent from my SM-N915P using WAYALIFE mobile app
 

MacManInfi

New member
The Scout was tired. Everything leaked, the engine overheated. It was hard to drive. The steering box ratios were dangerous (too many turns to get your wheels straight again after rounding a corner.) If I remember correctly, it was a four speed but geared so low you really couldn't go on the freeway. Terrible brakes and the turning radius was awful. I read some vintage magazine reviews where they were comparing the Scout to the Bronco and they mentioned how bad the turning radius was. So there was a lot that I was unhappy with, a lot that didn't work and some of the issues (things like turning radius) didn't seem easy to fix. I priced up new axles, motor, trans, etc. and it was obviously a bunch of money. That's when I thought about a Jeep.

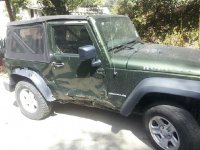
I wondered if I could buy a wrecked Rubicon and take the drivetrain and use it on the Scout. I watched Ebay for a number of weeks and then a salvage titled 2009 Rubicon showed up. It was too expensive to use just for the axles and transfer case, but the thing was driveable, so that's when I got it in my head that maybe I could just put the Scout body on the Jeep chassis and use pretty much everything. Bought the Jeep and had it shipped to California.

Felt like this was either going to be the most awesome thing I've ever built, or the biggest waste of money if it all went wrong!

1233388_10201350245110475_951597173_2013.jpg
 

MacManInfi

New member
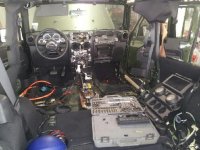
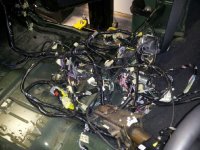
First thing I did was gut the interior. I was able to sell a lot of the bits and pieces on ebay to recover some of the build money (these days shipping and ebay fees are so expensive that I've had to make do with Craigslist.)
1185868_10201389326607488_777229591_n.jpg

It was hard not to start getting overwhelmed with the amount of wires pulled out, but I never cut any of the harness and everything was carefully labeled. Screws, nuts and bolts went in bags. Plugs that came apart had labels on each end so I'd know what plugged into what.
1234789_10201390851645613_311855589_n.jpg

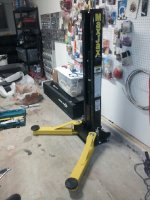
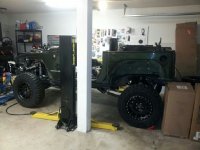
My garage ceiling is 10ft so I had to buy a small lift so that I would be able to lift the Jeep body off and drop the Scout body on.
1234132_10201356234580208_1218833906_n.jpg

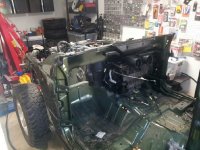
The body is now unbolted from the chassis and just sitting on there.
61088_10201480152038067_1202175633_n.jpg 1235263_10201395426959993_615374999_n.jpg
 

MacManInfi

New member
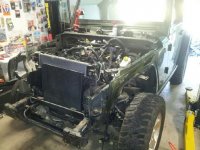
Before I removed the body, I got the Jeep up on the lift and started to notice some damage from the accident. Bent brackets mostly, a bent axle and messed up ebrake hardware that would need to be cut off and replaced. Dropped the gas tank to get that out of the way before a lot of sparks start flying.
945815_10201529769998485_1061619358_n.jpg 1381371_10201534933807577_747163451_n.jpg

I took measurements of the Jeep body and compared them to the Scout body and I also compared the wheelbases of both vehicles. After measuring and checking again and again, I came to the conclusion that I needed to increase the wheelbase of the Jeep chassis by five inches. The width looked like it was going to work out ok if I added fender flares. The Jeep frame rails are much wider (spread apart) than the Scout frame rails, so that was one of my biggest concerns going forward. That said, the bottom of the Scout is pretty flat so it was really only going to be an issue in the engine compartment.

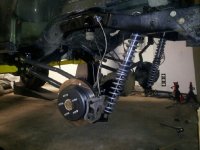
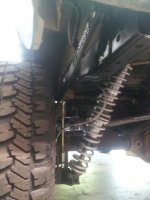
One of the best things about Jeeps is the crazy aftermarket support for them. You can get ANYTHING for them, which meant I found a rear stretch kit that was designed to increase the wheelbase of the 2doors by 8 inches. I only needed five, so the plan was to mount the bracketry three inches forward of the instructions. The kit requires moving to coil overs, so it wasn't cheap but it did make the job really straight forward. In this shot, everything is in place but the bump stops haven't been moved yet, so you can see what the +5 inches looks like.
1391797_10201634368653386_1662046936_n.jpg

And I worried about just running coilovers in the rear, so I went ahead and bought the kit for front and rear.
1377241_10201577301226736_1480793472_n.jpg 1381936_10201676138497606_1303772182_n.jpg
 

MacManInfi

New member
Put some new wheels and tires on the chassis and now I could take the body off.
1379427_10201676502986718_2026344552_n.jpg 1380465_10201780180098581_1537689598_n.jpg 1392038_10201787433239905_643064689_n.jpg

With the body off, it's a lot easier to install the new exhaust system. This was also a good time to re-route the longer brake lines for the wheel base extension and make sure that everything was out of the way before the Scout body came down.
1460970_10201844399984038_2029059406_n.jpg

Now a similar process needed to happen with the Scout, although there are a lot less wires and tubes that need to be disconnected! Look how simple the Scout chassis is compared to the Jeep!
1455847_10202056455805301_1784068694_n.jpg
 

MacManInfi

New member
Now it was time to start test fitting the Scout body on the Jeep chassis. I wound up putting the Jeep's wheels on rollers so that I could nudge the chassis under the Scout body however I needed to. I fabricated new body mounts on the Jeep chassis that lined up with the original Scout body mounts. That was one of my biggest worries and it was one of the things that went the smoothest.
545916_10202064622289458_1227433371_n.jpg 1380036_10202118116586782_1036285286_n.jpg
 

MacManInfi

New member
Now you've just gotta start matching up bits piece by piece. Cut a new hole in the Scout body for the Jeep gas filler.
1538689_10202162091126118_77820378_n.jpg

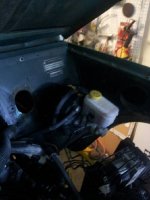
Fabricate new mounts for the Jeep brake booster, and fabricate a new rod from the Scout brake pedal to the Jeep brake booster. Sorry for the cruddy photos. Cell phone cameras have come a long way since 2013!
995591_10202174872205637_696481722_n.jpg

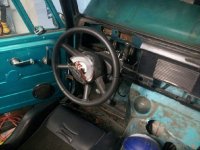
Fabricate mounts for the Jeep steering wheel, retaining the tilt steering!
1535375_10202201585393450_735316851_n.jpg

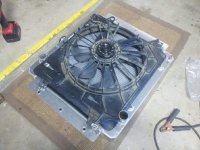
Fabricate aluminum mounting brackets on the Scout radiator for the Jeep cooling fan. It fit good!
1504119_10202207117251743_419398168_n.jpg

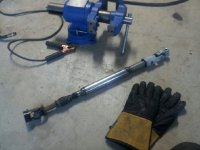
Had to lengthen the Jeep steering shaft.
1480626_10202248484005886_1498211777_n.jpg
 

MacManInfi

New member
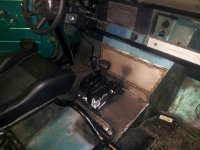
Modify Scout transmission tunnel to make room for the Jeep shifters.
1558518_10202256212399091_1292881885_n.jpg

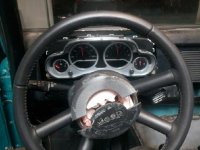
Fabricate mounts for the Jeep gauge cluster.
1005938_10202256533167110_810196990_n.jpg

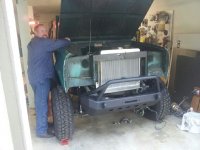
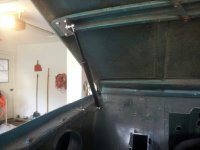
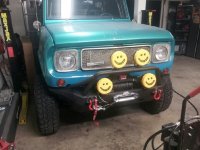
Bought and installed a Jeep shorty front bumper. My buddy Sean in the picture helped that weekend. Also converted the Scout hood over to gas struts, removing the hood prop rod.
559501_10202294675040633_44177419_n.jpg 1012664_10202297375948154_195104776_n.jpg

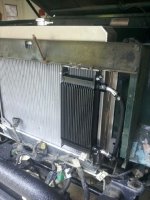
Bought an aftermarket transmission oil cooler and fabbed brackets for it.
1546100_10202297367747949_621249885_n.jpg
 

MacManInfi

New member
Here's where things get kind of fun and interesting. I wanted to retain the entire Jeep wiring harness all the way to the light bulbs. So I designed tail light buckets that accepted the Scout lenses and Jeep twist in light fixtures.

1511263_10202131184113462_2064634929_n.jpg 1526826_10202158870085594_486606812_n.jpg 1514529_10202174857165261_74761813_n.jpg 1528453_10202137788998580_1455016793_n.jpg
 

MacManInfi

New member
The Scout's original windshield wipers were vacuum powered, which turned out to be a terrible design for a number of reasons. If I were going to retain the Jeep functionality, I needed to convert to electric wipers, and given the Scout's super shallow dash, they had to be extremely low profile. I think this electric kit may have been made for Broncos, or perhaps it was just a "universal" low profile solution, but essentially you mount the motor somewhere remotely, and then it pushes and pulls a flexible, ridged rod. The ridges in the rod work like gears and drive the windshield wipers. Worked like a charm. The factory Jeep windshield wiper switch works perfectly, complete with the different wipe speeds.
1536634_10202384324441812_972112258_n.jpg

Can't have a Jeep and not have a winch!
998151_10202618704181159_1258745231_n.jpg

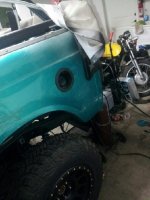
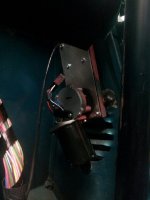
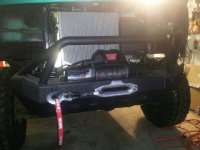
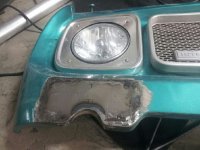
Started to fit the Scout nose. The bumper bars went right through the turn signal area, so I removed the turn signal (would later use the round, Jeep ones) and welded in a flat piece of sheet metal, then used a piece of exhaust pipe to get the rounded bit.
1959895_10202712330001746_1338901162_n.jpg

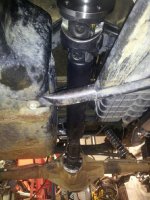
Since the Jeep wheelbase was stretched five inches and the Jeep effectively has a lift, I took measurements and had Tom Wood's custom driveshafts make a new one.
1939817_10202747432959298_289573279_n.jpg

Installed a Currie antirock off-road swaybar five inches back to account for the wheelbase stretch.
10152620_10202756295580858_1708511879_n.jpg
 

MacManInfi

New member
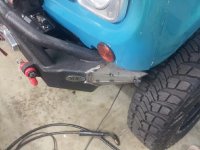
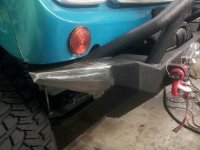
I really wanted the shorty bumpers to match up better with the Scout body so I got some metal plate and extended the ends.
10155018_10202841291185695_778038571_n.jpg 10245386_10202841817158844_310220490_n.jpg 10252135_10202849002138464_662414625_n.jpg

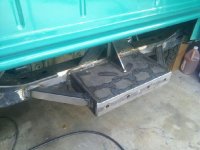
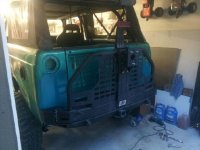
Although I stretched the wheelbase, the Jeep frame was still shorter than the Scout body. This proved to be an obstacle when trying to mount a Jeep rear bumper. Essentially I wound up adding an extension to the chassis. It was either that, or add an extension to the bumper, but this way I figure I could always swap out the bumper for another Jeep one and it'll fit. I have no idea how structurally sound this design is, but it has held up just fine after years of use. I wound up trimming a little off the edges of the rear bumper since it was originally designed to match up to the wider Jeep fenders.
1502552_10202885395008263_816157341554558434_n.jpg 10262035_10202932377222789_5798853805493539872_n.jpg

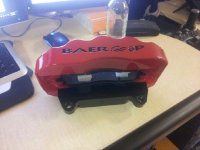
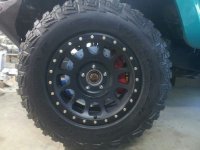
Since I was building my vehicle my way, I decided to install a set of big brakes. I know it didn't need em, but I love the way they look.
10170967_10202907731086651_1537004603340225542_n.jpg 10006576_10202931850289616_3365544782808640750_n.jpg
 

MacManInfi

New member
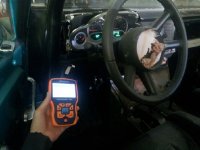
Was now ready to try to start the Sceep for the first time. Having completed far less complex builds and had significant difficulties in getting them up and running, I didn't expect much. But the gauge cluster lit up with the key on and when I turned the key, it ran the first time!!!

It did throw some codes and I thought it was hilarious that I was using a code reader on a 1969 International Scout.
1604900_10202927154052213_6071665867200192320_n.jpg

Pulled it out of the garage for the first time under its own power!
10259330_10202939749527092_2378260023673654501_n.jpg

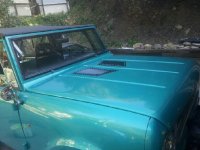
Added some hood vents cause those are cool.
10256890_10202939753287186_9123006217236438116_n.jpg

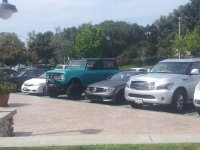
Drove it to lunch under Jeep power for the first time on April 27th, 2014, nearly a year after starting on it.
10178063_10202988570827594_7278898555866958734_n.jpg 10291832_10203037634094145_6199186695283758193_n.jpg

Since the wheelbase is longer and the body is skinnier than a Jeep, I wound up buying some rock sliders for a Toyota and adapting them to the Scout.
10334381_10203129129661477_7111439970215024313_n.jpg
 

MacManInfi

New member
And that's the Scout that I knew and drove for over a year.

Oh! Good story. So I kept the entire Jeep wiring harness and all the boxes and relays and such intact. Sometimes I didn't even know what the boxes were for, but I'd find a good place to mount them (preferably related to where they were originally located in the Jeep) and be done with it. But whenever I would brake hard, the traction control would freak out and it would throw a code. The code said something about lateral g-forces. Did some digging on a Jeep mechanics manual and found a picture of the lateral g box. I had it mounted under the seat, but it was mounted 90 degrees from the way it should be mounted. So every time I braked hard, the traction control system though I was going sideways!!! Rotated the g force box and stopped getting the code. :)

On occasion I'd have problems in a parking lot. I would put it in gear and start to accelerate and then the drivetrain would lock up. The tires would bark and the Scout would come to a screeching halt. I could never figure out what was happening. I opened the front and rear diffs, tried it in 4wd and 2wd. Go forward and backward a few times and it would suddenly free up like nothing had ever happened. I was always nervous about it though and one day when I got home, it locked into place and there was absolutely nothing I could to do free it up. It was just stuck there in my driveway. As I started to get frustrated with it, I put it into 4 low and gave it some gas and whatever it was suddenly got a lot worse! It moved a little and made all kinds of broken, grinding metal sounds.

Popped a gear in the transmission. I figure that maybe a tooth had been broken off in the original accident and was maybe floating around in there, every once in a while wedging itself between two gears.

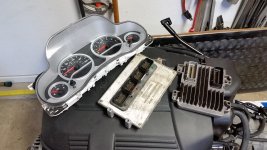
It wasn't until then that I started reading about how the auto transmissions in the Jeeps got a lot stronger in 2010 (not to mention the more powerful motor.) So now I found myself in a tough position. Replace or repair the transmission, or go to something stronger. One thing led to the other and in November of 2015, I mailed out the Jeep gauge cluster, computer and Chevy computer as part of a V8 conversion.
12241507_10207086050022013_4088116499456579447_n.jpg
 

JeepJeep75

New member
So cool how you did this! It's such a complex project. Looks like you broke it down into nice, chewable pieces. Very nice work on the front bumper extensions too!


Sent from my iPhone using WAYALIFE mobile app
 

timberwoof

New member
DANG BRO!!! that is a very nice build. I wish I had the skills, time and cash to do something like that. koodos
 
Top Bottom