You are using an out of date browser. It may not display this or other websites correctly.
You should upgrade or use an alternative browser.
You should upgrade or use an alternative browser.
CJ buggy build
- Thread starter klungly
- Start date
jesse3638
Hooked
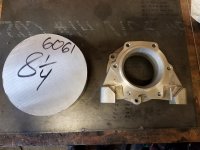
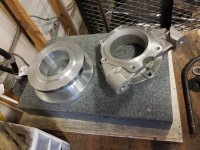
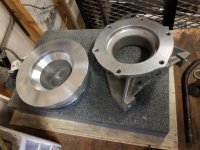
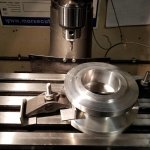
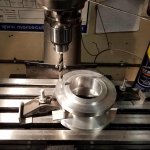
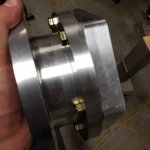
Nice and I thought it was fun drawing machine parts in drafting class in highschool.The material for the new foot plate came in today. I'll have to wait until I go to work to get started turning it in the lathe. I ordered a piece of 6061 aluminum, 8 1/4 diameter by 3 1/4 length. It should be stronger than the old cast plate.
Sent from my 2PYB2 using WAYALIFE mobile app
klungly
Member
Nice and I thought it was fun drawing machine parts in drafting class in highschool.
Sent from my 2PYB2 using WAYALIFE mobile app
Thanks, I'm glad I had those classes too. It definitely came in handy for the transfer case flange, I can use the adapter plate and transfer punch the hole for that flange.
jesse3638
Hooked
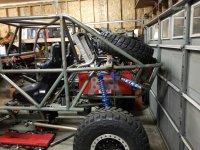
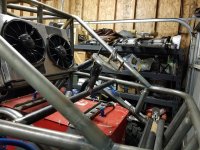
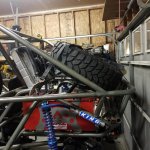
It's looking good. Closer and closer to being drivable. Note how I didn't say finished...haha.
Sent from my 2PYB2 using WAYALIFE mobile app
Sent from my 2PYB2 using WAYALIFE mobile app
klungly
Member
It's looking good. Closer and closer to being drivable. Note how I didn't say finished...haha.
Sent from my 2PYB2 using WAYALIFE mobile app
Thanks man. I don't think it'll ever be completely done haha.
klungly
Member
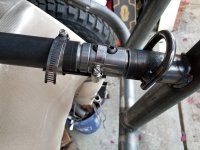
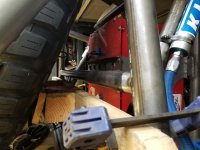
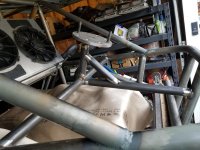
Made some progress on the tire carrier. I welded up some flanges to make the carrier removable. I only had parts with a 2" ID and I'm using 1 3/4 tubing. I welded some 2" and will slide them onto the 1 3/4".
Attachments
TrainWreck618
Caught the Bug
Nice, everything is looking good! That’s a big block of aluminum
Sent from my iPhone using WAYALIFE mobile app
Sent from my iPhone using WAYALIFE mobile app
klungly
Member
Nice, everything is looking good! That’s a big block of aluminum
Sent from my iPhone using WAYALIFE mobile app
Thank you. That aluminum isn't as big any more, u have it chucked in the lathe at work. It's too bad, I really liked it as a heat sink for welded parts. Thinking about getting a large plate for that reason.

jesse3638
Hooked
Looking good. If I had time and skills like that it'd be a fun project to do.
Sent from my 2PYB2 using WAYALIFE mobile app
Sent from my 2PYB2 using WAYALIFE mobile app
wjtstudios
Hooked
klungly
Member
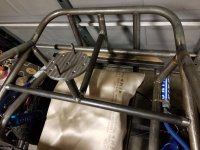
Looking good! The Y strap does look cool.
That looks awesome.
That looks great!
Thank you!
klungly
Member
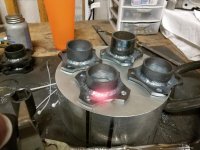
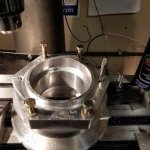
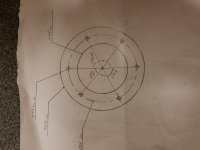
Got the bolt hole pattern drilled for the transmission adapter plate. I used a 3/8 x16 tap with a point as a center punch to transfer the holes from the adapter plate. Since none of the holes on both sides of the flanges are uniform, transferring on this side was the easiest. On the other side, all the holes share a radius but transferring isn't an option. I had to make a drawing on the hole pattern.
Attachments
klungly
Member
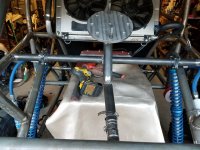
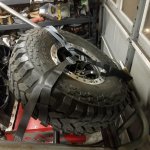
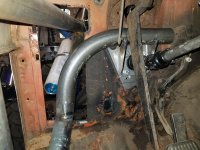
Finished welding in the orbital valve support. I cut out the tire carrier and added some parts to make it removable. The only thing left to do on it is to burn it in. Ran out of c25 so I'll have to TIG it in.