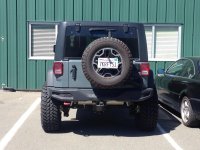
15 Anvil JKUR HR Build

WJCO

Meme King
Today I finally got around to installing my front chromo axle shafts. Short side was kind of a bitch. First the axle nut didn't want to come off. Impact struggled for a bit which had me worried. Threads all looked good, weren't galled up or anything. All I can think is the factory went overboard on lock-tite on that side. Next, the yokes on the new shaft wouldn't fit through the knuckle. Had to clearance them a c-hair with the grinder. Didn't like doing that but I took off very little. Maybe like a mil on each side. Rather do that than drop the knuckle. Passenger side went smoothly, no issues. And now I have two complete trail spares! :rock:


Tires and wheels are next on the docket. The Jeep should be growing up here in the next month or so. :thumb:

Someone else here recently had that issue with the yoke not going through the knuckle, he did the same thing with the grinder I think. Glad you got er done.
 

Speedy_RCW

Hooked
Someone else here recently had that issue with the yoke not going through the knuckle, he did the same thing with the grinder I think. Glad you got er done.

Yea kinda sucks. Do you know if they were Ten Factory axles as well? I contemplated for awhile on dropping the knuckle but decided if I ever need to pull it on the trail I'd wanna leave the knuckle on. But now that I'm thinking about it, may have to do that anyways if the yokes flair when it breaks. Oh well, it's done now.
 

WJCO

Meme King
Yea kinda sucks. Do you know if they were Ten Factory axles as well? I contemplated for awhile on dropping the knuckle but decided if I ever need to pull it on the trail I'd wanna leave the knuckle on. But now that I'm thinking about it, may have to do that anyways if the yokes flair when it breaks. Oh well, it's done now.

Yes they were Ten Factory axles. Just found the thread:

http://wayalife.com/showthread.php?32867-Yoke-knuckle-won-t-fit
 
Nice build.
I'm having some binding issues with my tire carrier. It squeals and it doesn't close smooth. Need to pull it apart and take out/add a shim I think.

I'm about to weld the C gussets and was curious what you used and the specs or settings of your machine? Did you do little by little as to not melt the ball joints?
 

Speedy_RCW

Hooked
Nice build.
I'm having some binding issues with my tire carrier. It squeals and it doesn't close smooth. Need to pull it apart and take out/add a shim I think.

I'm about to weld the C gussets and was curious what you used and the specs or settings of your machine? Did you do little by little as to not melt the ball joints?

Yea mine was tight as well. I loosened up the spindle bolt underneath a smidge and it made it much better. But you could pull that bolt and washer and place a small shim between there and the carrier and get the same effect.

As for the gussets, I had a millwright at work burn em in with the stick welder so I can't speak to machine setup but yea we just did little by little and switched sides often. We found using air to keep the ball joints cool was the ticket. Worked better than wet rags. Just hooked up a nozzle to the compressor and blew on them while he was welding and for a bit after.
 

Speedy_RCW

Hooked
Well I'm slowly making progress on my Jeep. I've been working 7 days a week so I've been trying to find bits of time in between to get things done. Had a little pile of parts sitting in the garage that were just aching to get installed.

First up was a JKS 3.5 JSpec suspension system with Fox 2.0 IFP shocks. Also installed their adjustable LCA's and drag link flip. Don't have any pictures of the install as I got tunnel vision pretty badly.
Pile of parts ready to go on!
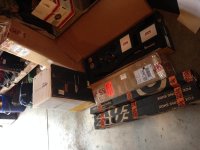
IMG_2282.jpg

Here's what she looks like after the suspension install but still on factory rubber.
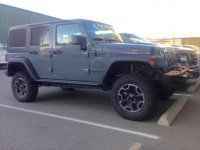
FullSizeRender.jpg
FullSizeRender1.jpg

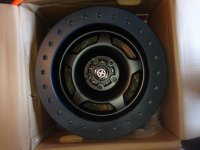
Had quite the debacle with my tires so while I was waiting I went ahead and painted the rings on my Slabs. The color came out very close, maybe just a little darker than the Jeep. No big deal... They'll get thrashed anyways.
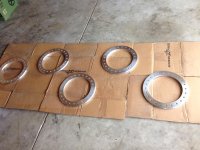
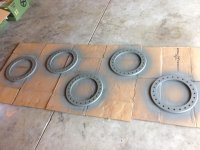
IMG_2253.jpg
IMG_2254.jpg
IMG_2255.jpg

Tires finally showed up along with a front 1310 driveline from Adams and an AEV Procal. Time to get to work!
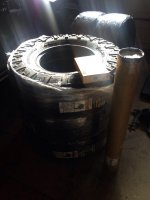
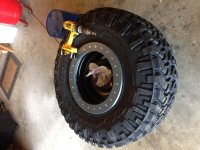
ImageUploadedByWAYALIFE1458966102.553070.jpg
IMG_2314.jpg

Got 4 out of 5 tires mounted up and ran into a problem with one of the inserts in the wheels. There were a couple on each wheel that needed to be screwed in a little further to make them flush, but on the last wheel I couldn't screw one in any further. Looks like the threads in the wheel are galled up a little and I didn't have the right tap. I'll borrow one from work today and hopefully finish mounting the tires tonight.

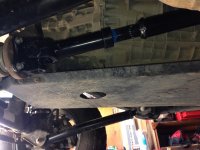
So I moved on to installing the driveline. Super simple install only took about 20 minutes or so.
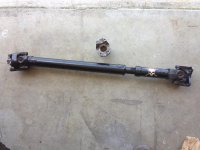
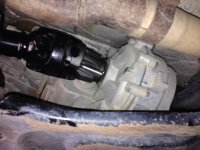
IMG_2311.jpg
IMG_2313.jpg
IMG_2312.jpg

So my caster is currently sitting at 5.2 and I don't seem to have any vibes. I still plan on slow decreasing the caster to improve my pinion angle but don't want to start on that until I'm on the new tires. Just plan on raising the pinion until I don't like the way it handles.
So that's where it sits right now. Have some more parts on order that haven't showed up yet. Currently waiting on EVO sliders and rock skins, Switch Pro's, set of Rigid Dually spots and A-pillar mounts, and set of Rigid Dually Floods that I'll mount to the tire carrier as rear facing lights.

As always, comments, questions or suggestions are always welcome.
 

JK_Dave

Caught the Bug
Looks like you're on a good track! I like that you didn't go the route of red rings, but body matched them. Subtle but classy!
 

Speedy_RCW

Hooked
Great build so far. Can't wait to see it with the wheels and tires!

Those tires mounted are going to look bad ass. Great looking rig man!

Looks like you're on a good track! I like that you didn't go the route of red rings, but body matched them. Subtle but classy!

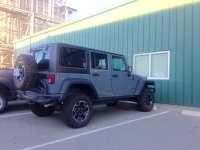
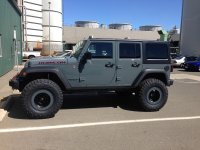
Thanks guys. Finally got the tires all mounted up and put on the Jeep. Still have to adjust my tire carrier and hoist the spare up. Gotta find some time to trim fenders and I'm still waiting on sliders and rock skins. Hopefully see those here real soon. I need to take it out and flex everything once all that is done, it looks like my rear tires are going to be close to the pinch seam.
IMG_2318.jpg
IMG_2319.jpg
 

loonies

Member
Looking good...I like that color a lot

Kinda weird how the AEV tire carrier is just a touch off center, are they all like that? I never noticed it before on the AEV stuff
 

SteelBadger

New member
Thanks guys. Finally got the tires all mounted up and put on the Jeep. Still have to adjust my tire carrier and hoist the spare up. Gotta find some time to trim fenders and I'm still waiting on sliders and rock skins. Hopefully see those here real soon. I need to take it out and flex everything once all that is done, it looks like my rear tires are going to be close to the pinch seam.
View attachment 195170
View attachment 195171

That looks awesome. Damn I wish I had one of those hoods for mine.
Hey isn't the pinch seam already cut on an angle from factory?
 

highoctane

Caught the Bug
Thanks guys. Finally got the tires all mounted up and put on the Jeep. Still have to adjust my tire carrier and hoist the spare up. Gotta find some time to trim fenders and I'm still waiting on sliders and rock skins. Hopefully see those here real soon. I need to take it out and flex everything once all that is done, it looks like my rear tires are going to be close to the pinch seam. <img src="http://wayalife.com/attachment.php?attachmentid=195170"/> <img src="http://wayalife.com/attachment.php?attachmentid=195171"/>

Those Anvil beadlock rings look great! I'd consider it on my Jeep but they would only look that nice for maybe a week, if that.
 

Speedy_RCW

Hooked
That looks awesome. Damn I wish I had one of those hoods for mine.
Hey isn't the pinch seam already cut on an angle from factory?

Thanks. The hood looks cool but not very functional. It's only a tiny vent hole underneath. Some guys mod the vents and cut out more material to make it more functional. Yea the pinch seam is cut but it still looks close to me. Just gotta flex it out and make sure it doesn't rub.
 
Top Bottom