Project "Thanos" Build

iRonin

Member
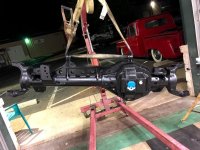
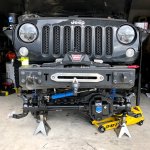
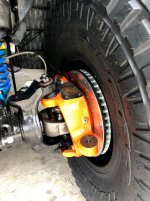
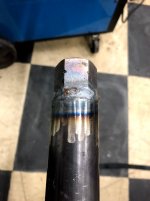
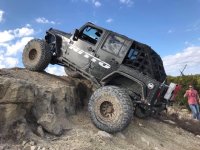
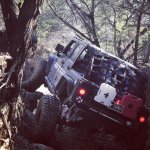
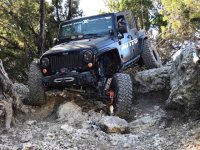
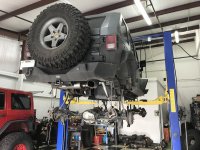
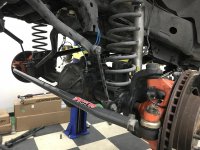
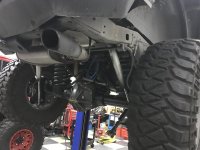
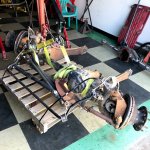
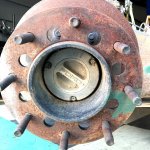
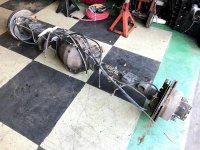
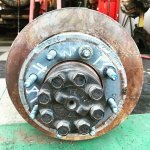
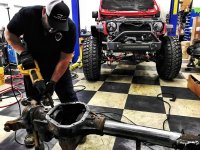
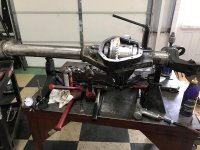
Happy to announce the one-ton swap is finally complete. This past weekend we had a shakedown run and only had minor items to tweak! I’ll be making more in-depth posts about the swap itself, but there’s a LOT to it so it will take a minute.

Till then here’s a raw gallery of photos over the entire process:
https://photos.app.goo.gl/REMXCoFy3csNRMFo8

Stay tuned!
IMG_0416.JPG
IMG_0430.JPG
IMG_0419.JPG
 

Ddays

Hooked
Happy to announce the one-ton swap is finally complete. This past weekend we had a shakedown run and only had minor items to tweak! I’ll be making more in-depth posts about the swap itself, but there’s a LOT to it so it will take a minute.

Till then here’s a raw gallery of photos over the entire process:
https://photos.app.goo.gl/REMXCoFy3csNRMFo8

Stay tuned!
View attachment 315863
View attachment 315864
View attachment 315865

Meh, looks ok I guess....Lol, came out awesome- that things a beast!
 

13_gecko_rubi

Caught the Bug
Happy to announce the one-ton swap is finally complete. This past weekend we had a shakedown run and only had minor items to tweak! I’ll be making more in-depth posts about the swap itself, but there’s a LOT to it so it will take a minute.

Till then here’s a raw gallery of photos over the entire process:
https://photos.app.goo.gl/REMXCoFy3csNRMFo8

Stay tuned!
View attachment 315863
View attachment 315864
View attachment 315865
Great seeing it back together!

Sent from my SM-G960U using WAYALIFE mobile app
 

Speedy_RCW

Hooked
Nice work. Looking forward to hearing more of the details as I ha e a few questions on this swap. I’m slowly getting my shit together for a similar swap. Currently working on the 14b.


Sent from my iPad using WAYALIFE mobile app
 

iRonin

Member
1 Ton Swap - Part 1 - Out with the Old, In with the Old

The journey to 1-Tons begins with the evolution of the current axles I was running beforehand. As my build is a true "build it in stages" progression rather than an all-at-once upgrade, some of the early economic decisions led me down a path where I was effectively stuck running a 37" tire and living with the constant risk of a semi-float rear being the weakest link.

The progression, in summary, was as follows:
- Originally a Sahara, the Jeep began life with an open diff D30 front, and a limited slip D44 rear, on 3.73 gearing, plenty for 35" tires.
- Knowing that I would eventually upgrade axles, but still wanting to invest a wee bit in improving capability, I upgraded the front to a cheap Spartan locker, again still on 35s.
- Now ready to upgrade to 37s, the weakest link was the front axle. Not knowing any local shops well enough to truss/sleeve/gusset the existing axle, I instead elected to go with a Dynatrac ProRock 44, regearing to 4.88, and gaining an ARB selectable air locker as well as RCV shafts, reid knuckles, etc.
- This shifted the weak point back to the stock rear, where I eventually broke a rear shaft. I upgraded them to chromoly out of necessity but was still stuck with an otherwise stock limited slip rear.
- After recovering from the PR44/37" wheel/ATX beadlock upgrade, Dynatrac had just announced the XD60, so I decided it was time to upgrade. Small problem though - I was still on 5x5 wheels and it wasn't an option at the time through NorthRidge for full-float. So rather than trying to figure out how I was going to convert things between, I opted to instead save money and run the semi-float in a 5 lug. On the up-side, it was still a much stronger axle all around, and now I finally had selectable lockers front and rear.
- This PR44/XD60 config was plenty good for a *lot* of wheeling on 37" Mud Grapplers, and carried me into the JKX.

If my plan was to remain at 37" tires forever, I'd probably still be running the configuration. I did somehow manage to bend a rear flange on the JKX but as you an imagine, this was a week-long wheeling adventure at serious parks like SMORR and Hot Springs, and the wet/muddy conditions called for a lot more skinny pedal than I normally like to throw at things.

So, after the JKX, I decided it was time to super-size to 40s. Again, not being sponsored or made of money, it wasn't really in the budget for me to jump to a 60/80 combo. The cost-effective approach was instead for me to sell my PR44/XD60 setup and use those proceeds to fund about 80% of a complete junkyard swap using quality components.

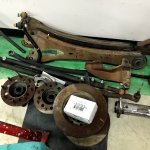
So with that plan in the books, back in March I found a buyer, and my ProRocks were off and onto a new owner:
Photo Feb 23, 10 09 52 PM.jpg
Photo Feb 23, 11 08 18 PM.jpg

Photo Feb 24, 4 23 03 PM.jpg
Photo Feb 25, 1 13 20 AM.jpg
Photo Feb 25, 2 10 37 AM.jpg

And poor Thanos would begin what would ultimately be 7-8 month hibernation in my garage:
Photo Feb 25, 4 52 42 AM.jpg

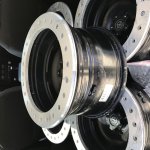
I also ended up selling my ATX Slabs, since I would now finally be moving to 8 lug wheels:
Photo Mar 10, 12 02 11 PM.jpg

The guy who bought 'em was excited they were wheels that had seen the JKX, but I didn't charge extra for the bonus history :cheesy:

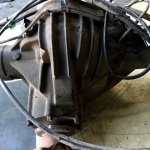
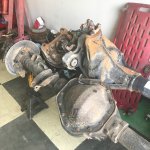
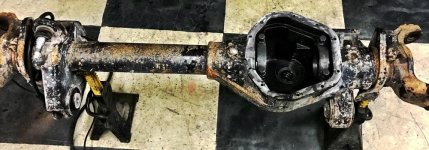
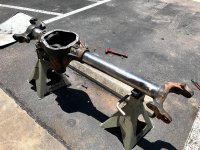
With a healthy budget to work with, it was time to find the donor axles. I posted the donors a while back, but I effectively pulled a 2008 Ford SD60 out of an 350 for the front, and a 14 bolt rear out of a 2005 GMC 2500. We used the Artec 1 Ton Swap guide to narrow the list of donor vehicles which helped a lot, particularly in identifying the correct 14 bolt rear variation to get.
Ford SD60 Raw.jpg
Ford SD60 Raw 2.jpg

GMC 14b Rear Raw.jpg
GMC 14b Rear Raw 3.jpg
GMC 14b Rear Raw 2.jpg

With the donor axles in hand, it was time to order parts and being the build :)
junkyard axles.jpg

In the next post, I'll be deviating slightly from chronological order and consolidate everything that went into building up the Front SD60 axle up first, even though we effectively worked a little-bit-at-a-time across both axles. Stay tuned.
 
Last edited:

dillard09

New member
So good to see Thanos back together. And he looks good on those 40s too. So I'm ready to wheel again with ya. I'm down in San Antonio now so let's plan a trip. Hit me up!
 

TheGrendel

Active Member
The guy who bought 'em was excited they were wheels that had seen the JKX, but I didn't charge extra for the bonus history :cheesy:

Haha. They’ve been great and were in surprisingly great condition following a JKX. Lmao.
 

iRonin

Member
So good to see Thanos back together. And he looks good on those 40s too. So I'm ready to wheel again with ya. I'm down in San Antonio now so let's plan a trip. Hit me up!

Thanks, hell yeah, lets grab Bubba and head to K2 or Wolf in Jan.

Haha. They’ve been great and were in surprisingly great condition following a JKX. Lmao.

Yesss! Glad to hear they're still serving you well!
 

iRonin

Member
1 Ton Swap - Part 2 - Front SD60, "The Grind"

The build plan for the front axle, based around the Ford Super Duty 60, was to use the Artec coversion/truss kit, paired with Reid high-steer knuckles, Curry Hubs, stuffed with 5.38 Yukon gears, and locked with an Eaton E-Locker.

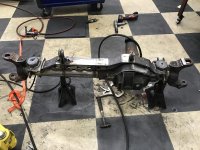
But first, we had to strip all the Ford-itry off this massive slab of metal.
sd1.JPG

The original truck was a dually, so the front hubs had spacers we'd no longer need.
sd2.jpg

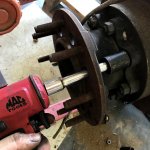
We also weren't going to reuse the crusty old locking hubs...
sd3.jpg

...or any of the rest of the steering components, cracked & rusted rotors, control arms, R&P, diff cover...
sd4.jpg

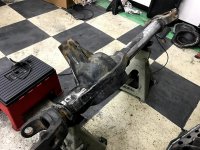
With the axle disassembled, it was time to strip it of all the factory brackets and excess casting.
sd5.jpg

The passenger side brackets aren't too bad - a torch quickly zips through and makes short work of them.
sd6.jpg
sd7.JPG

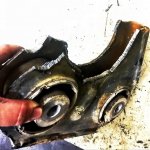
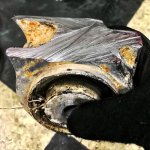
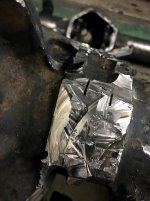
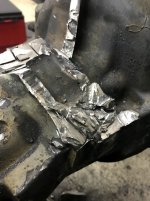
The driver side though, is another beast entirely. This was.. by far.. the most labor-intensive part of the process. The control arm mounts are part of a massive single solid cast of metal extending off the pumpkin like The Hunchback of Notre Dame and there's just no easy way to blow through it. So it's... a lot... of sawzall, and... a lot... of grinding.
sd8.jpg
sd9.jpg
sd10.jpg
sd12.jpg

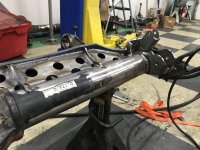
After carving off the mounts, you're still left with a solid slab of metal below it all that has to be cut and ground down to the tubes to make room for the truss.
sd11.jpg

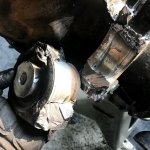
The method I found to work best was to saw-zall a checker pattern down through an inch or so at a time, then undercut the layer, using an air hammer to chisel away squares as they weakened.
sd13.jpg

Eventually, you hit paydirt and make it down to the tubes. Then it's just a matter of grinding for a few years to clean it up.
sd14.jpg

After that? You guessed it. Even more grinding and clean-up to smooth things out and make room for all the bracketry... but eventually, we had a nice, stripped canvas to work with.
sd15.jpg
sd16.jpg

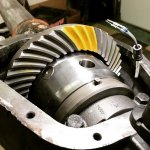
At this point, before welding, we opted to get the Eaton E-Locker/Carrier installed and get the gears pre-set. This makes it easier not having to work around a truss for things like drilling for the locker connector, etc.
sd18.JPG
sd19.jpg

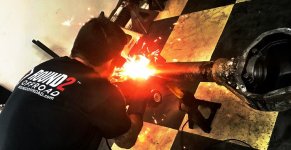
With the setup done, it was time to pull the carrier and weld on all the Artec goodies. John from R2 stacks some nice dimes. :beer:
sd22.jpg
sd23.jpg
 

iRonin

Member
1 Ton Swap - Part 2 - Front SD60, Final Assembly & Install

With the axle set up it was finally time for some primer and paint!
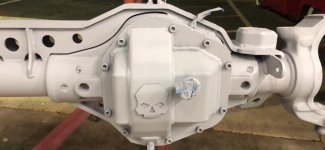
sd20.jpg
sd21.jpg

After a few coats and drying overnight at the shop, I picked up the axle first thing in the morning to bring it home. Joe He-Man'd it up into the truck by himself. What a beast!
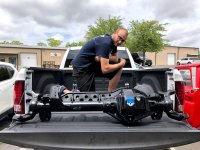
sd24.jpg

Back at home, and solo, I totally cheated and just used the cherry picker to unload it and get it under the jeep.
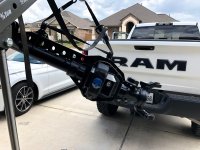
sd25.jpg
sd26.jpg

Things aligned well enough, but it is an absolute requirement that you have fully adjustable control arms with some decent misalignment joints. My EVO Long Arms were able to do the job but things definitely sit spread out given the wider axle position with brackets being more out-board.

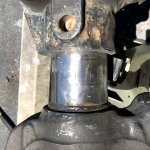
With all the remaining parts on hand, it was time for final assembly. This was where I encountered my first issue - the Currie unit bearings. The fine print I didn't pay close enough attention to mentions that their 1-Ton UBs were based on 1999-2006 F350/F450 UBs. Unfortunately, my SD60 came out of a 2008, and had a slightly different hole alignment, so the Curries were out.

With no other real aftermarket solution readily available, I opted to go with a set of Raybestos "professional grade" UBs that were a few steps higher than OEM quality. They fit perfectly, and came with a pair of ABS sensors. The second thing I needed to do to make them work for my application was to have them re-drilled for an 8x6.5 lug pattern to match the 14b rear.

The reason I went this direction rather than redoing the rear to match the Ford 8x170mm pattern was for current and future wheel options. (The KMC Machete Crawl beadlocks I elected to run are not offered in 8x170mm)

Lucky for me, Busted Knuckle Offroad offers an inexpensive service to re-drill super duty unit bearings - so I ordered the Raybestos UBs off Rock Auto and had them shipped directly to BKO, who redrilled 'em and shipped them back to me, ready to install.
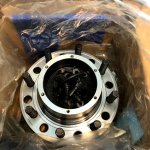
sd27.jpg

After installing the 35 spline 1541H shafts, the the new UBs mated perfectly to the Reid high-steer knuckles.
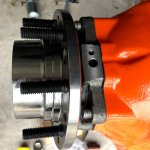
sd28.jpg

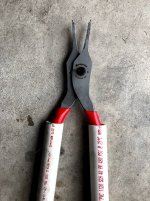
Let me take a moment, if I may, to call out how silly difficult the snap rings are on these SD axles. The ring itself is massive and requires a ton of force to pry. The amount of shaft you have to clear to get them recessed enough for the groove is so deep you need super long, super skinny pliers to even reach. I broke two of my cheap HF pliers trying to get them installed before I broke down and ordered the must-have Snap-On pliers apparently everyone must own to work on these things. And yes, my hands were so sore and tired from trying that I totally cheated and slipped some 1/4" pvc over the handles to give me more leverage. :sFun_hot:
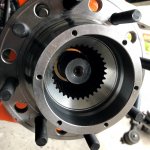
sd29.jpg
sd30.jpg

With that out of the way the rest of the tasks were pretty straight-forward. The ABS sensors connected straight up to the JK harnesses. For the E-Locker, I discarded most of the wiring harness as I simply ran what was needed up to the SPOD and replaced the front ARB Locker slot with the Eaton.

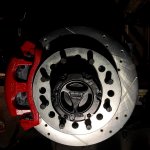
For Brakes, I installed the "Z23 Evolution Sport Brake Upgrade Kit" from PowerStop, which came with calipers, pads and rotors. No issues.
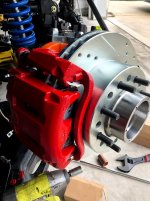
sd31.jpg

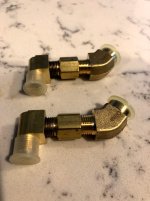
The breather hose was an interesting nuance. The truss interferes with the existing hole, so you need to buy a few NPT bits to elbow in a re-route. Thankfully the Artec instructions tell you exactly what to get :)
sd40.jpg

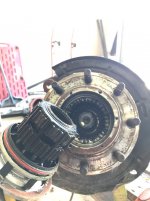
New Warn Locking Hubs finished out the assembly and it was ready for wheels and tires!
sd32.jpg
sd33.jpg

The next task to was to figure out steering linkage. With the high-steer plate installed on the passenger knuckle, steering wheel centered, and the front tires on the ground with about 1/8" toe set, I took hole-to-hole measurements from the pitman arm to the knuckle for the draglink, and between the two lower knuckle holes for the tie rod.

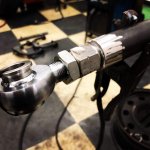
Ruff Stuff Specialties makes a "GM Crossover Steering" kit which consists of beefy 1.5" X .25" Wall DOM tubing and 4 tie rod ends. The kit comes raw and disassembled, so you cut the tubes to length, then weld on the bungs. I opted to not use the TREs and instead go with high misalignment HEIM ends.
sd34.JPG
sd35.jpg

There was some drilling to get things to work. The pitman arm and knuckles needed to be bored out to accept the larger bolts for the HEIM ends. The knuckles were easy, but the forged pitman arm was a PITA to drill.

I took the newly assembled drag link and tie rod home and mocked it up, still straight as an arrow, just to see how much we would need to clear the Ballistic Fabs diff cover at full lock. The tie rod would for sure need a couple of bends to make it work, but nothing drastic, I think it was 10-11 degrees on 2 bends. The drag link, at full passenger lock, ever-so-slightly touches... so slight that I opted to leave it straight as it puts zero strain on the bar.
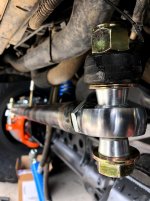
sd36.jpg

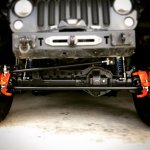
With the tie rod ends bent and dialed in, it was again time to prime and paint. (Note the pic below has the tie rod flipped to the underside of the knuckle for ease of on/off installation as it's a bit of a dance to get the bolts/nuts going on the passenger side knuckle)
sd37.JPG

At this point I took the time to align the jeep as best I could for the garage. Adjusted the track bar to get things centered, adjusted caster a decent amount, and got the toe in to 1/8". From there, I set up a fixed horizontal point off the axle to the tie rod, and turning the wheels lock-to-lock, I taped off and measured the throw needed for the Ram assist. I was previously running the West Texas Offroad Redneck Ram, which consists of a ram piston running off a tapped and rebuilt steering box. One of the issues I had on the JKX was that my piston kept weeping/leaking fluid, so because of that, and the fact that the new throw measurements were outside its spec, I opted to go with a new PSC ram.

With the PSC ram installed, it was just a matter of re-connecting the hydraulic lines and bleeding the steering, and we were in business with the complete new 1-ton front end!
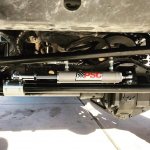
sd38.JPG

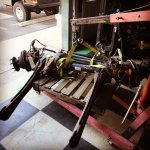
Rear coming soon :)
 
Last edited:
Top Bottom