Ordered long arms, but questions about what else I need

KevinG

Caught the Bug
Looking good man! One day I’ll get around to getting that setup

Thanks! I'm sure you probably know this but you live in a beautiful area. We went through there when we moved back here from the east coast. Thanks again for the comment!
 

KevinG

Caught the Bug
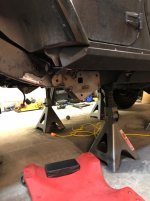
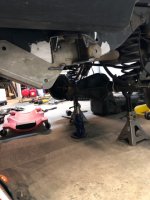
So I spent about another hour grinding and test fitting the drivers side rear bracket then my wife and daughter got home. Then work called and had to run in which took the rest of the afternoon. Just spent another hour cleaning up. Brackets are in place.

Image1552627467.228164.jpg

Image1552627494.110701.jpg

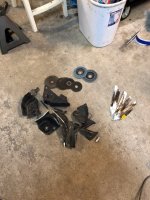
And here’s the carnage

Image1552627521.307976.jpg

Hopefully I’ll be able to button up the back tomorrow night after I get home from work.


Sent from my iPhone using WAYALIFE mobile app
 

TrainWreck618

Caught the Bug
So I spent about another hour grinding and test fitting the drivers side rear bracket then my wife and daughter got home. Then work called and had to run in which took the rest of the afternoon. Just spent another hour cleaning up. Brackets are in place.

View attachment 322986

View attachment 322987

And here’s the carnage

View attachment 322988

Hopefully I’ll be able to button up the back tomorrow night after I get home from work.


Sent from my iPhone using WAYALIFE mobile app

Looks good[emoji106] are you welding these in?


Sent from my iPhone using WAYALIFE mobile app
 

bhaner

Active Member
Nice! Looks good!

Little tip with sawzall blades to save you some money... Run them as slow as you can. Wide open heats up the blade and will actually melt the teeth off. Once you start to see sparks it's all over.
 

KevinG

Caught the Bug
Looks good[emoji106] are you welding these in?


Sent from my iPhone using WAYALIFE mobile app

I was actually going to bolt in. I have a pretty light duty welder so I had thought about welding and bolting, but I'm a pretty novice at best welder. I may leave them bolted for a while to see how bad I abuse the rear lower control arm mount. If I feel I'm beating them up or they are hindering me, I may see if I can buy the hi clearance mounts and see if the guy that commented below you will help me get 'em on.

Nice! Looks good!

Little tip with sawzall blades to save you some money... Run them as slow as you can. Wide open heats up the blade and will actually melt the teeth off. Once you start to see sparks it's all over.

Where were you 5 blades ago????!?!? :cheesy:
 

TrainWreck618

Caught the Bug
I was actually going to bolt in. I have a pretty light duty welder so I had thought about welding and bolting, but I'm a pretty novice at best welder. I may leave them bolted for a while to see how bad I abuse the rear lower control arm mount. If I feel I'm beating them up or they are hindering me, I may see if I can buy the hi clearance mounts and see if the guy that commented below you will help me get 'em on.


Where were you 5 blades ago????!?!? :cheesy:

They are bolt on but I recommend welding them in for sure. The lower mounts haven’t hung up on me too bad yet, but they do definitely hang lower than the high clearance. If they cause you too much trouble just get bigger tires


Sent from my iPhone using WAYALIFE mobile app
 

KevinG

Caught the Bug
They are bolt on but I recommend welding them in for sure. The lower mounts haven’t hung up on me too bad yet, but they do definitely hang lower than the high clearance. If they cause you too much trouble just get bigger tires


Sent from my iPhone using WAYALIFE mobile app

Yeah, I'll probably see what I can do about that afterwards. I know I am creating more work for myself, but it's not a big deal to bolt and then weld is it? Thanks for the vote of confidence with them not hanging up too bad, but I'm sure 40's would help.
 

TrainWreck618

Caught the Bug
Yeah, I'll probably see what I can do about that afterwards. I know I am creating more work for myself, but it's not a big deal to bolt and then weld is it? Thanks for the vote of confidence with them not hanging up too bad, but I'm sure 40's would help.

No issue at all bolting then welding, it will help you get everything in the right place.


Sent from my iPhone using WAYALIFE mobile app
 

KevinG

Caught the Bug
The high clearance mount is quite a bit different than yours.

I was fairly impressed.

View attachment 323008

#moneyshot

In all seriousness, it looks so much better but I was apprehensive about the "bolt on"being too hard to get on. I know the top is pretty straightforward but I was worried about the axle end w/o ponying up to go lever. 7 pages and nearly three days and all I have managed is to not have a gas tank or a way to keep my back axle in place.

Edit: make that 8 pages....

Edit again:
No issue at all bolting then welding, it will help you get everything in the right place.


Sent from my iPhone using WAYALIFE mobile app

Thanks :2thumbsup:
 
Last edited:

KevinG

Caught the Bug
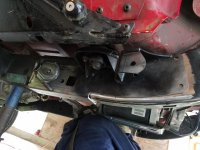
Got home from work at about 8:30. Spent some time with the fam and did a labout an hour and a half of drilling and test fitting and now just waiting for paint to dry. I think I should be home in time to button up the back.

Image1552718592.793803.jpg


Sent from my iPhone using WAYALIFE mobile app
 

jesse3638

Hooked
Got home from work at about 8:30. Spent some time with the fam and did a labout an hour and a half of drilling and test fitting and now just waiting for paint to dry. I think I should be home in time to button up the back.

View attachment 323027


Sent from my iPhone using WAYALIFE mobile app
Not to be discouraging but after all said (Full traction 3" long arm kit a few parts were incorrect and had to be reshipped, drag link flip, exhaust crossover relocation, front and rear DS installed, bead locks and tires) it took me 3.5 weeks...haha. Working off of Jack stands is a pain and not fun.

Sent from my 2PYB2 using WAYALIFE mobile app
 

KevinG

Caught the Bug
Does this high clearance kit use the factory axle mounts or are those changed too?


Sent from my iPhone using WAYALIFE mobile app

The axle mounts are changed. One of the other guys can explain it better but since the evolever mounts on top and the lower control arms mount outside and up on the frame so the axel mount is out and moved up on the tube to stay in line without interference. You can do the high clearance without the lever but it needs fab for the shocks or bolt in coilover. If you look for Rubicat with bolt ins you can see it there’s tons of pics or google the images for rubicat and coilovers and click on the pic with the forklift pulling up the rear tire.


Sent from my iPhone using WAYALIFE mobile app
 

KevinG

Caught the Bug
Not to be discouraging but after all said (Full traction 3" long arm kit a few parts were incorrect and had to be reshipped, drag link flip, exhaust crossover relocation, front and rear DS installed, bead locks and tires) it took me 3.5 weeks...haha. Working off of Jack stands is a pain and not fun.

Sent from my 2PYB2 using WAYALIFE mobile app

All good. I think I saw that you had posted that in one of the other threads that I had bookmarked. I had the drag link flip already, and everything else from the 4.5 lift so I think the amount of work I started with is quite a bit less.
My only regret so far is that I haven't had a lot of down time from work and family to really buckle down and work on it. I should have started on Wednesday, but life got in the way. Thursday my daughter had early release. It seems like I keep getting a few hours here or there before I get called in for work stuff. Next week I have Monday, Tues, Friday, Saturday and Sunday off, which is when I actually should have started. I was just a little to eager to get it going.
We should close work by 7 tonight, my wife was in Seattle all day and will be exhausted when she gets home about the same time as me and will probably turn in early, so I should be able to get three or four hours in tonight. My goal is to get the brackets in for a final time and hang control arms. I've heard the front is easier (crossing fingers). I know it's going to be worth it in the long run.
 

KevinG

Caught the Bug
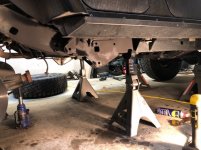
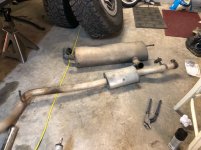
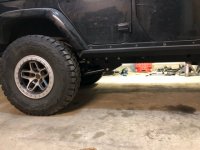
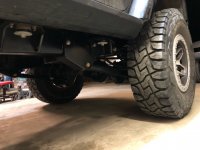
Thought I would post an update, even if it's for my own sanity. Got home late from work and got in the garage around 8:30 tonight. I had left off contemplating how to drill the holes on the inside of the frame with the exhaust in the way. While I was at work I reviewed the pictures from the install ORE did for the guy that won the kit. Saw they pulled it, so I did the same. I wish I would have done it before I stared cutting and grinding because it opened everything up underneath . I finished drilling the holes, painted everything and mounted the brackets for the final time. My hope is that it will make getting the y pipe and driver's cat off to make the exhaust loop flip easier. (Flame suit on so let me have it). Last week I ordered a loop from afe that is supposedly made for a long arm. It is flanged to and has relief cuts in it so it should go in pretty easy. While I have it out, I will still probably weld the loop from the stock exhaust, but I got it as a "just in case". If don't use it, I'll give it to the next poor SOB that tries this at home
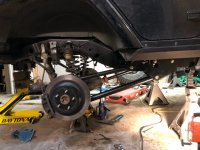
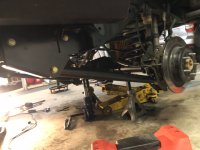
At this point it's on all four wheels with the rear "somewhat" buttoned up. It's kind of a domino effect, but I hadn't made the cuts to the gas tank skid and it was too late to piss off the neighbors, so it's not back in, which means the passenger lower CA has to come back out for the bolt that goes above it in the skid. Since I didn't put the tank in, I left the driveline out. So I can't set the pinion, so I have one upper loose to set it without bind. I put the rear tires back on to move the jeep back about five feet so I can get to the front with lot's of room. Feels pretty good to actually have had a few hours to work on it uninterrupted and to be putting something on instead of cutting and yanking stuff off. Pics are going to be below.
 

jesse3638

Hooked
Looking good. Keep plugging away. I didn't realize you left the exhaust in otherwise I'd have said pull it. I think which ever end you start on first, front or rear, will be harder. I started on the front of mine and finished with the rear and thought the rear was a lot easier...haha.

Sent from my 2PYB2 using WAYALIFE mobile app
 
Top Bottom