CJ-5 Project Old School

Body paint color, just for fun.

  • Mojito Green, JL color

    Votes: 0 0.0%
  • Chestnut Brown Metallic, Classic 70's

    Votes: 0 0.0%

  • Total voters
    2
  • Poll closed .

AZ Explorer

Caught the Bug
Fenders look good and like the fact you are keeping the patina, so much character there.

Sent from my SAMSUNG-SM-G930A using Tapatalk

Thanks! I did a lot of research on the brown Golden Eagle, and I really love the looks of those. However, I do now think that for this Jeep, keeping the body original is a better idea.
My wife and I discussed it and we decided to look into buying another CJ down the road. One that is a real Golden Eagle rather than a clone and has the original clean body. We were thinking that one might be a CJ-7 so we'd have one of each. I have seen a few pop up here and there in the brown that I like... although I'd be open to a black one as a second choice.
We'll see what happens.
For now, I continue the slow process on the 5.
 

AZ Explorer

Caught the Bug
A few things

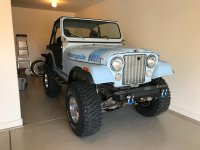
Finally had a chance to get some pics of some of the new stuff. The biggest thing was I had the frame mostly straightened.
It was weird, but while they had it on the rack and had everything set up after making the pulls, the frame was perfectly level according to the targets.
However, the driver front still was dipped down noticeably, yet way better than it was. The best we could figure was the problem had to be in the suspension since the frame was good now and the body was straight to the frame. The front frame horns are still bent up slightly causing the front to sag down. They didn't want to make any pulls there
until we figured out the suspension issues. I thought maybe the spring bolts could be too tight and held the spring in a sagging position after the pulls so I loosened and retightened and that didn't do much.
I want out on a limb and guessed it could be in the springs and swapped the fronts from right to left and and vise versa and suddenly it was perfectly level all around.
Now I need to finish the frame straightening but I will probably wait until Jan. or Feb. to do that.
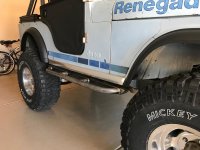
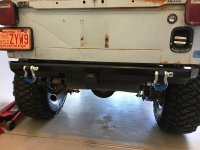
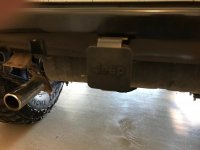
Since the frame from the front bumpstops back is good, I installed the rock sliders which I still need to powder-coat. Also picked up a Procomp rear bumper and Rockhard Front bumper.
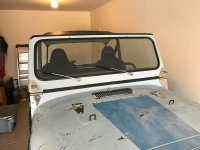
I replaced all the hinges finally. The Crown windshield ones were junk and didn't fit at all. Got some Kentrol ones and they were perfect. All the other stainless on the outside was fine.
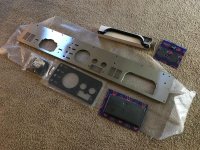
Now it's time to concentrate on the inside. Got a new brushed stainless dash panel. Went with black accent parts for that and already have the gauges and wiring as posted previously.
I also have a pair of 6" round KC Daylighters with a wiring harness in stainless for those windshield brackets coming in maybe next week.
This will take awhile but hopefully will be fun.
After all that I will move onto the final phase, the drivetrain and exhaust. Plans on that are a cleanup, gaskets and painting of the engine along with a small assortment of upgrades. Then axle refurbishing and a rear drive shaft.
maybe I'll be driving it sometime late 2019-early 2020. We'll see how it goes.
IMG_0614.jpg

IMG_0615.jpg

IMG_0616.jpg

IMG_0611.jpg

IMG_0612.jpg

IMG_0618.jpg
 

AZ Explorer

Caught the Bug
Got these Monday

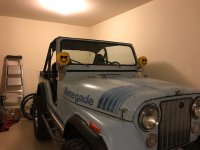
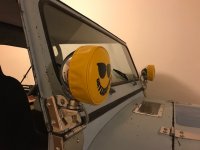
Picked these KC Daylighters up Monday and threw them on the brackets. They're the stainless set with the wiring harness. I'll complete the install whenever I do the other wiring. Oh, and the headlight bezels/rings are new too
Took it for a run around the neighbor hood and now the sagging is back. All kinds of measurements are off. This thing is in worse shape than I thought. Tub is slightly collapsed.
Mechanically it's fine but I don't think there's any way to get around buying a new frame and tub. The build time just got extended pretty far out.
Most likely I'll do a fiberglass tub and fenders which I actually like (though some others don't). Hood grill and windshield frame will stay steel. So since that has to happen, I guess I'm back to brown paint with the Golden Eagle decals.
Maybe it was just meant to be...

IMG_0619.jpg

IMG_0620.jpg
 

WJCO

Meme King
Lights look good.
Being that your frame was already fixed, it sounds like you have a spring problem. I used to work for a shop called American Spring. They can fix, re-arch, rebuild leaf springs. There is still a location in Flagstaff to the best of my knowledge but Phoenix may have a similar style shop. It's amazing what can be done with your existing leaf springs.
Just seems unlikely to be a tub of frame issue from what you're saying.
 

AZ Explorer

Caught the Bug
Are the Aqualu aluminum tubs really expensive?


Sent from my iPhone using WAYALIFE mobile app

About 3 times the price of a glass one.:shock:

Lights look good.
Being that your frame was already fixed, it sounds like you have a spring problem. I used to work for a shop called American Spring. They can fix, re-arch, rebuild leaf springs. There is still a location in Flagstaff to the best of my knowledge but Phoenix may have a similar style shop. It's amazing what can be done with your existing leaf springs.
Just seems unlikely to be a tub of frame issue from what you're saying.

All they did was hang some guides and it's straight at the guides. From the side it's pretty much a horse shoe. The actual spring hangers are at different heights from the floor. I've switched the springs from left to right front and rear and it sags the same way. I was going to have to spend another $400-$500 to bring the horns down anyhow and I'm just not willing to throw any more money into what is a relatively weak frame prone to cracking. I'm also concerned that with the amount of bending to front needed that I know of, it could crack during that repair. The drivers side body has been compressed and I can't fix that at a reasonable cost and I'm pretty sure now that some of the issue is the driver side frame rail is forward of the passenger. I could make it work enough to be drivable if I wanted to use it as an off road only toy, but that wasn't ever what I wanted to do.
Ultimately, I want a nice clean CJ and even with the extra expense, I'll still come in way under budget over buying a restored one that isn't done the way I want it to be. Throttle Down Customs has a heavy duty frame that is really nice and I can weld the extra stuff on that I want and have it powdercoated after. It'll all be worth it in the end.

Thanks on the lights! It's the first time I ever ponied up for real KC lights. I always went with the $20.00 knock offs. You can't always tell by looking at them but boy do they rust, even in Phoenix and they never worked well. The harness is really nicely put together too.
 
Last edited:

catahoula

Caught the Bug
Man, your CJ is looking soooo sweet. I love the old school pillar lights. The bumpers are perfect on it as well.
 

AZ Explorer

Caught the Bug
jeep14.jpeg

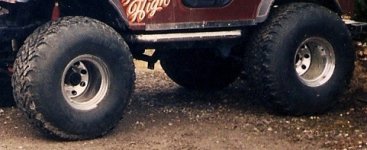
I found out that U.S. wheel makes a wheel that is just like the ones I used to have on my old CJ-5. I really wanted to get these in a 15x12 originally but I couldn't find them at the time I got my Mag wheels. Those were only available in a 15x10 and not what I had in mind for this project. I may sell them or I may hold onto them for a later build. (Maybe a CJ2A :daydream:)

Happy that I am getting what I wanted in the first place now. Something about a nice chrome steel wheel on a vehicle from the 70's. Or maybe that's just me.
It will take about 5-6 weeks to get the new ones because they have to make them, but I'm not in a hurry... obviously.

I am also a month or two away from ordering the new steering column. It's a little more money but I like the Ididit ones over the Flaming River or doing a rebuild.
 

TOPLESS

Caught the Bug
Those wheels look like Bart Wheels Super Truckers. I had a set on my 78 chevy. I love the old school look! Too bad they don’t make that style of Fun Country tire anymore.
 

AZ Explorer

Caught the Bug
Those wheels look like Bart Wheels Super Truckers. I had a set on my 78 chevy. I love the old school look! Too bad they don’t make that style of Fun Country tire anymore.

They were Bart Wheels! The new ones are pretty much an duplicate of them. You are right about the fun country's, I'd buy them again in a minute. They were the best tire for the sand dunes if you didn't have gobs of horsepower. Really great flotation.
 

JKbrick

Active Member
They were Bart Wheels! The new ones are pretty much an duplicate of them. You are right about the fun country's, I'd buy them again in a minute. They were the best tire for the sand dunes if you didn't have gobs of horsepower. Really great flotation.

I used to get Bart wheels from Halls off road in Coldwater Mi. They used to give me jobber pricing so I could sell stuff for a little profit


Sent from my iPhone using WAYALIFE mobile app
 

AZ Explorer

Caught the Bug
Faster than expected

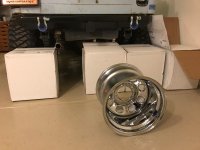
The five week lead time was a bit of an overestimate. The Wheels arrived in 12 days from the time I placed the order with Discount Tire.
They were as shocked as I was to see them show up so fast. I pulled out each one as soon as I got them home. They look great, and all were in perfect condition as far as I can see.

IMG_0695.jpg

In other news... I borrowed a manual version of a hydraulic ram and used it to see if I could push back the rear section of the body and open up the driver side wheel well. The good news is it worked. The flare goes on without warping now and the bottom edge of the tail section has a proper gap along the back bumper now. Pretty much everything is lined up the way it should be again.

The reason this is such a big deal is I haven't done any real body work in about twenty years. I was petrified that I would have to replace the entire driver side body panel which is a crazy big job and would still need to figure out the tail panel. Not to mention any affordable replacement would be thin Philippine metal without a Jeep logo. All of that has caused no end of wishy washy ideas on how to proceed. I kind of felt that all those issues were beyond my ability and ambition. Thus the fiberglass body idea was born, since I had one before. Still, it bummed me out big time that since I know I am replacing the frame, I began to wonder if I really just overpaid for essentially an engine, axles and a title.

Now, I am confident I am left with what is really minor bodywork and am able to keep the factory original tub. The only things I want to replace body-wise is the front fenders. I could probably save those too, but I really don't like the seams. So for those I will go with fiberglass replacements. I still need to collect a number of tools including an air compressor to do all the body repair and paint. The only thing I'll need extra to keep the steel body is a welded-pin dent pulling system. I've used them before and Eddie has as well in a few videos like working on Jane. It reminded me of just how awesome that tool is.

Even though paint is some time away I am still trying to decide what color to go with. Mostly because it affects some of the other aftermarket stuff I am buying along the way.
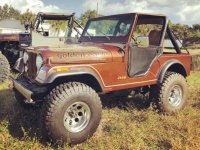
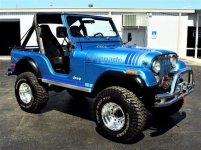
I had thought for sure I was going to go with the Chestnut Brown metallic with the Golden Eagle graphics. What has me second guessing that is I came across some pictures of a Renegade with the same decal package as mine came with originally. Only instead of the non-metallic baby blue mine has, it wears a darker blue with the metallic in it. It looks beautiful. Either would look great, but it's difficult for me to say which is more eye catching in the end.

I usually don't solicit opinions on what I'm going to do, but I think I am interested to hear what others think in terms of the color and decal packages. I'll add a picture of both so you can see what I'm looking at. If you do post an opinion, thanks for taking the time! :thumb:

B408A4FF-744B-492C-A9F7-46B881DEE870.jpeg 389EA9A7-FF29-4FD2-822C-13B22BCC1476-269-000000049B09542B.jpg
 

nbunga

Caught the Bug
Man that’s a hard one. Those are two very sharp color schemes. That blue looks great whith the chrome bumper and trim.
 
Top Bottom