You are using an out of date browser. It may not display this or other websites correctly.
You should upgrade or use an alternative browser.
You should upgrade or use an alternative browser.
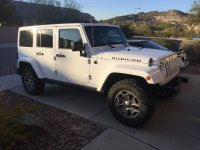
Blazindevl's white Rubicon build
- Thread starter Blazindevl
- Start date
Blazindevl
LOSER
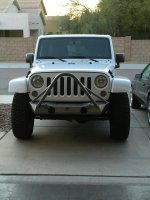
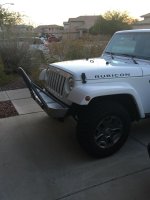
I bought the Poison Spyder Brawler lite front bumper with stinger and test fit it today on the jeep to make sure all is good. In the coming days I'll be painting it white to match, but today was test fit and prep day. I spent the afternoon sanding it with 200 grit paper and cleaning it with lacquer thinner.


Blazindevl
LOSER
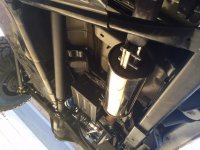
After seeing the bumper on the Rubicon I came to realize very quickly that the crash bar must go. It's kinda ugly when exposed and the extra clearance I'll get once it's gone will be nice. The next few pics show how I accomplished this.
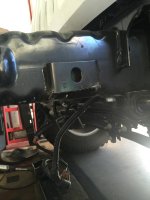
I cut across the crash bar just above the frame leaving this small section attached.
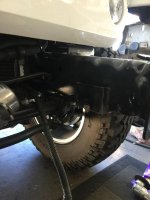
The other side of the drivers side framerail.
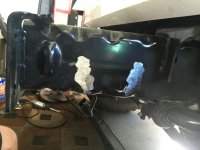
From there it was really easy to remove the left over tab and grind down the excess to get ready for paint.
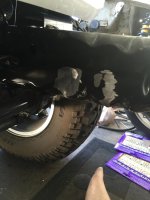
The opposite side.
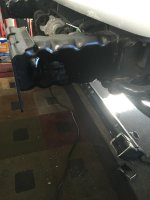
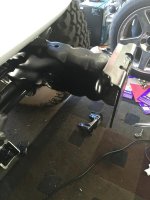
Once painted you could hardly ever tell they were ever there!
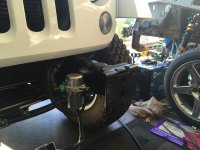
I quickly realized I forgot to account for the vacuum assembly so I chopped up it's original mount, welded it to the frame and painted it.
Tomorrow I will work on moving the swaybar disconnect up out of the way and lay some paint!

I cut across the crash bar just above the frame leaving this small section attached.

The other side of the drivers side framerail.

From there it was really easy to remove the left over tab and grind down the excess to get ready for paint.

The opposite side.


Once painted you could hardly ever tell they were ever there!

I quickly realized I forgot to account for the vacuum assembly so I chopped up it's original mount, welded it to the frame and painted it.
Tomorrow I will work on moving the swaybar disconnect up out of the way and lay some paint!
Blazindevl
LOSER
So, yesterday I dedicated most of my day to painting my bumper so that I could finally install it and flipping my e-disco(thanks to those of you that posted how to threads on this by the way).
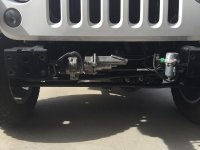
a pic of it flipped up and I used a M10-1.50x100 bolt to secure it... could've used one just a tad bit longer maybe!

a pic of it flipped up and I used a M10-1.50x100 bolt to secure it... could've used one just a tad bit longer maybe!
Blazindevl
LOSER
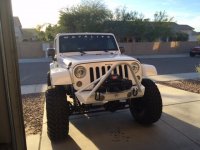
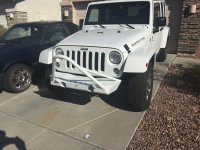
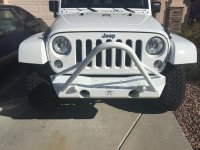
Today I mounted up the bumper and I have to say I'm really pleased with the way it turned out! I painted it myself in my garage using a 2 step base coat, clear coat application. Today I'm off to watch football... Go Cards! Tomorrow I will get the fog lights mounted up and put my new winch on... a Warn Zeon 10-s:yup:


notnalc68
That dude from Mississippi
View attachment 183565
quickly realized I forgot to account for the vacuum assembly so I chopped up it's original mount, welded it to the frame and painted it.
Tomorrow I will work on moving the swaybar disconnect up out of the way and lay some paint![/QUOTE]
That sucker is in the way! They put it in a bad place.
quickly realized I forgot to account for the vacuum assembly so I chopped up it's original mount, welded it to the frame and painted it.
Tomorrow I will work on moving the swaybar disconnect up out of the way and lay some paint![/QUOTE]
That sucker is in the way! They put it in a bad place.
WJCO
Meme King
Today I mounted up the bumper and I have to say I'm really pleased with the way it turned out! I painted it myself in my garage using a 2 step base coat, clear coat application. Today I'm off to watch football... Go Cards! Tomorrow I will get the fog lights mounted up and put my new winch on... a Warn Zeon 10-s:yup:
View attachment 184306
View attachment 184307
Great work. The winch will look great on there.
Blazindevl
LOSER
That sucker is in the way! They put it in a bad place.
Yeah, not the greatest engineering by Jeep. If I ever switch bumpers again, I'll be moving it inside the engine bay. At least for now, its tucked up out of harms way and is protected by the new bumper.
Great work. The winch will look great on there.
First I recall seeing a white painted bumper - looks great!
Thanks for the kind words! :thumb:
JeepJeep75
New member
Off to a great start. Looking forward to see what you have coming next! [emoji106]
Blazindevl
LOSER
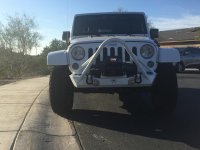
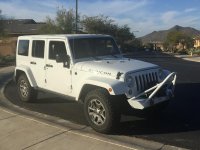
So I got the winch on the other day and just needed to install the synthetic rope to finish it all up. I was dreading this after reading several posts about how people struggled with this. I found this link on youtube, https://www.youtube.com/watch?v=vzrk13HKr_U and I'm here to tell you it literally took less than 10 minutes to install it! Got my D rings, factor 55 prolink and new fairlead on at the same time... Phase 1 now complete:rock: Phase 2 to follow very shortly!


Speedy_RCW
Hooked
Looking good. I like the color-matched bumper.
WJCO
Meme King
So I got the winch on the other day and just needed to install the synthetic rope to finish it all up. I was dreading this after reading several posts about how people struggled with this. I found this link on youtube, https://www.youtube.com/watch?v=vzrk13HKr_U and I'm here to tell you it literally took less than 10 minutes to install it! Got my D rings, factor 55 prolink and new fairlead on at the same time... Phase 1 now complete:rock: Phase 2 to follow very shortly!
Too funny! That video is only 2 weeks old. At least someone figured out the trick to make it easier. We all know now.
Blazindevl
LOSER
Too funny! That video is only 2 weeks old. At least someone figured out the trick to make it easier. We all know now.
I know right, made it look so easy! I'm sure glad he posted it.
Blazindevl
LOSER
Blazindevl
LOSER
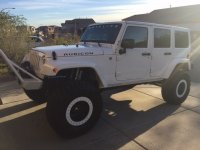
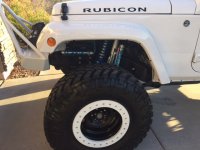
Yesterday was a loooooong day! My much anticipated trip had finally come. I was to make the trek from Phoenix to Fullerton, Ca. To see some dude named Drew, lol. When I showed up I was completely blown away at what I saw. I had the guys at ORE install a DTD and evolever in my rubicon and the quality of work they do there can only be described as incredible. From the welds to the fit and finish, it's all just perfect.
It didn't stop there...Drew spent close to 2 hours going over stuff and showing me things on my jeep and others and then Mel the owner came over and said hello and sat with me for a bit shootin the shit and thanking me for the business. I definitely felt like more than a customer! Kudos to Mel and his team for being extremely professional and for taking my jeep to the next level! If you have the means, i highly reccomended a visit... It'll change your life!
A big thank you to those here who reccomended ORE and their lift either directly or indirectly... I'm very fortunate that I came across this forum and read countless posts on first hand knowledge and I can only say thanks and I couldn't be happier!
Now for the eye candy!
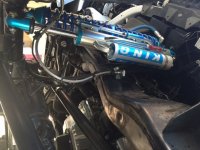
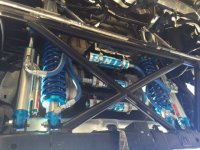
Time to get it dirty now
It didn't stop there...Drew spent close to 2 hours going over stuff and showing me things on my jeep and others and then Mel the owner came over and said hello and sat with me for a bit shootin the shit and thanking me for the business. I definitely felt like more than a customer! Kudos to Mel and his team for being extremely professional and for taking my jeep to the next level! If you have the means, i highly reccomended a visit... It'll change your life!
A big thank you to those here who reccomended ORE and their lift either directly or indirectly... I'm very fortunate that I came across this forum and read countless posts on first hand knowledge and I can only say thanks and I couldn't be happier!
Now for the eye candy!


Time to get it dirty now
Blazindevl
LOSER
notnalc68
That dude from Mississippi
Here's the exhaust I did i preparation for my install
View attachment 192101
View attachment 192102
And can't forget the WAL sticker!
Next thing to do is trim my fenders and order my ORE tire carrier which will most likely happen tommorrow.
Next phase to come Summer 2016: dynatrac xd60 front and pr80 rear
Looking good!
Blazindevl
LOSER
Thx buddy! I can tell you the amount of thumbs up and gawks i got in the short time I've driven it is crazy:rock:

