You are using an out of date browser. It may not display this or other websites correctly.
You should upgrade or use an alternative browser.
You should upgrade or use an alternative browser.
TankJK: My Billet Rubi Build
- Thread starter 10frank9
- Start date
10frank9
Web Wheeler
9th time was a charm. (Hammer down!)
OverlanderJK
Resident Smartass
9th time was a charm. (Hammer down!)
Oh yeah.
"No Russ tell him to hammer it"
10frank9
Web Wheeler
Oh yeah.
"No Russ tell him to hammer it"
Good times. Too bad your GoPro didn't catch it :cheesy:
JK's JK
Banned
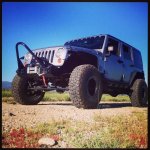
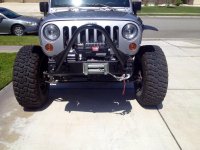
Installed an EVO Mfg. 1/4 pounder with stinger today. Thanks to ttfhell for the help, Offroad Evolution (Drew) as always and OverlanderJK for the moral support...
View attachment 62057View attachment 62058
In case anyone needs pointers on installing this bumper with the Powerplant PM me. There were some modifications (expected) and was a bit time consuming.
Looks great. I'm on that road now... :rock:
***EDIT***
I went out to the garage to admire the work I've done and then.............No holes on the top of the bumper for the stinger. Did you have to drill the holes for the stinger?
Last edited:
10frank9
Web Wheeler
Looks great. I'm on that road now... :rock:
***EDIT***
I went out to the garage to admire the work I've done and then.............No holes on the top of the bumper for the stinger. Did you have to drill the holes for the stinger?
Yes. I actually mounted the stinger first then the bumper. This made drilling out the holes a lot easier but you need a buddy to lift and hold that bumper/ stinger combo to mount it unless you have a tall enough jack.
JK's JK
Banned
Yes. I actually mounted the stinger first then the bumper. This made drilling out the holes a lot easier but you need a buddy to lift and hold that bumper/ stinger combo to mount it unless you have a tall enough jack.
I'm hopping a weak wife will count!!!!! :doh:
OverlanderJK
Resident Smartass
Yes. I actually mounted the stinger first then the bumper. This made drilling out the holes a lot easier but you need a buddy to lift and hold that bumper/ stinger combo to mount it unless you have a tall enough jack.
If you drill the holes first they won't even line up. Make sure you mount the bumper and stinger then drill the holes. You need to pull the stinger toward the bumper little by little.
(Not directed at you frank)
StrizzyChris
New member
what overlander said. I did the first hole(closest to the face of the bumper) and tightened the bolt down on each side. I then did one of the rears and tighened it down then finally the last one.
Skid_Kid
New member
Installed an EVO Mfg. 1/4 pounder with stinger today. Thanks to ttfhell for the help, Offroad Evolution (Drew) as always and OverlanderJK for the moral support...
View attachment 62057View attachment 62058
In case anyone needs pointers on installing this bumper with the Powerplant PM me. There were some modifications (expected) and was a bit time consuming.
Looks good! Is your alignment off a tad? Might want to get the tape measure out.....:thinking:
10frank9
Web Wheeler
Looks good! Is your alignment off a tad? Might want to get the tape measure out.....:thinking:
Yes thanks after heading out this weekend I noticed my alignment was off. Will be doing the DIY alignment with the help of the Project-JK write-up.
Tigrcky
New member
Yes thanks after heading out this weekend I noticed my alignment was off. Will be doing the DIY alignment with the help of the Project-JK write-up.
btw as an ase certified mechanic and one of those certs are in alignment i approve of that write up :thumb:
Brankz
New member
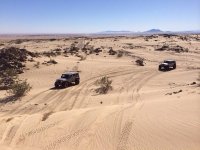
Took my boys on an overlanding adventure
View attachment 78688
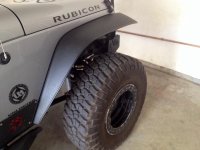
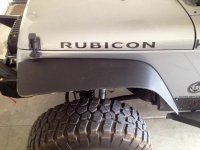
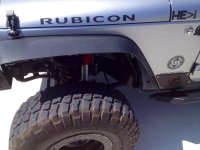
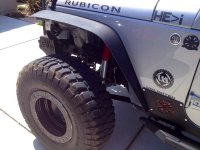
Today I also trimmed my front fenders about 2 inches more (narrower). I also removed the edge trim and sanded them for a cleaner look.
Before:
View attachment 78689View attachment 78690
After:
View attachment 78691View attachment 78692View attachment 78693
Awesome!!!!!!!!!!
10frank9
Web Wheeler
Fenders look nice.
I've been thinking about cleaning mine up to go without the door trim as well. Hopefully I'll have time before the Rubicon. It's on the long list of things to do/get done.
- Jason
Thanks they aren't perfect. Could still use some fine sanding and buffing but good enough for government work
10frank9
Web Wheeler
Jeep is looking nice man! Good work.
Thank you. I will see you in June sir. :yup:
Grab your PM, Frank

