DIY Spod- Waytekwire

pastorwug

New member
Nice Paul (pastor)! What are you doing for switches, location?

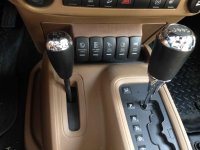
Purchased 5 switches from Waytekwire and 5 switch covers from OTRATTW - all mounted near the tranny selector.
Ran 5 lines from the 5 relays to these switches
Winch
Rock Lights
Off Road Lights
Rear Lights
Windshield lights

I also ran 4 fused lines into the cabin:
CB
Garmin
Switch lights
Radar Detector

For what I did I used 10 different colors of wire including the ground for the switch bank. I think my Auto Stereo place had about 10 or 12 different colors but I only bought 5 colors from them, I had the rest already.

All finished and it has worked out great.
Been looking at Off-road lights and have noticed that Eddie has two large lights on the front of one of his Jeeps - probably Lightforce lights - wondering what he has.

BIG THANKS TO PVANWEELDEN!
 
Last edited:

pvanweelden

New member
Thanks Pastor! Glad it worked out for ya! Sounds like you made full use of the relay fuse panel- with only 1 empty fuse to spare :thumb: :rock:
 

pastorwug

New member
Thanks Pastor! Glad it worked out for ya! Sounds like you made full use of the relay fuse panel- with only 1 empty fuse to spare :thumb: :rock:

Yes, I put a 14g wire in it anyways and coiled the lead in the engine bay for future use. I'll take some pictures of what I did and add them in here.


Sent from my iPhone using WAYALIFE mobile app
 

pastorwug

New member
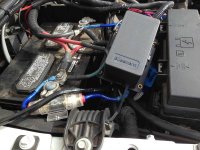
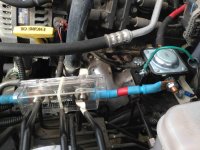
Here's a pic of where I installed the Bussman - close as I could to the battery - a short 8g wire run to the positive pole.
IMG_0473.jpg

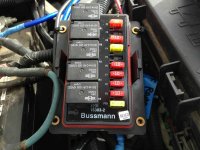
A pic with the Bussman open - I like the organization of the fuses
IMG_0474.jpg

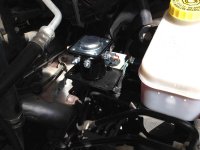
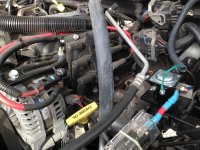
Here's where my winch switch wire goes - operating a large starter motor type solenoid.
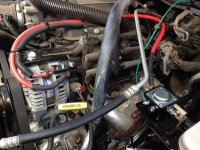
I took the positive off of the alternator positive. Works great.
IMG_0476.jpg
IMG_0475.jpg

Finally - here are switches in the cabin:
IMG_0472.jpg

All in all a great project I'm glad was on WOL - this is one of the great benefits of a community of Jeep enthusiasts!
 
daystar panel fitment?

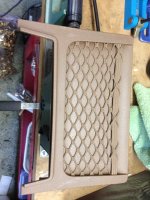
Has anyone else had trouble keeping the daystar panel that goes in front of the shifter to stay clipped in? For some reason mine will not stay put. Other than this issue, great write up! :thumb:
 

pvanweelden

New member
I don't have an auto, so I couldn't use the daystar there, but I read that Kenny had some issues with his daystar popping out or not fitting right :grayno:

did you take the steel clips from your factory piece and put them on the daystar?
 
I don't have an auto, so I couldn't use the daystar there, but I read that Kenny had some issues with his daystar popping out or not fitting right :grayno:

did you take the steel clips from your factory piece and put them on the daystar?

Huh, weird? and mine were plastic. I might just end up glueing it
 

davantalus

Member
Nice davantalus! Is the a pillar switch mount for four switches? I have not done it, but I believe you can cut a hole for the 5th switch and there is room for it

Hadn't thought about adding another hole... I'll let you know what I find when it arrives. (Yay prime)
 

pvanweelden

New member
Iclimbthings- Guess I could be wrong about that lower dash piece having steel clips from the factory- I haven't taken mine off- maybe Pastor can answer that better since he has the daystar in that location.

I know on my upper dash piece I removed the steel clips from the factory piece and used them on my daystar dash piece.
 

pastorwug

New member
Huh, weird? and mine were plastic. I might just end up glueing it

Ditto on the metal clips that were on your original mesh insert - you should have taken those off and put them on the daystar.
Also keep in mind - you have to really PUSH DOWN on the daystar panel so that the lower hooks snap into the two bottom attachments in the dash, it took a considerable amount of pressure for mine to finally snap in, from there (with the metal pieces up above) it snapped right in and has stayed put.
 
Last edited:

pastorwug

New member
I hope pvanweelden doesn't mind but it's in keeping with his great thread here that I also did a starter solenoid mod to my winch. I'd like to add to his thread how I did that.

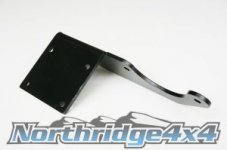
I bought the ARB Compressor JK Mounting Bracket used off a guy who had 2 for some reason - paid $30 but they go for $44 at Northridge:
arb-bracket_md.jpg

This was to become the platform for the Starter solenoid I was adding - seemed like a good location and was very sturdy once installed.
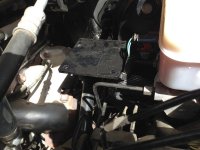
IMG_0230.jpg

I used a small piece of angle metal I found in the garage to be the attachment point for the starter type solenoid.
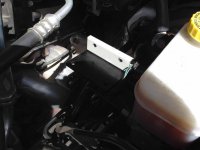
IMG_0232.jpg

I got the starter type solenoid ready and found two bolts that would work well in attaching the solenoid to the small angle metal I had attached to the ARB Compressor Mounting bracket. I purchased the solenoid at a local Auto parts store and they seemed to know immediately what I wanted, they said this particular one is used all the time for the low-rider hydraulics, so they had plenty of them.
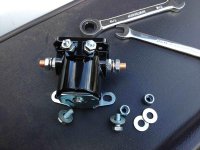
IMG_0233.jpg IMG_0234.jpg

Bought starter cable and soldered the right ends I needed with shrink tubing - it's in the lower right of this picture:
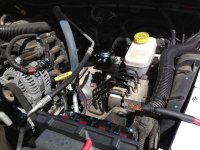
IMG_0235.jpg

This is where I had my winch line running to and knew things were going to get cramped there with the new Bussman relay/fuse box from pvanweelen's great thread. Rerouting the line took a little time in getting it over to the other side of the engine bay:
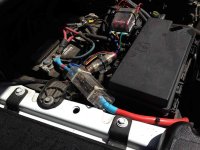
IMG_0236.jpg

I next ran the starter size wire from the alternator to the solenoid mounted earlier:
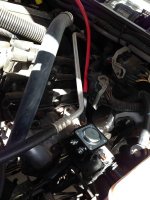
IMG_0237.jpg IMG_0238.jpg

Finally I attached the winch line to the solenoid with the 300amp fuse I had earlier.
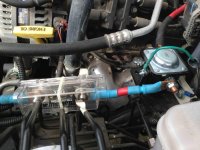
IMG_0476.jpg

Running the 14 gauge wire from the Bussman relay/fuse box to there was a breeze and now my Winch switch on the cabin Daystar panel operates the large solenoid providing ample power to my winch and ample fusing.
I probably will go with a circuit breaker later for the winch line but for now this has worked well.

BTW - the best Rootbeer out there:
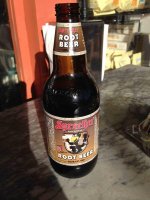
IMG_0239.jpg

Cheers!
 
Ditto on the metal clips that were on your original mesh insert - you should have taken those off and put them on the daystar.
Also keep in mind - you have to really PUSH DOWN on the daystar panel so that the lower hooks snap into the two bottom attachments in the dash, it took a considerable amount of pressure for mine to finally snap in, from there (with the metal pieces up above) it snapped right in and has stayed put.

Still not sure why I have orange plastic clips instead of metal ones?:idontknow: Either way, it seemed I just wasn't being "manly" enough lol, just pressed real hard and it looks like it's staying put. thanks for the help!
 

pastorwug

New member
Still not sure why I have orange plastic clips instead of metal ones?:idontknow: Either way, it seemed I just wasn't being "manly" enough lol, just pressed real hard and it looks like it's staying put. thanks for the help!

You know what, you're not going nuts, I am - they were orange plastic clips, not metal ones (old age) - hope you used them and they stay now.
 
Here's a pic of the daystar mounted to the center console, 07-11 jk's can do this, 12 or newer has the power inverter here. This is a little tricky as the cut has to be perfect, and it is hard to slip the daystar under the mounting tabs to the inside of the center console, but I did it for my 2nd set of switches.
View attachment 64113

I like that spot. That's pretty cool and convenient. Anything to make us lazier. lol.
 

pvanweelden

New member
^ thanks for the awesome addition of the solenoid winch power write up Pastorwug! :thumb: :rock:

and thanks DunnyBunny- so far, I enjoy the switches in the center console a hundred times over reaching up above the mirror!
 

Jeep_Dawg08

New member
I have a question... i am planning on this, but for a main power switch I was gonna use the factory fog light switch on the turn signal...
My question how do I get the power to not shut off while the high beams r on??

●|||||●
 

pvanweelden

New member
You would have to cut the wires right after the factory fog light switch, before they go to anything else

Sent from my SM-N900V using WAYALIFE mobile app
 
Top Bottom