GraniteCrystal build thread

GraniteCrystal

New member
OK, setting aside issue of bump stop for now so I can finish the rear. First problem of the day: stripped lug nut. Anyone seen this before? How did it happen? How do I get it off? The thing is bulged outward like it just took too much pressure or something
 

Attachments

  • 1467571479081.jpg
    1467571479081.jpg
    70.5 KB · Views: 312
  • 1467571492416.jpg
    1467571492416.jpg
    79.6 KB · Views: 318
OK, setting aside issue of bump stop for now so I can finish the rear. First problem of the day: stripped lug nut. Anyone seen this before? How did it happen? How do I get it off? The thing is bulged outward like it just took too much pressure or something

That sucks. Discount Tire stripped one of mine once putting on new tires.
 

GraniteCrystal

New member
Problem solved! I was afraid I was dealing with a stripped stud on my Spidertrax spacers, but I was more fortune than that. Turns out the lugs have a case on them and that's what was blown. I took a chisel, used a mallet to hammer it into the center of the lug, then took pliers and pried the case off. Underneath was a perfectly good lug that I could put an 18mm socket on and it came right off. Stud on spacer is completely fine.
 

Attachments

  • 1467573446814.jpg
    1467573446814.jpg
    79.6 KB · Views: 271
  • 1467573455564.jpg
    1467573455564.jpg
    85.4 KB · Views: 265

Journeyman

New member
Problem solved! I was afraid I was dealing with a stripped stud on my Spidertrax spacers, but I was more fortune than that. Turns out the lugs have a case on them and that's what was blown. I took a chisel, used a mallet to hammer it into the center of the lug, then took pliers and pried the case off. Underneath was a perfectly good lug that I could put an 18mm socket on and it came right off. Stud on spacer is completely fine.

I've never experienced this. But I was advised by a friend to replace these to one piece lug nuts when I upgraded my wheels and tires, for this exact reason. Glad to seeing worked out.
 

GraniteCrystal

New member
I've never experienced this. But I was advised by a friend to replace these to one piece lug nuts when I upgraded my wheels and tires, for this exact reason. Glad to seeing worked out.

Got the link for the ones that you put on yours? Or did you just get them from the dealership?
 

GraniteCrystal

New member
Back at it tonight. Putting on rear sway bar links. Eddie's write up has the grease fittings racing forward. Didn't make sense to me and TF calls out they should face rear, so I'm removing and flipping them around.
 

Attachments

  • 1467601463584.jpg
    1467601463584.jpg
    76.5 KB · Views: 244

GraniteCrystal

New member
Next issue: break lines don't fit in brackets. I can still bolt everything but the old bracket doesn't fit in the groove of the new bracket with holes lining up. I think it'll be alright though.
 

Attachments

  • 1467604319663.jpg
    1467604319663.jpg
    68.7 KB · Views: 236

GraniteCrystal

New member
Done. Still need to realign steering wheel and release bound up bushings (recommended not required) but I drove it tonight, just in front of the house. Can tell I'm higher up and it looks a ton better without the rake. I'll post pics tomorrow.

All in all, about 20 hours. Longer than expected. Would've been shorter if I hadn't run into some hiccups along the way. An impact wrench would help too.
 

JeepJeep75

New member
Done. Still need to realign steering wheel and release bound up bushings (recommended not required) but I drove it tonight, just in front of the house. Can tell I'm higher up and it looks a ton better without the rake. I'll post pics tomorrow.

All in all, about 20 hours. Longer than expected. Would've been shorter if I hadn't run into some hiccups along the way. An impact wrench would help too.

Nice job dude!! After installing my Enforcer lift I'm pretty beat up too. All hand tools and crawling around on the ground isn't as easy as when I was 20 something. An impact gun is now at the top of my wish list.
 

GraniteCrystal

New member
Completed pics

Here are some before and after pics. Left column is before. Right column is after.
BeforeAndAfter.jpg

And here are some more after pics (our road slopes down from right to left)
IMG_20160704_102624.jpg
IMG_20160704_105620.jpg

Also, this happened last night. That's a rope tied from roof rack to tree in order to line up the rear tie rod. Desperate times. Desperate measures.
IMG_20160703_235235.jpg
 

GraniteCrystal

New member
3rd break light mod

Ok, I haven't seen this exact version of 3rd break light relocation anywhere but I'm sure it's been done before. Nonetheless, I'm proud of how it turned out since I was making it up as I went along. It was inspired by a pic from BdugJK.

What you need:
Dremel with cutoff wheel
Blue painters tape (other tape would work too)
2-3 hours

Here is the finished version so you can see what we're going for:
IMG_20160702_094834.jpg

First, while the tire is still on, put some blue tape up at the highest level you want the light so it still shows between the slots in the wheels.
IMG_20160701_173347.jpg

Next, unmount the brake light by removing the 4 torx screws on the back. Mark it off a few inches from the bottom so that it will sit at the right height:
IMG_20160701_173756.jpg

After the cut:
IMG_20160701_180106.jpg

Next, use tape to mark out the shape of the cuts. I have a right angle in mine, but you could do a nicer sloped cut to match the contour of the top piece.
IMG_20160701_181621.jpg

IMG_20160701_183126.jpg

IMG_20160701_195336.jpg

Next, remove the actual light from it's housing so it's just the metal portion. Now cut some slots in the metal portion so it can slide over the lower mount:
IMG_20160702_072557.jpg

Post cuts you can see how it fits over the bottom portion:
IMG_20160702_082251.jpg

IMG_20160702_082303.jpg

Next up, trim off the rest of the base piece so it just comes up to the top of the light holding piece:
IMG_20160702_090944.jpg

Next, place a large piece of cardboard over the bottom portion and spray paint the cuts:
IMG_20160702_091801.jpg

IMG_20160702_093825.jpg

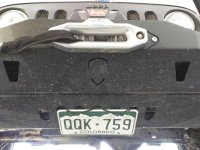
Here is the final product:
IMG_20160702_094358.jpg

IMG_20160702_094852.jpg

IMG_20160702_094834.jpg
 
Last edited:

GraniteCrystal

New member
Got sick of the license plate under my seat, so I zip tied it to the front bumper skid. Anyone had issues with it falling off when attached like this?
 

Attachments

  • 1467689114492.jpg
    1467689114492.jpg
    92.2 KB · Views: 313

8POUND

New member
Yes they do, but most LEO don't worry too much about it. Stay out of Downtown Denver though. It's a $75 ticket. That's why I put my front plate on my skid plate. It's low, but legal.
 

AllAmericanInfidel

Caught the Bug
Got sick of the license plate under my seat, so I zip tied it to the front bumper skid. Anyone had issues with it falling off when attached like this?

Have you seen the JCR front plate mount? I'm considering it because Hawaii requires a front plate. I've also though about just mounting it to the front grill lol.
 
Top Bottom