EVO rear corner Skin QUESTION

JKFlyer

New member
Hey everyone

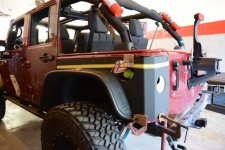
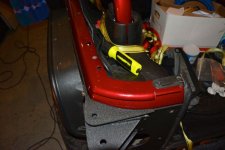
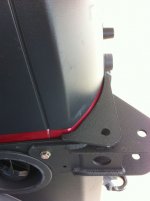
question for those of you with evo skins - i ordered the EVO rear tire carrier and skins. Normally I would install myself, but this is a tough one (and i dont mesh well with rivets) so my shop started the install today. During their test fit, they said there was a 1/8-1/4 gap along side and aroudn actual corner, it was more like 1/4-3/8 gap. this is looking down from the top where skin meets the body of Jeep. Because the CB mount tab is welded at corner, they said there is no real way to bend it or make it fit tighter. They have done plenty of other skins like Poison Spyder that form better (i knew this going in), but this is their first with the EVOs and they really want to do it right. As we all know, you must use the EVO skins with the EVO tire carrier.

of course they said they will fill in the gap with black silicone and hide it best as possible, but IS THIS NORMAL? in looking at pics on google, seems as if the skins sit flush (but maybe they are hiding it well).

Input appreciated!! or any tricks of the trade appreciated.

Thx
 
Last edited:

biggy

Member
You should not have any gaps along the side. Mine have about a 3/16 gap around the corner. Once you RTV the gap it's not noticeable imo.
Sent from my SM-N900W8 using WAYALIFE mobile app
 

JKFlyer

New member
Sorry, what does rtv mean? Also, does gap go away slightly once you tighten screws on to rivets during final assembly?

Sent from my DROID RAZR HD using WAYALIFE mobile app
 

cozdude

Guy with a Red 2-Door
I think ratchet straps are used to snug it up to the body before holes are drilled.

^^^What moochie said. I obviously haven't done the install but I have read plenty of times of guys using ratchet straps to get them to form right.


Sent from my iPhone
 

biggy

Member
I used a big c clamp through the taillight and another above the wheel well. Also a ratchet strap from the rear door striker to the striker of the tailgate. Not sure if that makes any sense .

Sent from my SM-N900W8 using WAYALIFE mobile app
 

13WhiteRubi

New member
If you are talking about the gap at the very back corner that is normal and is designed to be there. That is where the tire carrier will mount. If you need a pic let me know and I'll go take a pic of mine.
 

JKFlyer

New member
If you are talking about the gap at the very back corner that is normal and is designed to be there. That is where the tire carrier will mount. If you need a pic let me know and I'll go take a pic of mine.

Yup...so I am thinking that seems normal at corner. Its on the sides too though they said...but a smaller gap. About 1/8. I know they didn't have it ratcheted down though

I used a big c clamp through the taillight and another above the wheel well. Also a ratchet strap from the rear door striker to the striker of the tailgate. Not sure if that makes any sense .

Sent from my SM-N900W8 using WAYALIFE mobile app

It does make sense. Thank you


Sent from my DROID RAZR HD using WAYALIFE mobile app
 

piginajeep

The Original Smartass
I used a big c clamp through the taillight and another above the wheel well. Also a ratchet strap from the rear door striker to the striker of the tailgate. Not sure if that makes any sense .

Sent from my SM-N900W8 using WAYALIFE mobile app

This works perfect. There should not be gaps anywhere.

Poison spyder is stamped using a thinner metal. It's for sure form fitting.
 

wayoflife

Administrator
Staff member
This works perfect. There should not be gaps anywhere.

Poison spyder is stamped using a thinner metal. It's for sure form fitting.

What he said. Also, there will be a slight gap but some silicon will fill it in just fine. The PS corners are just AEV corners with extensions welded onto them. As mentioned, they are form fitting but only because they are thin and stamped.
 

Sc741

Member
Well the skins were a perfect fit but it took some massaging and a lot of patience. One side flare is slightly tight against the skin but otherwise no issue at all. My flares were already mounted obviously so I could make any adjustment that was needed. The hard part was the corners. Getting them close to the body took a lot of clamping. More than what is depicted in the photo. I used an air nutsert gun so that part went very quickly.
 
Top Bottom