Earlier in the year, our 1997 Jeep XJ Cherokee developed a coolant leak that was small enough to ignore for a while but over time, it grew to the point that I knew it needed to be addressed. Hoping that it was just a loose lower hose clamp or cracked hose, I started there but as luck would have it, everything was tight and the hose was in good enough condition to not be the source of the leak. Needless to say, the coolant was most likely oozing out of the water pump weep hole and that meant it was time for it to be replaced. Fortunately, a Jeep 4.0L water pump is a common part, can be found at just about any autoparts store and for cheap. And, since I was going to have to pull a lot other parts to get to it, I decided to use the opportunity to replace the thermostat and fan clutch at the same time too. If you're in need of replacing your XJ's water pump, this step by step write-up should be able to help you out.
What you will need
• Jeep XJ Cherokee 4.0L Water Pump & Gasket
• Jeep XJ Cherokee 4.0L Thermostat & Gasket
• Jeep XJ Cherokee 4.0L Fan Clutch
• 8, 13, 15mm Sockets & Wrenches
• 1/2" Wrench
• Ratchet
• Ratchet Extension
• Flathead Screwdriver
• Phillips Screwdriver
• Hammer
• Gasket Scraper
• Teflon Tape
• Bench Vice
• Wire Brush
• Emery Cloth
• Coolant
• Bucket
• Paper Towels
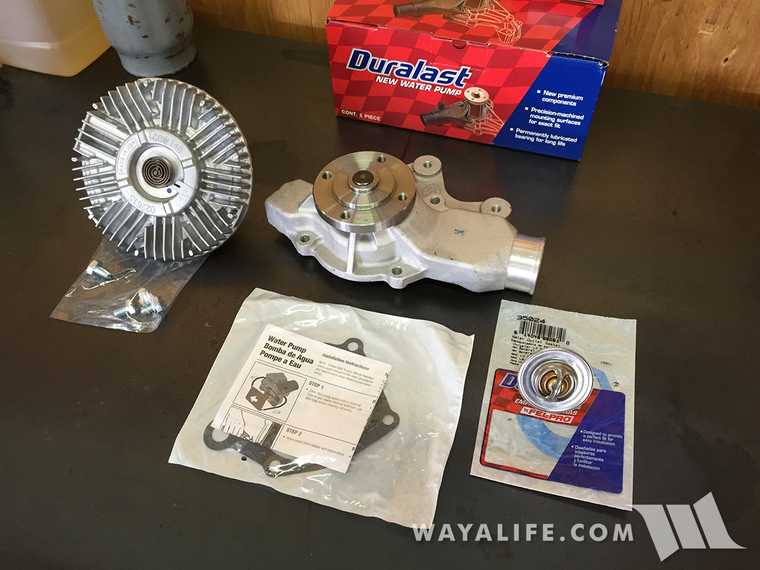
Shot of all the new parts I got.
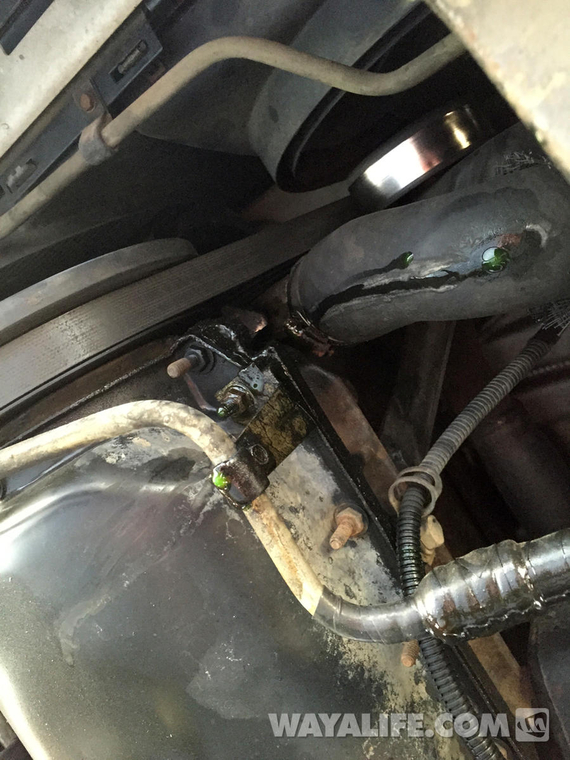
Here's a shot of the coolant leak I was seeing under my XJ.
Instructions
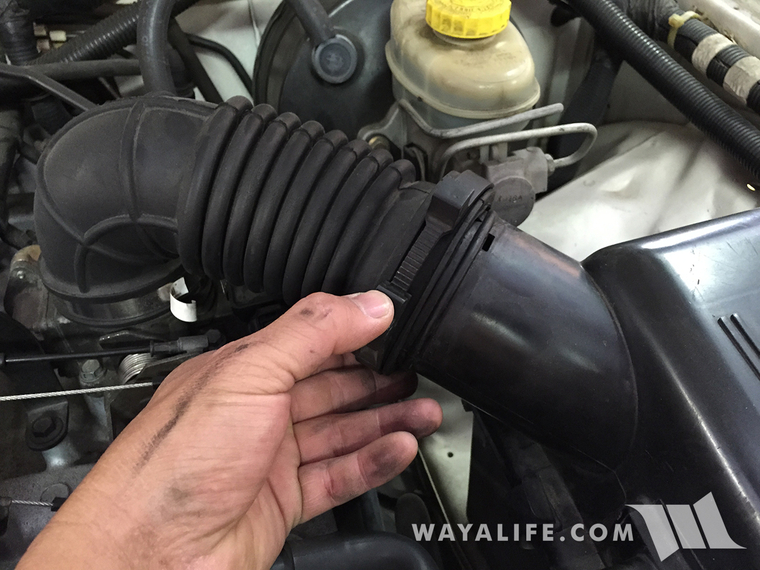
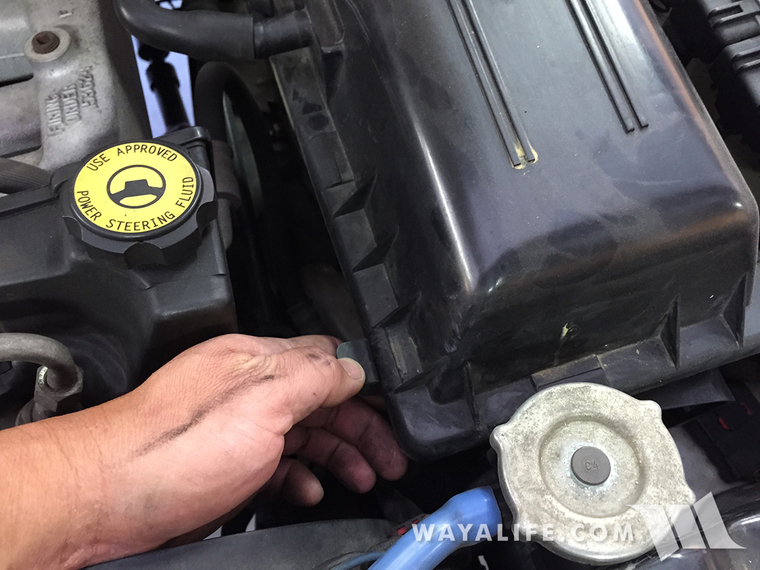
1. Start off by disconnecting your air intake tube from the air box. To do this, simply lift up on the plastic clamp and pull back as shown in the photo below.
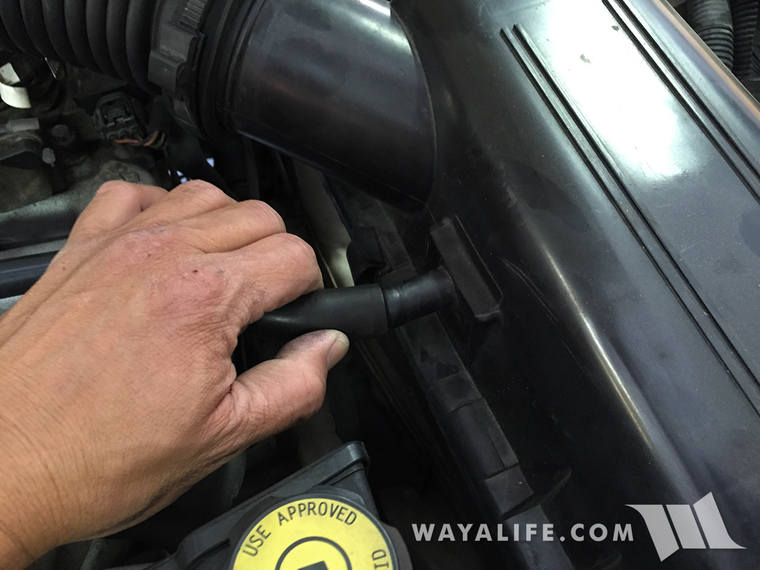
2. Firmly grasp the PCV tube and wriggle it free from the port on the air box.
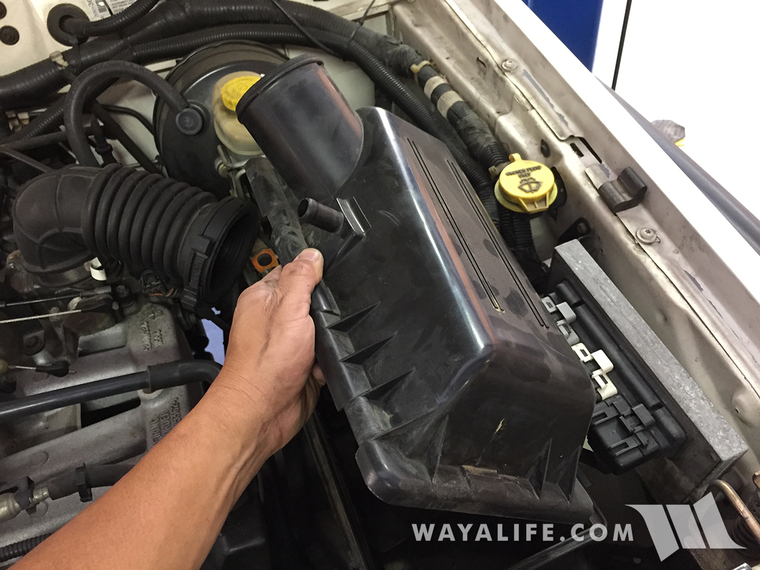
3. Release the 3 clamps securing the lid of your air box.
4. Remove the air filter and then remove the air box lid.
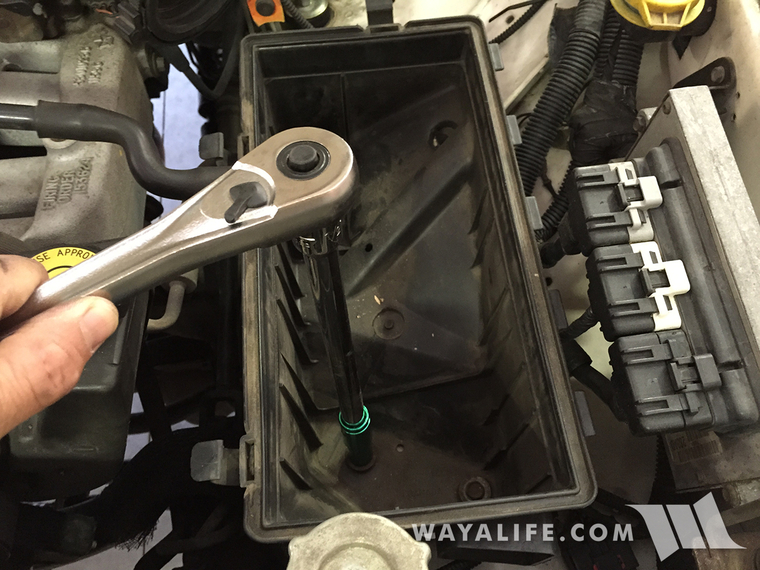
5. Using a 13mm socket and ratchet extension, remove the 2 bolts and 1 nut securing the air box to the body of your Jeep.
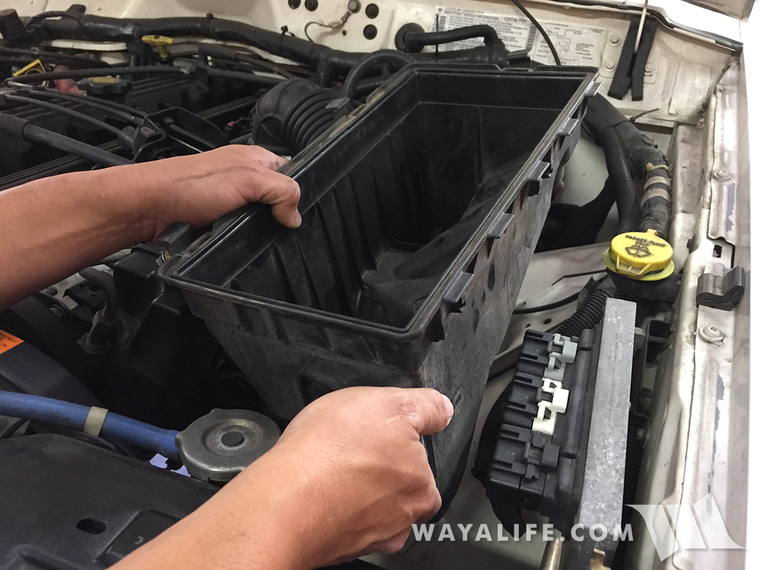
6. Remove the air box from your Jeep and set it aside.
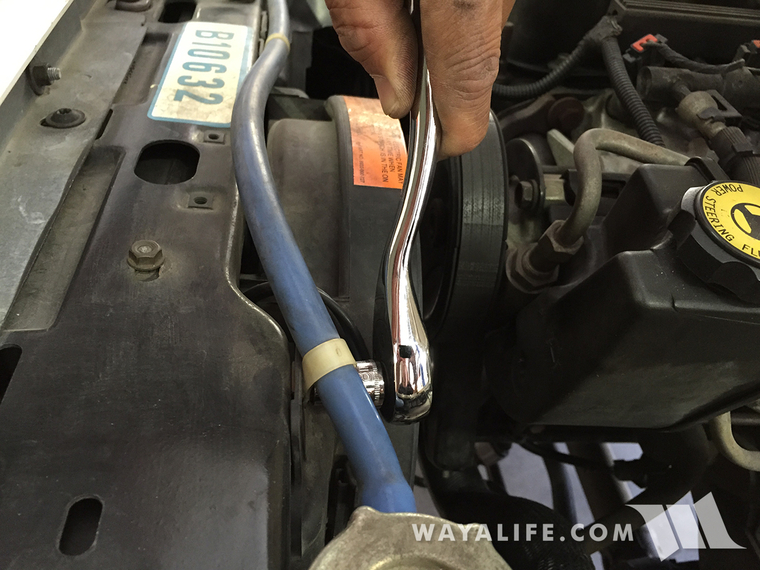
7. Using an 8mm socket, remove the 2 screws securing both your radiator overflow hose and electric fan to the front of your Jeep.
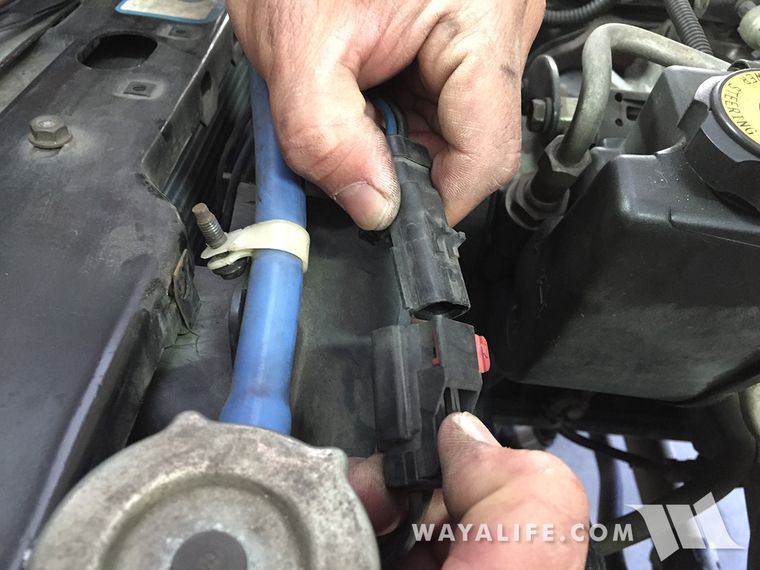
8. Take the plug for your electric fan, slide the lock tab out and then separate the ends by squeezing on the release tab.
9. Wriggle the radiator overflow hose off the radiator fill neck.

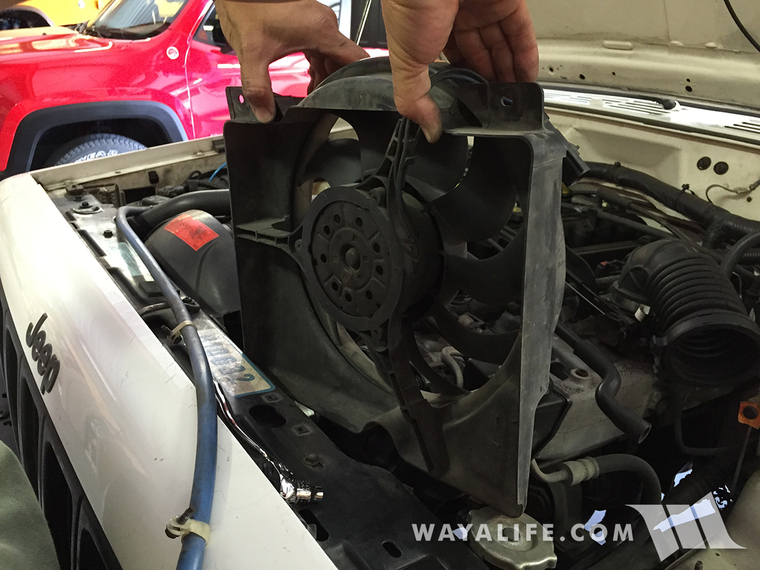
10. Lift the electric fan up and out of your Jeep's engine compartment.
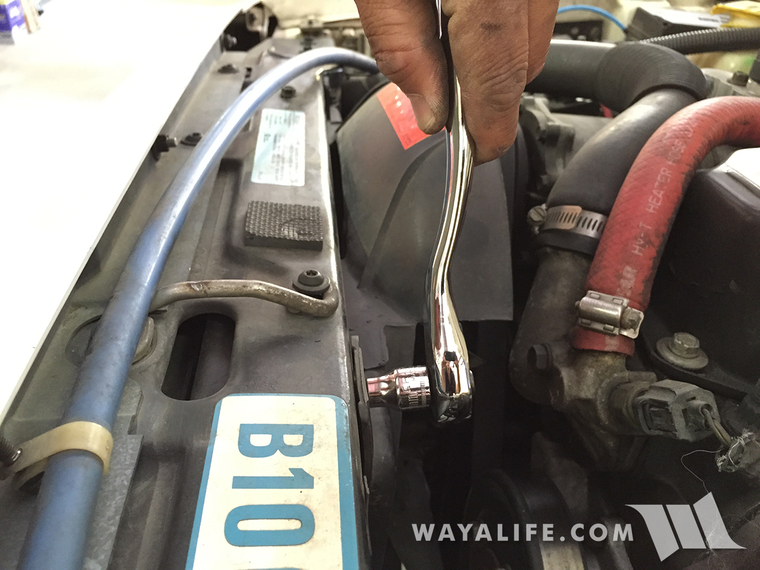
11. Using an 8mm socket, remove the 2 screws securing the fan shroud to the front of your Jeep.
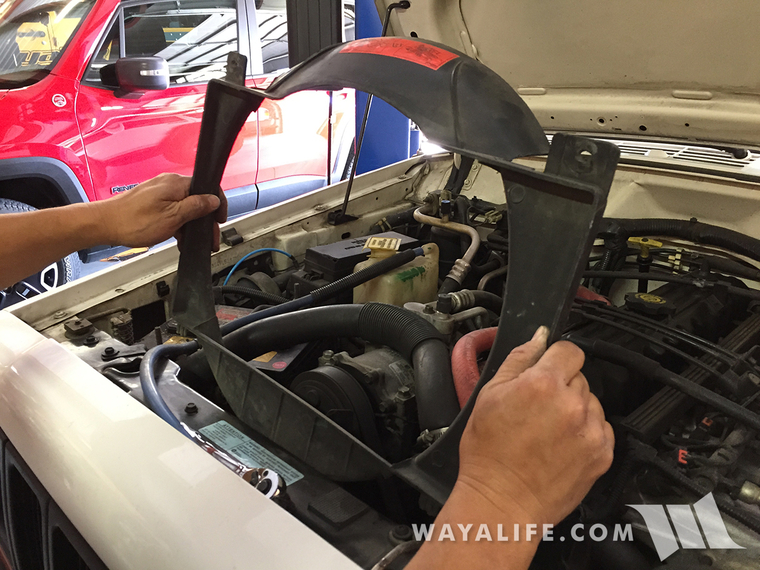
12. Carefully lift the fan shroud up and out of your Jeep's engine compartment. You will have to work it around the mechanical fan and fan clutch and you'll want to take care not to bump into the fins of your radiator as you do this.
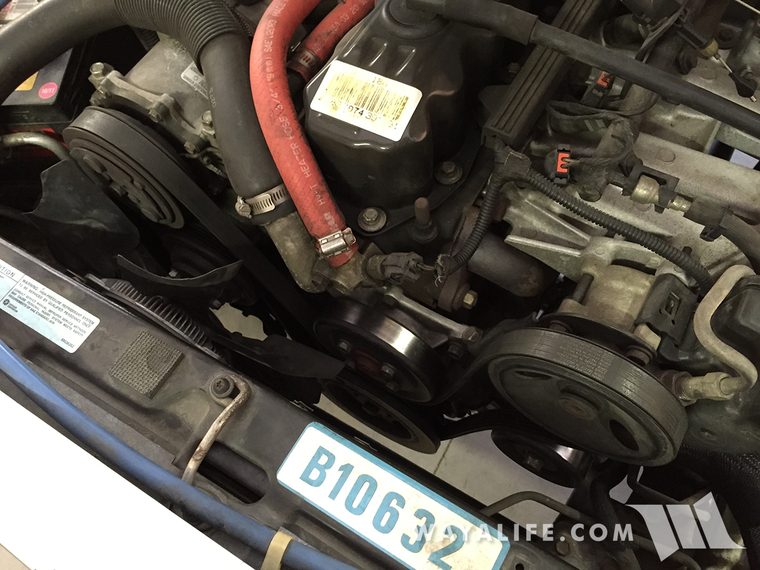
13. Using a 15mm socket, loosen the bolt securing your idler pulling in place.

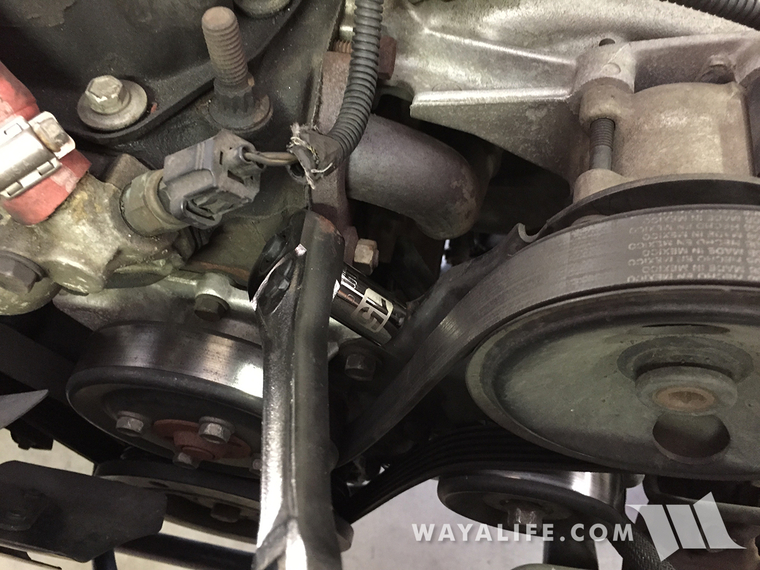
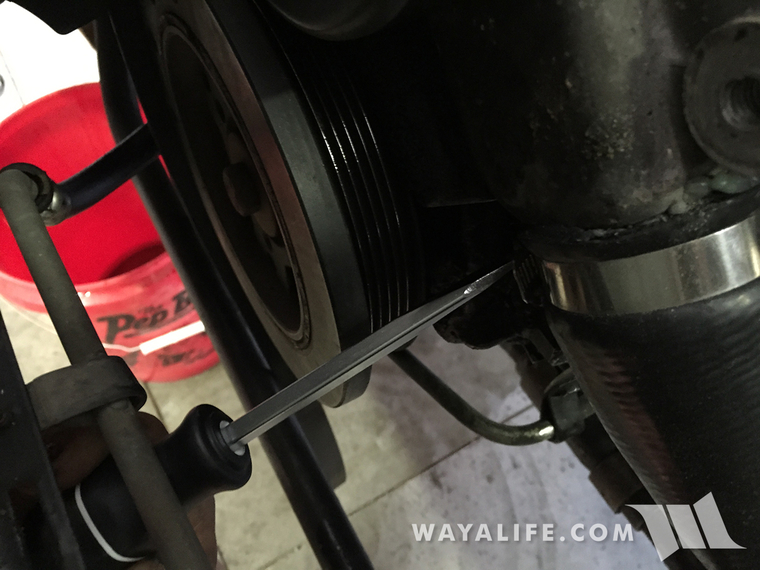
14. Using a 15mm socket, loosen the serpentine belt adjuster as shown in this photo.
15. If you no longer have a diagram of your serpentine belt on the fan shroud, take a moment to photograph it with your phone. You can use it as a reference when reinstalling it later.
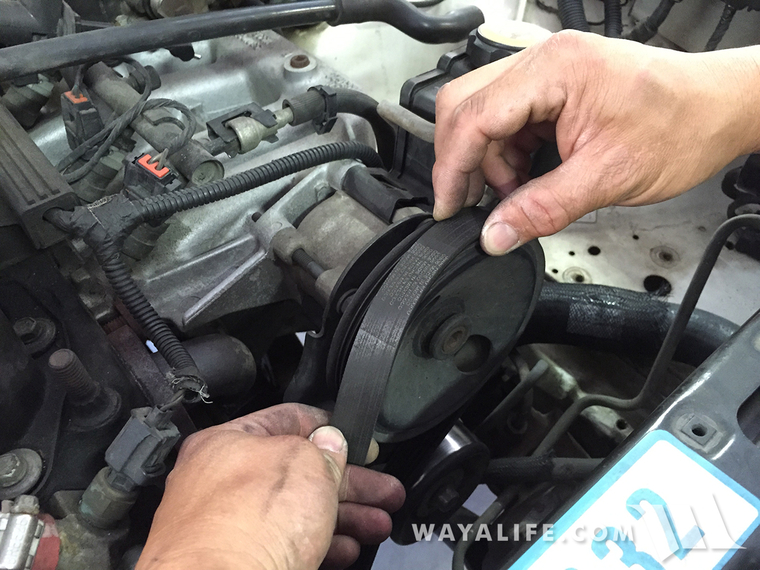
16. Remove your serpentine belt and examine it carefully. If it shows signs of cracking especially across the grain, you should plan on replacing it. If it's still in good shape, set it aside for now.
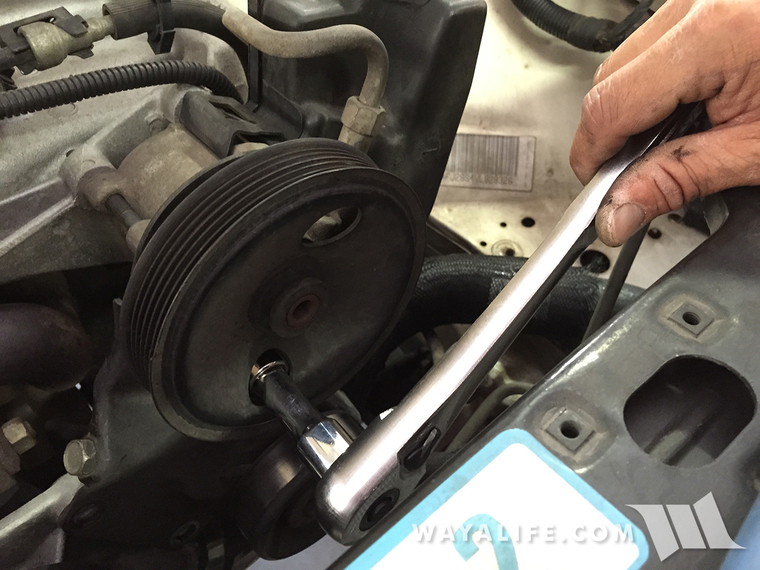
17. Using a 15mm socket, remove the 2 bolts securing the front of your power steering pump bracket to the water pump housing.
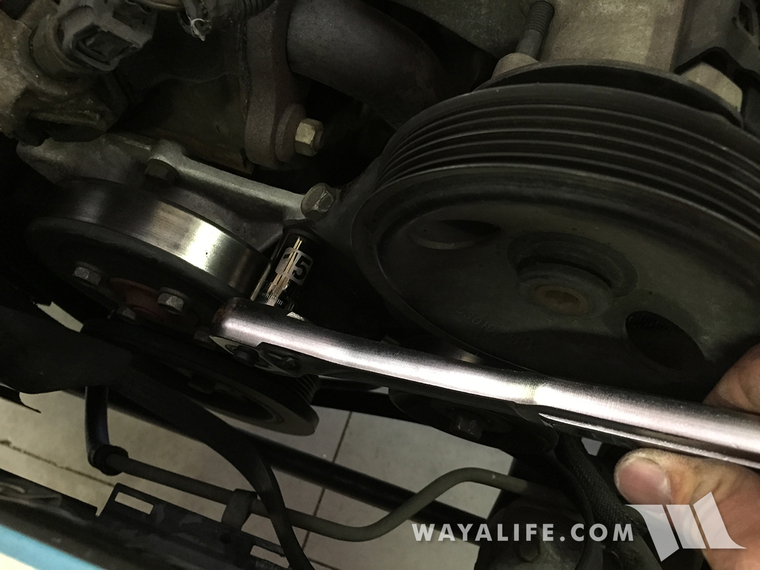
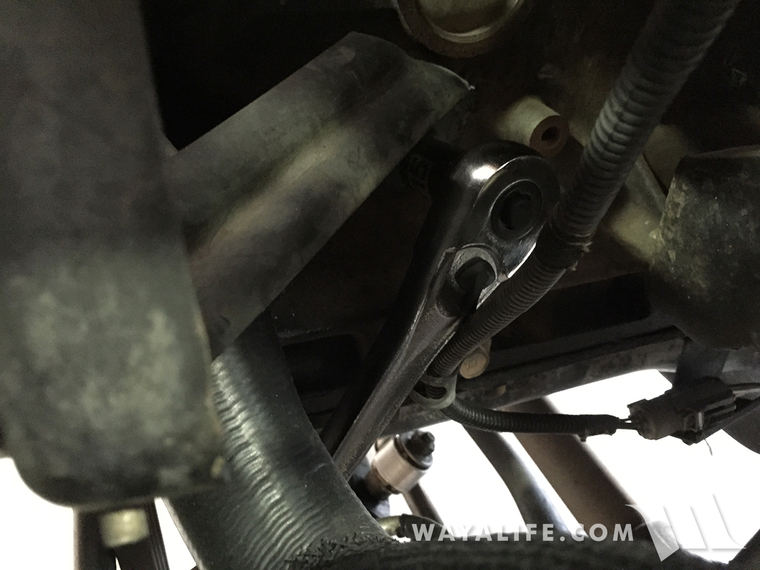
18. Using a 15mm socket, remove the bolt securing the power steering pump support brace to the engine block.
19. Using a 13mm socket and ratchet extension, remove the 3 bolts securing the power steering pump to the intake manifold. You will need to rotate the pulley so that the 2 openings allow access to them.
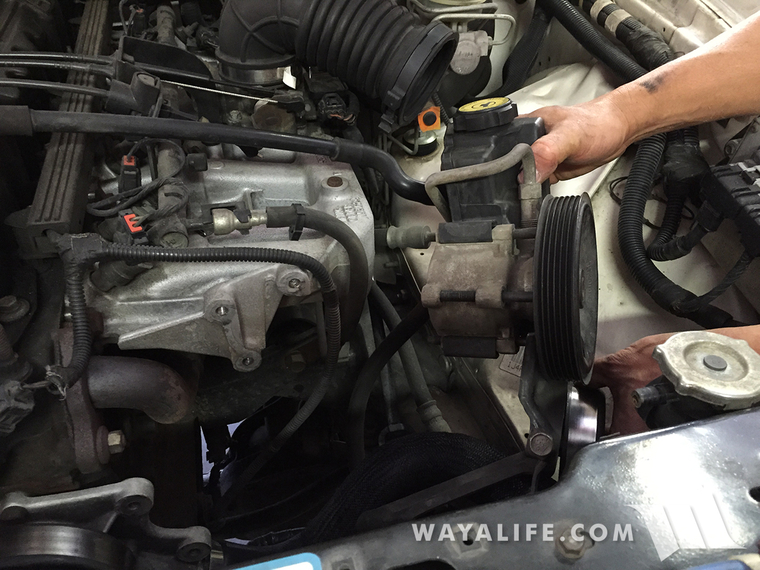
20. With the power steering pump free of the engine block, pull it aside and rest it on the fender well to give you more room to work with.
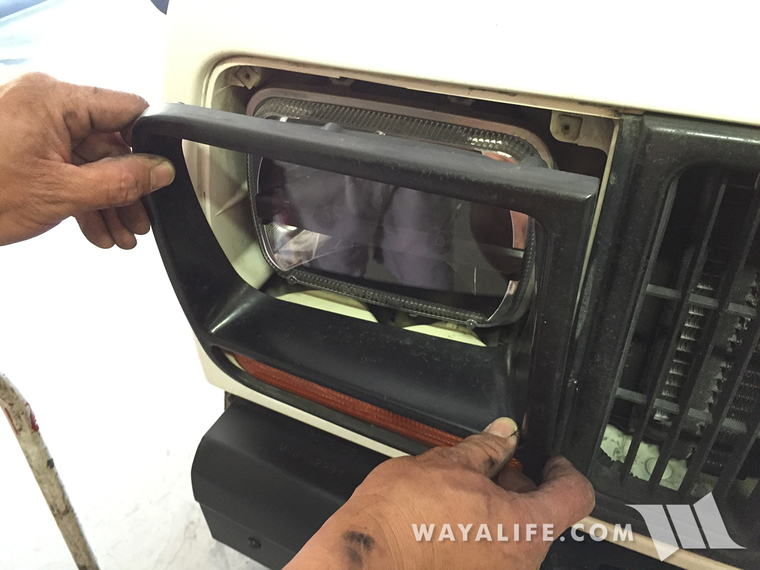
21. Using a phillips screwdriver, remove the 2 screws securing the head light bezels to the front of your Jeep.
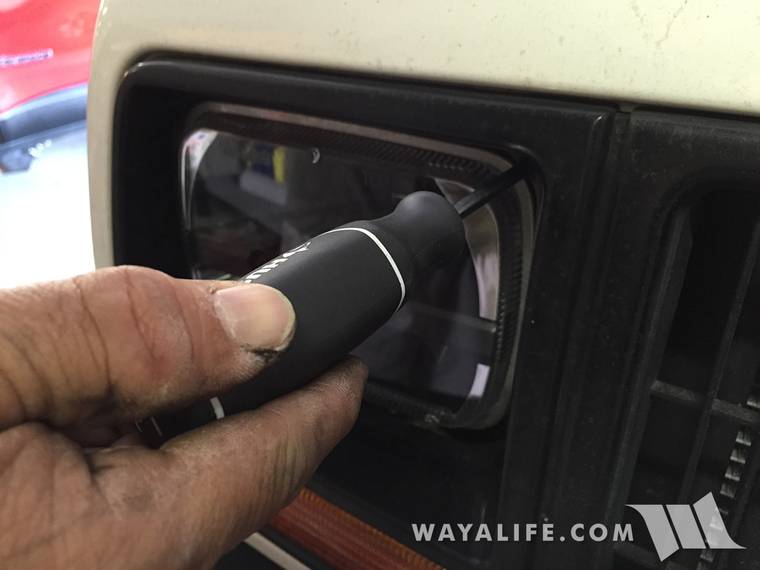
22. Remove the bezels and set them aside.
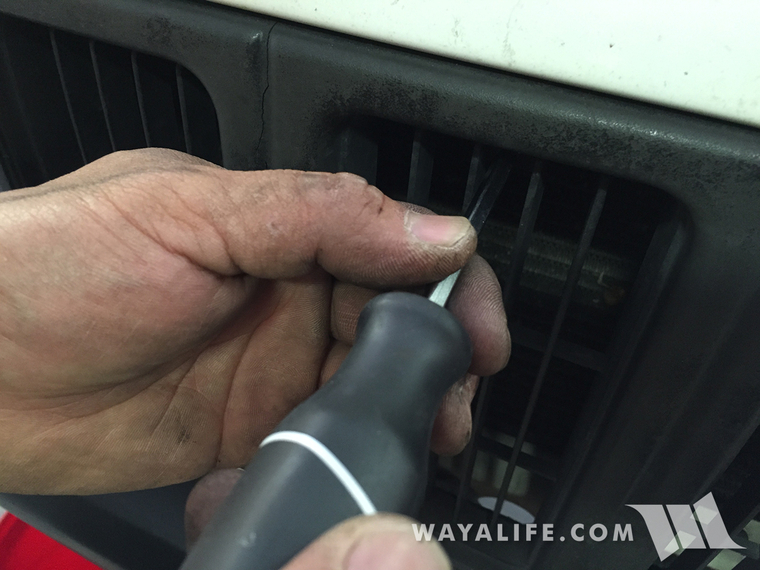
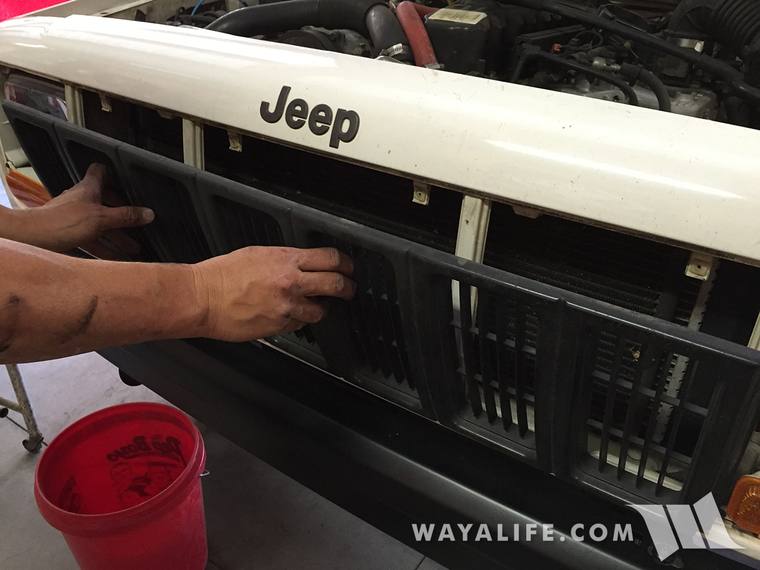
23. Using a phillips screwdriver, remove the 4 screws securing the plastic grill to the front of your Jeep.
24. Remove the grill and set it aside.
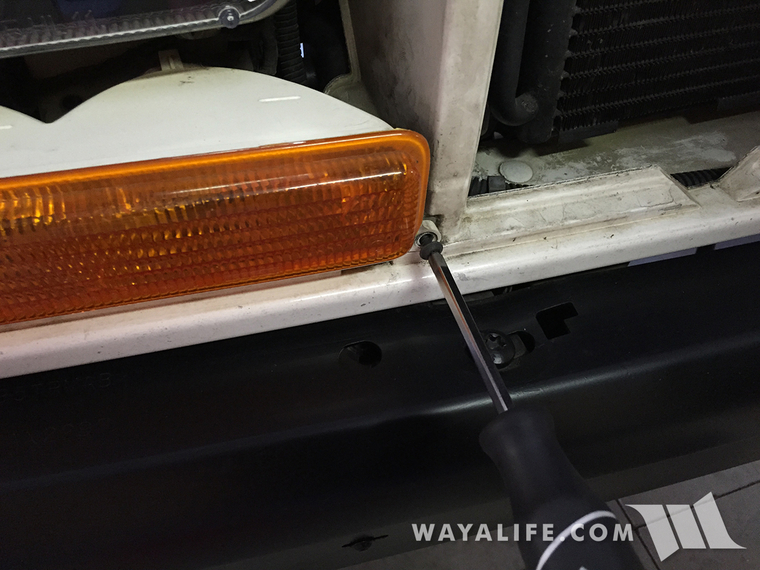
25. On the passenger side of your Jeep, use a phillips screwdriver to remove the 2 screws securing your indicator light in place.
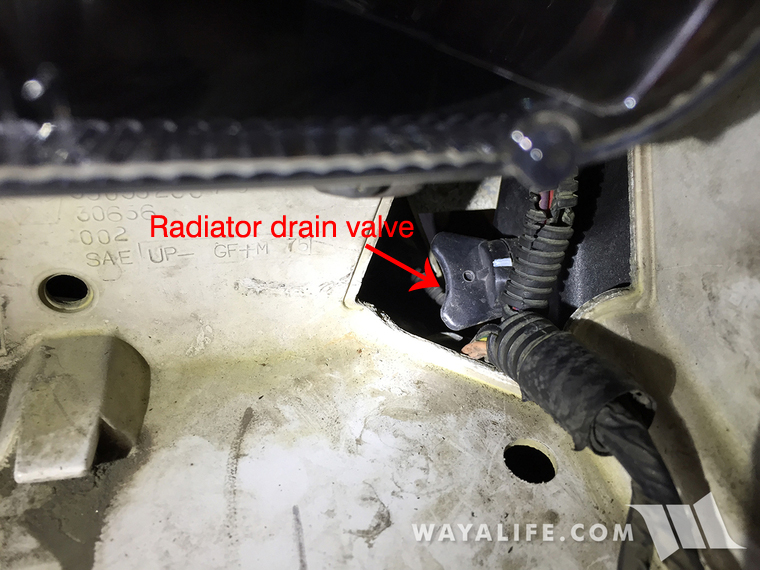
26. Place a bucket underneath your Jeep and open up the petcock valve to drain the radiator. This valve is located behind where your passenger side indicator light was.
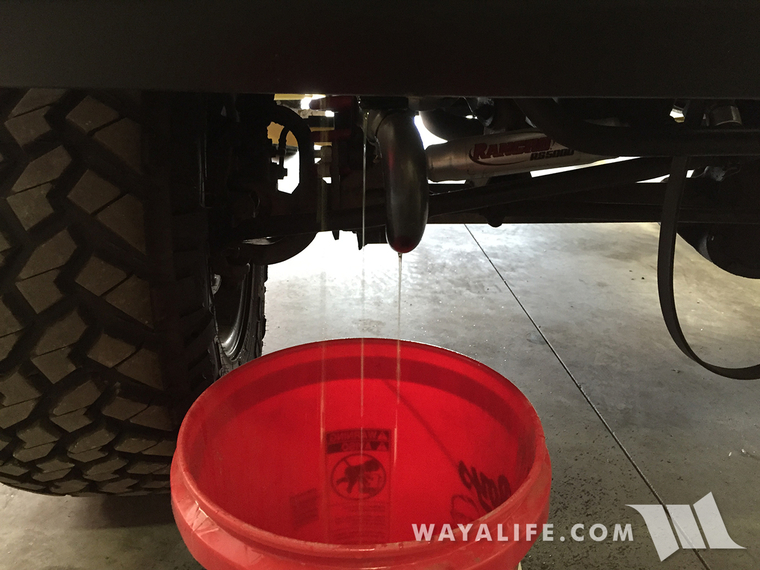
27. Allow your radiator to drain completely before proceeding.
28. If your lower radiator hose is secured to the water pump with a hose clamp, use a flat head screw driver to loose up the clamp.
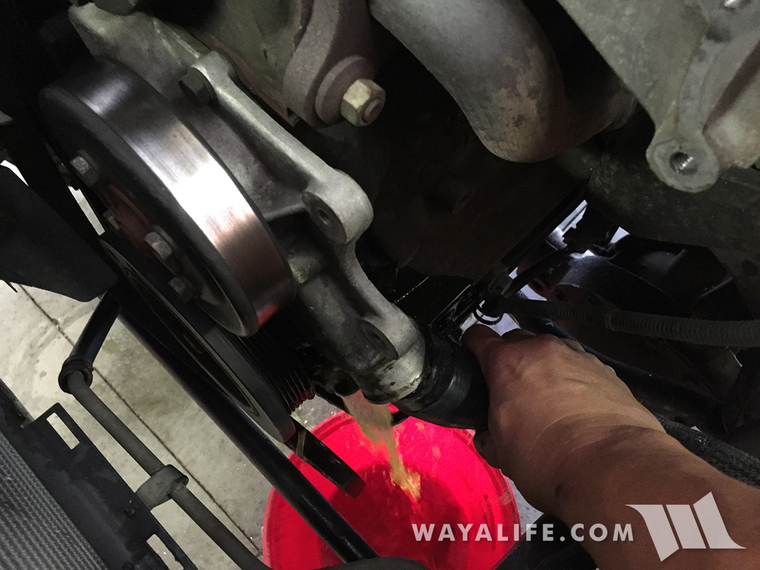
29. Move your bucket underneath your water pump, carefully pry off the lower radiator hose and allow it to drain into the bucket.
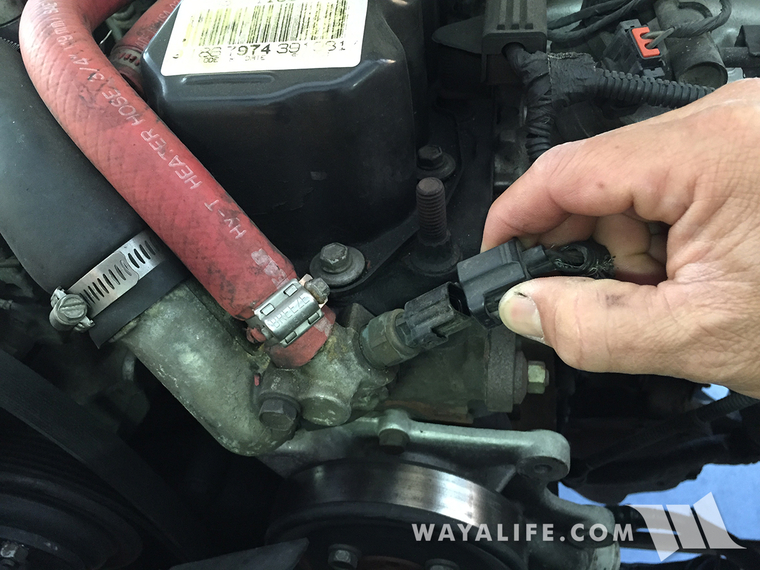
30. On your Jeep's thermostat housing, take a hold of the temperature sensor plug, slide the lock tab to the open position and unplug it by squeezing on the release tab and pulling it off.
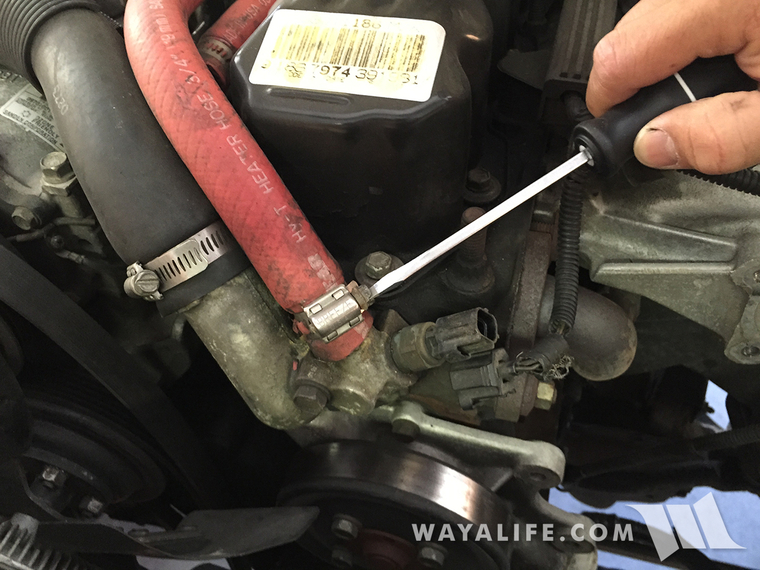
31. Use a flat head screw driver to loosen the hose clamp securing the heater hose to the thermostat housing and then pull it off.
32. Use a flat head screw driver to loosen the hose clamp securing the upper radiator hose to the thermostat housing and then pull it off.
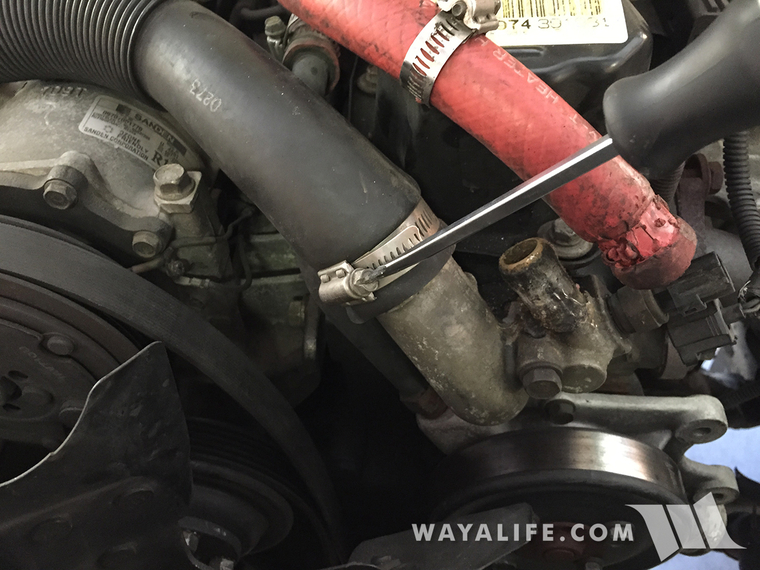
33. Use a flat head screw driver to loosen the hose clamp securing the heater hose to the tube extending off the water pump and then pull it off.

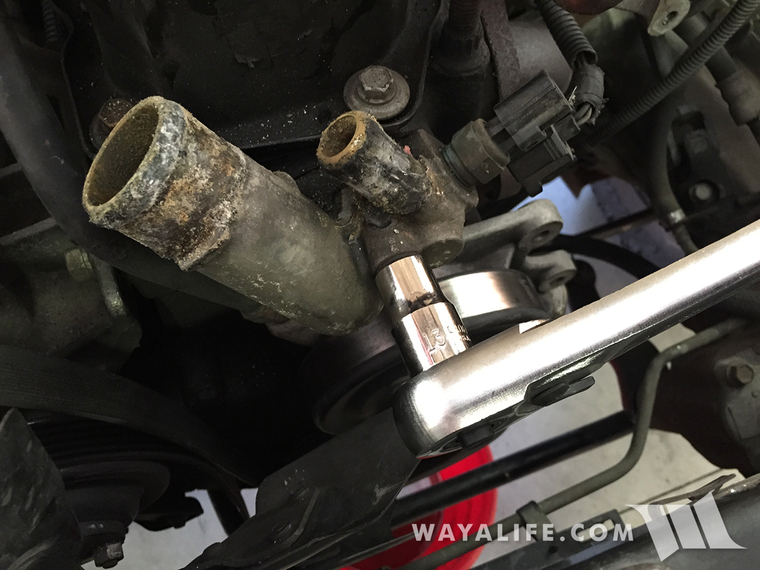
34. Use a 13mm socket to remove the 2 bolts securing the thermostat housing to the engine block.
35. Pry the thermostat housing off the engine block.
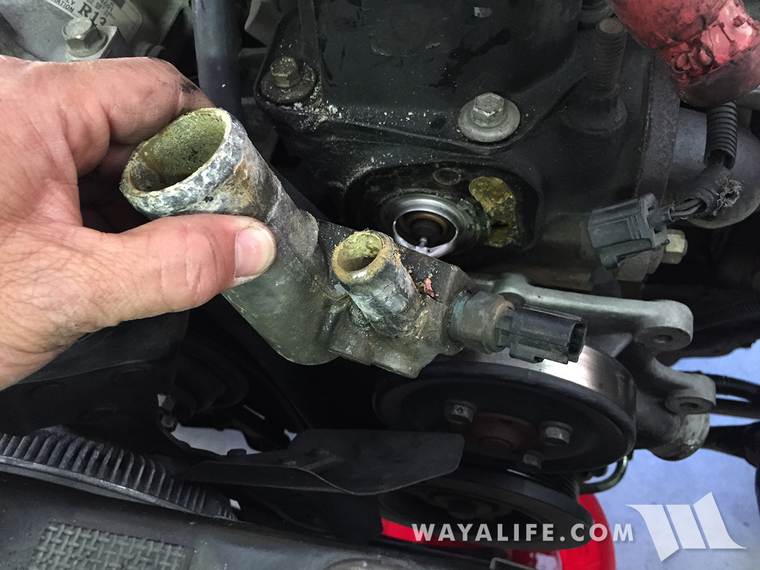
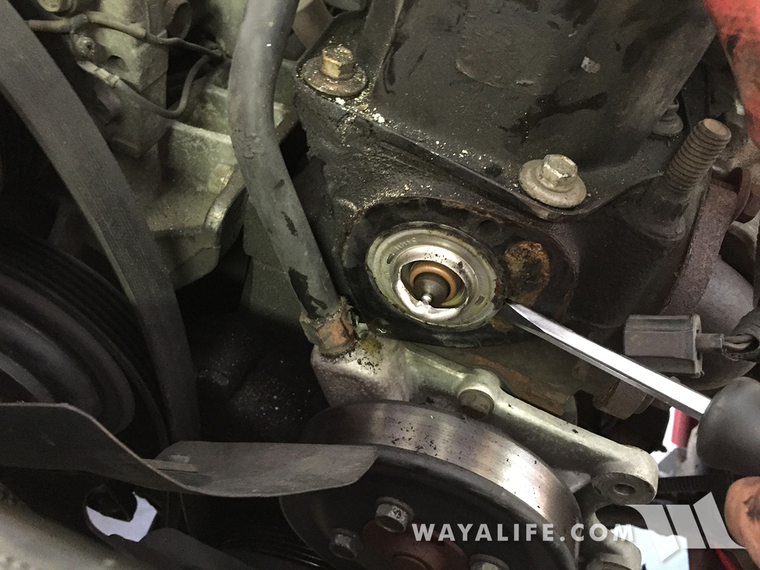
36. Use a flathead screw driver to help pry off the thermostat from the engine block.
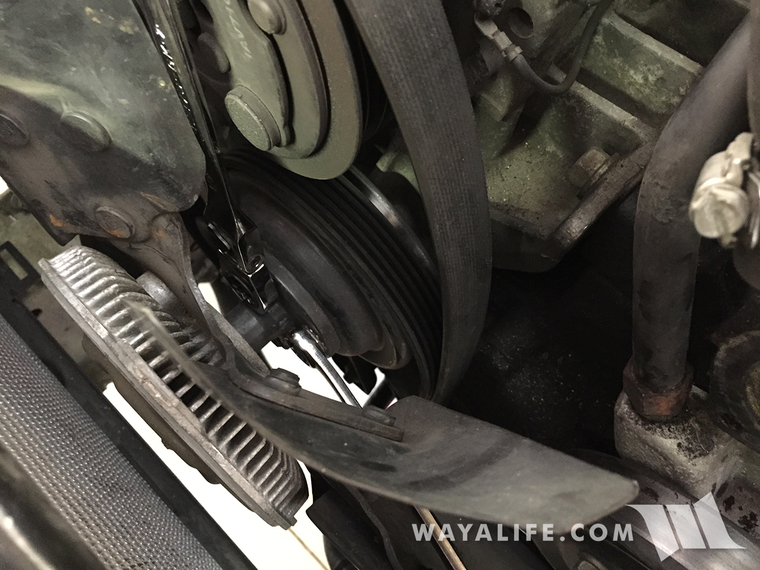
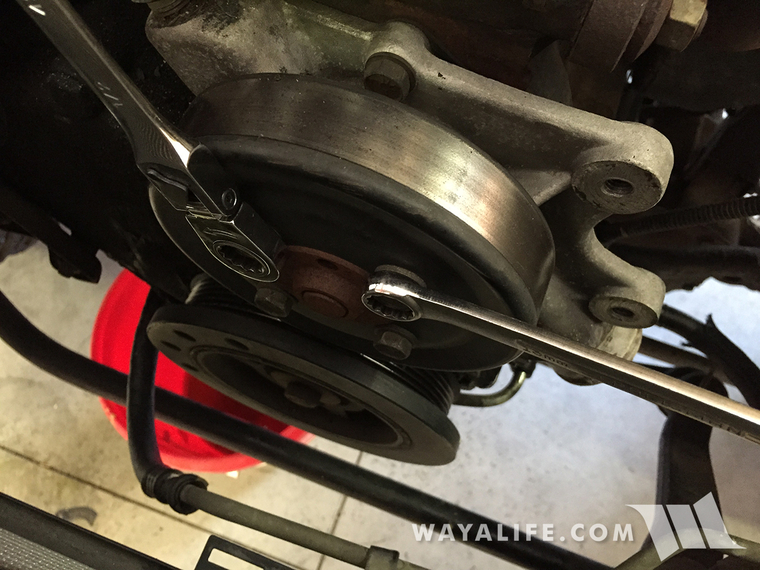
37. Using a 13mm and a 1/2" wrench, remove the 4 nuts securing the mechanical fan and clutch to the pulley. You can use one of the wrenches to hold the pulley in place while using the other to remove the bolts as shown.
38. Carefully remove the fan from the pulley studs being careful not to hit the radiator.
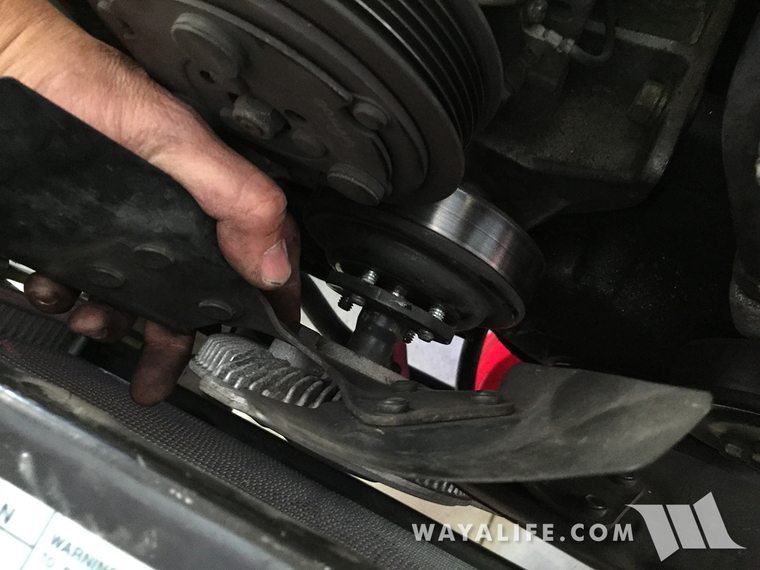
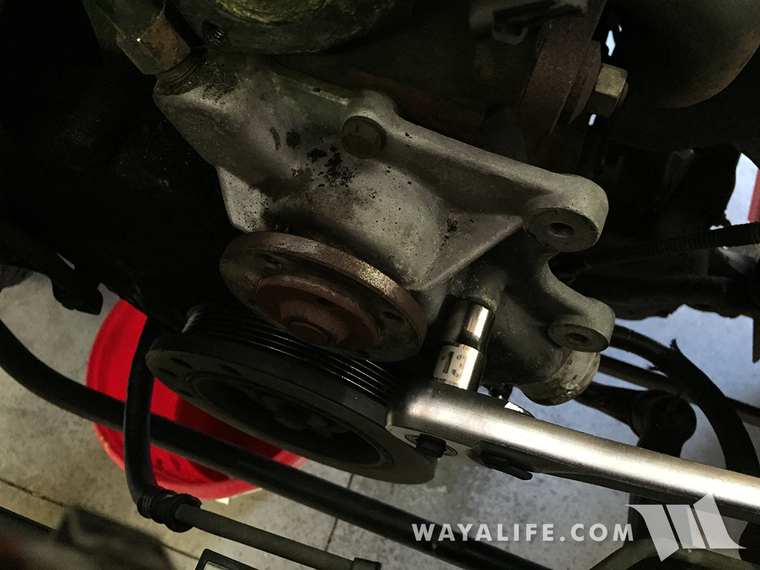
39. Using a 13mm and a 1/2" wrench, remove the 4 bolts securing the water pump pulley. As before, you can use one of the wrenches to hold the pulley in place while using the other to remove the bolts as shown.
40. Using a 13mm socket, remove the 3 bolts securing your water pump to the engine block.
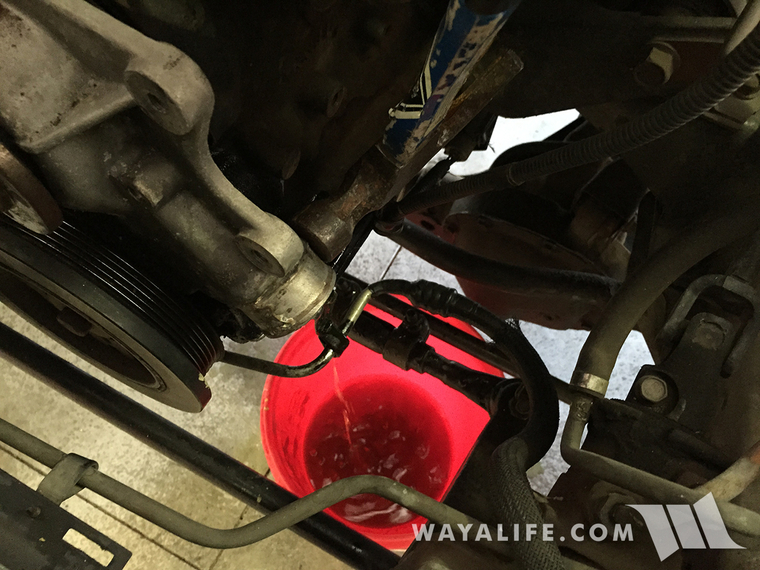
41. Using a hammer, give the back side of the water pump lower hose connector a tap to free it of its gasket bond and then allow the remaining coolant to drain as shown.
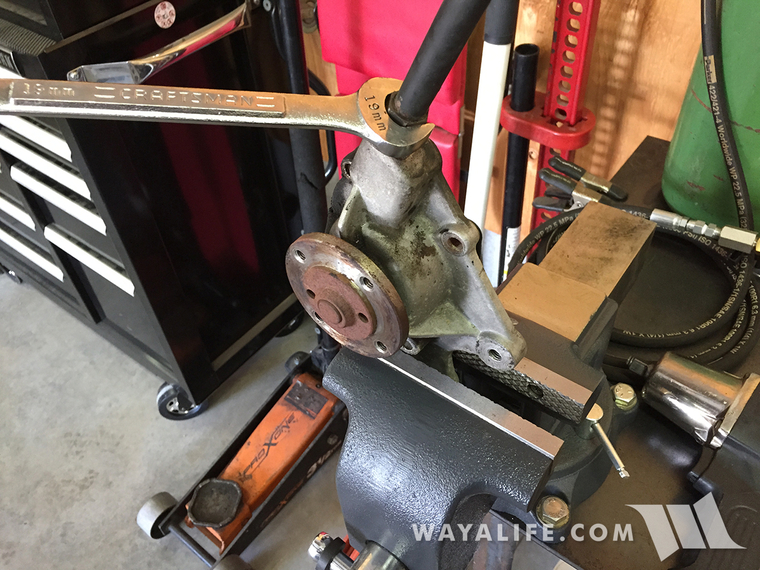
42. Remove the water pump, place it in a bench vice and then, using a 19mm wrench, remove the heater hose tube.
What you will need
• Jeep XJ Cherokee 4.0L Water Pump & Gasket
• Jeep XJ Cherokee 4.0L Thermostat & Gasket
• Jeep XJ Cherokee 4.0L Fan Clutch
• 8, 13, 15mm Sockets & Wrenches
• 1/2" Wrench
• Ratchet
• Ratchet Extension
• Flathead Screwdriver
• Phillips Screwdriver
• Hammer
• Gasket Scraper
• Teflon Tape
• Bench Vice
• Wire Brush
• Emery Cloth
• Coolant
• Bucket
• Paper Towels
Shot of all the new parts I got.
Here's a shot of the coolant leak I was seeing under my XJ.
Instructions
1. Start off by disconnecting your air intake tube from the air box. To do this, simply lift up on the plastic clamp and pull back as shown in the photo below.
2. Firmly grasp the PCV tube and wriggle it free from the port on the air box.
3. Release the 3 clamps securing the lid of your air box.
4. Remove the air filter and then remove the air box lid.
5. Using a 13mm socket and ratchet extension, remove the 2 bolts and 1 nut securing the air box to the body of your Jeep.
6. Remove the air box from your Jeep and set it aside.
7. Using an 8mm socket, remove the 2 screws securing both your radiator overflow hose and electric fan to the front of your Jeep.
8. Take the plug for your electric fan, slide the lock tab out and then separate the ends by squeezing on the release tab.
9. Wriggle the radiator overflow hose off the radiator fill neck.
10. Lift the electric fan up and out of your Jeep's engine compartment.
11. Using an 8mm socket, remove the 2 screws securing the fan shroud to the front of your Jeep.
12. Carefully lift the fan shroud up and out of your Jeep's engine compartment. You will have to work it around the mechanical fan and fan clutch and you'll want to take care not to bump into the fins of your radiator as you do this.
13. Using a 15mm socket, loosen the bolt securing your idler pulling in place.
14. Using a 15mm socket, loosen the serpentine belt adjuster as shown in this photo.
15. If you no longer have a diagram of your serpentine belt on the fan shroud, take a moment to photograph it with your phone. You can use it as a reference when reinstalling it later.
16. Remove your serpentine belt and examine it carefully. If it shows signs of cracking especially across the grain, you should plan on replacing it. If it's still in good shape, set it aside for now.
17. Using a 15mm socket, remove the 2 bolts securing the front of your power steering pump bracket to the water pump housing.
18. Using a 15mm socket, remove the bolt securing the power steering pump support brace to the engine block.
19. Using a 13mm socket and ratchet extension, remove the 3 bolts securing the power steering pump to the intake manifold. You will need to rotate the pulley so that the 2 openings allow access to them.
20. With the power steering pump free of the engine block, pull it aside and rest it on the fender well to give you more room to work with.
21. Using a phillips screwdriver, remove the 2 screws securing the head light bezels to the front of your Jeep.
22. Remove the bezels and set them aside.
23. Using a phillips screwdriver, remove the 4 screws securing the plastic grill to the front of your Jeep.
24. Remove the grill and set it aside.
25. On the passenger side of your Jeep, use a phillips screwdriver to remove the 2 screws securing your indicator light in place.
26. Place a bucket underneath your Jeep and open up the petcock valve to drain the radiator. This valve is located behind where your passenger side indicator light was.
27. Allow your radiator to drain completely before proceeding.
28. If your lower radiator hose is secured to the water pump with a hose clamp, use a flat head screw driver to loose up the clamp.
29. Move your bucket underneath your water pump, carefully pry off the lower radiator hose and allow it to drain into the bucket.
30. On your Jeep's thermostat housing, take a hold of the temperature sensor plug, slide the lock tab to the open position and unplug it by squeezing on the release tab and pulling it off.
31. Use a flat head screw driver to loosen the hose clamp securing the heater hose to the thermostat housing and then pull it off.
32. Use a flat head screw driver to loosen the hose clamp securing the upper radiator hose to the thermostat housing and then pull it off.
33. Use a flat head screw driver to loosen the hose clamp securing the heater hose to the tube extending off the water pump and then pull it off.
34. Use a 13mm socket to remove the 2 bolts securing the thermostat housing to the engine block.
35. Pry the thermostat housing off the engine block.
36. Use a flathead screw driver to help pry off the thermostat from the engine block.
37. Using a 13mm and a 1/2" wrench, remove the 4 nuts securing the mechanical fan and clutch to the pulley. You can use one of the wrenches to hold the pulley in place while using the other to remove the bolts as shown.
38. Carefully remove the fan from the pulley studs being careful not to hit the radiator.
39. Using a 13mm and a 1/2" wrench, remove the 4 bolts securing the water pump pulley. As before, you can use one of the wrenches to hold the pulley in place while using the other to remove the bolts as shown.
40. Using a 13mm socket, remove the 3 bolts securing your water pump to the engine block.
41. Using a hammer, give the back side of the water pump lower hose connector a tap to free it of its gasket bond and then allow the remaining coolant to drain as shown.
42. Remove the water pump, place it in a bench vice and then, using a 19mm wrench, remove the heater hose tube.
