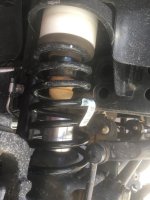
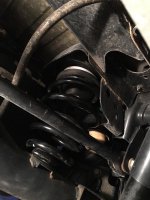
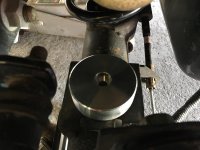
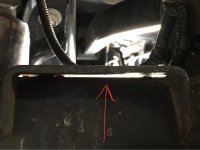
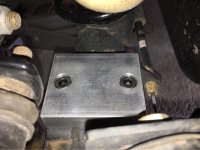
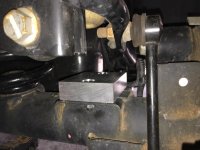
Oscar's No Build Thread

sipafz

Caught the Bug
Amazing! Nice work!:rock:

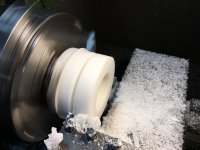
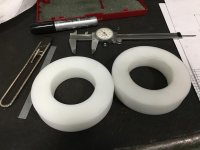
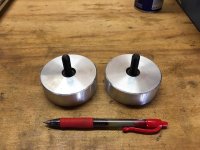
Thanks! I enjoy designing and making my own stuff. This project was pretty straightforward and I’m real happy with the results even though I didn’t use the rear spacers. I’m going to wait until the new tires go on and see how it is.
 

sipafz

Caught the Bug
Lol got to work with what you got good work finish looks pretty good in the images

Sent from my LG-TP260 using WAYALIFE mobile app

True that! If I were to turn them on a CNC then the CNMG would do the roughing followed by a DNMG for finishing. Being that I turned them manually, I wasn’t really concerned about tool life and the CNMG was producing a nice 125 micro-inch finish.
 

Bensjk

New member
True that! If I were to turn them on a CNC then the CNMG would do the roughing followed by a DNMG for finishing. Being that I turned them manually, I wasn’t really concerned about tool life and the CNMG was producing a nice 125 micro-inch finish.
I would have went the same route


Sent from my LG-TP260 using WAYALIFE mobile app
 

sipafz

Caught the Bug
Really cool to see. Not many people would even think of making something like that themselves, NICE WORK!!


Sent from my iPhone using WAYALIFE mobile app

Thanks! I know that I could just buy this stuff for $150. I just can’t see doing that when I have the means to do it myself. For me it’s a hobby and I enjoy it!
 

sipafz

Caught the Bug
I couldn’t leave well enough alone:

IMG_6637.jpg

IMG_6638.jpg

I made additional 1” spacers for the front so I can add the rear spacers and keep the same level stance. Still need to make extensions for the bump stops. I should have it all installed this weekend.
 

Bensjk

New member
I couldn’t leave well enough alone:

View attachment 296364

View attachment 296365

I made additional 1” spacers for the front so I can add the rear spacers and keep the same level stance. Still need to make extensions for the bump stops. I should have it all installed this weekend.
Lol I was wondering when you were going to go ahead and try to perfect your work. Machinist are never satisfied with their work always looking to improve even the smallest things

Sent from my LG-TP260 using WAYALIFE mobile app
 

sipafz

Caught the Bug
Lol I was wondering when you were going to go ahead and try to perfect your work. Machinist are never satisfied with their work always looking to improve even the smallest things

Haha, it’s like you know me even though we’ve never met! I just call it OCD 🤣.

That's really cool! Nice work[emoji106]

Thanks! Speaking of nice work, I haven’t seen any pictures of your rig outside the garage yet [emoji848].
 

sipafz

Caught the Bug
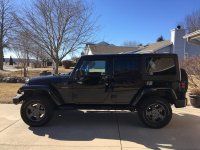
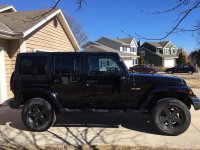
I pretty much finished installing my DIY lift:

IMG_6665.jpg

IMG_6667.jpg

I’m really happy with the results. I ended up 2 3/4” higher in the front and 1 1/4” in the rear. My favorite part is how level the Jeep sits and as a bonus, my head lights actually illuminate the road!

Here is a shot of how the front looked after adding an additional 1” spacer to the spring and bump stop:

IMG_6657.jpg

And the rear with the spacer added:

IMG_6639.jpg

I did run into a couple of snags. As a testament that I completely designed the lift myself, I completely screwed up the rear bump stop extension:

IMG_6659.jpg

My intentions were to fasten it with one bolt, through the center just like I did on the front. Well, that’s not possible since the perch sits tight to the axel:

IMG_6660.jpg

I will need to redesign that and make a couple new parts 🤬.

The second issue is that both the front and rear sway bars are down well past level:

IMG_6656.jpg

IMG_6662.jpg

I’m thinking that I’ll modify the links to make them longer. I’m also going to design and make disconnects for the front.

Anyone need a pair of 1” long bump stop extensions? They would work on the front only. Free to a good home:

IMG_6664.jpg
 
Last edited:

catahoula

Caught the Bug
I pretty much finished installing my DIY lift:

View attachment 296640

View attachment 296641

I’m really happy with the results. I ended up 2 3/4” higher in the front and 1 1/4” in the rear. My favorite part is how level the Jeep sits and as a bonus, my head lights actually illuminate the road!

Here is a shot of how the front looked after adding an additional 1” spacer to the spring and bump stop:

View attachment 296669

And the rear with the spacer added:

View attachment 296670

I did run into a couple of snags. As a testament that I completely designed the lift myself, I completely screwed up the rear bump stop extension:

View attachment 296643

My intentions were to fasten it with one bolt, through the center just like I did on the front. Well, that’s not possible since the perch sits tight to the axel:

View attachment 296644

I will need to redesign that and make a couple new parts ��.

The second issue is that both the front and rear sway bars are down well past level:

View attachment 296648

View attachment 296646

I’m thinking that I’ll modify the links to make them longer. I’m also going to design and make disconnects for the front.

Anyone need a pair of 1” long bump stop extensions? They would work on the front only. Free to a good home:

View attachment 296647

I would gladly pay you for them....let me know 81005.
 

sipafz

Caught the Bug
Whipped up some new rear bump extensions:

IMG_6683.jpg

They mount on the rear jounce perch using existing holes in the perch:

IMG_6684.jpg

IMG_6685.jpg

Some measuring shows that I should extend the shocks and brake line brackets. That will be the second part of this project.
 
Top Bottom