After installing our new 1.5" Daystar Lift and a set of 225/75R16 Cooper Discoverer STT Pro mud terrain tires on our Jeep Renegade Trailhawk, we found that we had a some some minor rubbing at about a 3/4 turn of the steering wheel. After giving things a closer look, we found that the rubbing was being caused by the edge of the front tires making contact with dimples on the plastic fender liners. Apparently, these dimples exist because of a pinch seam located directly behind the liners and if we were going to address the rubbing we had, we were going to have to do some trimming. In this short write-up, you'll get to see where the problem spots are and what you will need to do to do to fix it.
What you will need
• Phillips Screwdriver
• 10mm Socket
• Ratchet
• Vice Grips
• Angle Grinder
• Cut Off Wheel
• Flap Disc or Flat File
• Heat Gun
• Gloves
• Eye Protection
• Chassis Paint
• Marker
• Bungee Cord
Instructions
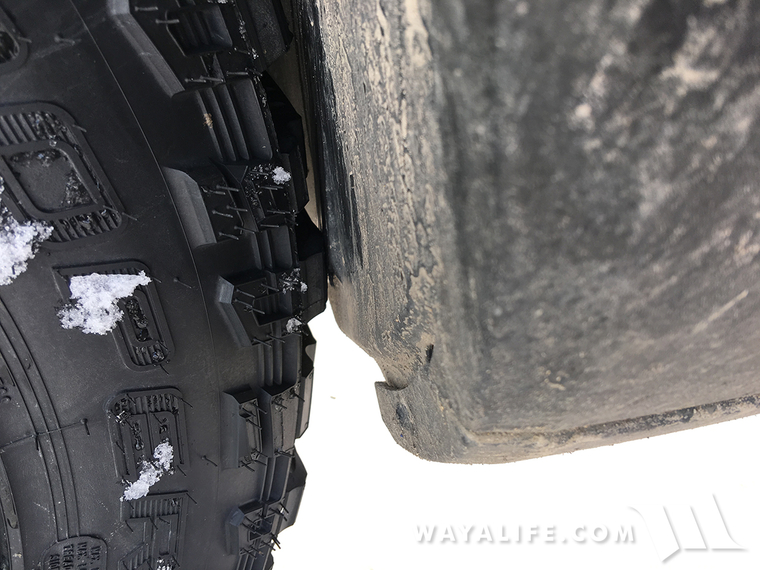
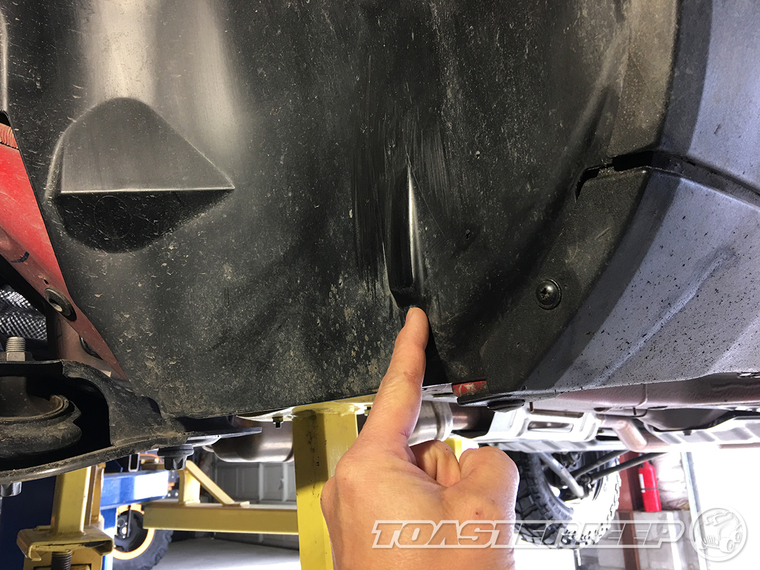
Here's a shot of the driver side front tire right where the edge of it makes contact with the dimple on the fender liner.
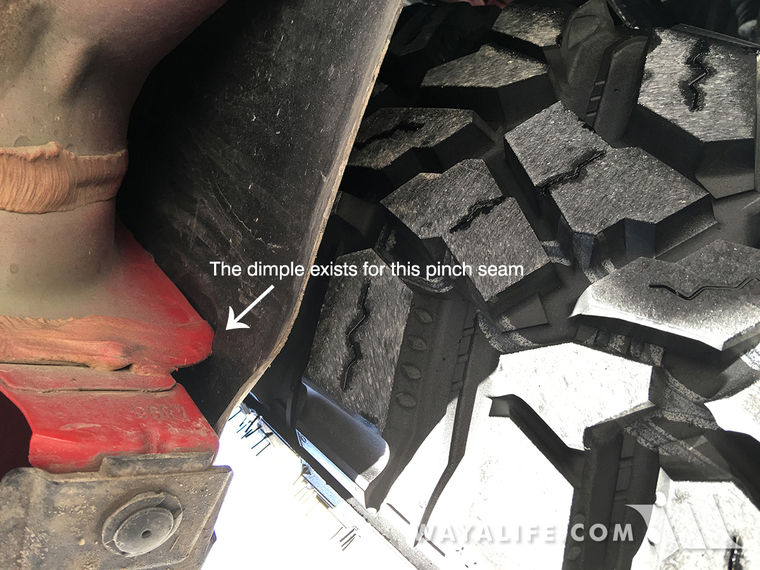
Looking up behind the fender liner, you can see the pinch seam that the dimple is created for.
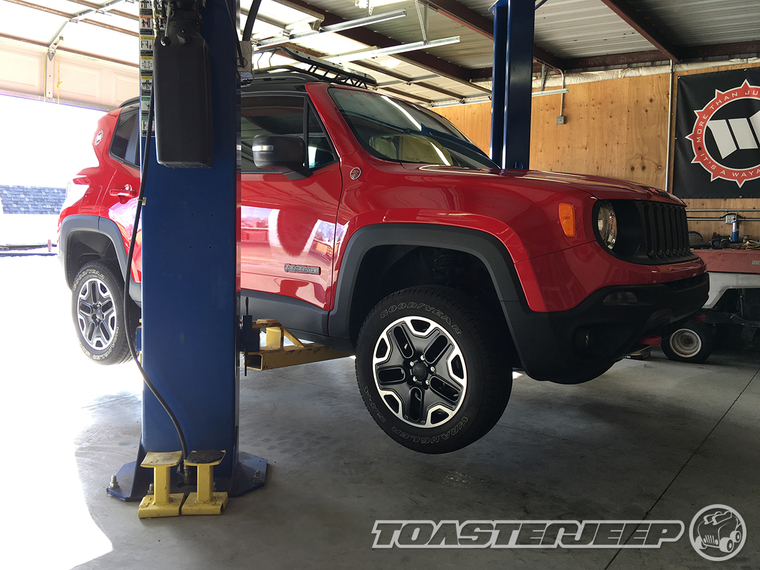
1. While we used a lift to help make it easier to photograph this install, all you will need is a floor jack, a pair of jack stands and wheel chocks. To begin your install, simply place the wheel chocks up against your rear tires, lift the front of your Renegade until the tires are off the ground and then set it back down on jack stands positioned under the frame rails and just behind the front tires.
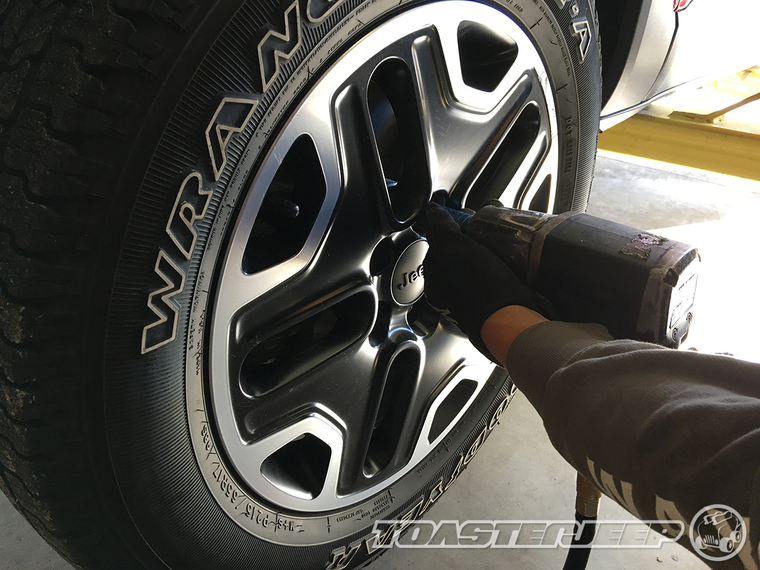
2. Using a 17mm socket, remove the lug bolts securing the front wheels to your Renegade.
3. Remove your wheels and then lay them flat under the frame rails of your Renegade for extra safety. You can now get a better look at the dimple you will need to address.
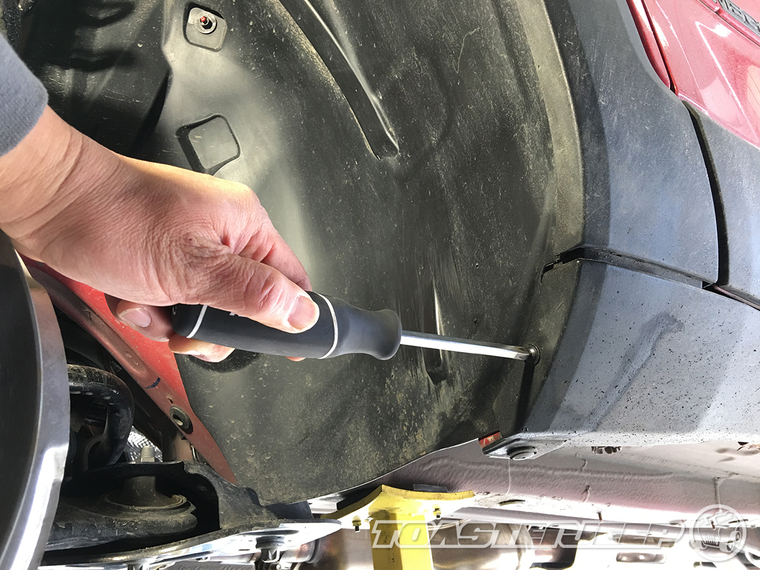
4. Starting on the driver side of your Renegade, use a phillips screwdriver, remove the screw securing the fender liner to the base of the rocker trim.
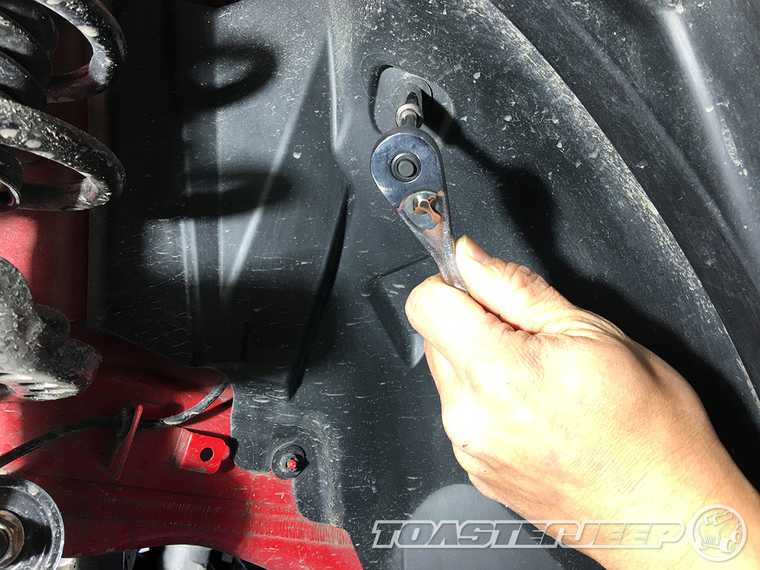
5. Using a 10mm socket, remove the 2 plastic nuts securing the rear half of the fender liner to the body of the Renegade.
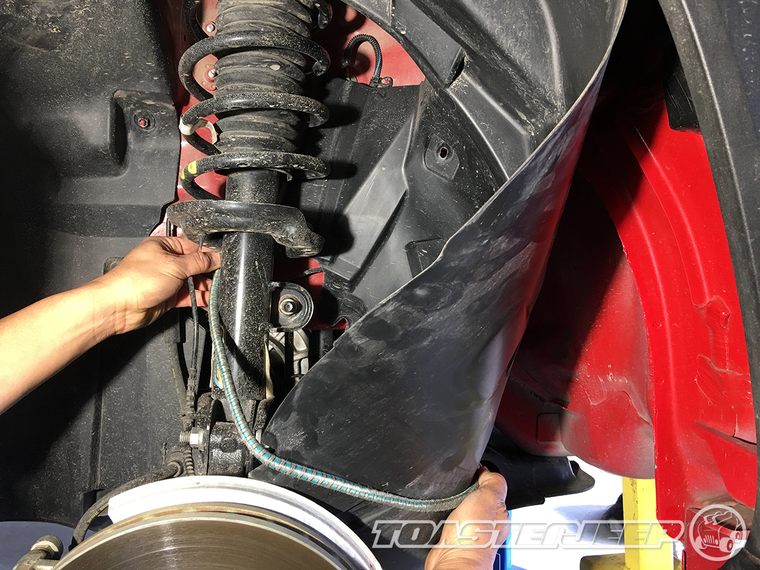
6. Pull the fender liner back then hold it out of the way using a bungee cord as shown.
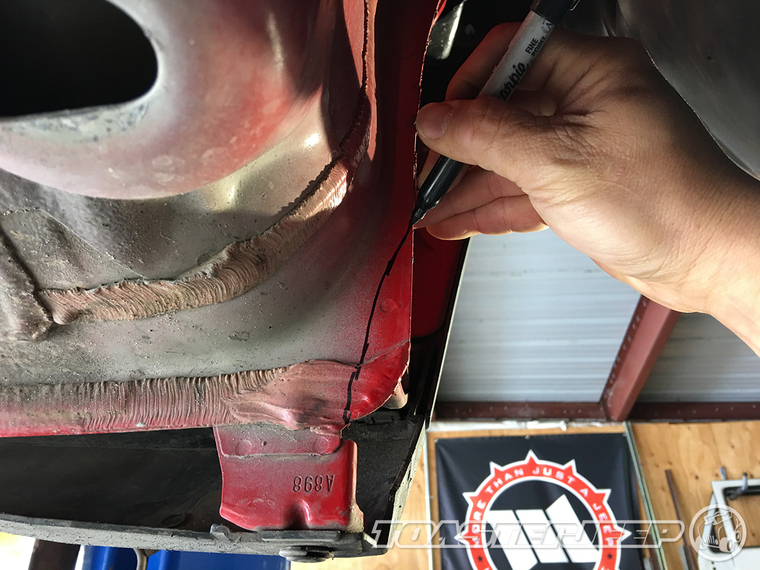
7. Using a marker, draw a line across the corner of the pinch seam where you will be cutting it off.
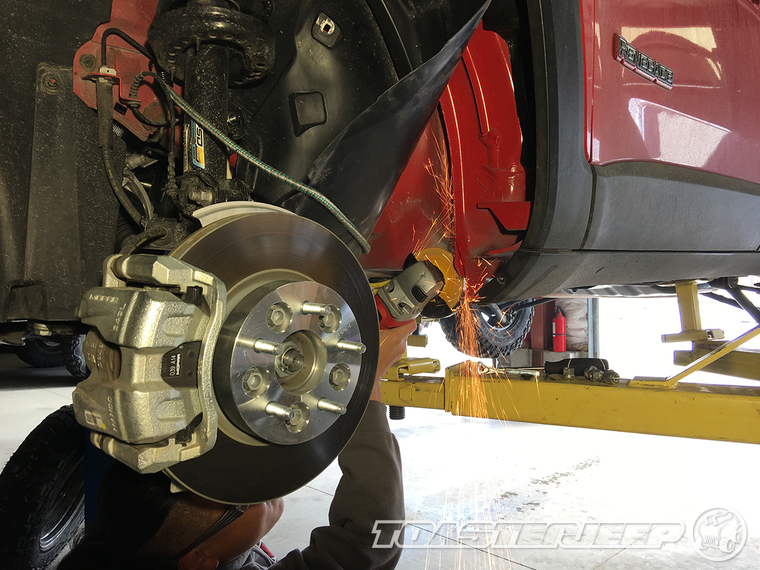
8. Using a grinder with a cut off wheel, proceed to score the corner of the pinch seam where you drew your line.
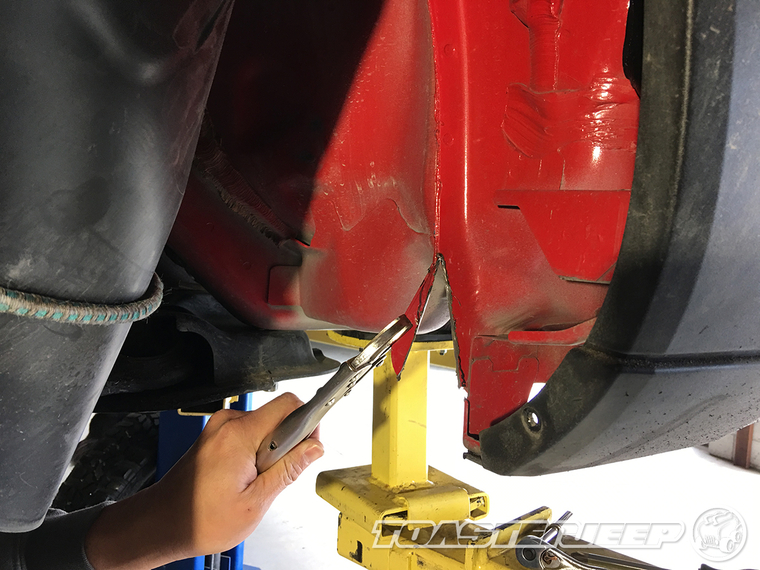
9. Grab the corner of the pinch seam with a pair of vice grips and then work it back and forth until it breaks free.
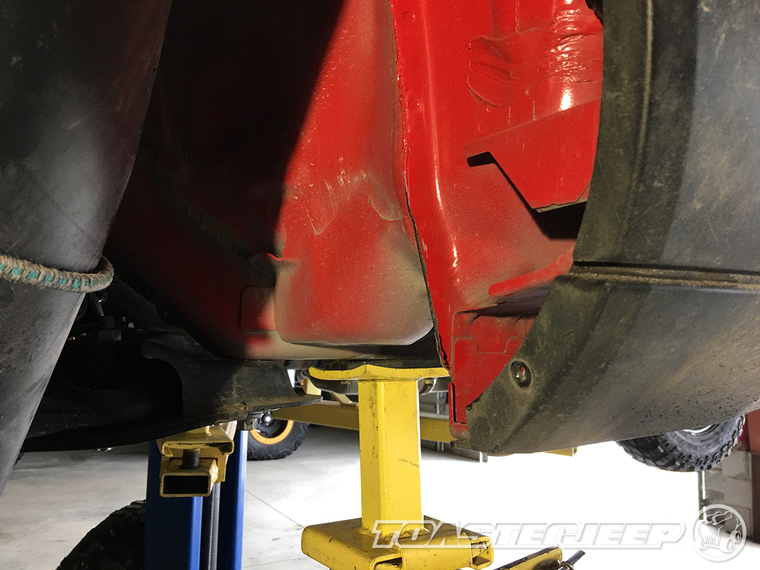
10. Clean up the rough edge with a flap disc or flat file and then touch up the exposed metal with some chassis paint.
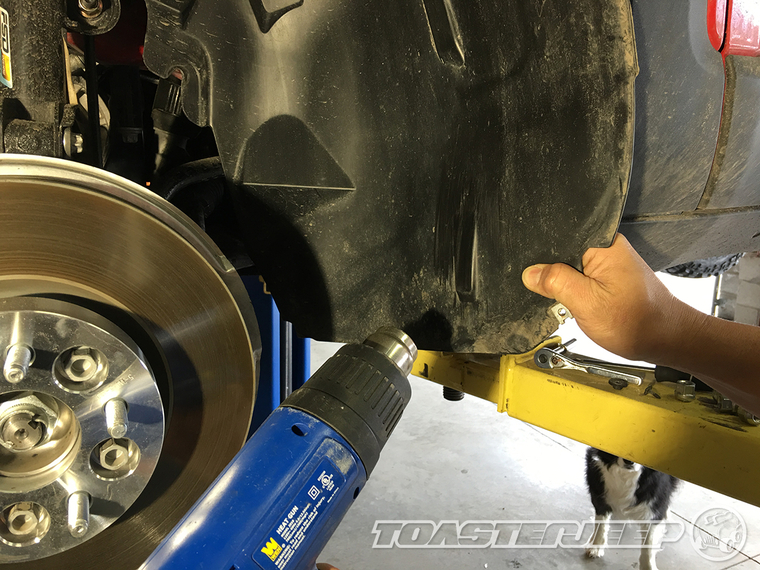
11. Release the plastic fender liner from the bungee cord and then soften up the dimple by heating it up with a heat gun as shown.
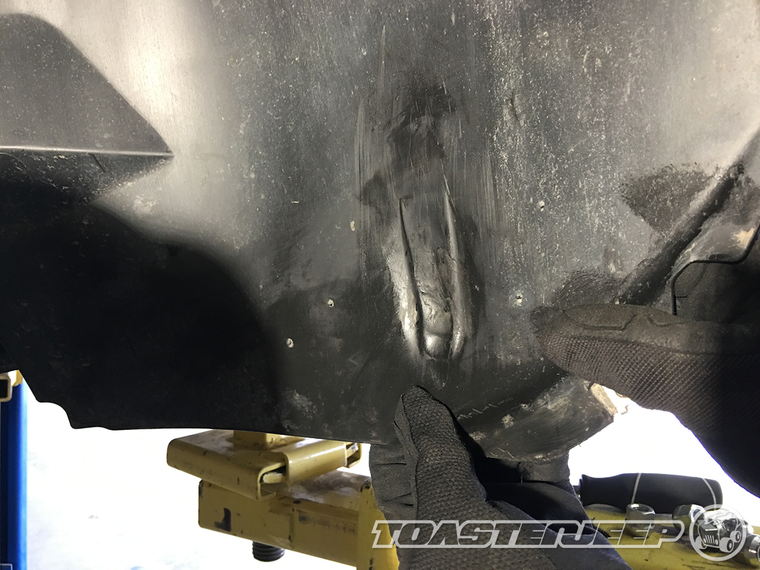
12. Once the dimple in the plastic is soft enough, press it inward. Being that the plastic will be very hot, you will need to be wearing gloves when you do this.
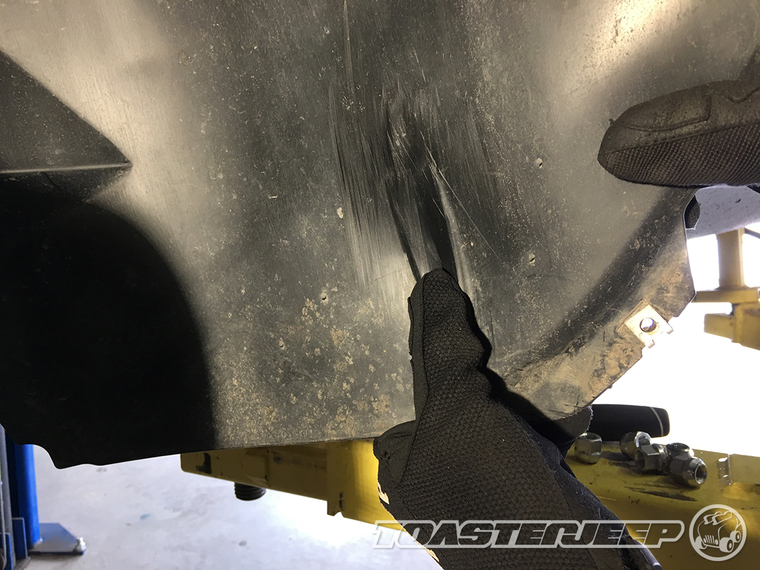
13. Repeat steps 11-12 until the dimple is effectively sitting concave to the surface of the fender liner.
14. Reinstall the fender liner and secure it in place with the 2 factory plastic nuts and 1 screw and then repeat the whole process on the passenger side of your Renegade.
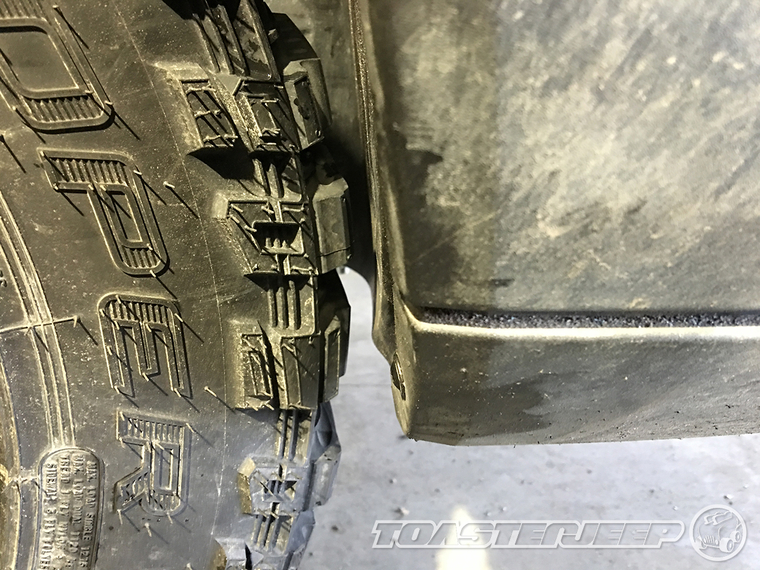
15. Reinstall your wheels making sure to tighten the lug bolts to 90 ft. lbs. of torque. Remove the jack stands and set your Renegade back on the ground. As you can see in this photo, you should now have enough clearance between your new larger tires and the fender liner to prevent any rubbing.
That's pretty much all you need to do. I hope this write-up has been helpful to you and of course, if you have any questions, please don't hesitate to ask.
What you will need
• Phillips Screwdriver
• 10mm Socket
• Ratchet
• Vice Grips
• Angle Grinder
• Cut Off Wheel
• Flap Disc or Flat File
• Heat Gun
• Gloves
• Eye Protection
• Chassis Paint
• Marker
• Bungee Cord
Instructions
Here's a shot of the driver side front tire right where the edge of it makes contact with the dimple on the fender liner.
Looking up behind the fender liner, you can see the pinch seam that the dimple is created for.
1. While we used a lift to help make it easier to photograph this install, all you will need is a floor jack, a pair of jack stands and wheel chocks. To begin your install, simply place the wheel chocks up against your rear tires, lift the front of your Renegade until the tires are off the ground and then set it back down on jack stands positioned under the frame rails and just behind the front tires.
2. Using a 17mm socket, remove the lug bolts securing the front wheels to your Renegade.
3. Remove your wheels and then lay them flat under the frame rails of your Renegade for extra safety. You can now get a better look at the dimple you will need to address.
4. Starting on the driver side of your Renegade, use a phillips screwdriver, remove the screw securing the fender liner to the base of the rocker trim.
5. Using a 10mm socket, remove the 2 plastic nuts securing the rear half of the fender liner to the body of the Renegade.
6. Pull the fender liner back then hold it out of the way using a bungee cord as shown.
7. Using a marker, draw a line across the corner of the pinch seam where you will be cutting it off.
8. Using a grinder with a cut off wheel, proceed to score the corner of the pinch seam where you drew your line.
9. Grab the corner of the pinch seam with a pair of vice grips and then work it back and forth until it breaks free.
10. Clean up the rough edge with a flap disc or flat file and then touch up the exposed metal with some chassis paint.
11. Release the plastic fender liner from the bungee cord and then soften up the dimple by heating it up with a heat gun as shown.
12. Once the dimple in the plastic is soft enough, press it inward. Being that the plastic will be very hot, you will need to be wearing gloves when you do this.
13. Repeat steps 11-12 until the dimple is effectively sitting concave to the surface of the fender liner.
14. Reinstall the fender liner and secure it in place with the 2 factory plastic nuts and 1 screw and then repeat the whole process on the passenger side of your Renegade.
15. Reinstall your wheels making sure to tighten the lug bolts to 90 ft. lbs. of torque. Remove the jack stands and set your Renegade back on the ground. As you can see in this photo, you should now have enough clearance between your new larger tires and the fender liner to prevent any rubbing.
That's pretty much all you need to do. I hope this write-up has been helpful to you and of course, if you have any questions, please don't hesitate to ask.