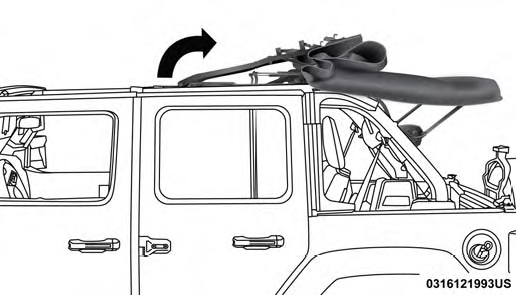
One of the things that Cindy and I love most about the all new Jeep JL Wrangler is its interior. For us, Jeep absolutely knocked it out of the park with its fine appointments, detail and trim. It literally feels like we're driving a luxury SUV, especially when compared to some of our old iron and for the crazy amount of time we spend in our Jeeps, this is a good thing. However, if there's a downside to the super nice interior, it'd be the fact that there are very few, if any options to mount and or install a CB, Race or HAM Radio. Or should I say, not without having to do some cutting or drilling. Because communicating with the people we wheel with is important to us, this was a problem that I needed to solve and did so with the CB BAR.
Designed as an overhead system and to accommodate a full size CB Radio like a Cobra 29, the CB BAR is a 100% bolt on mount that utilizes existing holes in the factory roll bar to install it. In other words, NO DRILLING, NO CUTTING and NO REMOVAL of any of the interior trim is required! I also designed the CB BAR to work with a hard top, soft top or no top and without blocking the rear view mirror or interfering with the sun visors, header latches or Freedom Top locks. The best part about the CB BAR is that it's super easy to install, can be done in just minutes and with just a few basic tools.
WAYALIFE CB BAR
The CB BAR comes powder coated in a fine texture, semi-gloss black and it comes complete with all the hardware you need to install it. Click on the link below to order yours today:
CLICK HERE TO BUY a WAYALIFE CB BAR
NOTE: The mounting holes for the CB Radio bracket are positioned for a standard Cobra 29 or the like and additional holes have been provided to accommodate a smaller Race or HAM Radio (hardware is NOT included for this). Because different manufacturers may have holes in their brackets that positioned with a different spacing, drilling new holes on their bracket may be required.
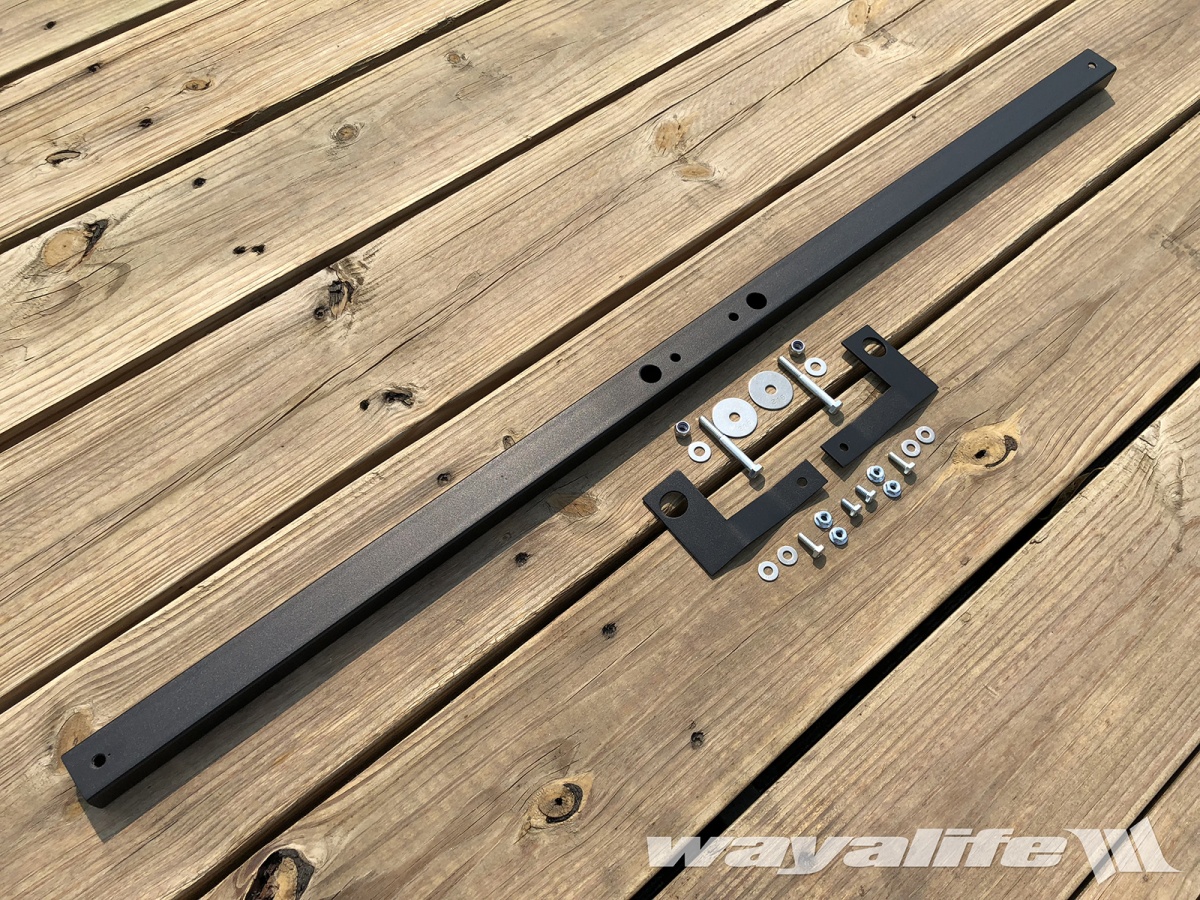
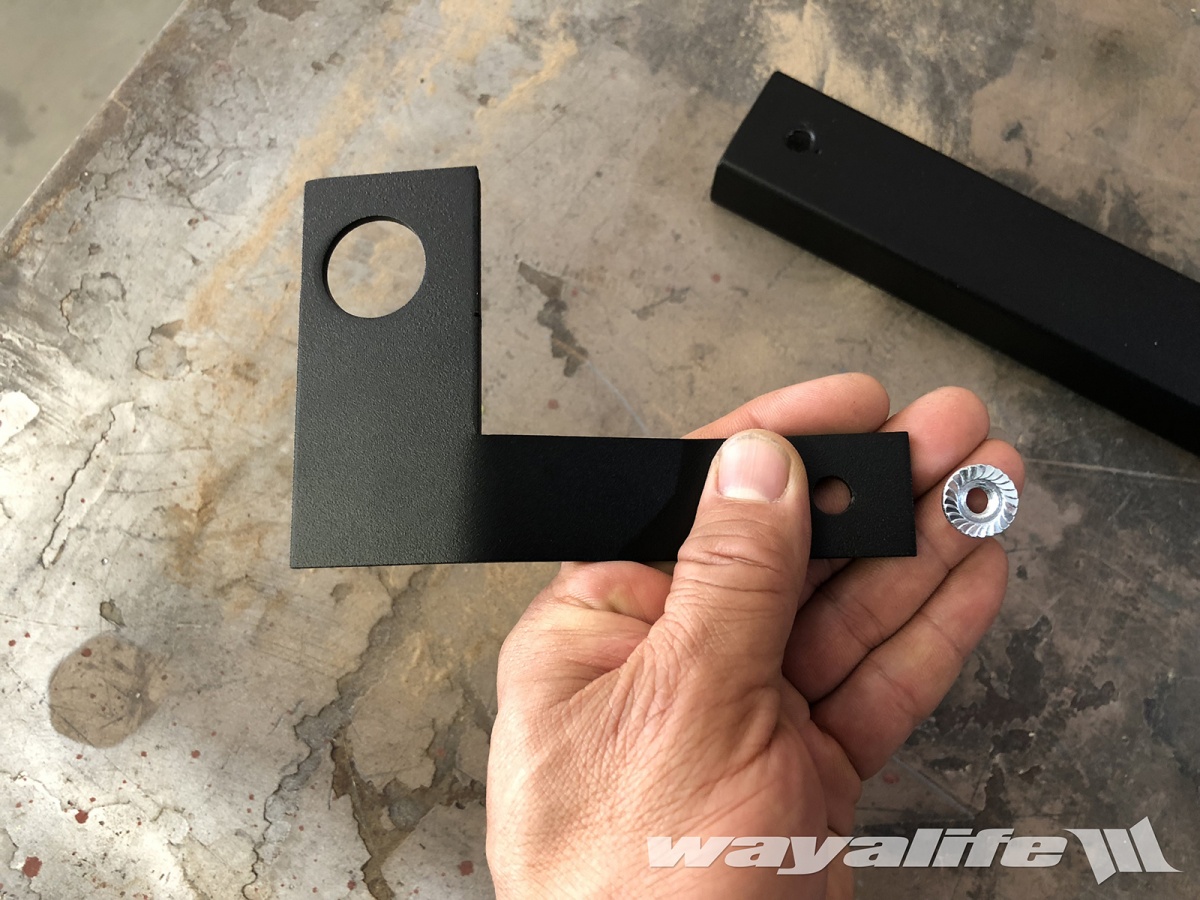
CB BAR CONTENTS
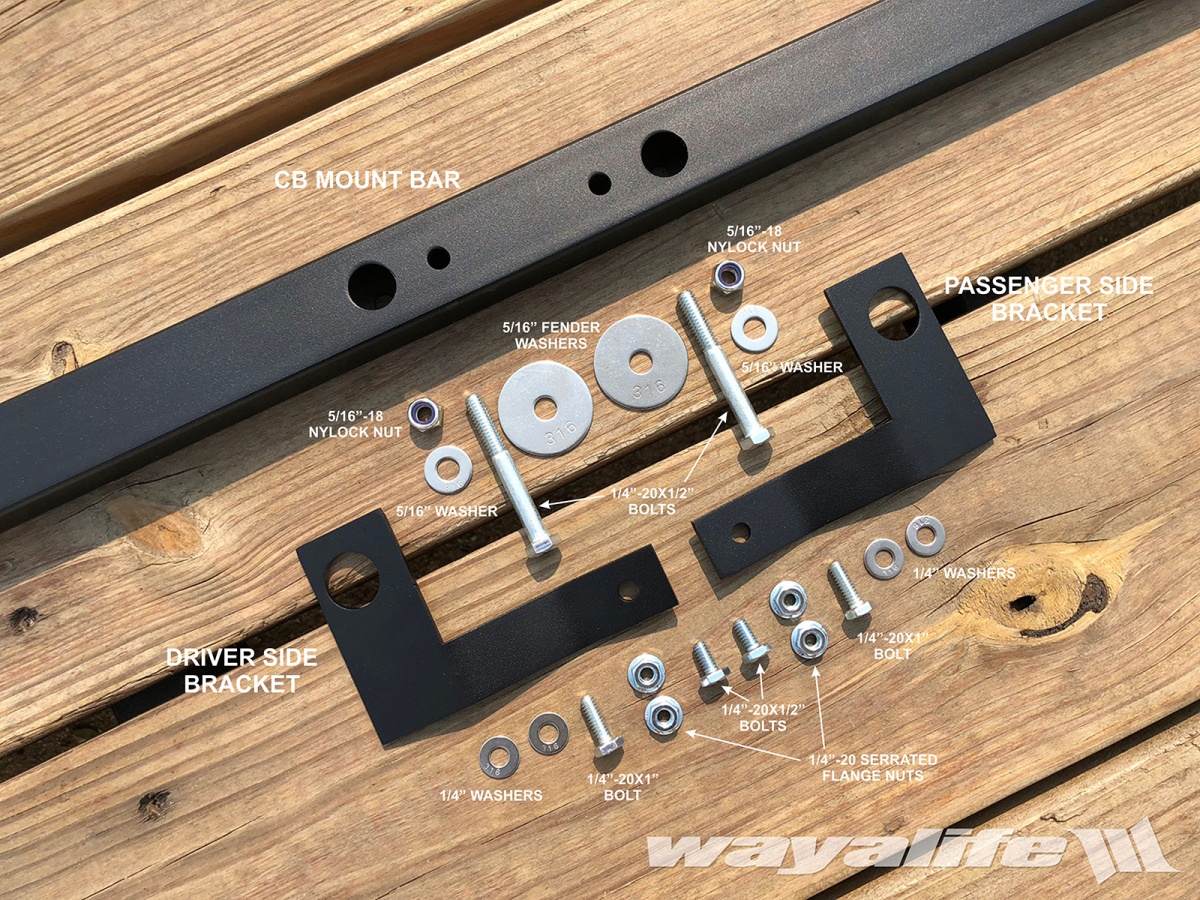
(1) CB Mount Bar
(1) Driver Side Mounting Bracket
(1) Passenger Side Mounting Bracket
(2) 1/4"-20 x 1/2" Bolts
(2) 1/4"-20 x 1" Bolts
(4) 1/4"-20 Serrated Flange Lock Nuts
(4) 1/4" Washers
(2) 5/16"-18 x 2-1/2" Bolts
(2) 5/16" Nylon Locknuts
(2) 5/16" Fender Washers
(2) 5/16" Washers
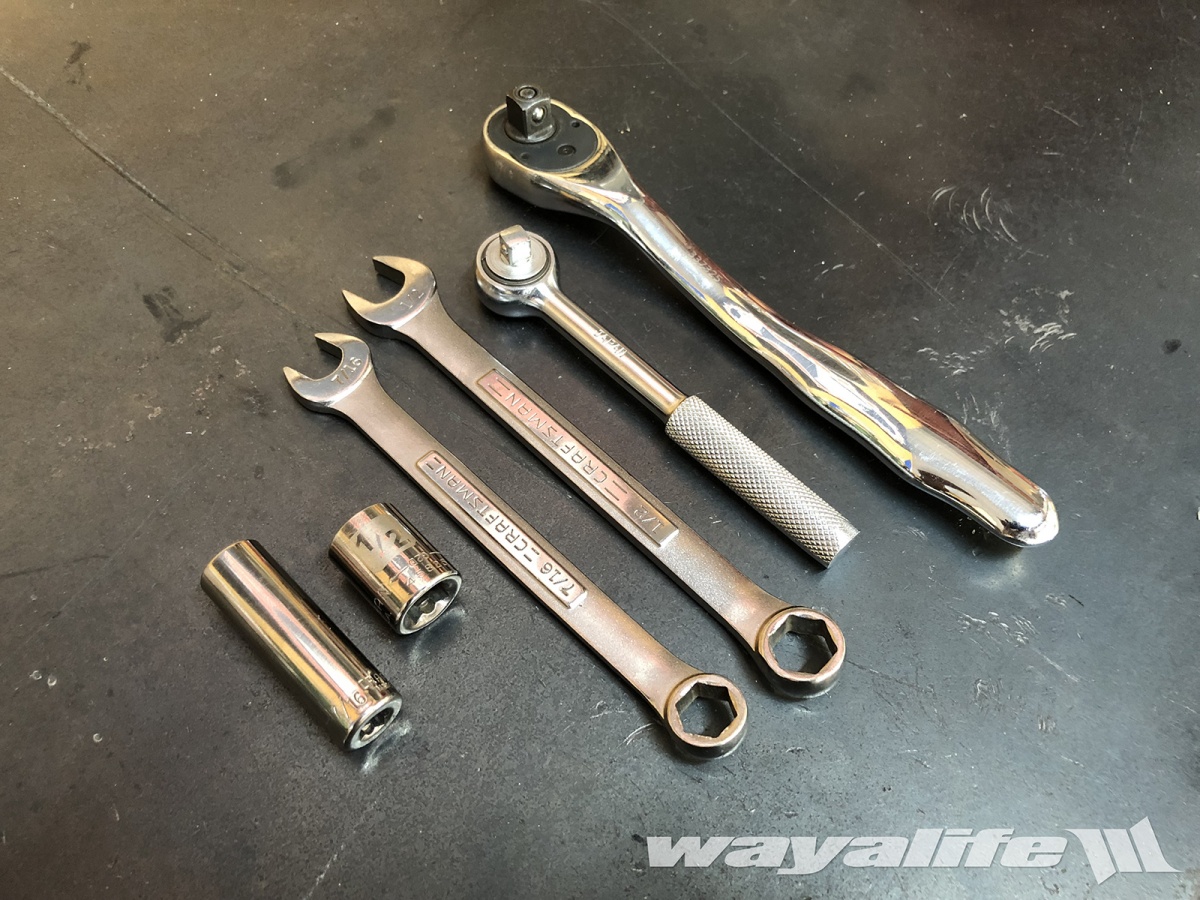
Tools You Will Need
7/16" Wrench & Deep Socket
1/2" Wrench & Socket
Torx T-45 Bit
Torx T-40 Bit
3/8" Drive Ratchet
1/4" Drive Ratchet
Here's a couple of shots of all that you'll get with your CB BAR.
HARD TOP or NO TOP INSTALLATION
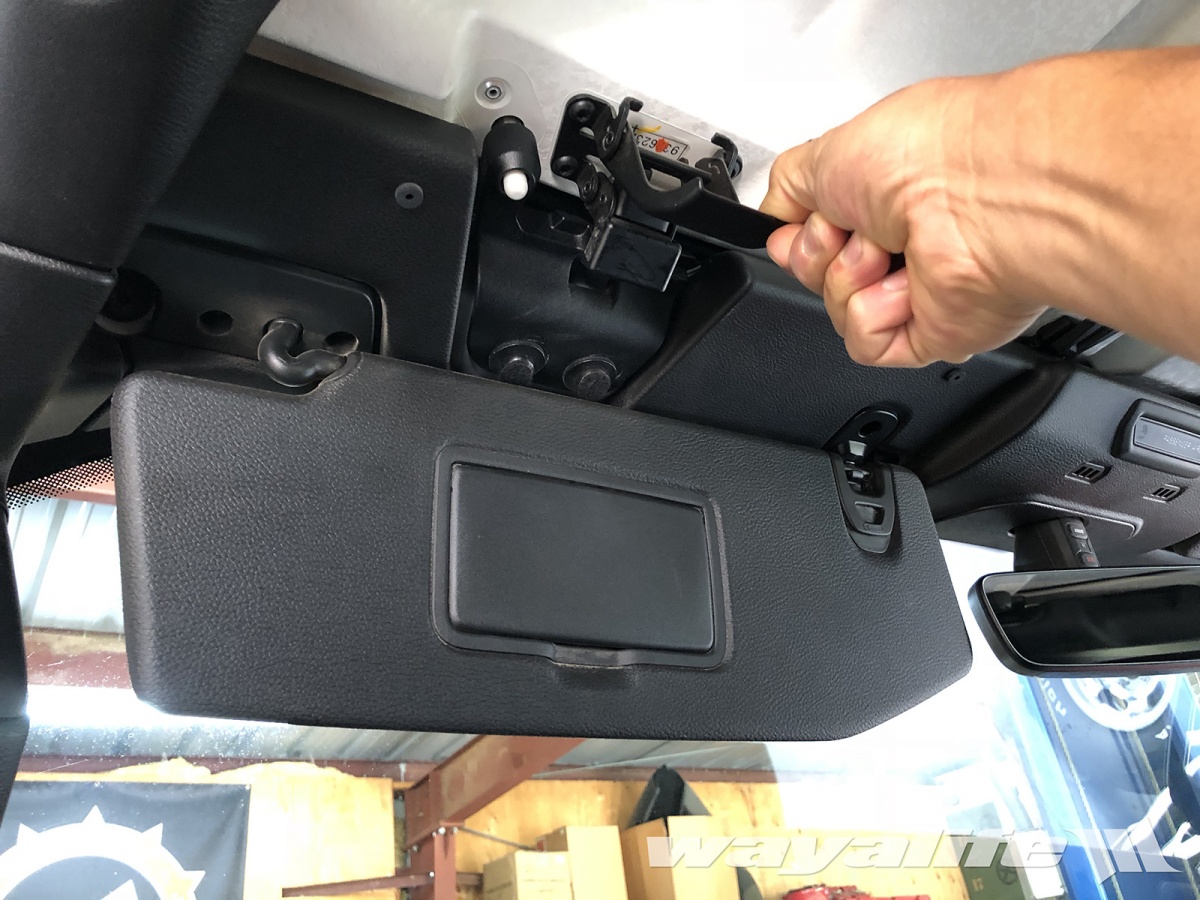
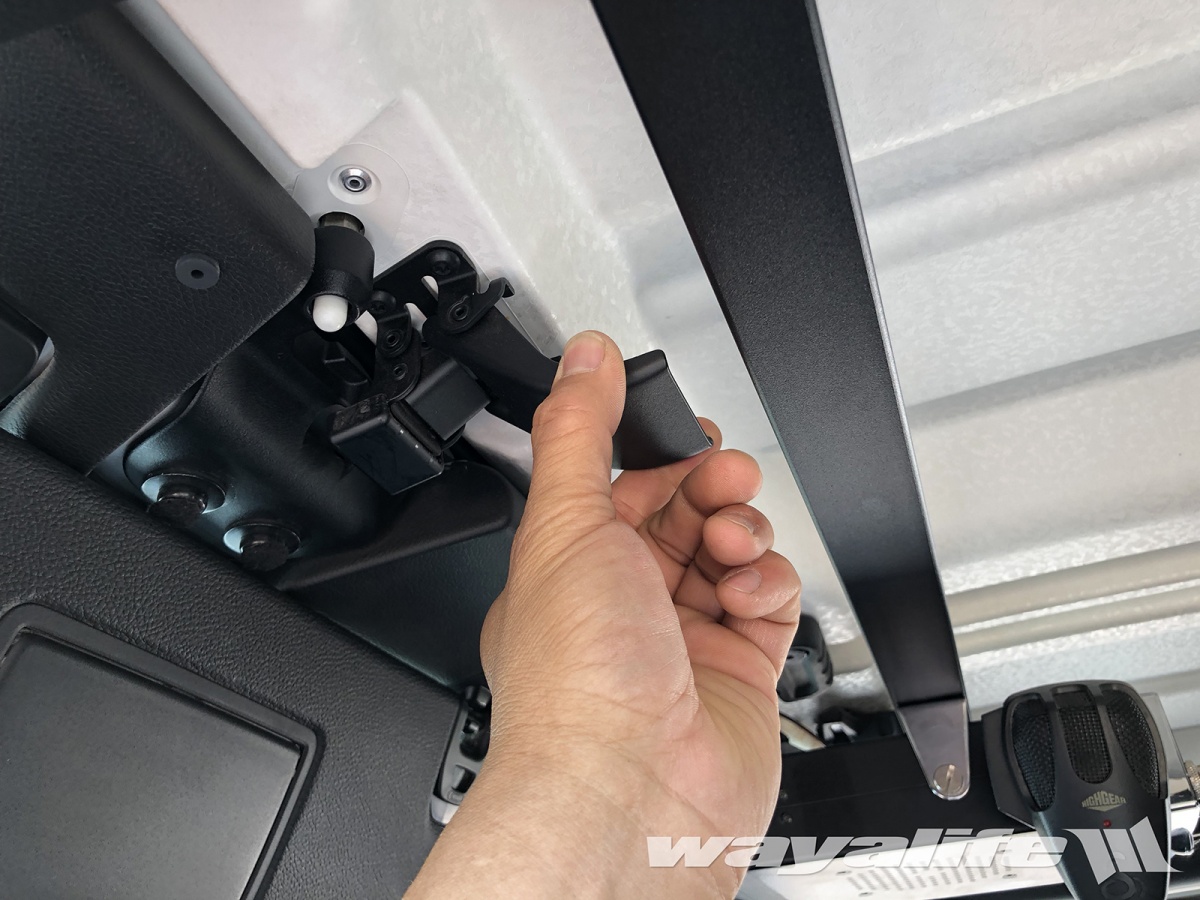
1. Fold both of your sun visors down and push them toward the windshield. Then, pull the header latches downward and make sure that the hooks are fully disengaged from their receivers.
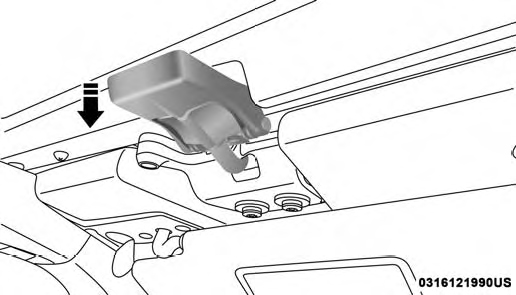
2. Starting from the driver side, rotate the 3 Freedom Top panel locks to the open position.
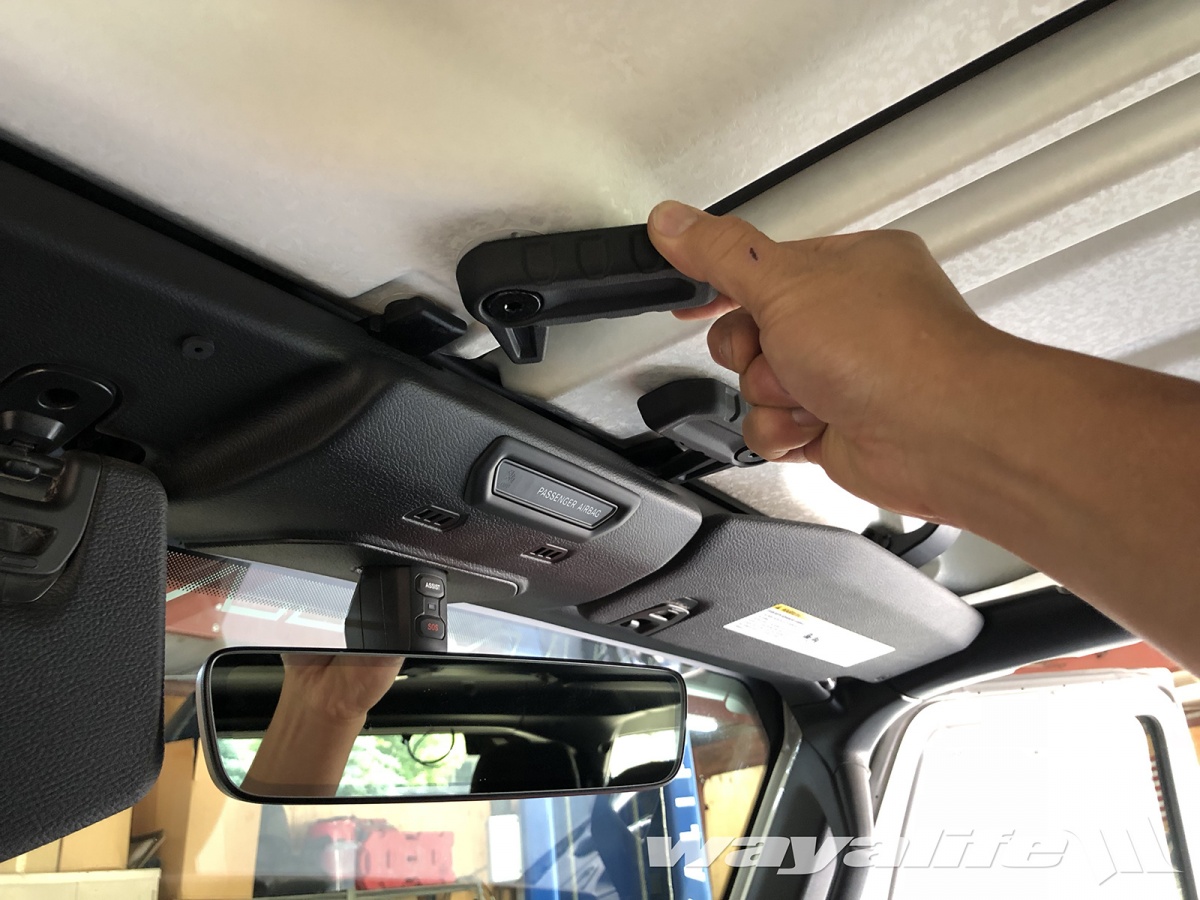
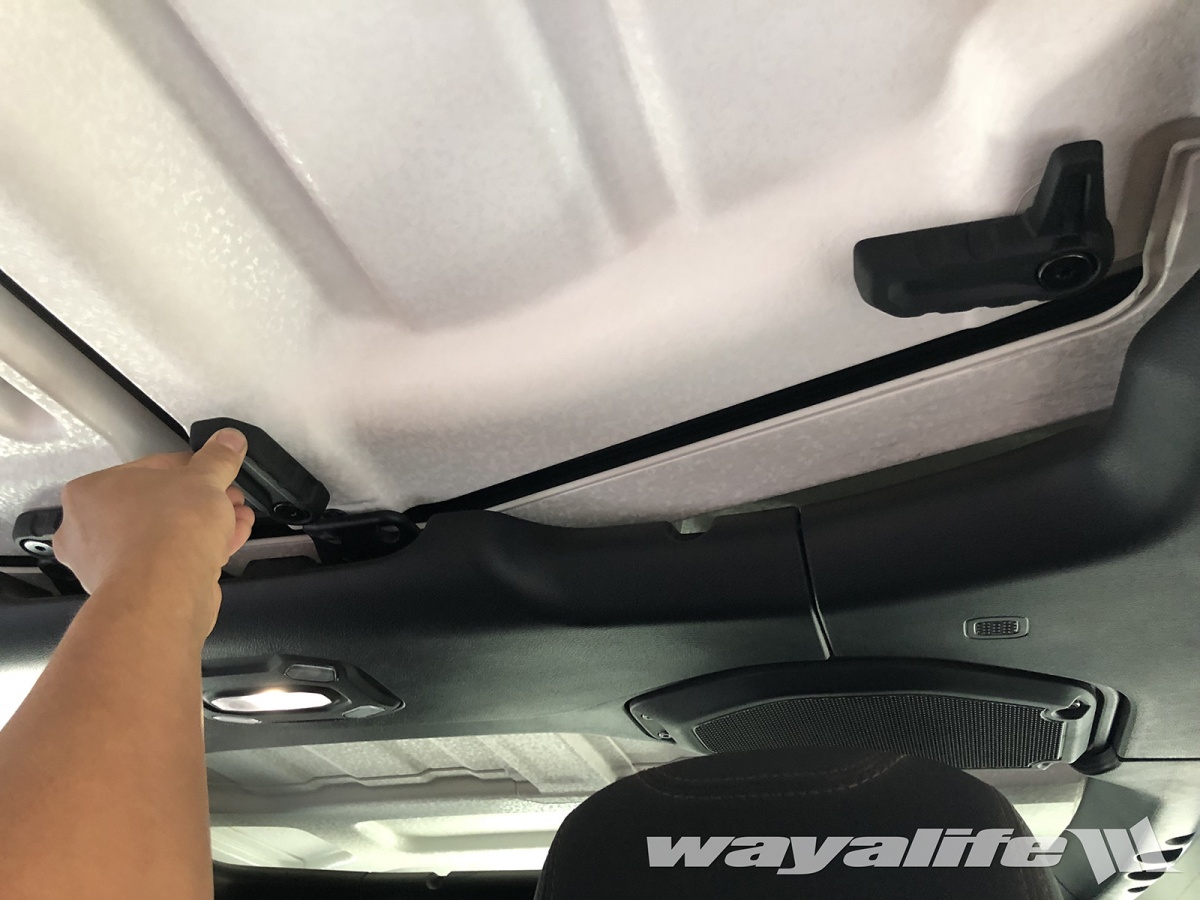
3. Lift up the driver side Freedom Top panel, remove it from your JL Wrangler and carefully set it aside. Repeat the same process on the passenger side.
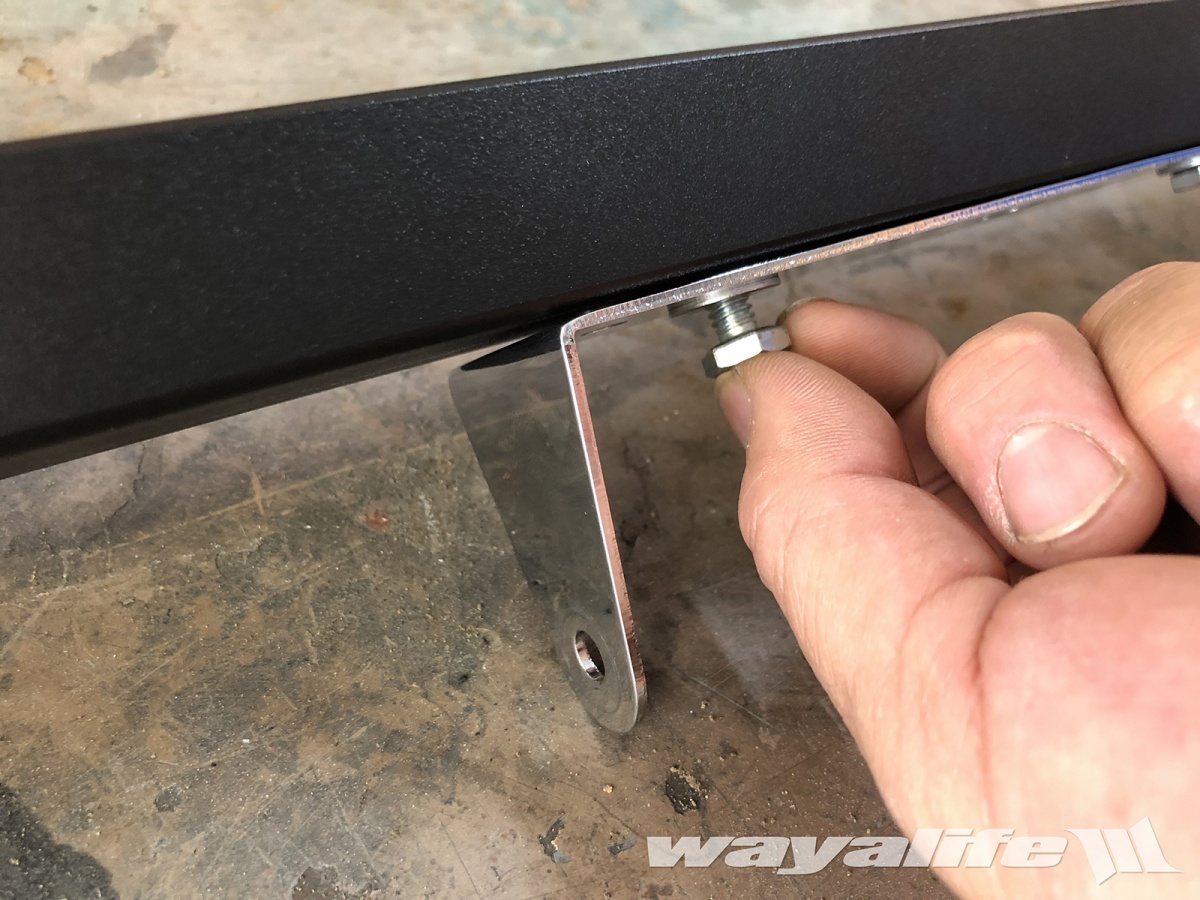
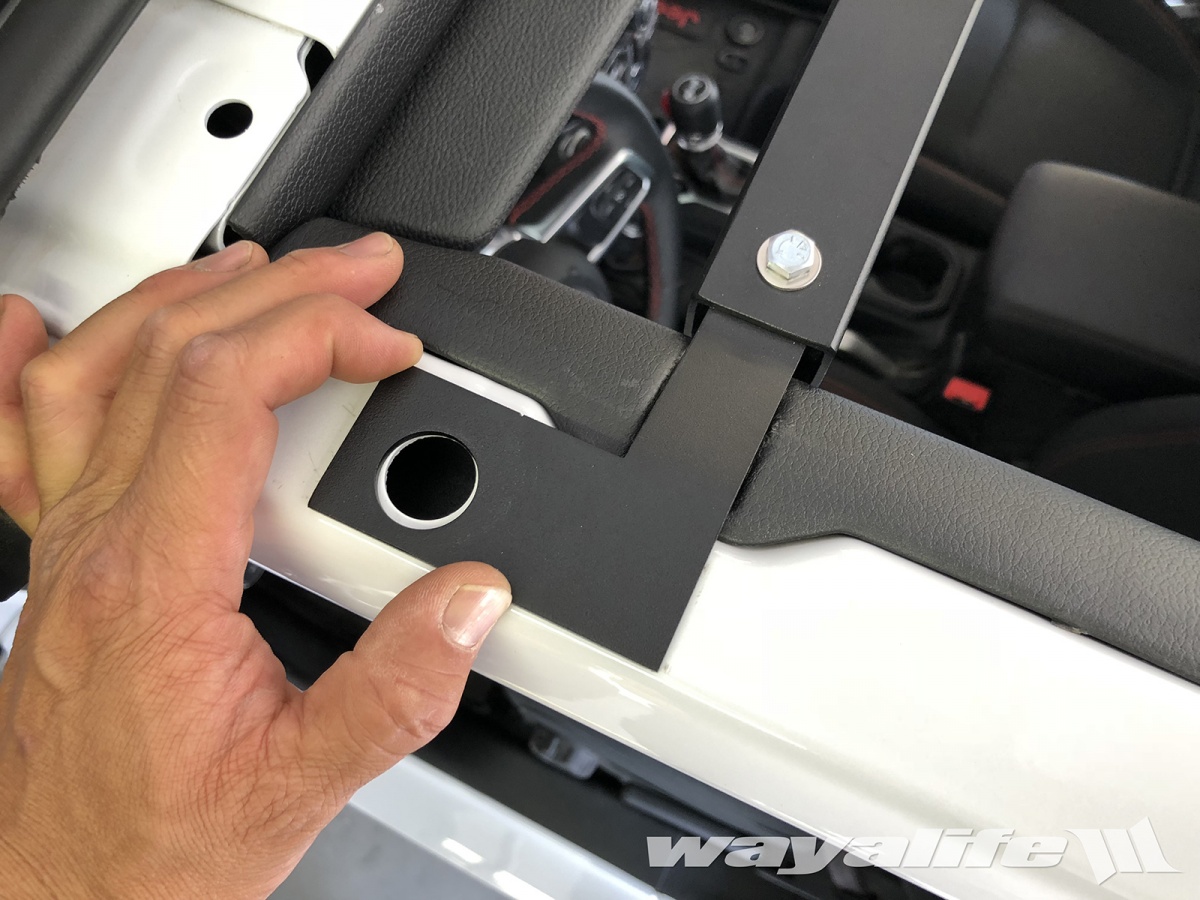
4. Take the driver side mounting bracket and with your fingers, hold a 1/4"-20 serrated lock nut under the small hole.
5. Insert the driver side mounting bracket and 1/4"-20 serrated lock nut into the driver side end of the CB BAR and then, use a 1/4"-20x1/2" bolt and washer to secure it in place. Loosely tighten the bolt and nut with a 7/16" socket and wrench and just to the point where you can feel the serrated nut biting into the metal.
6. Repeat Steps #4 and 5 on the passenger side of the CB BAR.
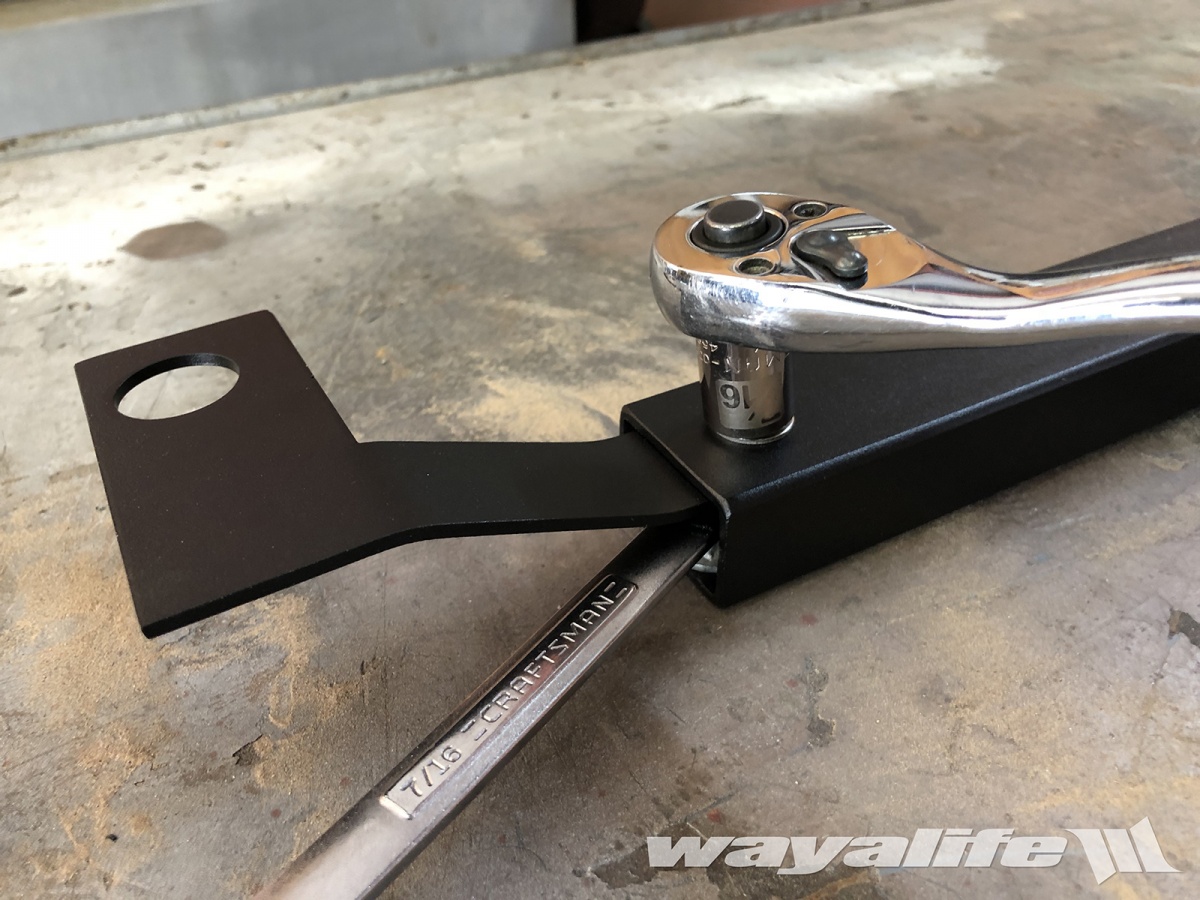
7. Hold the bracket that comes with your CB Radio on the bottom of the CB BAR and then insert 1/4"-20x1" bolts and washers up through the bracket and into the mount holes as shown.
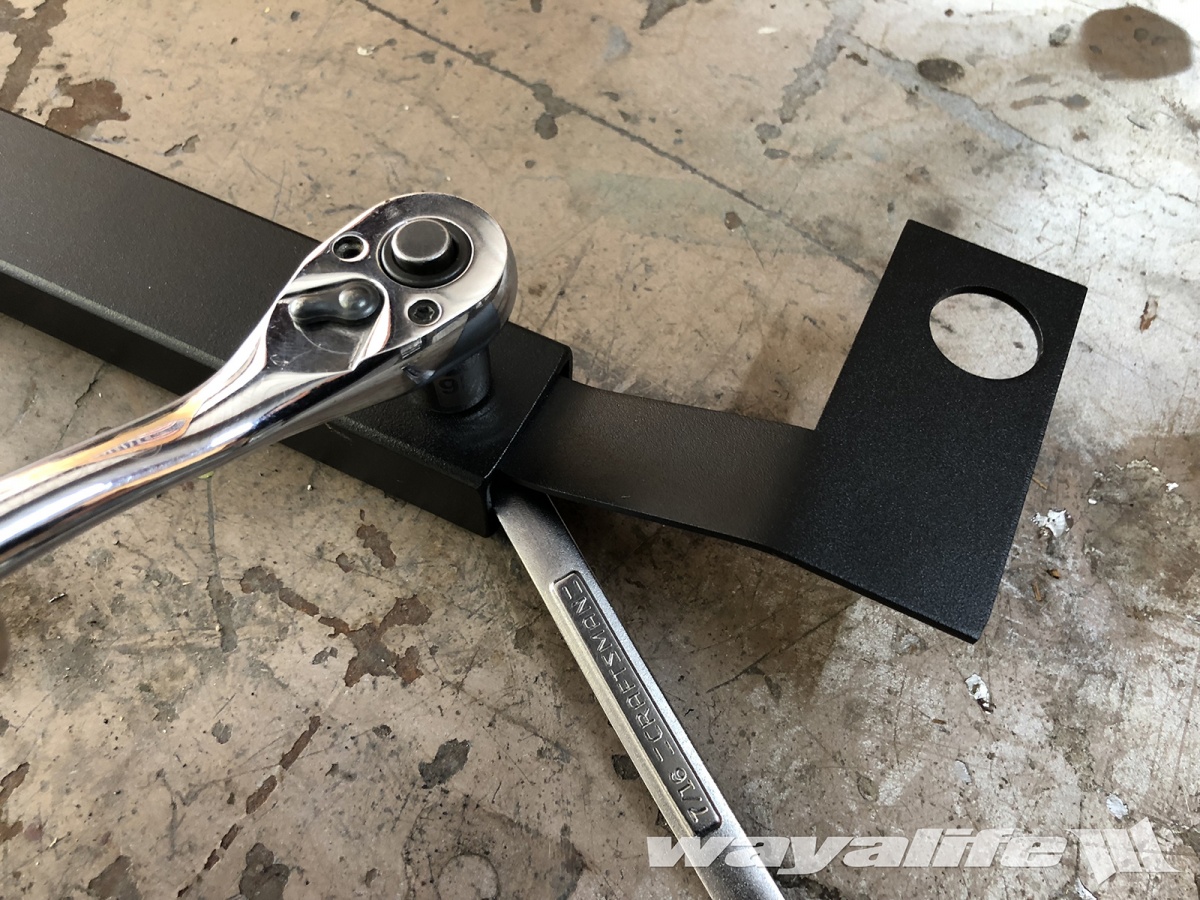
8. The holes on top of the CB BAR have been made larger so that you to thread on 1/4"-20 serrated nuts onto each of the bolts you inserted on Step #7.

9. Using a 7/16" deep socket and wrench if needed, tighten the bolts and nuts securing your CB Radio bracket on to the CB BAR.

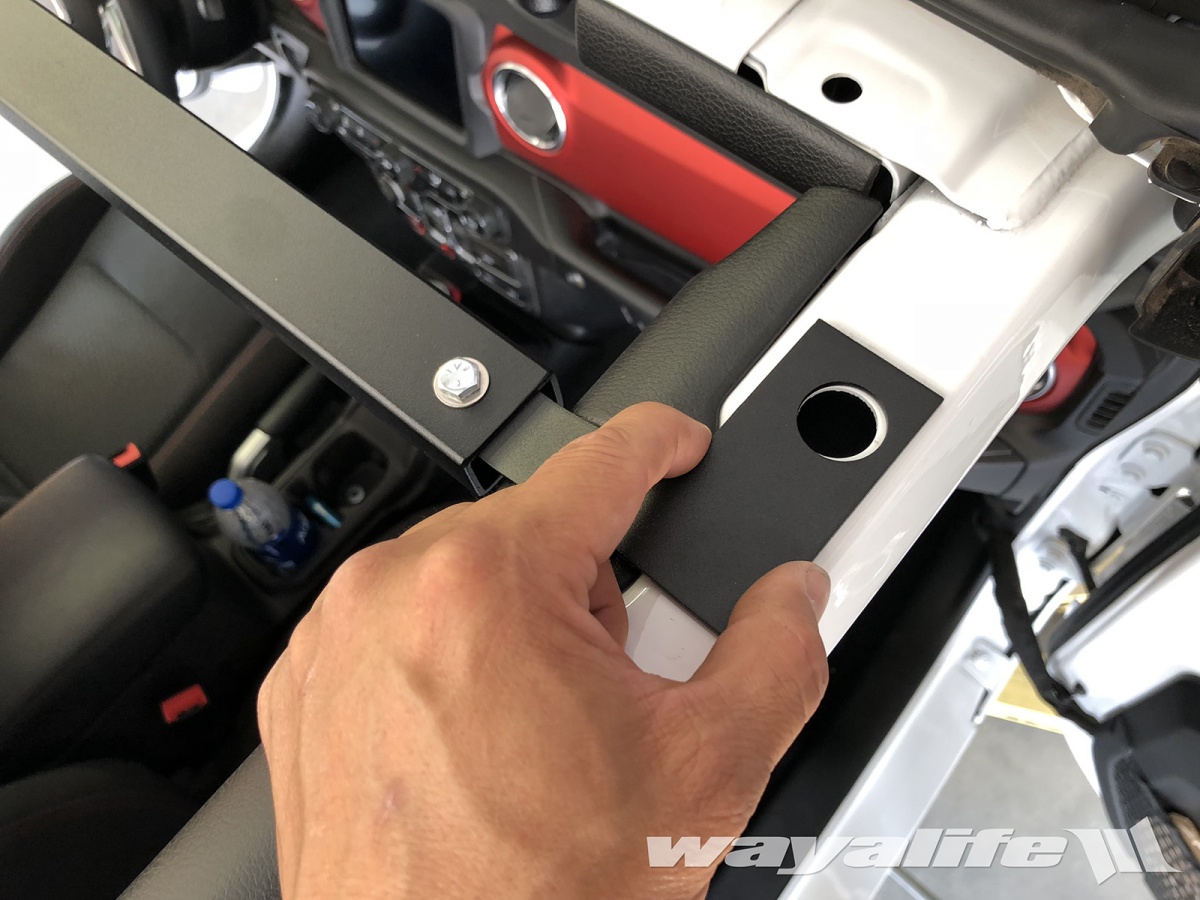
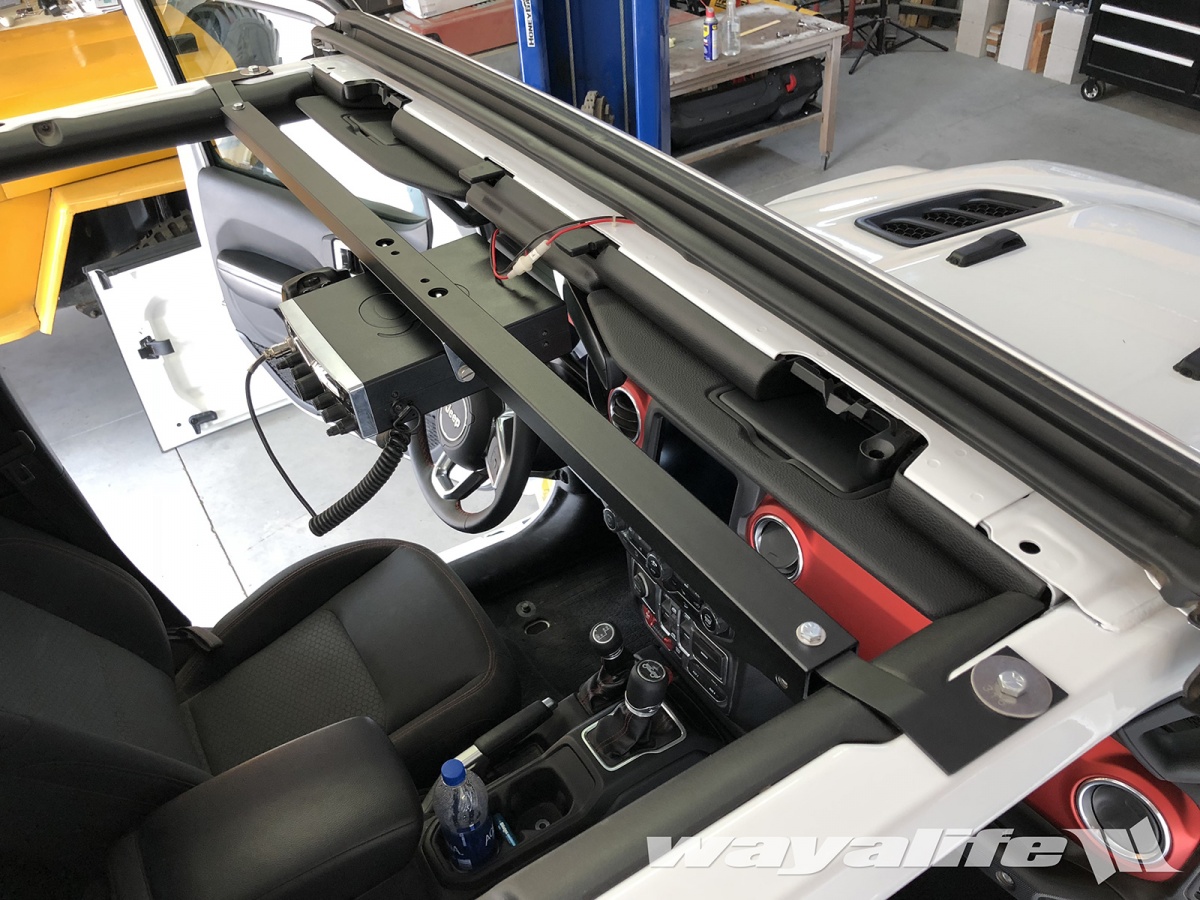
10. Standing on the driver side of your JL Wrangler, carefully place your assembled CB BAR on top of the roll bars.
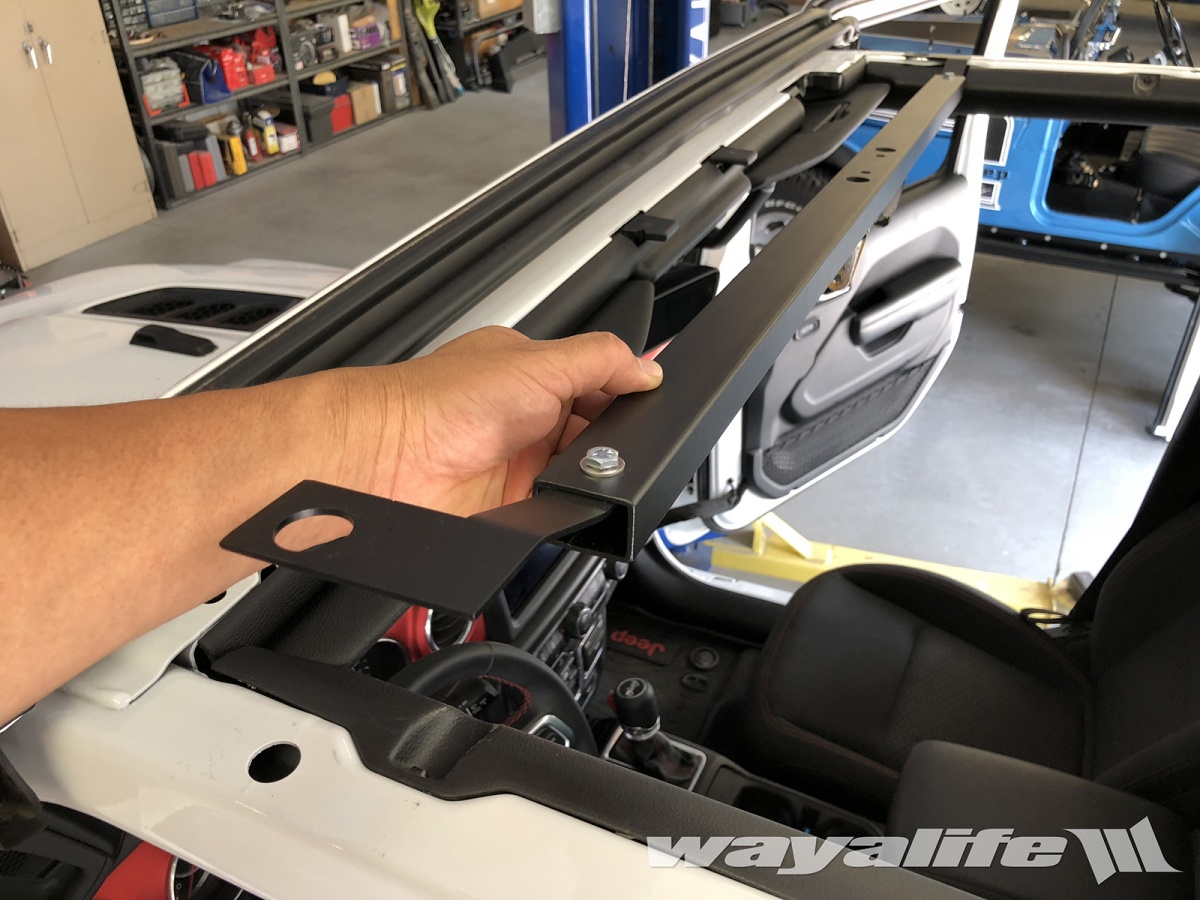
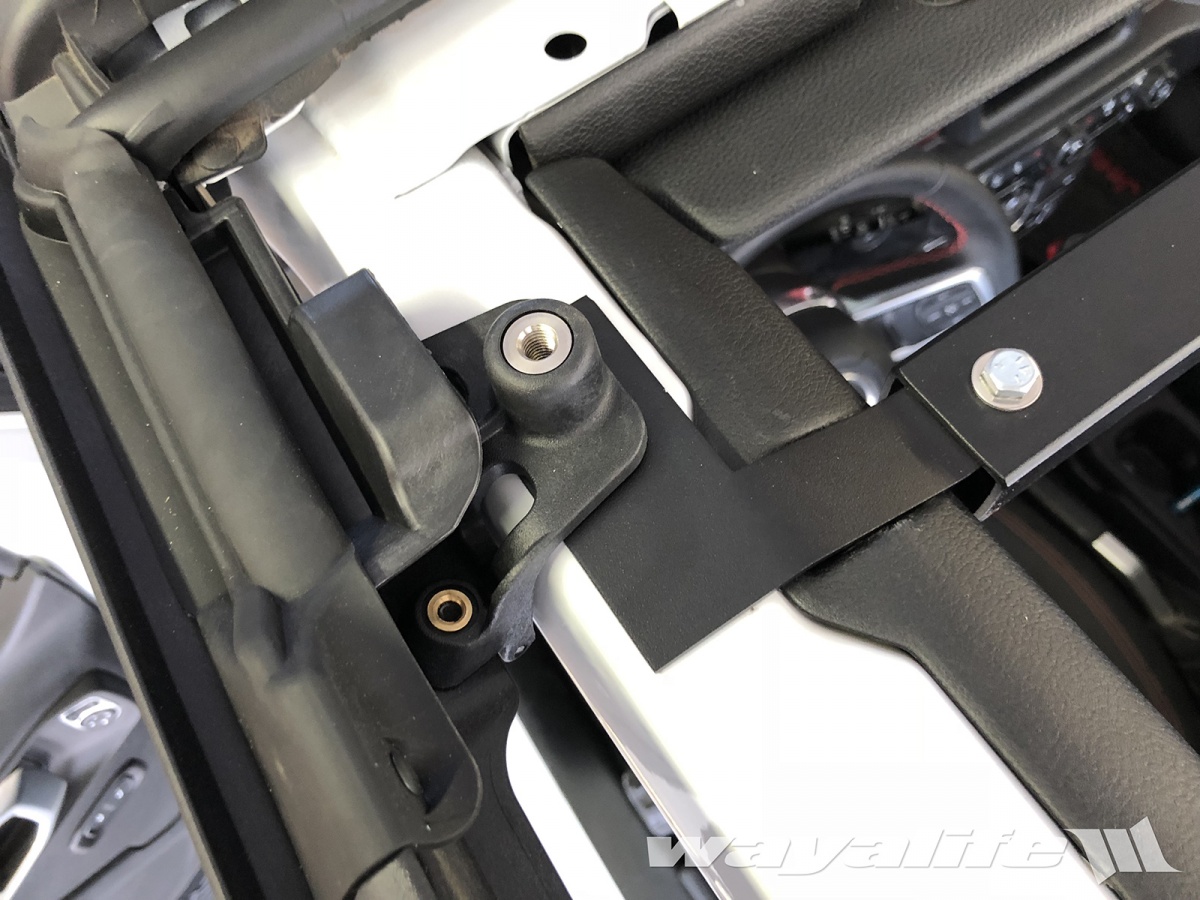
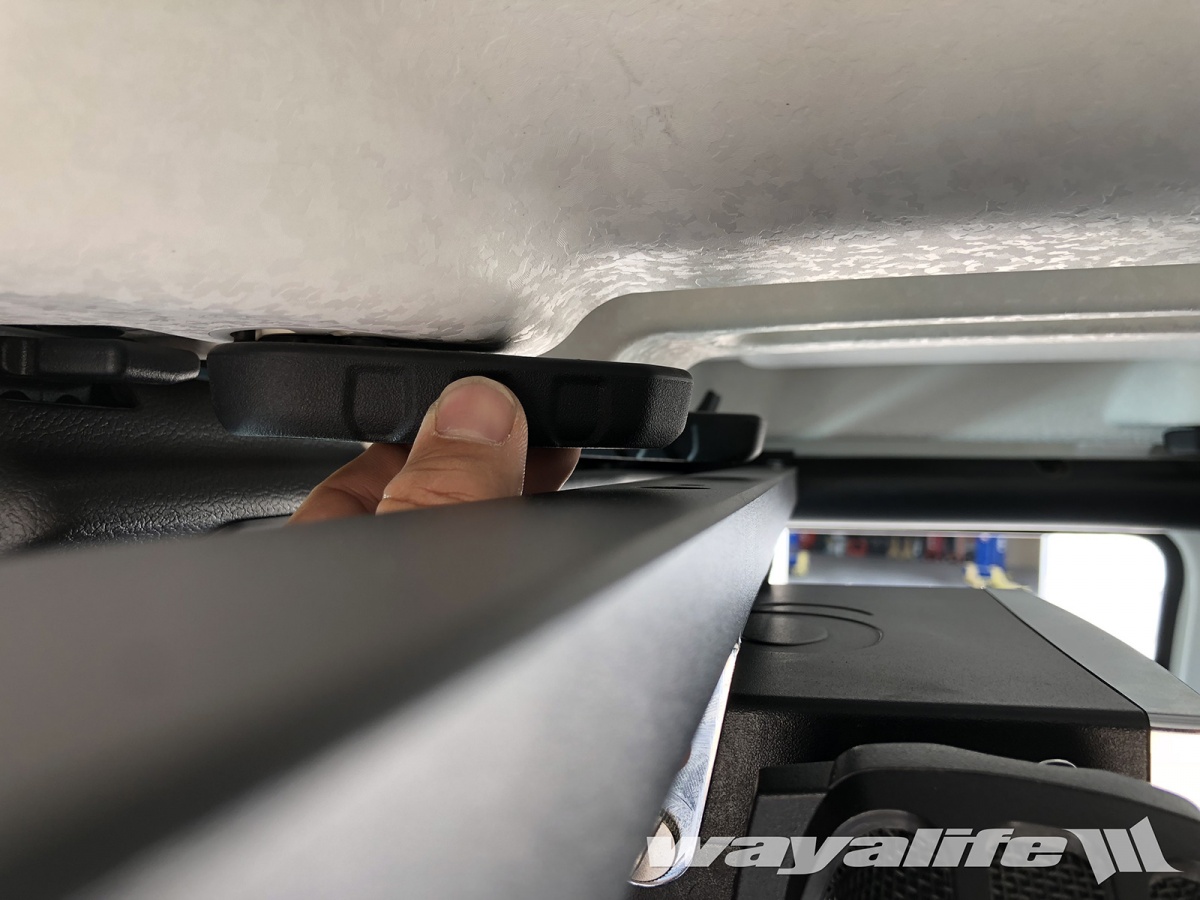
11. Position the large hole on the mounting bracket over the large hole on top of roll bar and so that the narrow end of the bracket is sitting in the grove of the plastic trim as shown. NOTE: Even after making adjustments to the position of the mounting bracket, the large hole may still not be completely centered to the hole on the roll bar. This is normal and is caused by inconsistencies in manufacturing tolerances. The holes on the mounting brackets are purposefully made larger to help accommodate for these differences.
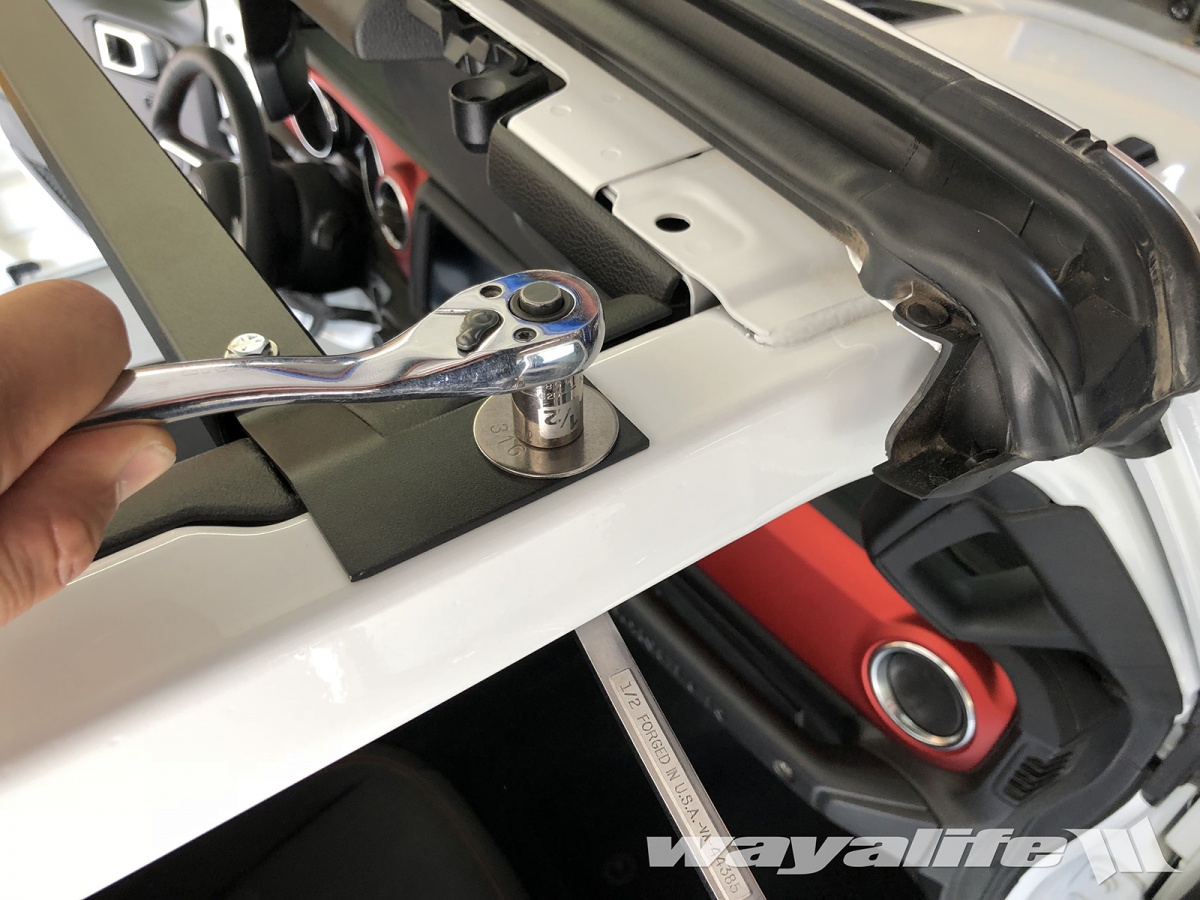
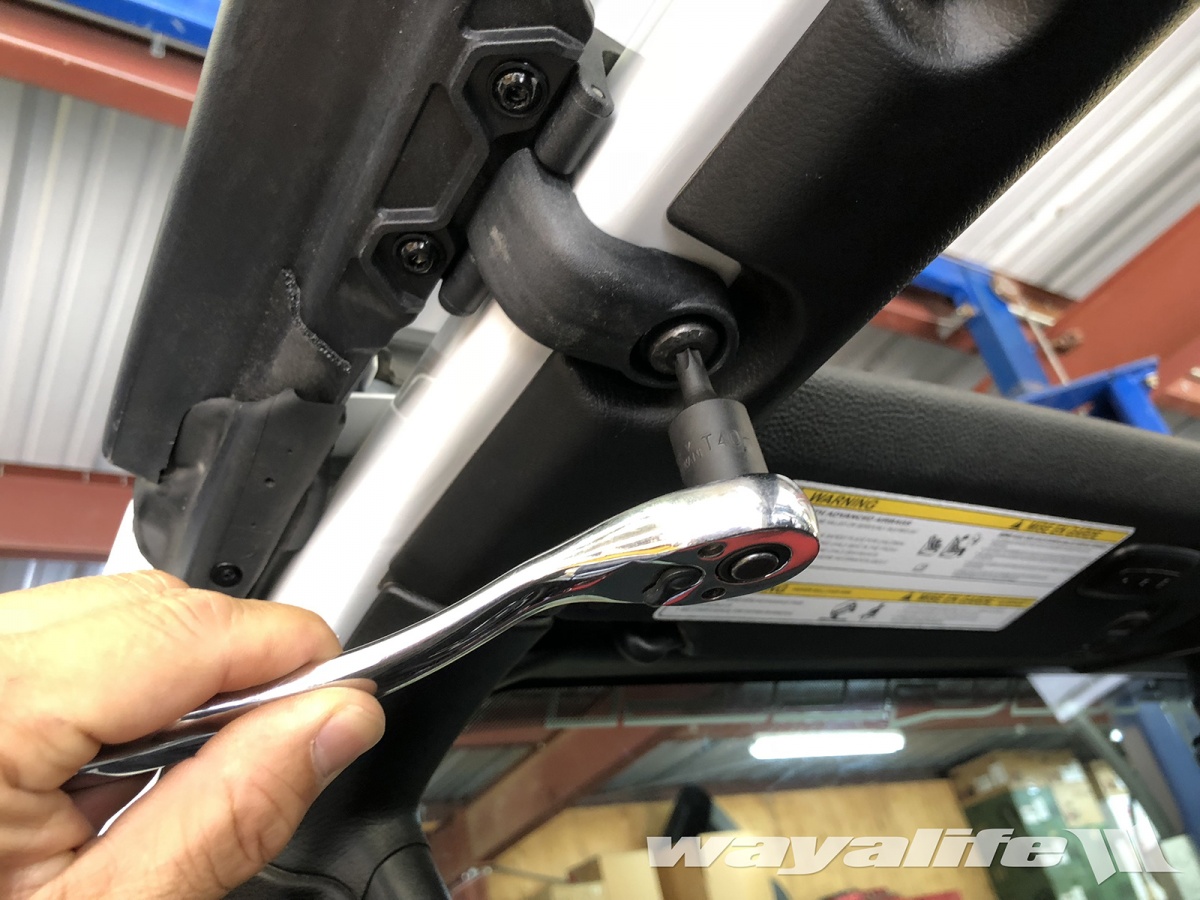
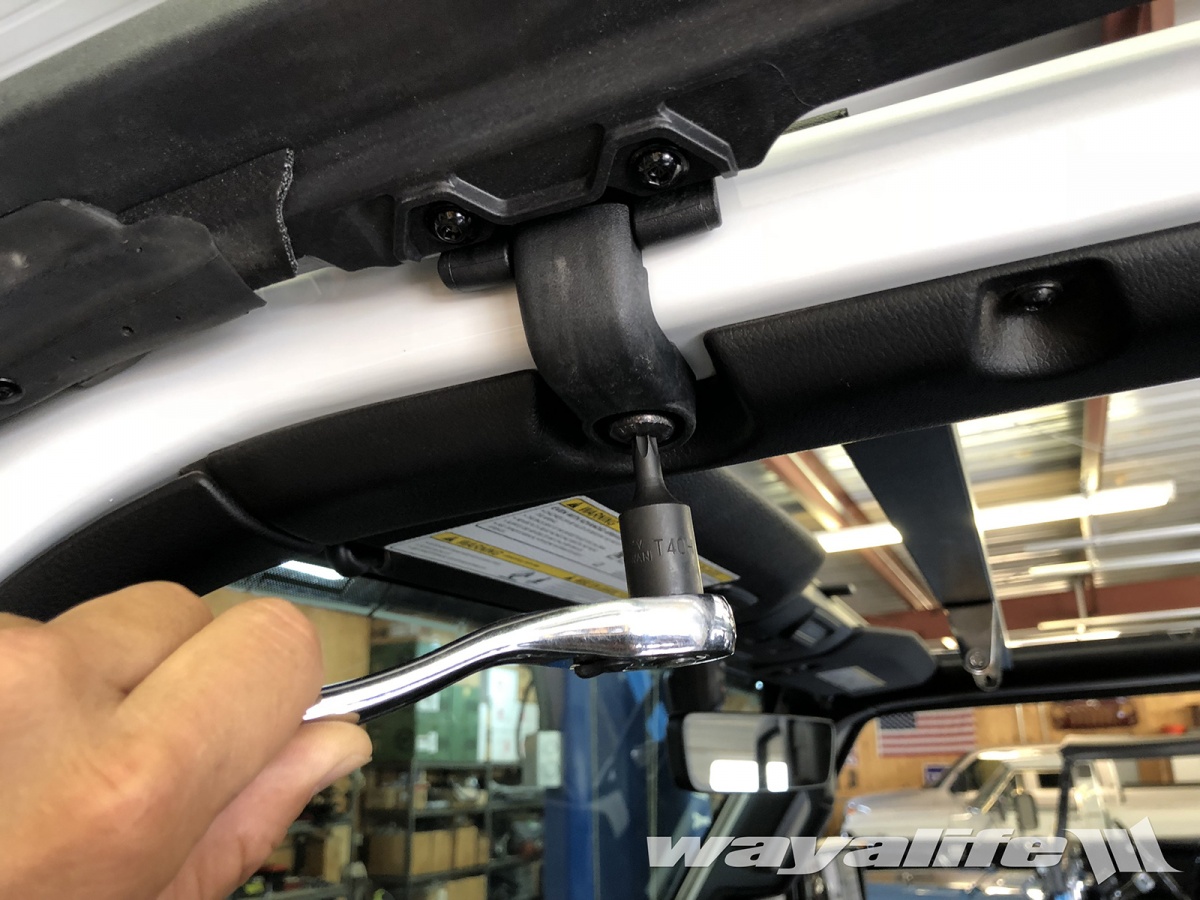
12. Repeat Step #11 on the passenger side and make adjustments to the mounting bracket as needed. Once positioned correctly, tighten the bolts securing the mounting bracket to the CB BAR using a 7/16" socket. No wrench should be needed as the serrated nuts inside of the CB BAR should bite into the metal and not spin.
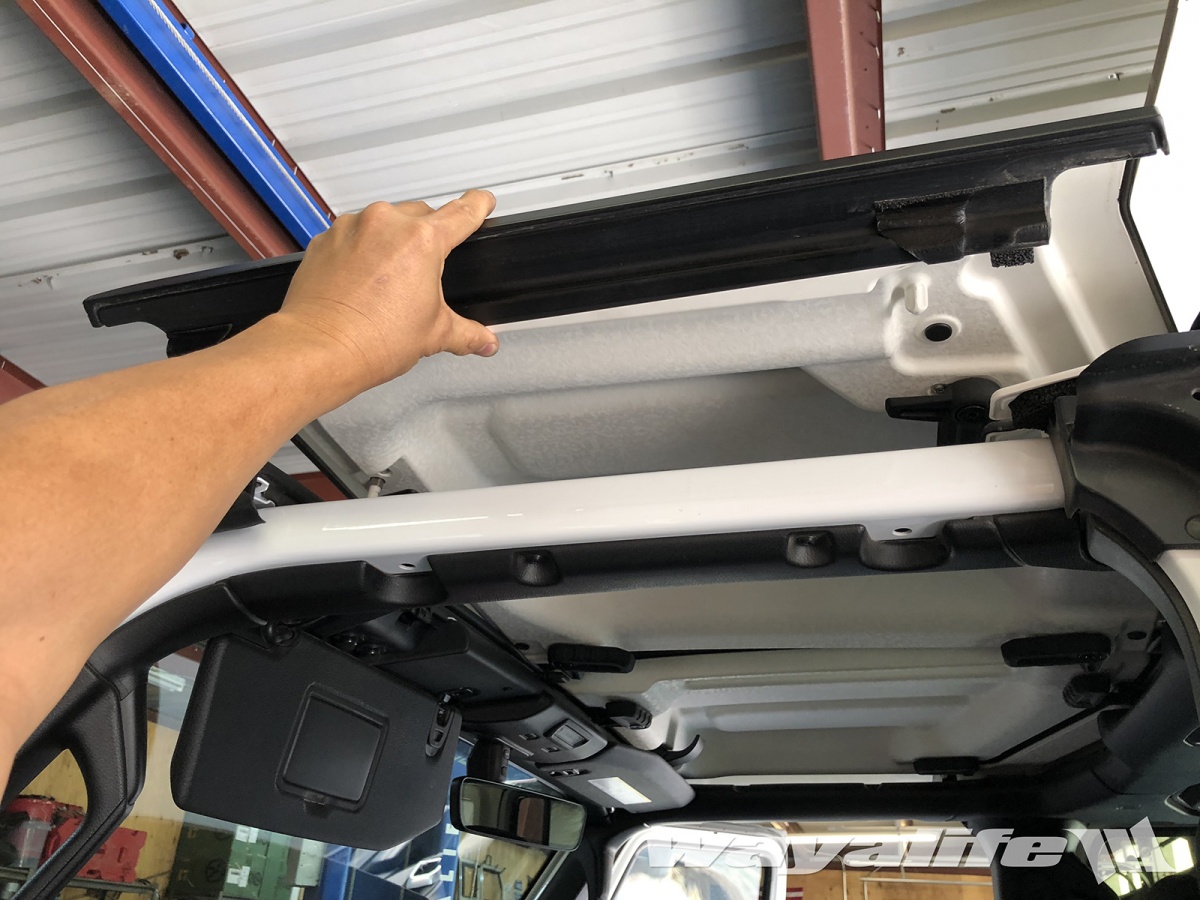
13. Take the 5/16"-18x2-1/2" bolts, slip 5/16" fender washers onto them and then insert them through the large holes on top of the mounting brackets. Make sure they go all the way through the bottom of your JL Wrangler roll bars.
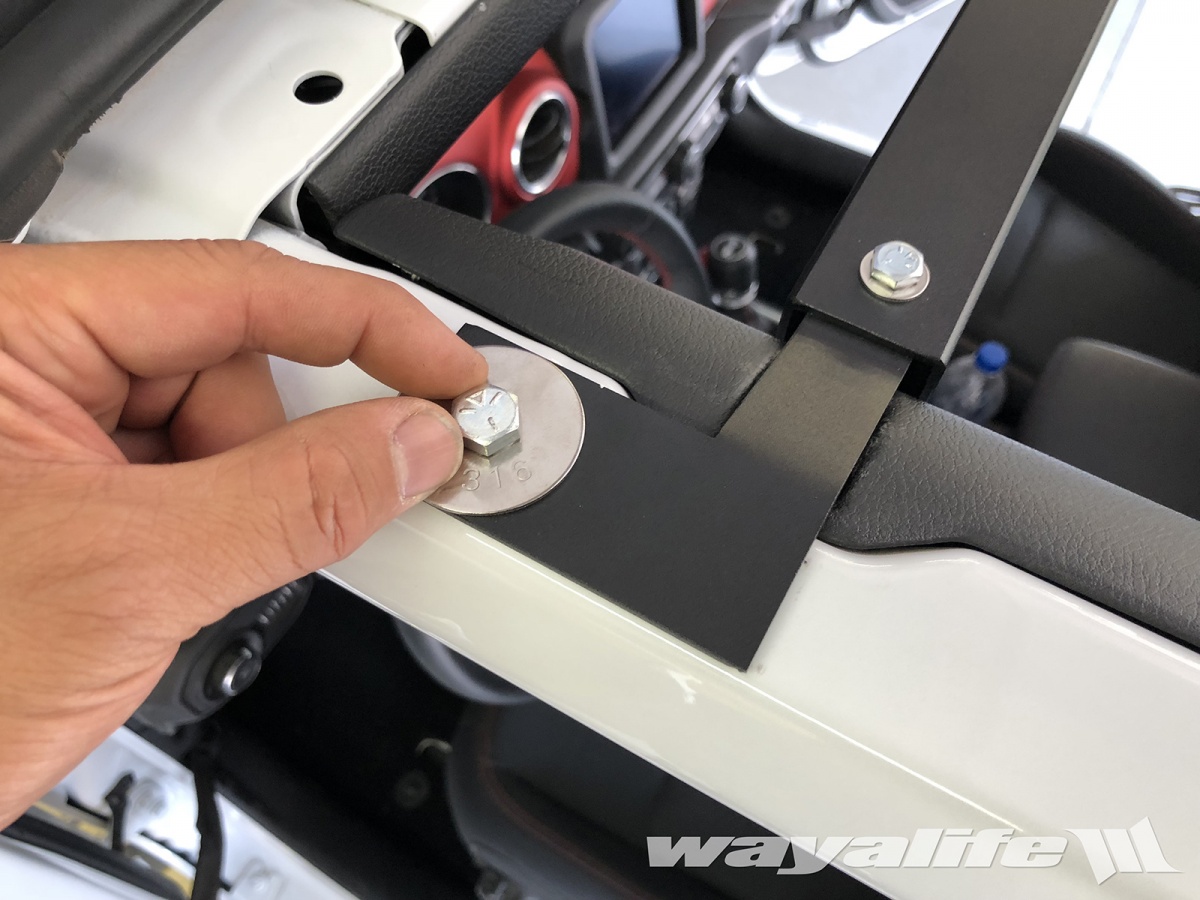
14. Using a 5/16"-18 nylon lock nut and washer, secure the mounting brackets to the roll bar using a 1/2" wrench and socket.
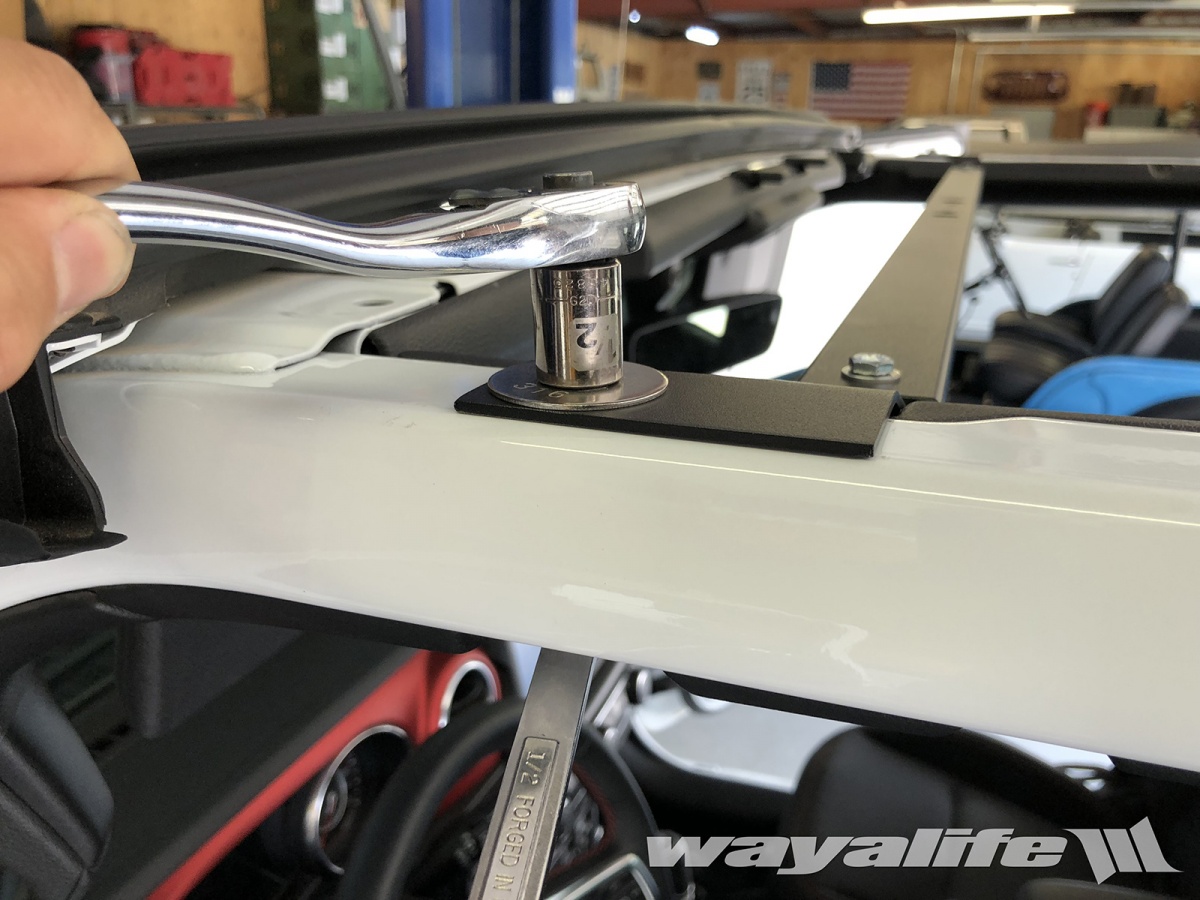
15. Repeat Step #14 on the passenger side.
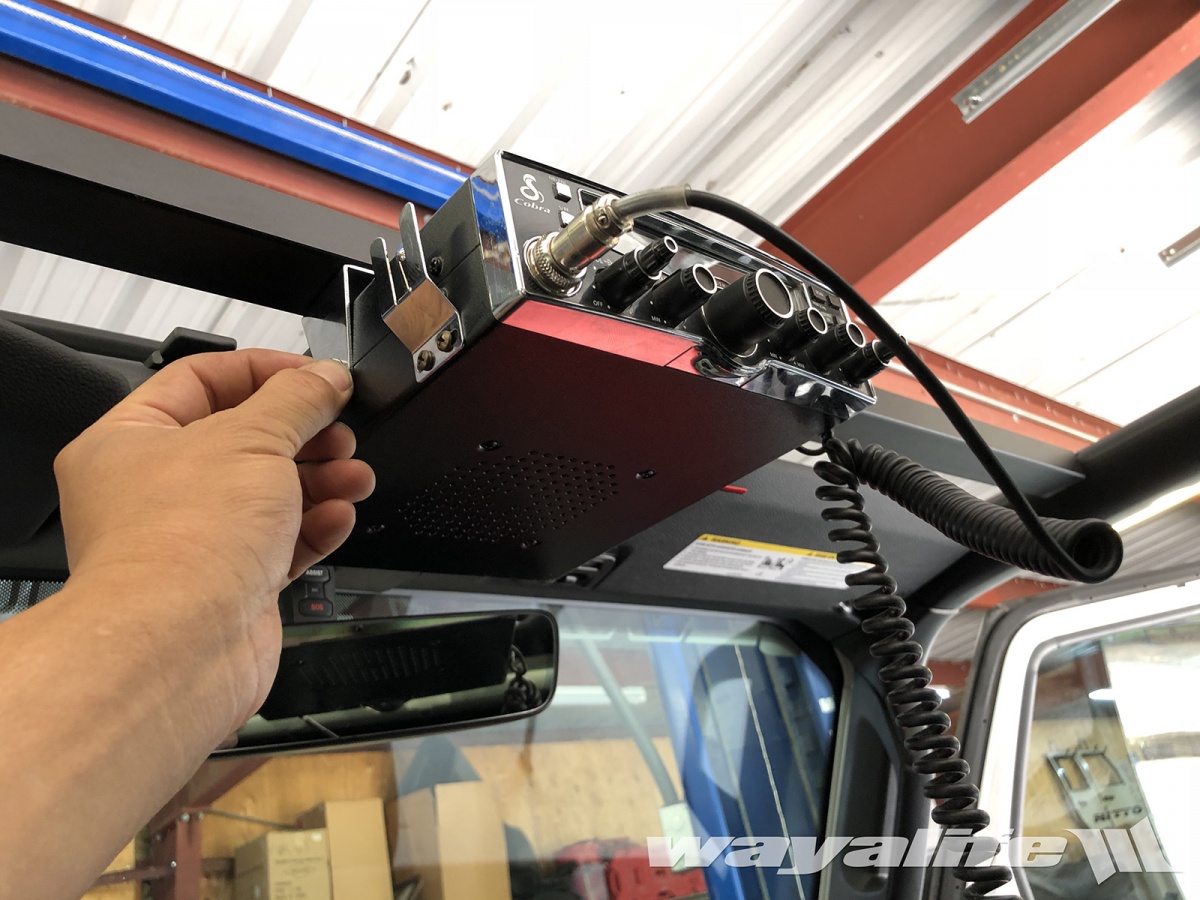
16. Hold your CB Radio up in its mounting bracket and secure it in place using the screws provided with it.
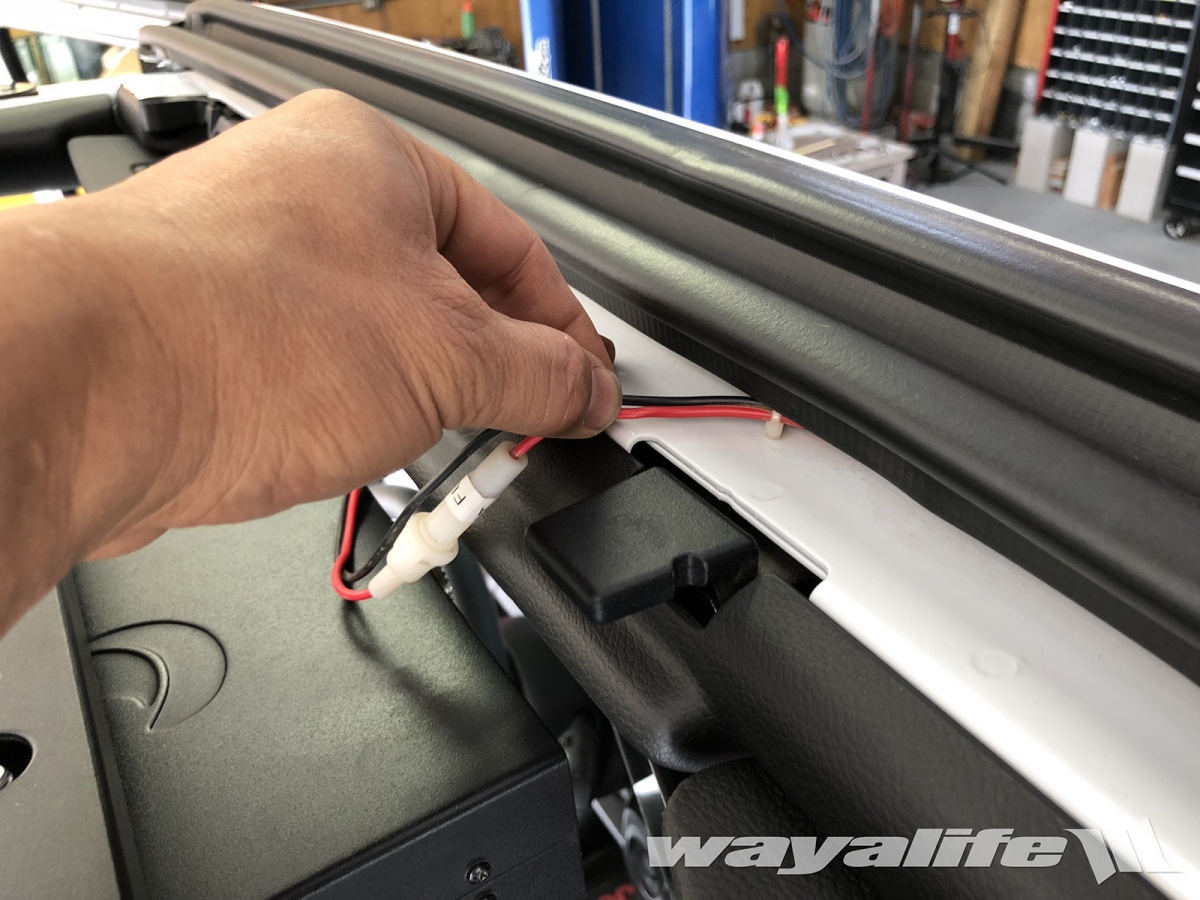
17. Your CB wiring and coax cable can now be fed in between the windshield header and frame and routed down the passenger side of your JL Wrangler as shown.
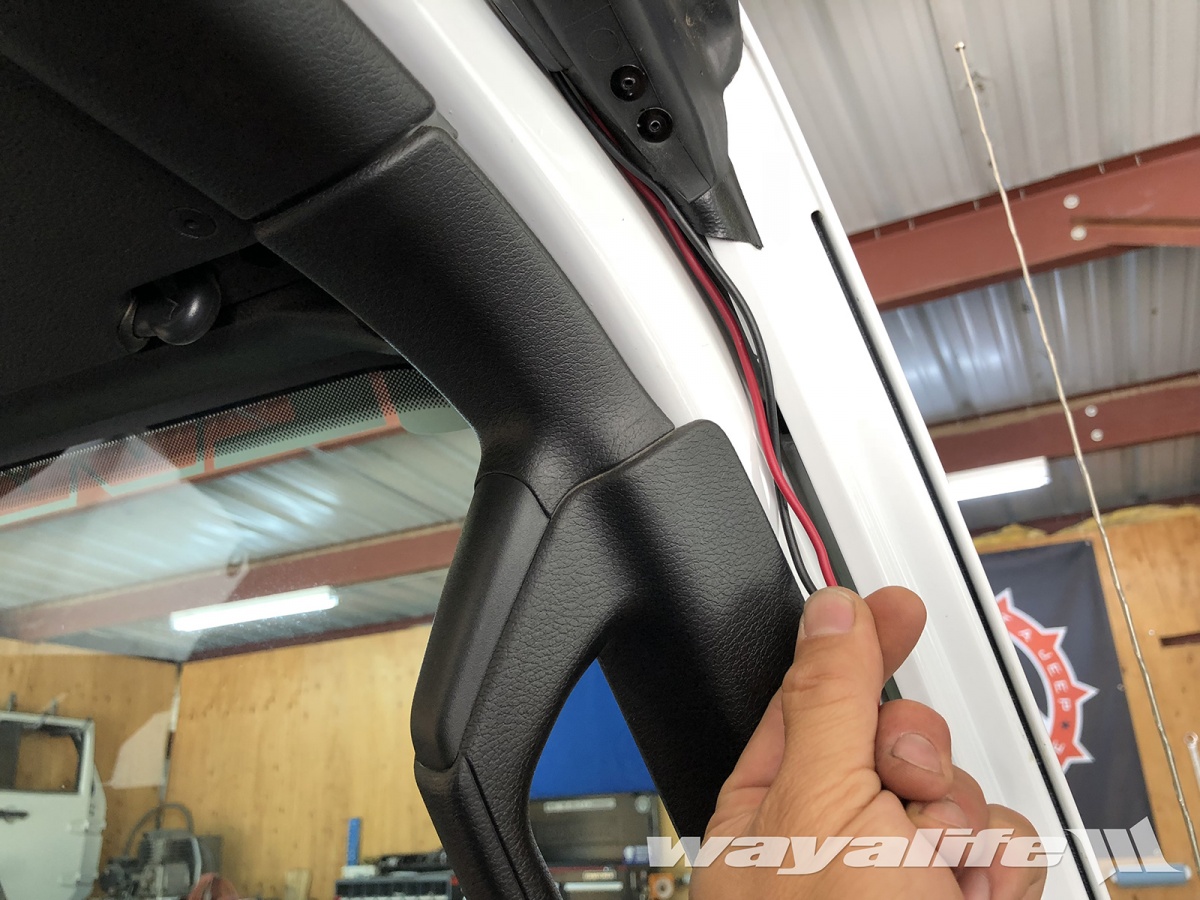
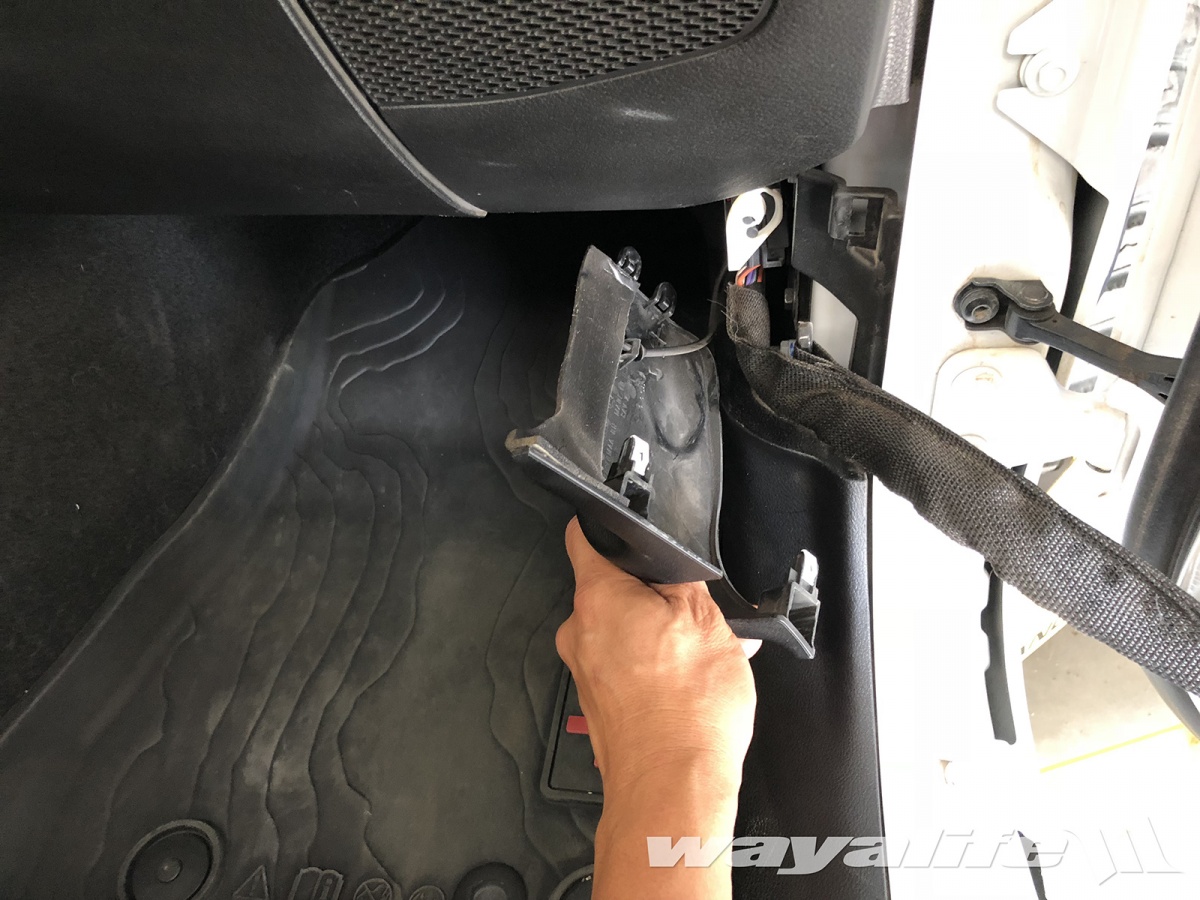
18. Down in the passenger side foot well, grab a hold of the kick panel and pull it straight back to free it from the body. You can continue routing your power lead through here and attach your ground to the existing ground stud located under the wiring harness plug.
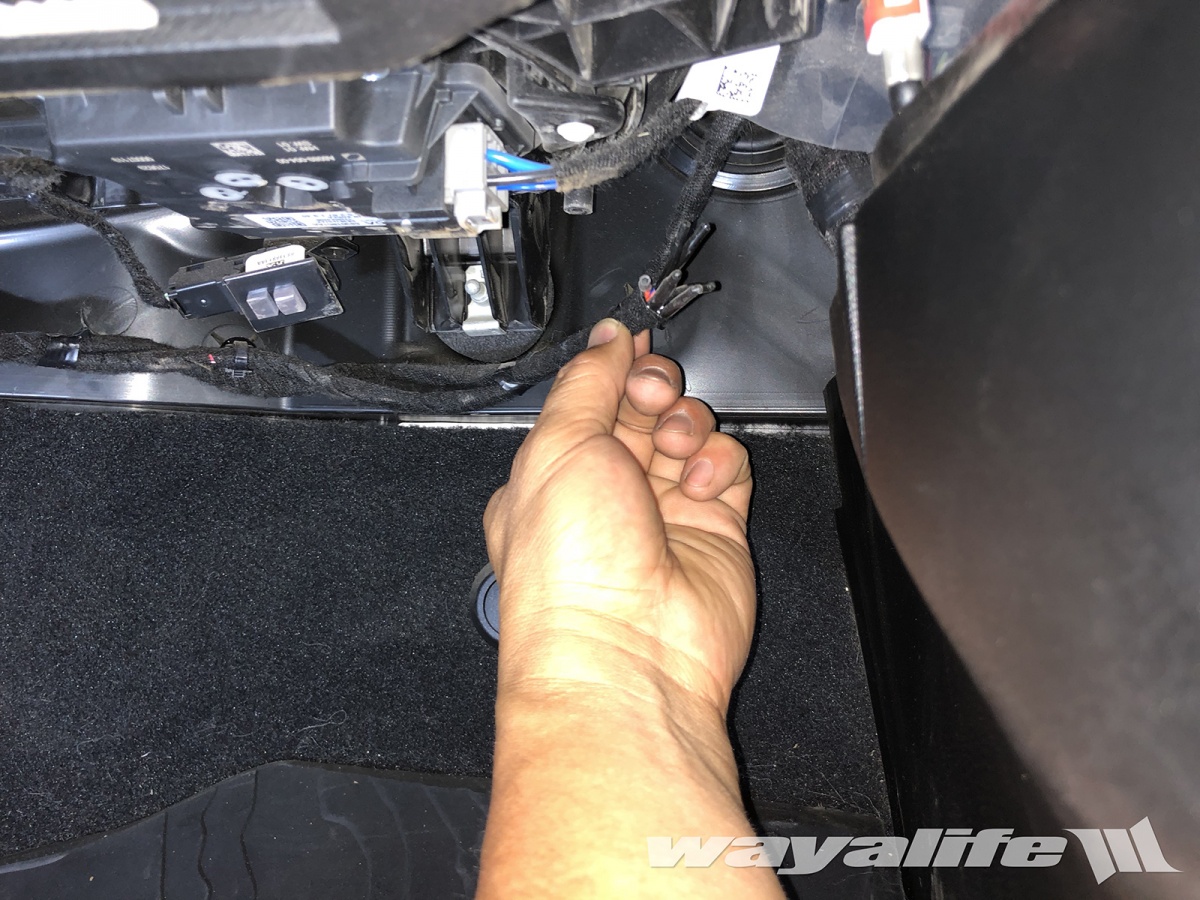
19. If you purchased your JL Wrangler with auxiliary switches, you can find the wiring for it located under the glove box and secured to the passenger side firewall. The Red Wire with the White Stripe goes direct to battery and it'll be what you'll want to tap into. If you do not have auxiliary switches, there is a rubber grommet in the firewall that you can phish your power lead through and connect it directly to the battery.
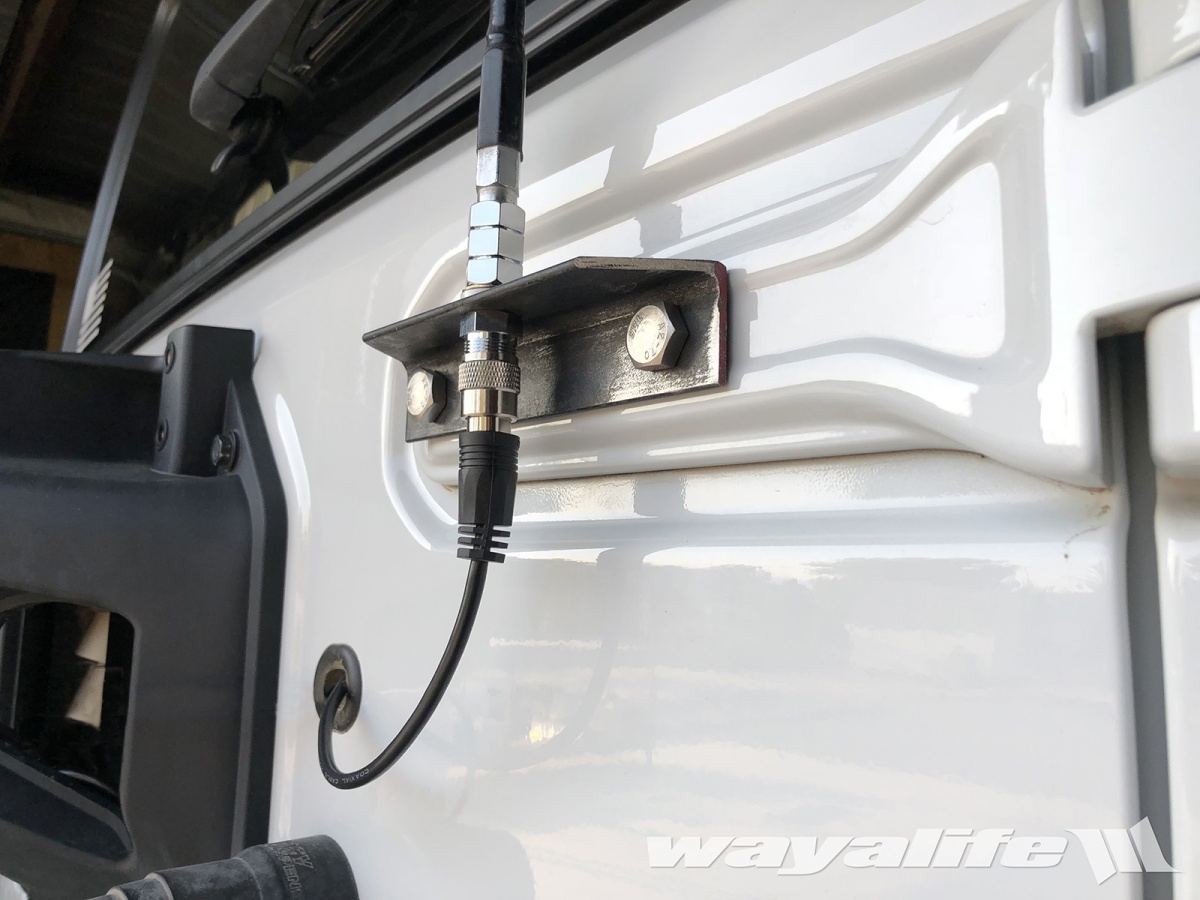
20. Your coax cable can be routed down the same path as your power and ground leads and then run it behind the door sill trim to the back of your JL Wrangler. Or, you can run it along the length of your roll bars to the back as well. The coax cable can then be phished into the tailgate and pulled through the rubber plug located next to the spare tire carrier mount. If you have Mopar heavy duty tailgate hinge supports, the upper hinge will have a built in mounting hole that you can secure an antenna stud to. If you don't have Mopar hinges, I am working on a basic antenna mount similar to what you see below. I hope to have these available for sale soon.
SOFT TOP INSTALLATION
1. Fold both of your sun visors down and push them toward the windshield. Then, pull the header latches downward and make sure that the hooks are fully disengaged from their receivers.
2. Stand on the outside of your JL Wrangler, lift up the Sun Rider portion of your soft top and fold it back.
3. Using a Torx T-40 bit, remove the bolts securing the front door surround to the roll bar. Separate the door surrounds and set them aside.
4. Follow Steps #4-12 of the hard top installation.
5. Place the soft top door surround on to the roll bars making sure that the plastic pegs insert completely through the large holes on the CB BAR mounting bracket.
6. Secure the door surround in place using the factory hardware. A Torx T-40 bit will be needed for this job.
5. The soft top door surround will hold the CB BAR in place and no other hardware will be needed to secure it in place. Continue following Steps #16-20 of the hard top installation.
JL WRANGLER Homemade Tailgate CB Radio Antenna Mount & Wiring WRITE-UP
https://wayalife.com/showthread.php...te-CB-Radio-Antenna-Mount-amp-Wiring-WRITE-UP
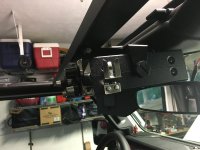
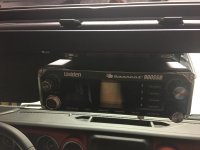
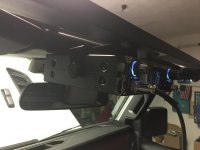
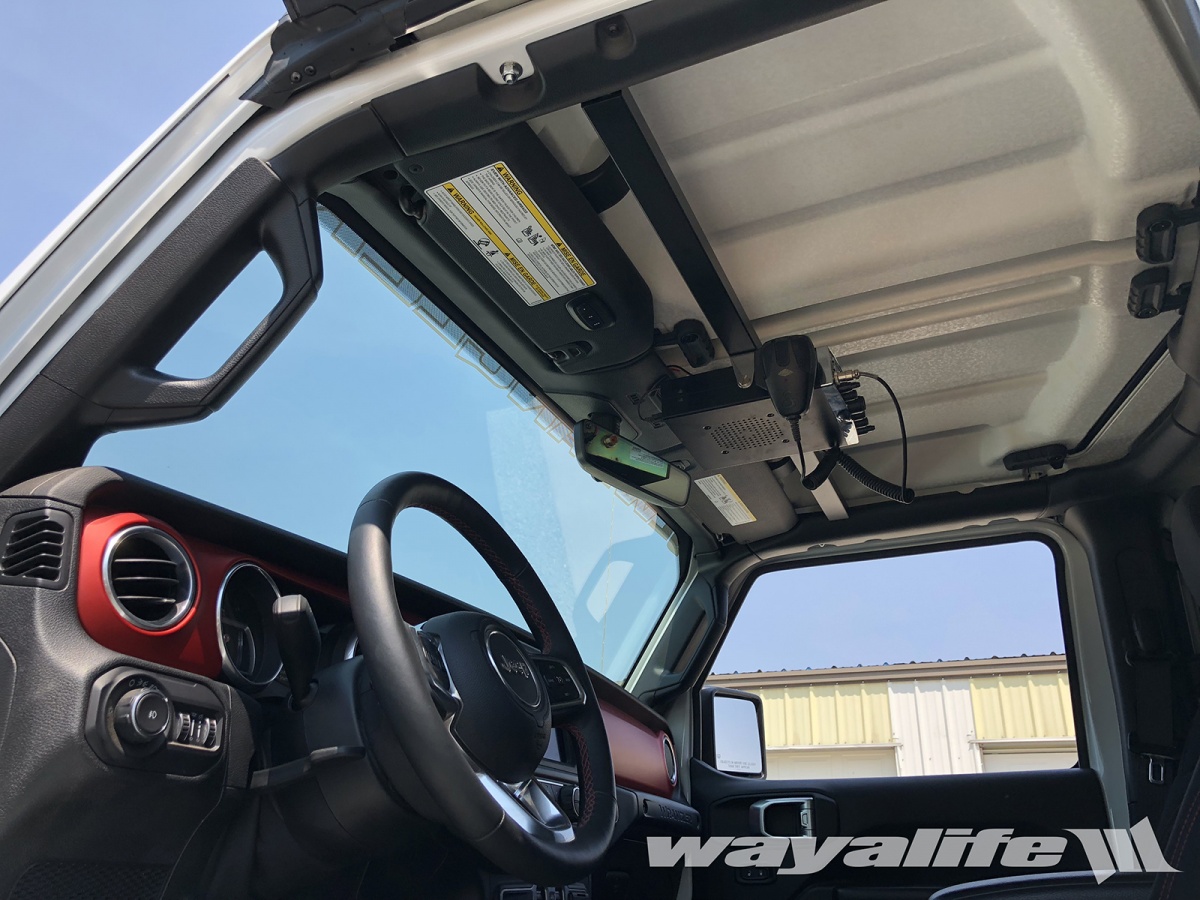
FINISHED PHOTOS
Here are a few shots of what your CB BAR will look like once it's installed on your JL Wrangler.

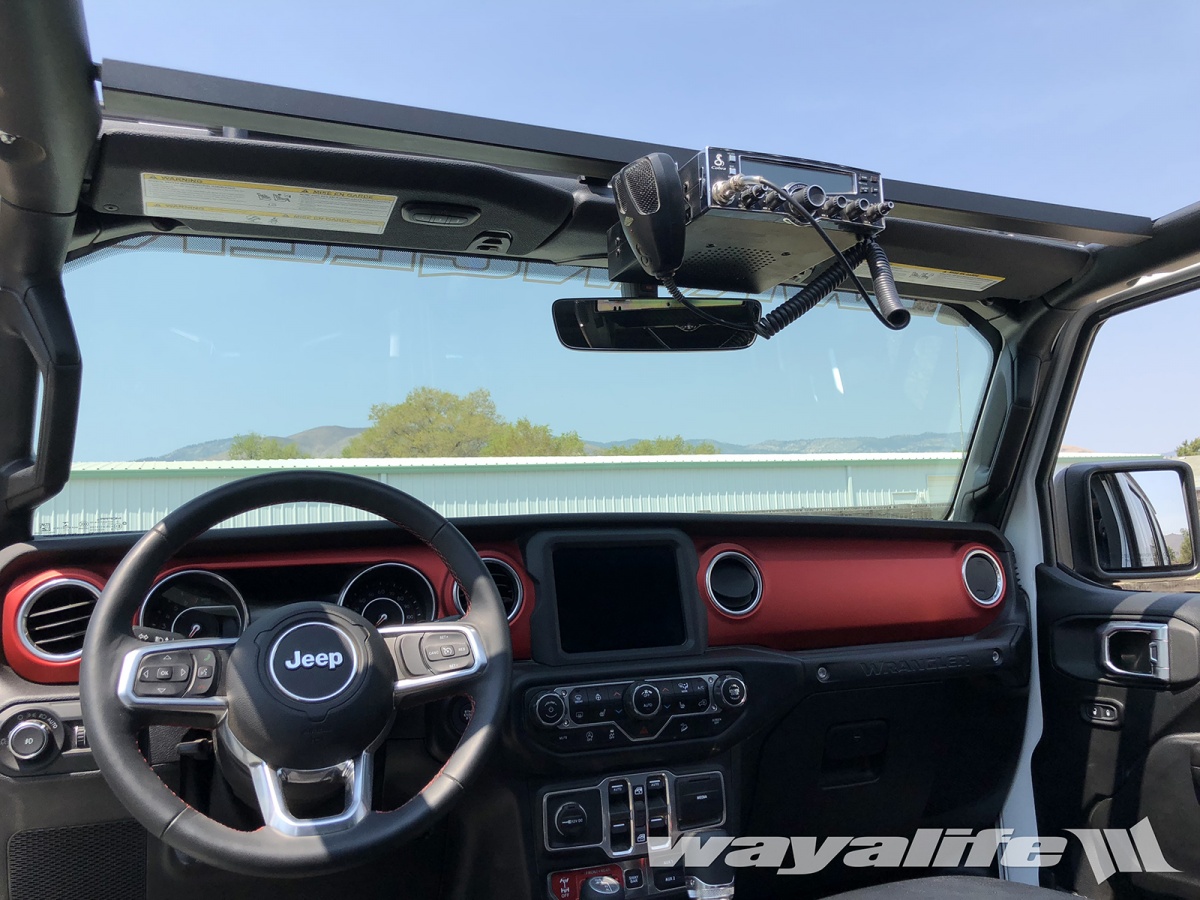
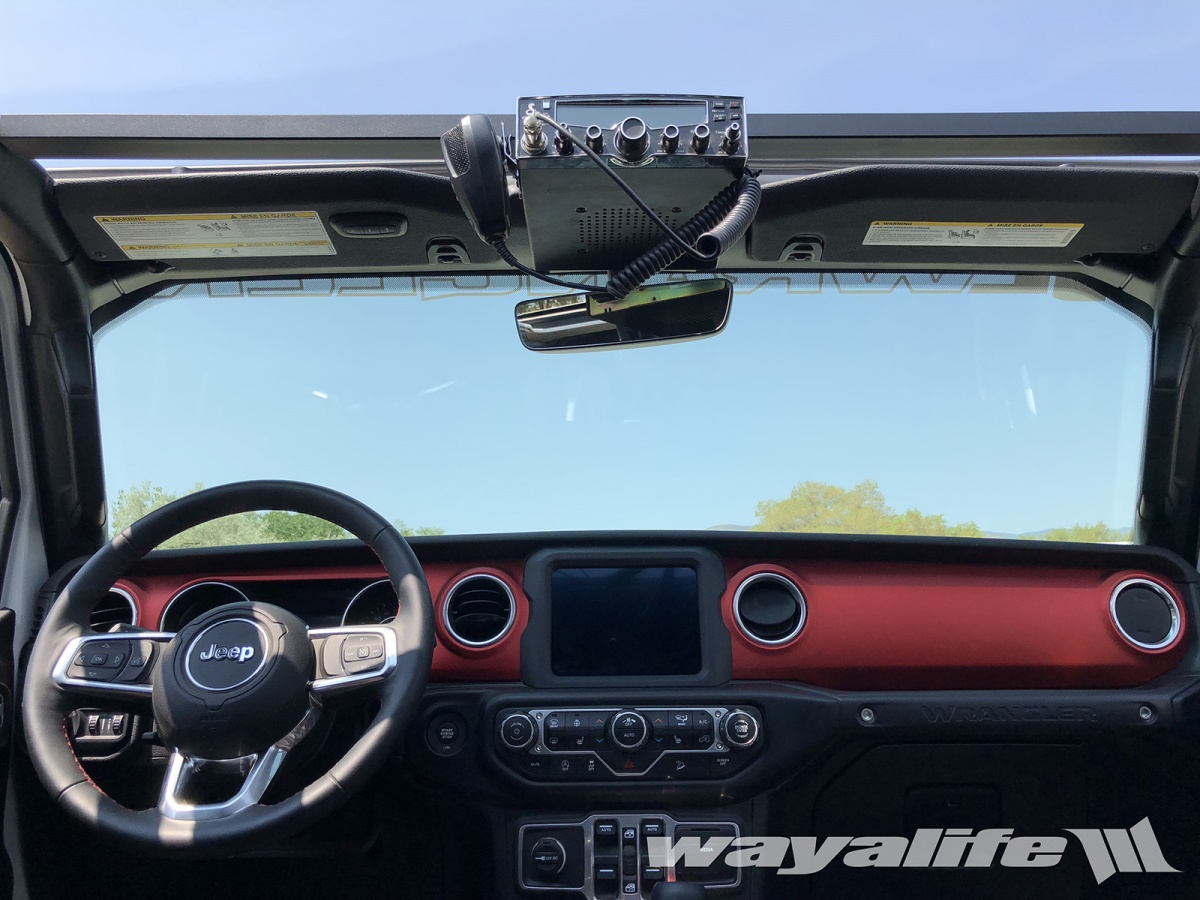
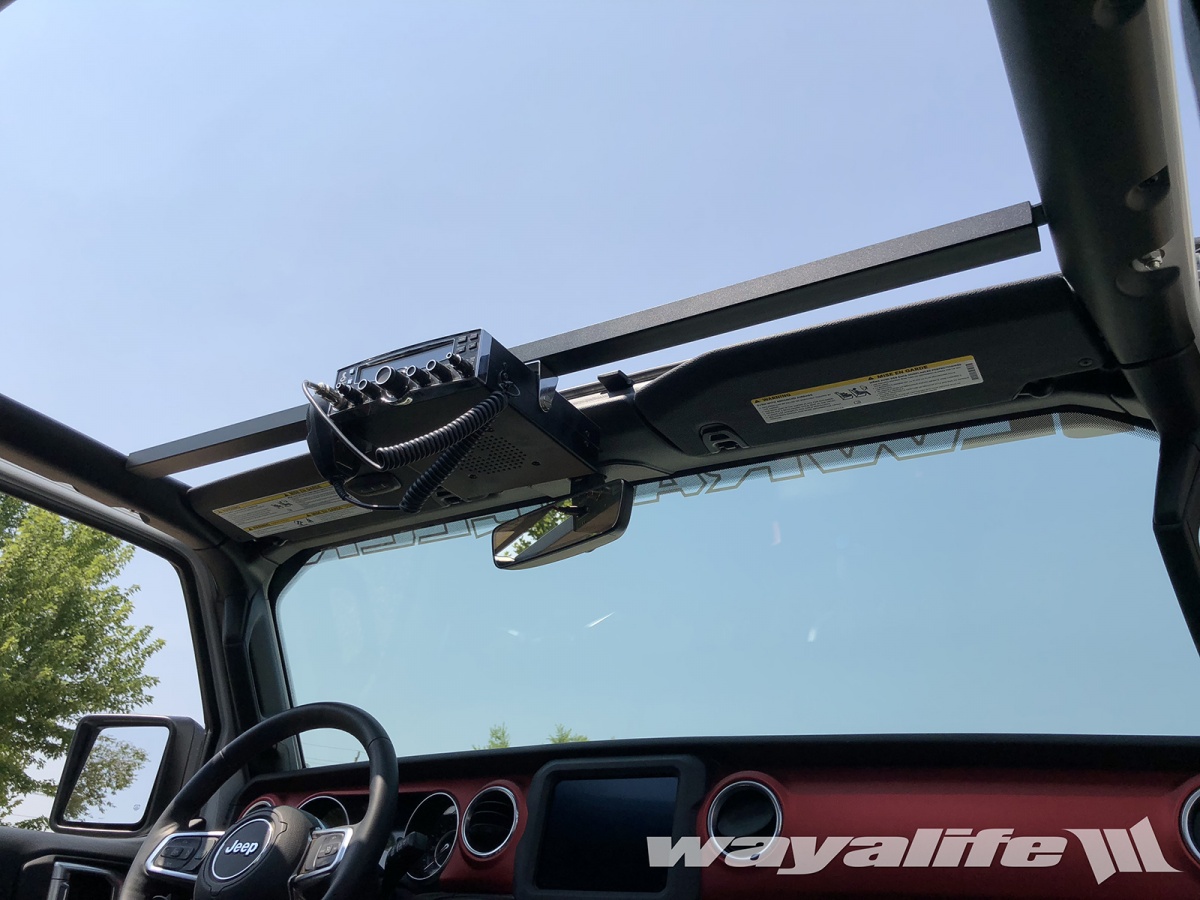
Here are a few shots with the hard top on.
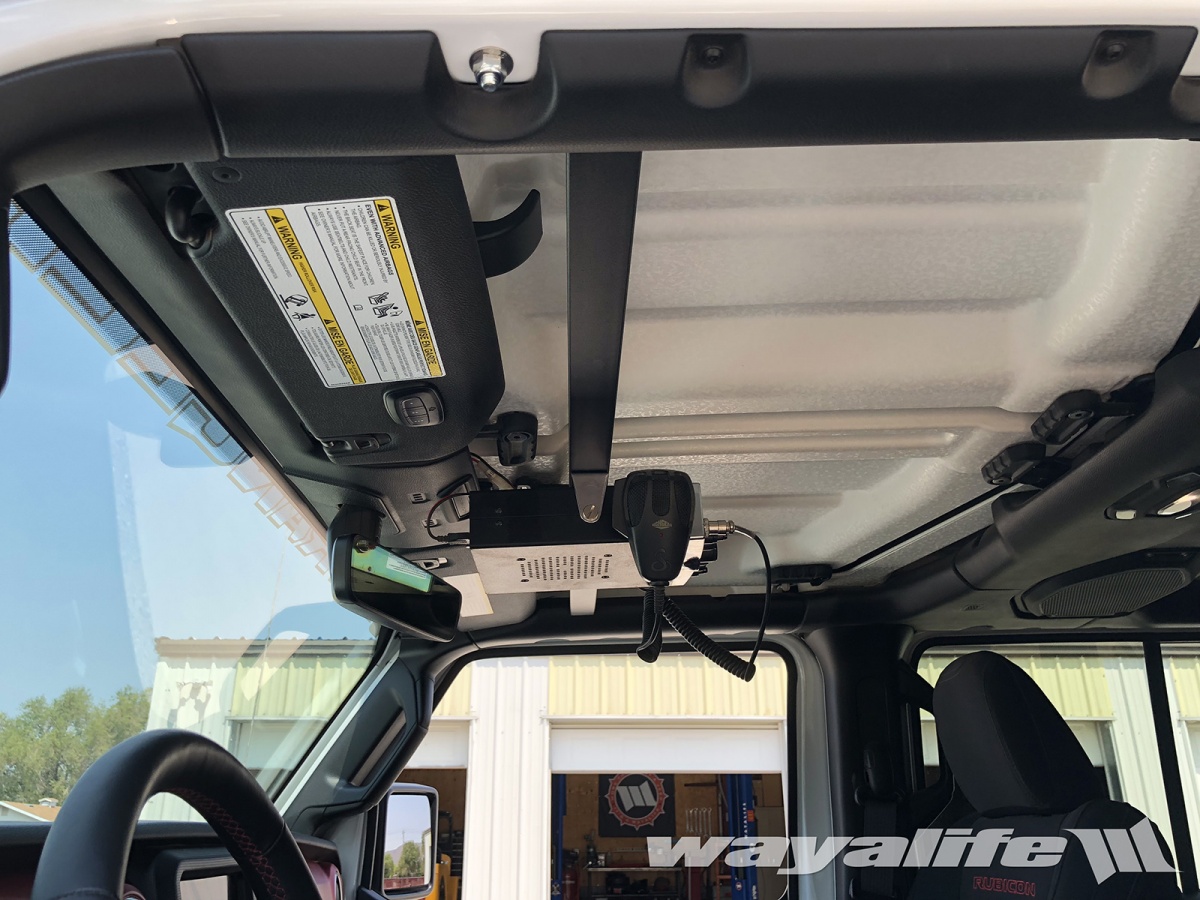
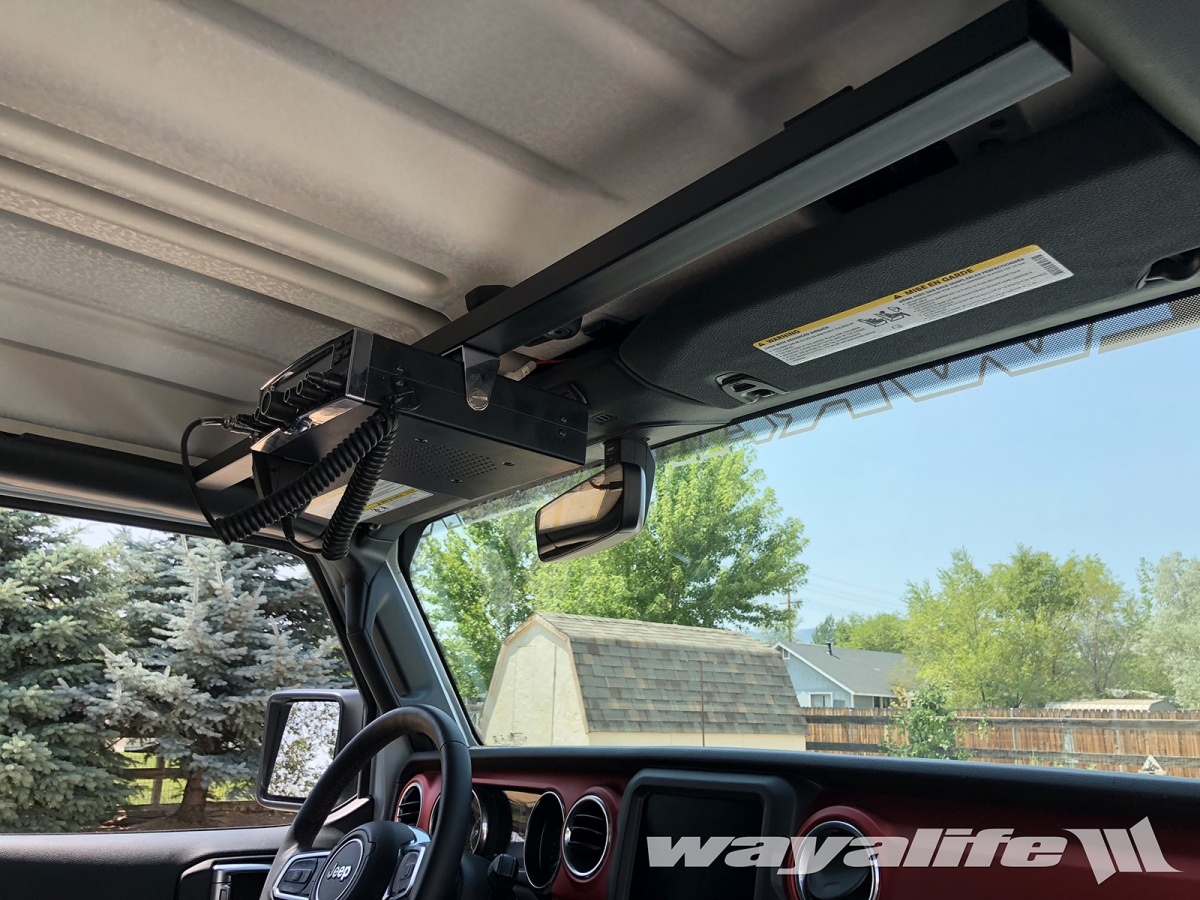
As you can see here, the CB BAR does not interfere with the use of the sun visors.
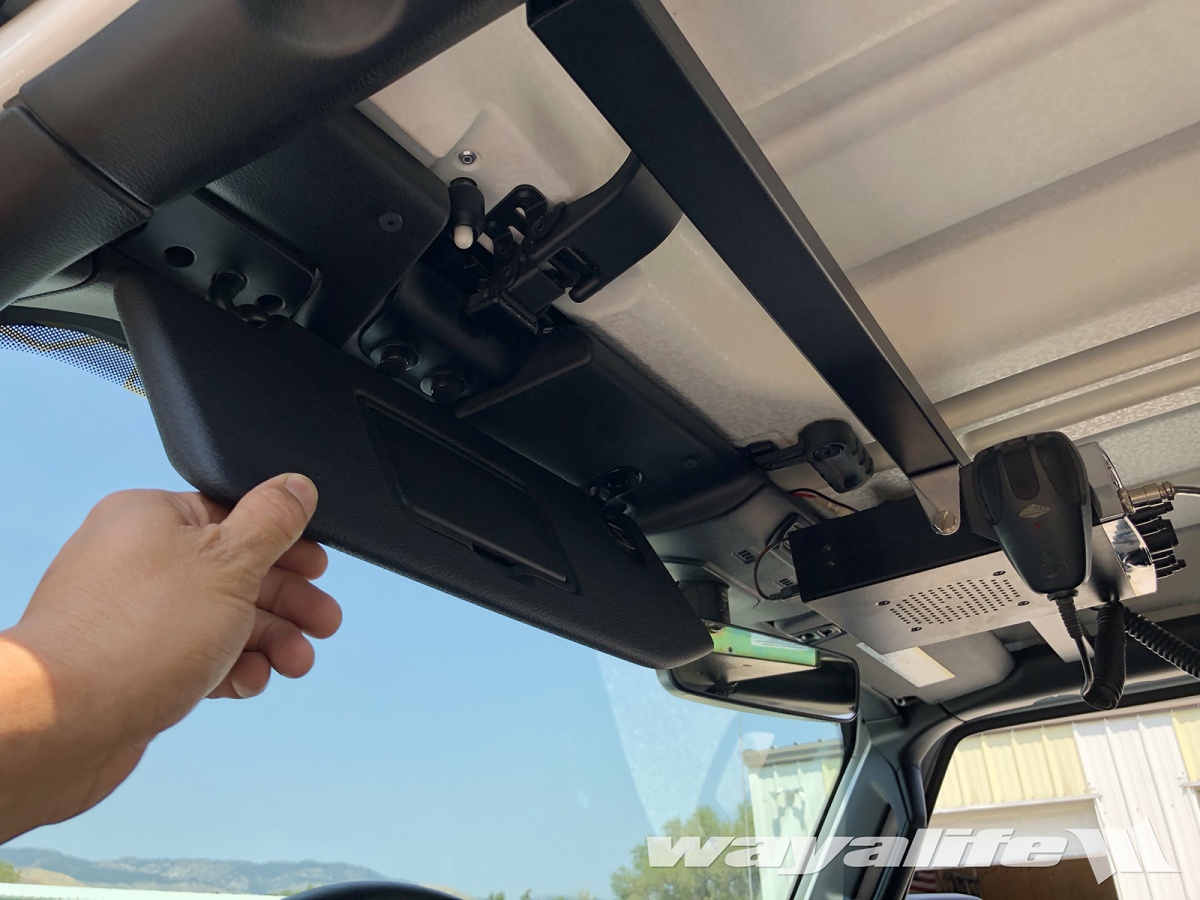
The header latches can also be used without any issues.
For those of you with a hard top, there's plenty of room for you to operate the Freedom Top panel locks.
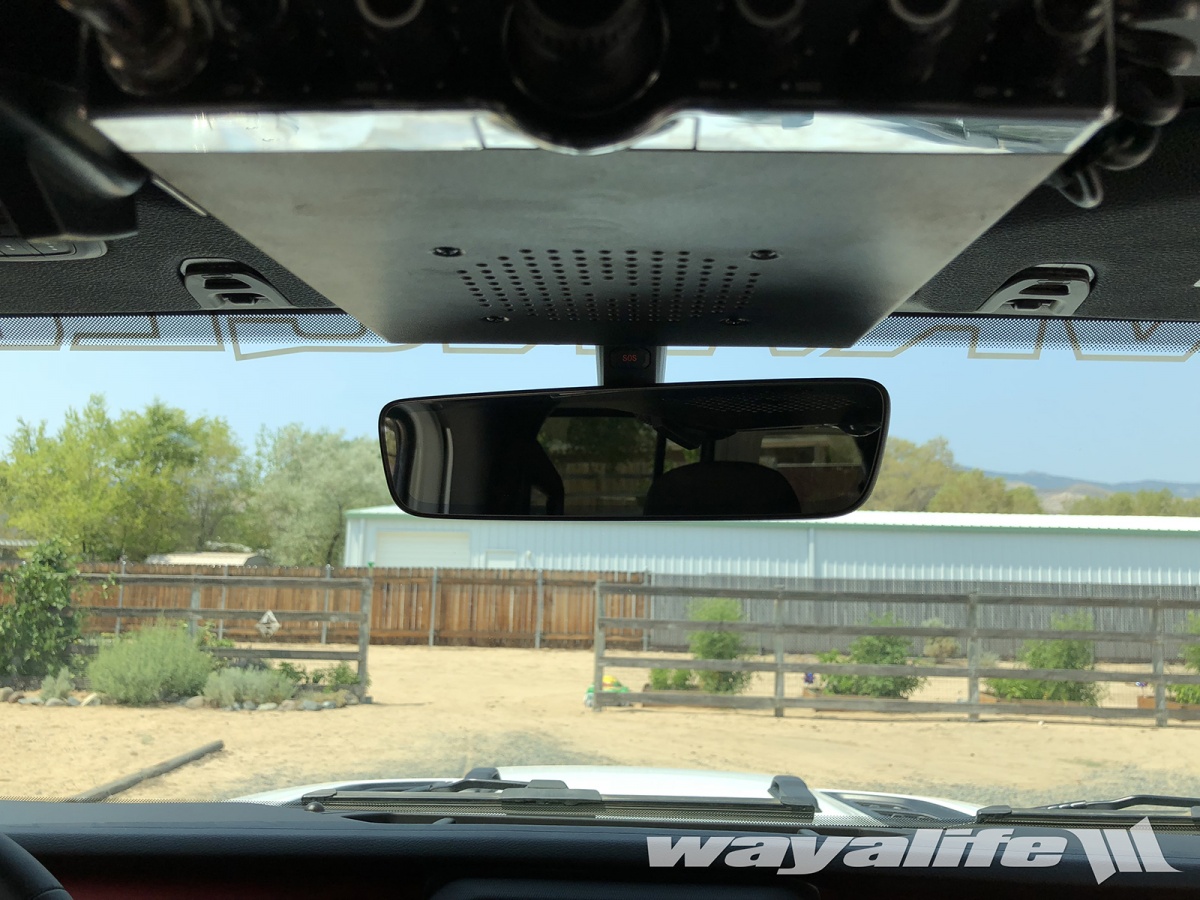
And last but not least, your CB Radio will not block your rear view mirror.
Much like the HITCH STINGER I offer, the CB BAR is MADE IN THE USA by a veteran owned shop and natives of Carson City, NV, Sean Weed and Josh Ostler.
Please let me know if you have any questions.

 Lol
Lol