CoWj Build /I'm back

xwaz

Member
Next up was probably the visit home over spring break, I worked at Juniper overland at this time so I went down there on a sunday and swapped in a new driver side CV shaft and helped my boss slap new rubber on his project tacoma.
Which I lost the photos for... damn.

Sent from my VS996 using Tapatalk
 

xwaz

Member
Moab was one of the first times I got to camp solo in my New set up so I had to get a few photos of that and the drive there and home. Yes I live 4 hours from moab. Its a pretty good deal, once the winter set in here up in Gunnison I can head out there whenever I want. IMG_20180223_151253741.jpg IMG_20180223_155832297.jpg IMG_20180223_160347555.jpg IMG_20180225_085736981_HDR.jpg IMG_4293.jpg

Sent from my VS996 using Tapatalk
 

xwaz

Member
In April I got a quick trip out to fruita for some mountain biking, which unfortunately got rained out on saturday night. We had a torrential down pour at about 2am causing minor flooding in the campsite, hail, and lighting. I crawled inside the Jeep to continue sleeping. It made the drive home a bit muddy, but I couldn't resist exploring on the drive. IMG_4503.jpg IMG_4514.jpg IMG_4516.jpg IMG_4509.jpg IMG_4504.jpg IMG_4505.jpg

Sent from my VS996 using Tapatalk
 

dillard09

New member
Nice! I have family that lives in the Gunny area so we are up there a couple times a year. And will be up there just after Christmas to see them. Love the area but that wind in Gunny is terrible in the winter. Haha
 

xwaz

Member
Next up, A New rear bumper Build. This marks bumper set up #5 Or maybe #6? No sure at this point.
I drove home the weekend before finals to get a head start on this project as I thought I was driving my Jeep to Expo West for work. (Didn't end up driving it)
But I ordered a set of Comp 4x4 Hinges, these required drilling 1-5/8" holes in the top and bottom, and welding a sleeve into the bumper. The hinge then gets welded inside that sleeve.
IMG_20180427_203522682.jpg
I then worked on tire carrier side of the bumper.
received_2539093936315716.jpeg
I tried to match the angle of the bumper to have the carrier sit as close to the body as possible with out the risk of hitting. received_2539093772982399.jpeg
I had to do my usual special touch of angling the top corners. I have done this on every Version of the carrier to date.
received_2539092452982531.jpeg IMG_20180428_141127748_HDR.jpg
I added another center support and the tire mounting surface.
IMG_20180428_193706877.jpg
IMG_20180428_141842359_HDR.jpg
I did move it out a couple inches from this when building so that I had room for bigger tires and deeper wheels.
And that was a wrap for Weekend one. I drove back to Gunny and finished up my finals.
The next weekend I made the push to finish is up.
IMG_20180510_233301753.jpg
0822181500.jpg
0822181500a.jpg
And that was a wrap on my dual swing out tire carrier. So far I am loving the dual swing out. It makes it much easier to open in confided spaces, and it removed any play on concrete roads which I had been dealing with for a long long time with other versions.

Sent from my VS996 using Tapatalk
 

Attachments

  • IMG_20180428_193706877.jpg
    IMG_20180428_193706877.jpg
    85.7 KB · Views: 64

xwaz

Member
The Option line through a puddle on our memorial day trip caused me a bit of trouble. It is now an optional line due to it being the original route but a pond has formed in that path. It is possible to make it through with out winching and it took me a few tries but I made it out without winching. I did unfortunately get water inside and it messed, really bad which didn't help my food poisoning on day one of the trip. As you can see there are some people that do still attempt the obstacle, and there are tracks in and out but its not often due to the soft rocky bottom that can grab you and stop out fast. IMG_20180524_112452781.jpg IMG_20180524_112443822.jpg FB_IMG_1527553538235.jpg FB_IMG_1527183017159.jpg FB_IMG_1527479346132.jpg
The trip ended early for my buddy when a older Metalclock skid plate rubbed a hole in his oil pan. We were able to repair it in the parking lot of a gas station with some quick steel. I had to pull it around the parking lot to get it in the right position for the repair.
IMG_20180525_113312790.jpg
IMG_20180525_113216302.jpg
I ended up following him from Dinosaur back to Denver to make sure he made it back without issue. Which signaled the end of the trip for me.
however I had just spent 2 weeks on the road doing a trip from Denver, to Moab, Lake Powell, Flagstaff Arizona (for expo west), back to Moab, Loma Co, then Denver. This was a work trip for Juniper, and I drove a 2015 F250 with a 2018 Four Wheel Camper Granby. It was 12 days and 3000 miles plus working for 4 days at expo west. IMG_20180521_140305639.jpg IMG_20180515_174449275.jpg IMG_20180515_081535548.jpg IMG_20180510_083828717.jpg
Man, talk about a straight road.
IMG_20180515_162725118.jpg

Sent from my VS996 using Tapatalk
 

xwaz

Member
Upon returning from the trips I bought a tacoma to daily drive. I call him Burt, its a 1998 Regular cab 2.7 i4 with a 5 speed and 4wd. I bought it from the second owner with 247k miles. He has owned it since 6k miles. Its my daily driver as I had been driving 50 miles a day to work a summer. And had some big projects on the jeep to take care of. IMG_20180526_134141158~2.jpg 0702181726_HDR.jpg
And the current set up while exploring a bit of Gunnison on move in day.
0823181942b_HDR.jpg
Alright enough toyotas for this site.
He sits with about 252k currently and drives like a dream, I put new Bilstein 5100s all around and the old generals off my Jeep with newer tacoma Steel wheels.

Sent from my VS996 using Tapatalk
 

xwaz

Member
The first big Project on the Jeep was to sleeve the front axle. Yes I am sticking with a dana 30 on the front. I haven't had any real issues with it other than 1 cracked cv and one busted boot. As I want 33s max and I don't "wheel" the jeep all the heavy very often, I didn't think that a dana 44 would be worth it. So apart the 30 came.
received_2538472363044540.jpeg 
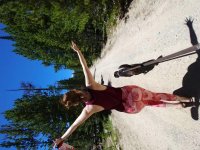
Oh but first Yes new wheels, Vision Manx that are 16x8. They fit perfectly and look awesome. But I have since rock rashed every single rim, eh I know I would.
0607182022a.jpg
Cover and fluid out 0608181731_HDR.jpg
Axles and hubs out, brakes off. 0608181732a.jpg
Took the Tie rod off to access the carrier. And found the ball joints were Shot, time to fix that up with upgrades. 0613181930.jpg
Mmm factory LSD, I have had great luck with this and I have no want to replace it. 0613181947.jpg
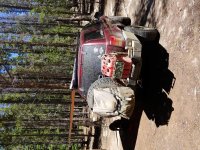
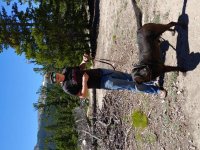
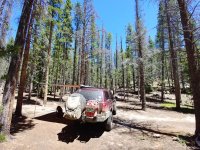
Back to work to flatbed and do a camper install on the old Maxtrax F250
0614181718.jpg
0615181706.jpg
Now back to pounding the sleeves into the axle. It was welded around the outer end, and I drilled 8 holes in the long tube and 5 in the short tube to button weld the sleeve. So it is safe to say its not moving. 0618181448.jpg
Back together with a fresh coat of paint which I didn't notice until halfway done that it is actually a dark brown. (Facepalm) 0624181921.jpg
New beefy 1/4" over from chassis unlimited to match the rear diff. 0624181921a.jpg
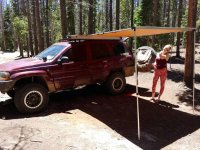
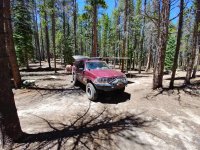
And all back together and ready to take a trip.
0630180842a.jpg

Sent from my VS996 using Tapatalk
 

xwaz

Member
A quick camping trip was in order to enjoy the summer. I got out with the girlfriend and my black lab Bear.
Nothing special, no wheeling just 40ish miles of Forest service roads and the open woods to relax in for a couple days. Hard to beat that.

Sent from my VS996 using Tapatalk
 

Attachments

  • 0701181248_HDR.jpg
    0701181248_HDR.jpg
    144.2 KB · Views: 65
  • 0701181250_HDR.jpg
    0701181250_HDR.jpg
    189.4 KB · Views: 62
  • 0701181400.jpg
    0701181400.jpg
    104.9 KB · Views: 66
  • 0701181305a_HDR.jpg
    0701181305a_HDR.jpg
    168 KB · Views: 69
  • 0701181251_HDR.jpg
    0701181251_HDR.jpg
    124.7 KB · Views: 74
  • 0701181249_HDR.jpg
    0701181249_HDR.jpg
    196.6 KB · Views: 71
Last edited:

xwaz

Member
Hold for later
 

Attachments

  • 0701181305.jpg
    0701181305.jpg
    120.6 KB · Views: 68
  • 0701181305a.jpg
    0701181305a.jpg
    171.2 KB · Views: 64
  • 0701181301b_HDR.jpg
    0701181301b_HDR.jpg
    144.2 KB · Views: 67
  • 0701181359a.jpg
    0701181359a.jpg
    101.9 KB · Views: 66
  • 0701181250a_HDR.jpg
    0701181250a_HDR.jpg
    202.9 KB · Views: 68
  • 0701181249_HDR.jpg
    0701181249_HDR.jpg
    196.6 KB · Views: 68

WJCO

Meme King
Looks like you've been busy. Nice photos. Question on the tire carrier. Does it have any support or bump stop against the body of the Jeep? Or does it just rest on the bumper alone?
 

xwaz

Member
Looks like you've been busy. Nice photos. Question on the tire carrier. Does it have any support or bump stop against the body of the Jeep? Or does it just rest on the bumper alone?
It sits only on the bumper, I personally am not a fan of bumpers that contact the body. As they tend to make noise and can damage the body more in and accident.

Sent from my VS996 using Tapatalk
 

WJCO

Meme King
It sits only on the bumper, I personally am not a fan of bumpers that contact the body. As they tend to make noise and can damage the body more in and accident.

Sent from my VS996 using Tapatalk

Ive built and rebuilt mine, and each time, the tire vibrated too much without a support leaning against the hatch. The first version was built off of the hitch. The second version I actually welded the hinge support to the body of the Jeep.

It's hard to explain how I built it but here's some pics: https://wayalife.com/showthread.php/31128-WJCO-s-Build-Thread-1999-WJ?p=961842&viewfull=1#post961842
 
Top Bottom