I guess it's the "Super Stocker" build

Looking good

Thanks! [emoji106] I know it's not much to look at right now. Getting the holes drilled with the front plate square and centered was the first hurdle in my mind. I do not have a drill press, so power drill and step bits was the process. That was fun with 1/4". Lots of cutting oil was dumped on! [emoji15]

Good start! I have been thinking about this since you first mentioned it so I will be following closely! I can design, cut and do the machine work. The problem for me is the welding. I only have access to a 30+ year old Miller stick or I can have a local shop TIG it together? I would rather do it myself so I guess its time to lay down some practice beads!

I'm sure the stick welder would do the trick. I plan on tacking with the mig option on my Lincoln 210 and probably finish with stick. I'm not sure how long my little bottle of mixed gas will last and it's pretty windy here. That's why I have it in my mind to finish the welds with stick. I have 50 lbs of 7018 vs 8lbs of mig wire on hand.

Love the versatility of the 210. Someday I'll get the tig setup for it and give that a spin. I've never run tig and want to eventually.

I love designing, but the actual building is almost therapeutic for me. I don't know how else to explain it.
 
I guess it's the "Super Stocker" build

I managed a little more time working on the bumper today.

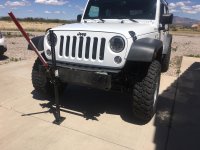
After opening up the top outside hole on the frame, the pass side was a little low. My Hi Lift finally got its first use! [emoji1]

ImageUploadedByWAYALIFE1460422353.769352.jpg

No one in town had 1/4"X1" steel so I went with 3/16. No big deal really.

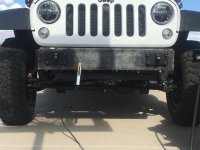
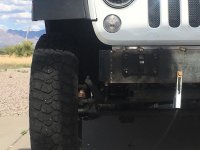
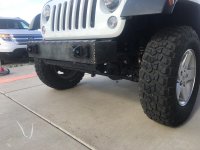
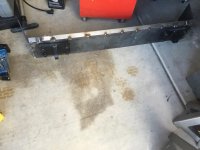
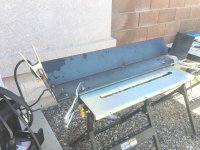
Top and side angles are all set and tacked up. I'm going to weld these pieces up before adding more sections for stability purposes.

ImageUploadedByWAYALIFE1460422518.201015.jpg

ImageUploadedByWAYALIFE1460422532.128043.jpg

ImageUploadedByWAYALIFE1460422545.096767.jpg

ImageUploadedByWAYALIFE1460422614.751117.jpg

ImageUploadedByWAYALIFE1460422635.600219.jpg

Between the fact I'm no professional and the wind blowing my gas away at times, some of the tacks indeed look like chewed bubble gum. It was just confirmation that with the wind here stick welding will be my best option.
 
Last edited:
Glad to see another person building there own bumper, or anything for that matter. :thumb: Cant wait to see the finished product. I should have taken more pictures of my build. Oh well.
 
Thanks! I have to remind myself to take some pics every once in awhile. I hope it turns out as good in reality as it is in my mind! [emoji1]
 
I managed a little more time working on the bumper today.

After opening up the top outside hole on the frame, the pass side was a little low. My Hi Lift finally got its first use! [emoji1]

View attachment 198000

No one in town had 1/4"X1" steel so I went with 3/16. No big deal really.

Top and side angles are all set and tacked up. I'm going to weld these pieces up before adding more sections for stability purposes.

View attachment 198004

View attachment 198005

View attachment 198006

View attachment 198007

View attachment 198008

Between the fact I'm no professional and the wind blowing my gas away at times, some of the tacks indeed look like chewed bubble gum. It was just confirmation that with the wind here stick welding will be my best option.

Bumper is looking good. Keep it up and you gonna be having to make them and sell them to the rest of us
 
I guess it's the "Super Stocker" build

Bumper is looking good. Keep it up and you gonna be having to make them and sell them to the rest of us

Thanks! If I had the experience and the money to open my own shop, I would. This is therapy at home for me. I'll never have enough of either, but it is fun!!!

First order of the day was...yard work. [emoji47] After that was done I did some electrical work at the house. (Don't tell my landlord!) This house has an outlet for RV hookup, but it was the four prong 14-30. Of course my welder has the three prong 6-50. So I pulled the RV outlet and put in the 6-50. I've only run my welder on the 110 setting and wow, loving the 220!

I had to knock the rust off my technique and get the welder dialed in.

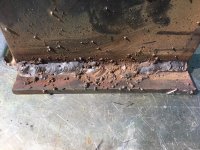
Ugly start...

ImageUploadedByWAYALIFE1460587127.524132.jpg

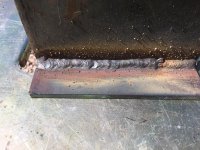
Better! But, moving too fast...

ImageUploadedByWAYALIFE1460587148.304641.jpg

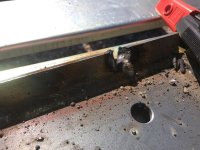
Keeping in mind to slow down, I dove into welding up the inner seams. Forgetting momentarily that the top strip was only 3/16, I made my first mistake, blowing through...

ImageUploadedByWAYALIFE1460587243.278043.jpg

I had to originally splice in a 1.5" piece of the 1" strap on each end. Oh well. I'll just cut that out ^^^ and patch in a new piece

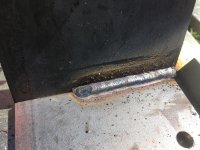
At the end, when it was time to call it quits for the day, I was pretty happy...

ImageUploadedByWAYALIFE1460587321.256245.jpg

I hope to get a couple more hours in tomorrow.
 
Last edited:
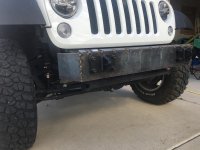
The bumper is starting to take shape, mostly as I have envisioned it...

Just some setup to add the bottom piece...

ImageUploadedByWAYALIFE1460768024.704970.jpg

Got that welded completely on both sides and then made a template for the bottom corners. Here's how it looks as of now...

ImageUploadedByWAYALIFE1460768086.532926.jpg

ImageUploadedByWAYALIFE1460768097.934445.jpg

Still need to finish the welds on the bottom corners and cut, fit and weld the top pieces in. I also still need to cutout the Hi-Lift notches, weld that up, then find my hawse fair lead and mark where I will cut for that. Also on the to-do list is move the vac pump and build a winch plate. I may wait on the winch plate until I can swing buying a winch. I'm open to suggestions.

End of the "work day" while on staycation.

ImageUploadedByWAYALIFE1460768362.003952.jpg
 
The bumper is starting to take shape, mostly as I have envisioned it...

Just some setup to add the bottom piece...

View attachment 198751

Got that welded completely on both sides and then made a template for the bottom corners. Here's how it looks as of now...

View attachment 198752

View attachment 198753

Still need to finish the welds on the bottom corners and cut, fit and weld the top pieces in. I also still need to cutout the Hi-Lift notches, weld that up, then find my hawse fair lead and mark where I will cut for that. Also on the to-do list is move the vac pump and build a winch plate. I may wait on the winch plate until I can swing buying a winch. I'm open to suggestions.

End of the "work day" while on staycation.

View attachment 198754

That is looking good!
 
Thanks! If I had the experience and the money to open my own shop, I would. This is therapy at home for me. I'll never have enough of either, but it is fun!!!

First order of the day was...yard work. [emoji47] After that was done I did some electrical work at the house. (Don't tell my landlord!) This house has an outlet for RV hookup, but it was the four prong 14-30. Of course my welder has the three prong 6-50. So I pulled the RV outlet and put in the 6-50. I've only run my welder on the 110 setting and wow, loving the 220!

I had to knock the rust off my technique and get the welder dialed in.

Ugly start...

View attachment 198410

Better! But, moving too fast...

View attachment 198411

Keeping in mind to slow down, I dove into welding up the inner seams. Forgetting momentarily that the top strip was only 3/16, I made my first mistake, blowing through...

View attachment 198412

I had to originally splice in a 1.5" piece of the 1" strap on each end. Oh well. I'll just cut that out ^^^ and patch in a new piece

At the end, when it was time to call it quits for the day, I was pretty happy...

View attachment 198413

I hope to get a couple more hours in tomorrow.

Keep it up. I feel you with the welding skills. It is fun and cheap therapy and a bumper is a great thing to practice on.
[emoji106]
 
Thanks! Love all the feedback I can get here. It really does mean a lot to me. I'm really liking it more as it comes together.

Side note...

Forgot to mention, I did replace that top piece I blew through without issue.
 
Keep it up. I feel you with the welding skills. It is fun and cheap therapy and a bumper is a great thing to practice on.
[emoji106]

Definitely. If this was "work", under a deadline, I may feel differently about it. So happy to rid myself of the plastic bumpers!!!
 
That thing is looking pretty damn good dude. Keep it up. I have finally talked my wife into me getting her the Evo 1/4 w/ stinger. She didn't like the looks of the stinger, but when she realized that it would keep you rolling over, she's all for it ha. Are you gonna try to put on a stinger or bull bar. Also are you gonna try to fabricate a roll cage since it looks like you are getting pretty descent at this welding stuff and you like building your own things
 
That thing is looking pretty damn good dude. Keep it up. I have finally talked my wife into me getting her the Evo 1/4 w/ stinger. She didn't like the looks of the stinger, but when she realized that it would keep you rolling over, she's all for it ha. Are you gonna try to put on a stinger or bull bar. Also are you gonna try to fabricate a roll cage since it looks like you are getting pretty descent at this welding stuff and you like building your own things

Thanks! Yeah, probably will go with a stinger, home brew style.

As far as a cage goes, I think by the time I bought all the fabrication collars, materials and a proper tube bender I would be better off buying the RH cage. The bender I have now is a Harbor Freight version. It's ok for tube doors and stingers, but not for tight 90* that I would need for something like the windshield area. Not to mention, RH is a pro outfit. I'm just a rookie.

Whatever you do, I'll give it to you, it's pretty good that you can be original and do your own stuff. And that's one thing that is awesome about jeeps, is you can let it be a reflection of you and your own style. So keep up the good work. This is always interesting seeing what your doing
 
The bumper project is on hold for a couple weeks due to other commitments and that dang thing called work. But, just got a complete set of take off fenders and liners, for free!

ImageUploadedByWAYALIFE1461115180.802651.jpg

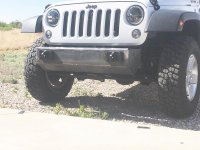
I've been hesitant to cut mine for fear it would look ridiculous with my tires being 33's. Now with this set, let the cutting begin!
 
The bumper project is on hold for a couple weeks due to other commitments and that dang thing called work. But, just got a complete set of take off fenders and liners, for free!

I've been hesitant to cut mine for fear it would look ridiculous with my tires being 33's. Now with this set, let the cutting begin!

Good news. I'm sure you will do a nice job on trimming your fenders. I was afraid to trim them too but once I was done was happy with the result. I'm sure the 33s will fill it fine
 
Good news. I'm sure you will do a nice job on trimming your fenders. I was afraid to trim them too but once I was done was happy with the result. I'm sure the 33s will fill it fine

Thanks! I'm sure the fender trimming will go well. I have seen pics of this setup with 33's and it looks fine, just haven't seen it in person. There is a JKU near me that's running a huge lift, 35's and trimmed fenders. I'm not a fan of that as it makes the 35's look tiny, but to each their own.

I'm not sure when I'll get to this, but couldn't pass up a free set to experiment with.
 
Top Bottom