You are using an out of date browser. It may not display this or other websites correctly.
You should upgrade or use an alternative browser.
You should upgrade or use an alternative browser.
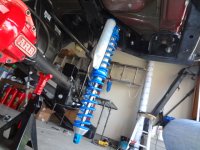
JK's JK Rubicon Build
- Thread starter JK's JK
- Start date
- Status
- Not open for further replies.
JK's JK
Banned
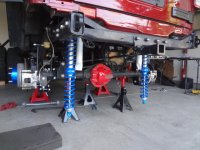
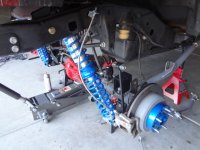
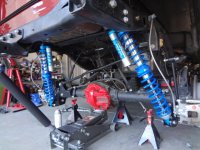
Looking sexy! That electric blue is something I can't wait to see under my rig someday!!
Thank you. It's coming along slow but surely. I'm wondering now if me dropping both break lines at the same time was a big mistake :thinking:
Just make sure you have all the material the first time :thumb:
Last edited:
Not a big deal dropping both at the same time. Just bleed the passenger first.
Thank you. It's coming along slow but shirley. I'm wondering now if me dropping both break lines at the same time was a big mistake :thinking:
Just make sure you have all the material the first time :thumb:
Who is Shirley?
Hack12
New member
Who is Shirley?
Surely, you can't be serious?
JK's JK
Banned
Who is Shirley?
Surely, you can't be serious?
oooops...
Hack12
New member
oooops...
Lol, no biggy. I was just trying to bait someone into saying, "I am, and don't call me Shirley!"
JK's JK
Banned
JK's JK
Banned
Not a big deal dropping both at the same time. Just bleed the passenger first.
Cool thank you. I was reading up on this link
http://wayalife.com/showthread.php?4335-MAINTENANCE-Bleeding-the-Brakes-on-a-Jeep-JK-Wrangler
Sounds easy!!!
Cool thank you. I was reading up on this link
http://wayalife.com/showthread.php?4335-MAINTENANCE-Bleeding-the-Brakes-on-a-Jeep-JK-Wrangler
Sounds easy!!!
I'm pretty sure I recall hearing you say the coilovers we're going to be easy
JK's JK
Banned
I'm pretty sure I recall hearing you say the coilovers we're going to be easy
It is when the material is there :rolleyes2: and the instructions are straight forward
StrizzyChris
New member
I'm pretty sure I recall hearing you say the coilovers we're going to be easy
It is when the material is there :rolleyes2: and the instructions are straight forward
The rears are more work(due to track bar relocation and rockstar install/stock brackets cut off) but an easier install IMHO. The fronts require a little more modification to make them work, but nothing too terrible. Lots of trimming, test fitting, trim some more, test fit again, etc. Just be careful with the passenger side battery tray. I had to cut the front upper bracket quite a bit in combination with cutting a lot of the ribbing/plastic...and just a tad bit into the battery tray). Just take your time, take deep breaths, and youll be just fine! Itll all be over fairly soon!
JK's JK
Banned
The rears are more work(due to track bar relocation and rockstar install/stock brackets cut off) but an easier install IMHO. The fronts require a little more modification to make them work, but nothing too terrible. Lots of trimming, test fitting, trim some more, test fit again, etc. Just be careful with the passenger side battery tray. I had to cut the front upper bracket quite a bit in combination with cutting a lot of the ribbing/plastic...and just a tad bit into the battery tray). Just take your time, take deep breaths, and youll be just fine! Itll all be over fairly soon!
I appreciate the vote of confidence. I'll have the Jeep back up and running this week, all the frustrations will pass, enjoying the new equipment and get a write up on this installation squared away. :rock:
I appreciate the vote of confidence. I'll have the Jeep back up and running this week, all the frustrations will pass, enjoying the new equipment and get a write up on this installation squared away. :rock:
Get busy on that write up, if all goes as planned I'll have mine as soon as next week.
JK's JK
Banned
Get busy on that write up, if all goes as planned I'll have mine as soon as next week.
Next week?? Hope your getting all the material.
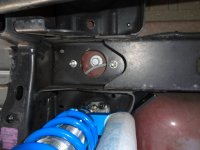
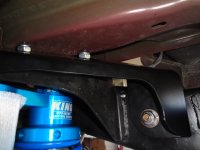
Called Northridge and received a call from EVO MFG. Getting the material shipped out today and hope it gets in this week. He answered all my questions on the material and parts. Sounds like there might be some design flaws on the top of the tower, bolts and clearances. I'll have to look into it a bit more and might have to take a shock out again....:grayno:
I don't usually have a problem with material since I inventory my parts BEFORE I start an install.
piginajeep
The Original Smartass
Next week?? Hope your getting all the material.
Called Northridge and received a call from EVO MFG. Getting the material shipped out today and hope it gets in this week. He answered all my questions on the material and parts. Sounds like there might be some design flaws on the top of the tower, bolts and clearances. I'll have to look into it a bit more and might have to take a shock out again....:grayno:
It's funny the first couple hundred kits went on just fine. It's your lack of experience not the part.
It's funny the first couple hundred kits went on just fine. It's your lack of experience not the part.
^^This^^ Plus you're just a little too quick to point the hate finger and smear the reputation of a company that you yourself swear by.
- Status
- Not open for further replies.

