"Mombo" the black rubi

canadianjku

New member
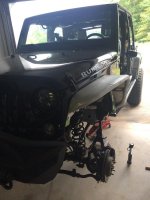
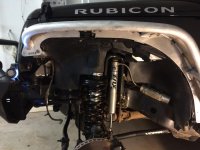
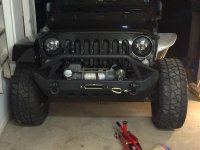
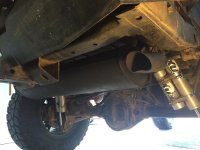
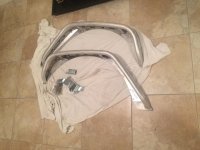
Managed to get the install done on my poison spyder crusher flares this weekend. Took a bit longer than expected as the provided instructions were fairly useless but overall not too hard of a job. Off to get painted to match the body colour this week. Hopefully the rear fenders will arrive sometime in the next week as well,
 

Attachments

  • IMG_1577.jpg
    IMG_1577.jpg
    82.2 KB · Views: 254
  • IMG_1584.jpg
    IMG_1584.jpg
    83.4 KB · Views: 259
  • IMG_1585.jpg
    IMG_1585.jpg
    75.1 KB · Views: 254

canadianjku

New member
Removed my exhaust and painted it this weekend. Used VHT very high temperature paint. Hopefully holds up ok
 

Attachments

  • IMG_1596.jpg
    IMG_1596.jpg
    81 KB · Views: 228

atomicdog

New member
Mopar Cargo Mat

I was looking at the floor mats and noticed the sub and I assume that you have the upgraded Alpine speakers. How do they sound overall at low and high output? Are they worth the upgrade price? Great looking Jeep! Really like the crusher fenders from Poison Spyder too
 

canadianjku

New member
I think they sound great. It's the first thing most people comment on when they sit in my jeep for the first time. Compared to the sound in my previous 2013 jku it is a huge difference. Much clearer, especially at higher volumes. The one thing I really like about it is the better quality when the doors and roof are off.... That is where I notice the greatest difference.

I definitely think it was worth the extra cost
 

canadianjku

New member
ImageUploadedByWAYALIFE1439911305.003532.jpg

Finally got the front fenders powder coated and installed. Also added in some 3/4 inch side marker clear LED lights.

Still waiting on the rear fenders to arrive but hopefully get them sometime this week. Will snap some better pics once I have all 4 finally installed
 
Last edited:

canadianjku

New member
Rear fenders have finally arrived. Hauled the stock fenders off to find out I need a 17/32 drill bit to make the holes big enough for the nut serts. Not the easiest size bit to find. Couldn't track one down at any of the local shops so install is just going to have to wait another week until I have one shipped off amazon.
 

Attachments

  • IMG_1632.jpg
    IMG_1632.jpg
    75.4 KB · Views: 162

canadianjku

New member
Moving along with the fender install. All holes are drilled and nutserts in place. Bought the astro pneumatic 1442 nut set tool which made the nut set install a joke

IMG_1641.jpg

IMG_1647.jpg

Not sure how others have done it but was only able to drill the lower of the two holes for the front brace in the inner side of the pinch seam. Where the top hole was aligned the pinch seam had already widned and was on an angle at the inner most part. Could have drilled a hole but no way the provided 1 inch screw would have made it though, and even if it did the nut would not have been flush given the angle on the inside.

IMG_1649.jpg

IMG_1650.jpg

Hardest part of the install is drilling the 4 holes for the rear brace. The two holes that are drilled in the absolute back park of the fender are not bad. Can be done with a regular drill (much easier with tire off) and can then be accessed from behind the brake lights. The two on the inner side of the fender are more difficult because of the tight space and angle. The bottom hole can at least be started with a small bit and an angled drill. I then recommend going to the cargo space, removing the lining, and finding the hole just drilled. Can then use a regular drill to make it to the recommended size. Even with the angled drill I found it tough to reach the top hole on the inner side of the bracket. I found it easiest to use the bracket and previously drilled lower hole to mark the top hole from the inside cargo area (measure twice and drill once). Much easier than screwing around in the tight fender space the whole time.

IMG_1643.jpg

IMG_1648.jpg

All holes lined up and fenders went back on easy once everything was pre installed. Currently getting powder coated to match the gloss black now so should have the finished product in a few days. Ill post more pics with the finished product.
 
Last edited:
Top Bottom