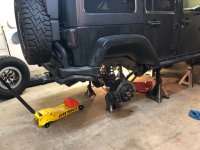
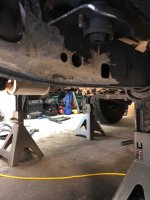
Ordered long arms, but questions about what else I need

KevinG

Caught the Bug
Thanks for the tips Byron. I grabbed a car from work so I have wheels. I am going to tear in to it in just a bit. Hardly have any fuel in the tank so it shouldn't be too bad to drop. It looks pretty straightforward so I'm not too nervous. I'll shoot you a text or post on here if I have anything that baffles me.
 

KevinG

Caught the Bug
Someone's gonna be busy....

Ha ha. Wish me luck!

Looks like you'll have your hands full. I had 2 4" angle grinders. And 2 floor jacks. 2 of each really helped. Also if you haven't got any go buy 30 or 60 grit flap disks for your angle grinder. They are way faster than grinding wheels. Wish I had figured this out when I did mine. Grinding wheels took forever to clean things up.

Sent from my 2PYB2 using WAYALIFE mobile app

Thank you for the heads up. I think I am pretty set to go. Have a total of three floor jacks, eight jackstands, a handful of flap and cut off disks, lots of recip sawblades in various lengths. I even have multiple bottle jacks! Now if I only had a bottle of Jack :hmm:
 

JK_0311

Member
Please post some pictures along the way, this a move I’m making this summer. Fingers crossed.

I may have missed it, did you go with the high clearance setup or the standard long arm ?

Good luck by the way, I’m sure I’ll find out how fun it is over the summer.


Sent from my iPhone using WAYALIFE mobile app
 

jesse3638

Hooked
The most important detail!

Good luck on tearing it down. Go easy on those fuel line clips when you drop the tank.


Sent from my iPhone using WAYALIFE mobile app
Yes this too. I broke one and didn't know where to source the clips. Dealer wanted to sell me a whole section of fuel line. I put both pieces back in and wrapped it well with electrical tape. That was 7 years ago and no issues..haha.

Sent from my 2PYB2 using WAYALIFE mobile app
 

KevinG

Caught the Bug
The most important detail!

Good luck on tearing it down. Go easy on those fuel line clips when you drop the tank.


Sent from my iPhone using WAYALIFE mobile app

Yes this too. I broke one and didn't know where to source the clips. Dealer wanted to sell me a whole section of fuel line. I put both pieces back in and wrapped it well with electrical tape. That was 7 years ago and no issues..haha.

Sent from my 2PYB2 using WAYALIFE mobile app


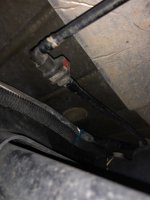
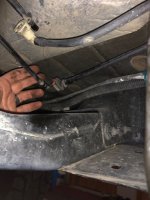
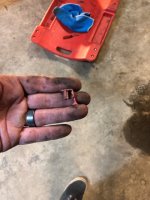
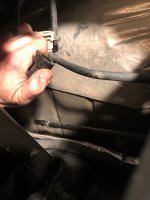
Funny you both mentioned this. So I started after dinner at about six. Did a quick inventory to make sure that I had all of the hardware. Got the rear end up in the air and driveline pulled. Filler pulled, vent pulled. I got the first fuel line at the front off with no drama, but the other one has a red clip around it. I have fiddled around with it a little bit of a "tab" came off, but no movement. What's the trick?. I'll have a picture up in just a few minutes, Gotta tuck our daughter in.
 

KevinG

Caught the Bug
Please post some pictures along the way, this a move I’m making this summer. Fingers crossed.

I may have missed it, did you go with the high clearance setup or the standard long arm ?

Good luck by the way, I’m sure I’ll find out how fun it is over the summer.


Sent from my iPhone using WAYALIFE mobile app

Normal Double D, I lack the fab skills to pull off the high clearance. I am taking pics as I go, so I will update on here. It's always fun to look at them and say, "oh yeah, that's where I gashed my knuckle against that" or, "there's the spot in the garage where I smacked my head, knocked myself out, and my wife found me in a puddle that I made"
 

KevinG

Caught the Bug
IMG_2311.JPG IMG_2310.JPG


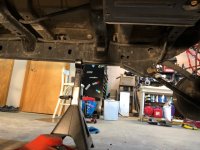
Came up in to the house to grab a beer and print the instructions, since I have only looked at the PDF on here. I think I am just about to wrap up for night. I snapped these a little while ago, but I got the control arms pulled and have the grinder and saw ready for the point of no return. For those thinking about doing it, I'm realistically about 3 hours in taking my time and stopping every once in a while. So far, not so bad. I'm sure it will get worse. :thumb:

Sent from my iPhone using WAYALIFE mobile app
 
Last edited:

jesse3638

Hooked
Came up in to the house to grab a beer and print the instructions, since I have only looked at the PDF on here. I think I am just about to wrap up for night. I snapped these a little while ago, but I got the control arms pulled and have the grinder and saw ready for the point of no return. For those thinking about doing it, I'm realistically about 3 hours in taking my time and stopping every once in a while. So far, not so bad. I'm sure it will get worse. :thumb:

Sent from my iPhone using WAYALIFE mobile app

Oh wait until you start cutting and drilling..[emoji6]. Don't do what I did and try to work around the axle and drive shaft attached. Unbolt, completely remove them, and set them aside. Also sliding a tire under there covered with a moving blanket will give you something to lean up against to get extra leverage.


Sent from my 2PYB2 using WAYALIFE mobile app
 

KevinG

Caught the Bug
Oh wait until you start cutting and drilling..[emoji6]. Don't do what I did and try to work around the axle and drive shaft attached. Unbolt, completely remove them, and set them aside. Also sliding a tire under there covered with a moving blanket will give you something to lean up against to get extra leverage.


Sent from my 2PYB2 using WAYALIFE mobile app


I think I saw that you had said that before. I pulled the driveshaft before the fuel tank, but didn't pull the axle. I may end up doing that tomorrow morning if I feel like I need more space. I guess at this point it would just be pulling the calipers, shocks, sway bar links and trackbar to get it out of there.:hmm:
 

KevinG

Caught the Bug
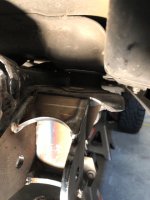
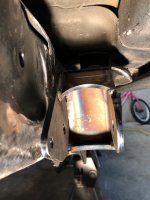
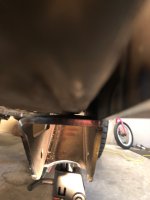
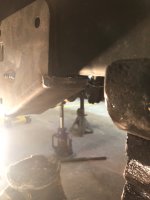
So I to cutting this morning. I got as close as I could with recip saw, then cut off wheels and finally flap discs. I’ve test fit to see how everything looks and I have a few gaps. I imagine it’ll suck down with bolts or a clamp, but before I get in to it wanted to see if everything looks right. Thanks guys.

Image1552590034.243909.jpg

This is from the rear towards the body mount
Image1552590078.166710.jpg

Image1552590101.779773.jpg
Looking towards the front


Sent from my iPhone using WAYALIFE mobile app
 
Last edited:

KevinG

Caught the Bug
57428611494__AEF8318F-3949-494E-9F2B-7658226FD648.JPG IMG_2332.JPG


Sent from my iPhone using WAYALIFE mobile app

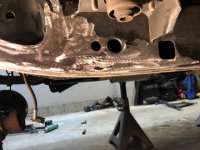
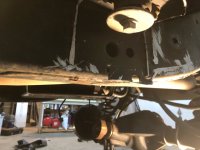
I was just being a girlie man. I shot bhaner a text and he said to "man up and grind it down", well, he was nicer than that. I still had a raised section from the weld on the upper control arm mount, took it down further and now fits flush. The first side took me three hours of cutting grinding and so on. I grew balls on the driver's side and am to where you see in the second pic in just about an hour. I kind of worked each side a few inches on the lower mount, made a relief cut and took some large channel locks to open it up like a clamshell. It was really slow cutting but I think it's because I was getting the sawblade on the weld. Looks like cleaning it will be pretty quick. Taking a little break to go grab my daughter and get some of the shavings out of my clothes. Trainwreck, thanks for chiming in about the bolt on the bottom.
 
Last edited:
Top Bottom