DIY Spod- Waytekwire

King Kork

New member
^ thank you-
And i applaud that you are thinking ahead- 12 ga between the fuse and relay would be fine. the 16 ga from the relay panel to the switches would be fine. But i would use 8 gauge going from the relay panel to your 50" light bar as long as the total length is under 15 feet for 20-25 Amp applications.

That probably makes sense, I'll need one different terminal for the 8AWG output to the accessory on that relay though I suppose, correct?

Also - I plan to tap behind the window switches for acc power to light and power the switches. Should that be able to support 4 switches no problem? I am concerned about someone flipping a switch with doors off and running down the battery.
 

pvanweelden

New member
You probably could solder the 8 gauge to one of the regular terminals, you just won't be able to crimp it.

You should be fine with getting the 12 volt switched and illumination from the window switch wires.
 

pvanweelden

New member
Added instructions on Page 1 for adding a 4 channel wireless remote to turn on 4 of your accessories from your diy spod with a remote.
 

King Kork

New member
I'm sure this is a stupid question but I got my circuit breaker today. How does it work? How do I reset it? Any breaker I've ever seen has some sort of switch to reset when it trips. This one does not appear to?
 

pvanweelden

New member
It resets on its own when the circuit is ok again.
Got the wireless hooked up
1396046834136.jpg
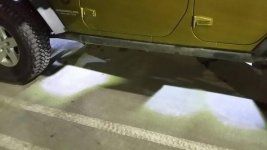
Rock lights turned on with remote
1396046873472.jpg

Sent from my SM-N900V using WAYALIFE mobile app
 

pvanweelden

New member
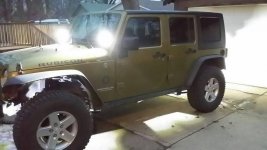
Here's the 3 of my lights that I hooked up to the wireless controller all on from the remote. The 4th remote function will be my air horn when I add it.
1396054321980.jpg

Sent from my SM-N900V using WAYALIFE mobile app
 

Schweaty

New member
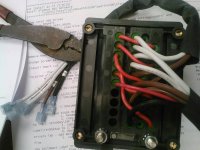
So, I have a bit of a problem I think. I went to the local car audio store as you recommended and purchased some "12 gauge" wire from them. When I went back to get more a few days later I was talking to the guy and he said that it wasn't 12 gauge but more like 16 or 18. Long story short, I wired the Bussman with what I thought to be 12 gauge wire when in all actuality it wasn't. Is there any way remove terminals and start over? I'm not really happy as I paid these guys 25 dollars for electrical wire and was told that it was 12 gauge when it wasn't.

Help is appreciated.

Unfortunately once the terminals are in place the are there. I used 18ga wire from the bushman to my switches. I used 16ga wire for the output from the relay to the accessories. I think you should be fine as long as you are not pulling too many amps. Maybe Pvann will chime in.

R/
Will


Sent from my fRuit product using WAL
 

pvanweelden

New member
16 gauge is fine. On the outputs of the relay panel, if you run about a foot of wire for each output, and then put a fully insulated female quick disconnect, then you can hook up whatever wire to it.
1396133268780.jpg

Sent from my SM-N900V using WAYALIFE mobile app
 

Rccrwlr

New member
So, I have a bit of a problem I think. I went to the local car audio store as you recommended and purchased some "12 gauge" wire from them. When I went back to get more a few days later I was talking to the guy and he said that it wasn't 12 gauge but more like 16 or 18. Long story short, I wired the Bussman with what I thought to be 12 gauge wire when in all actuality it wasn't. Is there any way remove terminals and start over? I'm not really happy as I paid these guys 25 dollars for electrical wire and was told that it was 12 gauge when it wasn't.

Help is appreciated.

Pin removal tool
ImageUploadedByWAYALIFE1396149894.589738.jpg


"One only needs to follow those that have been there/done that to learn how to do things proper the first time" BCH
 

King Kork

New member
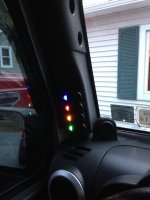
The orange factory clips are not metal on mine, they look (and feel) plastic(nylon). I like the location of the switches and want to keep the Daystar but this pissing me off. :mad:

Don't know if you have it figured out yet but if you look at the daystar panel around the edges compared to factory, you will notice the factory is thinner and sort of comes to a point. I used a file to trim it little by little till it fit right and flush with the dash. A razor blade will work as well
 

Flat Top

Member
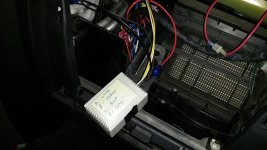
Flat top, I love the install location of the bussman box. I have a '12 and want to do similar. How did you make that work?

I will post an additional pic tomorrow but I basically made two L brackets to support on one side and fastened the Bussman to the plastic battery tray.
 

ljvsnyder

Member
I am thinking making this and wondered if anyone makes a switch panel that fits where the power window switches are located. I have manual windows and that space is just a catch all and a perfect place to put a few switches.
 

rubicrawl

New member
I am thinking making this and wondered if anyone makes a switch panel that fits where the power window switches are located. I have manual windows and that space is just a catch all and a perfect place to put a few switches.

Just get the daystar lower switch panel and trim it to make it fit it will look cherry :)
 
Top Bottom