You are using an out of date browser. It may not display this or other websites correctly.
You should upgrade or use an alternative browser.
You should upgrade or use an alternative browser.
Ordered long arms, but questions about what else I need
- Thread starter KevinG
- Start date
KevinG
Caught the Bug
Thanks :thumb:
Was able to work on it here and there the last couple of days. Weather was too nice to not be on a golf course with a beer in my hand. Buttoned everything up yesterday afternoon except for bleeding the brakes. Got up a little early this morning to get that done and attempt to fine tune the ride height. Can't believe how long these things are.
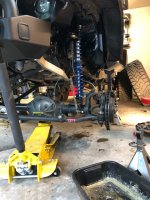
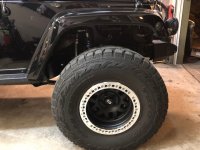
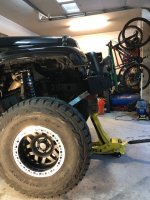
Ordered the back this morning. Have plans with my wife this weekend so it's probably be next wed before I will have time to get to the rear end.
KevinG
Caught the Bug
After a fun filled weekend in Seattle and a couple of days at work I was able to start the rear coilovers. Got about 4 hours of garage time on Wed, and then about 5 on Thurs. Everything is in. Haven't had time to screw with timing rings or height. Just pretty much driving it out of the box. Also put in an Adams 1350 shaft to finish up the front. I have a few more goodies to install. I am thinking of air bumps next....

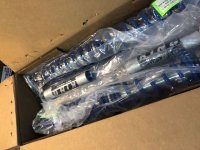
So much fun opening this box.
This is the AEV set up. I had totally forgotten that I had their track bar in there. Totally thought it was stock. I was concerned it would have a different bend to clear the diff or something....
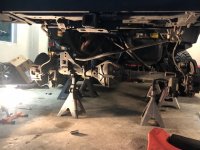
Trackbar at full bump. No probs.
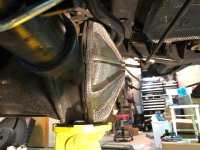
All done. The rockstars were a little tricky with trying to juggle in the lower arm and get the mount up at the same time. With short arms, do they just slide right up?
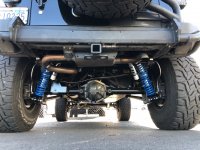


So much fun opening this box.
This is the AEV set up. I had totally forgotten that I had their track bar in there. Totally thought it was stock. I was concerned it would have a different bend to clear the diff or something....

Trackbar at full bump. No probs.

All done. The rockstars were a little tricky with trying to juggle in the lower arm and get the mount up at the same time. With short arms, do they just slide right up?

fiend
Caught the Bug
So are the long arms everything you we’re looking for? Noticeable difference from short arms?
Sent from my iPhone using WAYALIFE mobile app
Sent from my iPhone using WAYALIFE mobile app
KevinG
Caught the Bug
So are the long arms everything you we’re looking for? Noticeable difference from short arms?
Sent from my iPhone using WAYALIFE mobile app
Definitely noticeable. I haven't really had a chance to dial everything in and actually take it out and use it off pavement. On pavement, it's really different. I ran for a week or so with just the fronts CO's in, and you could really feel a difference in the back with the AEV springs still back there while the front just seemed to soak it up. Almost felt like it was floating but still attached to the road. I finished the back last night at 1 a.m. so I am pretty beat, but I did have to run out for a while and got to drive about 40 miles. I am all smiles, or I am just delirious from smacking my head so many times on the frikking hitch and lack of sleep. The only irritating thing is a couple of clangs and clunks I get at really low speeds, which I heard is kind of typical.
I do remember you from when I started this thread. The difference in ride from going to the LA's has been drastic. Especially the way the rear rides over bumps now vs. having the arms in the stock location and the 4.5" lift. The CO's have made it ride even better, and I have only had a chance to drive it on road. So far they are awesome, but I am really excited to get it out where it belongs and not up and down the freeway.
wjtstudios
Hooked
Glad to hear how happy you are. COs are coming soon for mine and The LA made such a difference as it is. Can’t wait to get them on.
Sent from my iPhone using WAYALIFE mobile app
Sent from my iPhone using WAYALIFE mobile app
fiend
Caught the Bug
The difference in ride from going to the LA's has been drastic. Especially the way the rear rides over bumps now vs. having the arms in the stock location and the 4.5" lift.
Glad to hear how happy you are. The LA made such a difference as it is.
Sent from my iPhone using WAYALIFE mobile app
[emoji86][emoji86][emoji85][emoji85]
Sent from my iPhone using WAYALIFE mobile app
KevinG
Caught the Bug
Glad to hear how happy you are. COs are coming soon for mine and The LA made such a difference as it is. Can’t wait to get them on.
Sent from my iPhone using WAYALIFE mobile app
Awesome! Evo's?
LOL. Is that monkey see monkey do?
fiend
Caught the Bug
LOL. Is that monkey see monkey do?
It’s hear no long arms, see no long arms, buy no long arms. [emoji23]
Sent from my iPhone using WAYALIFE mobile app
KevinG
Caught the Bug
LMAO!! Nothing to see here.. I seriously appreciate your comments though. Judging by your location and some of the times I’ve seen your name on some of the threads, I have no doubt you get around better on short arms than me on long.It’s hear no long arms, see no long arms, buy no long arms. [emoji23]
Sent from my iPhone using WAYALIFE mobile app
fiend
Caught the Bug
LMAO!! Nothing to see here.. I seriously appreciate your comments though. Judging by your location and some of the times I’ve seen your name on some of the threads, I have no doubt you get around better on short arms than me on long.
Ha well I dunno about that. I’m just interested in hearing about peoples experiences with stuff. Good on ya for doing all the work yourself.
Sent from my iPhone using WAYALIFE mobile app
KevinG
Caught the Bug
Ha well I dunno about that. I’m just interested in hearing about peoples experiences with stuff. Good on ya for doing all the work yourself.
Sent from my iPhone using WAYALIFE mobile app
Thanks :beer::beer: I get a ton of time off and have a lot of vacation saved up. I need to get off my butt and get out and use it for more then getting groceries.
Last edited:
wjtstudios
Hooked
Awesome! Evo's?
LOL. Is that monkey see monkey do?
Absolutely!
Sent from my iPhone using WAYALIFE mobile app
KevinG
Caught the Bug
I am super impressed with the quality of the brackets and how well they fit with what I am sure is a wide range of tolerances from the factory. Are you installing yourself? I have a few tips in case you are. Stuff that I found that worked pretty well
In the front, definitely start with the driver's side. I think I had the bracket in and out for fitting maybe 5 times. I went through and installed everything and realized that the res hose was touching the plastic, so I took out a bit more plastic but not totally sure it was necessary. On the passenger side, a TON has to get cut away. Before you get it on jackstands, pull the battery. Its right there in the instructions and for some reason I thought I could be precise enough with a dremel that I wouldn't need to do it. I was wrong. Pain in the ass trying to pull the battery when the jeep is way the "f" up there on jackstands. The next hardest part was drilling up in the spring bucket. I ran a small pilot hole with the plate in place, trying to center everything in the holes. After the pilot holes, I drilled the first one by just laying under the axle and used all arms. It was an awkward length from my body and tired me out pretty quick. I ended up rigging this up instead....
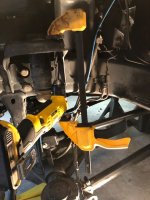
I know it's probably not the safest, but it was a lot easier to apply a little pressure to the clamp and keep the speed down on the bit. The good part is that the holes in the spring bucket matched up perfectly with the lower plate and the tower. Bolts literally fell in to place.
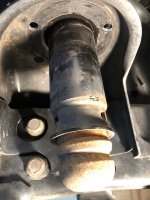
In the back, really the only two tough things are getting the body up high enough to get the reinforcement plate in. The exhaust hanger on my passenger side had to go up quite a bit more than a quarter inch. Make sure you have a long pry bar for it. The rockstars are a little tricky. I put the axle up to the bumps and made sure the johnny joint was pretty neutral so the arm would move easier. Dropped the arm for the cuts, and then put a jackstand under the arm when you are putting the rockstar up for the final time. One of the small (3/8" in think) bolt goes in from the front of the mount. I used a small piece of flat stock from the top of the mount to keep pressure on that bolt while I slid the rockstar on. I just realized I typed a frikking novel about a bolt, but the first one I did I literally was holding up a control arm with my leg, helping the bracket up with a rubber mallet while trying to "will" this tiny bolt to not fall out. My daughter walked in the garage and heard a lot of words she's never heard before....
wjtstudios
Hooked
I am super impressed with the quality of the brackets and how well they fit with what I am sure is a wide range of tolerances from the factory. Are you installing yourself? I have a few tips in case you are. Stuff that I found that worked pretty well
In the front, definitely start with the driver's side. I think I had the bracket in and out for fitting maybe 5 times. I went through and installed everything and realized that the res hose was touching the plastic, so I took out a bit more plastic but not totally sure it was necessary. On the passenger side, a TON has to get cut away. Before you get it on jackstands, pull the battery. Its right there in the instructions and for some reason I thought I could be precise enough with a dremel that I wouldn't need to do it. I was wrong. Pain in the ass trying to pull the battery when the jeep is way the "f" up there on jackstands. The next hardest part was drilling up in the spring bucket. I ran a small pilot hole with the plate in place, trying to center everything in the holes. After the pilot holes, I drilled the first one by just laying under the axle and used all arms. It was an awkward length from my body and tired me out pretty quick. I ended up rigging this up instead....
View attachment 326758
I know it's probably not the safest, but it was a lot easier to apply a little pressure to the clamp and keep the speed down on the bit. The good part is that the holes in the spring bucket matched up perfectly with the lower plate and the tower. Bolts literally fell in to place.
View attachment 326759
In the back, really the only two tough things are getting the body up high enough to get the reinforcement plate in. The exhaust hanger on my passenger side had to go up quite a bit more than a quarter inch. Make sure you have a long pry bar for it. The rockstars are a little tricky. I put the axle up to the bumps and made sure the johnny joint was pretty neutral so the arm would move easier. Dropped the arm for the cuts, and then put a jackstand under the arm when you are putting the rockstar up for the final time. One of the small (3/8" in think) bolt goes in from the front of the mount. I used a small piece of flat stock from the top of the mount to keep pressure on that bolt while I slid the rockstar on. I just realized I typed a frikking novel about a bolt, but the first one I did I literally was holding up a control arm with my leg, helping the bracket up with a rubber mallet while trying to "will" this tiny bolt to not fall out. My daughter walked in the garage and heard a lot of words she's never heard before....
Thanks for all the info. It might be a summer or fall project, We’ll see.
Most of my more challenging installs have been after 8 pm for exactly that reason. And not getting interrupted every 30 seconds by kids yelling DAD!!
Sent from my iPhone using WAYALIFE mobile app
KevinG
Caught the Bug
Thanks for all the info. It might be a summer or fall project, We’ll see.
Most of my more challenging installs have been after 8 pm for exactly that reason. And not getting interrupted every 30 seconds by kids yelling DAD!!
Sent from my iPhone using WAYALIFE mobile app
I totally understand that! The stopping and starting is always the toughest. The actual process really wasn't too hard, and it really can only go in one way. I know that evo has awesome customer support, which I haven't taken advantage of yet. When you start and if you are working on it after hours, I'll be happy to pass along my cell number. I know there are a lot of guys on here that have done the same install that are way ahead of me mechanically, but if you are in a jam and need a pic or anything, I am happy to help.
edit: 100 posts. I'm hooked!
wjtstudios
Hooked
I totally understand that! The stopping and starting is always the toughest. The actual process really wasn't too hard, and it really can only go in one way. I know that evo has awesome customer support, which I haven't taken advantage of yet. When you start and if you are working on it after hours, I'll be happy to pass along my cell number. I know there are a lot of guys on here that have done the same install that are way ahead of me mechanically, but if you are in a jam and need a pic or anything, I am happy to help.
edit: 100 posts. I'm hooked!
Will do. Thanks for the offer!
Sent from my iPhone using WAYALIFE mobile app
wjtstudios
Hooked
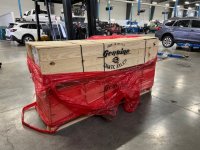
Such an awesome day when the axle crates arrive [emoji16]
2015 JKUR AEV JK350
1985 CJ8 Scrambler
2015 JKUR AEV JK350
1985 CJ8 Scrambler
Last edited:

