sunnysideup
Active Member
I sold the 2007 JK that I built over 12 years. I bought it for 17,000 used with 8500 miles on it and sold it for 17,500 with 172,000 miles on it. I had about 11 grand into extras on it... but I bought many parts used, and built and modified parts to make it all work. It was still running great and owed me nothing...
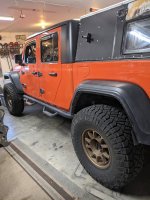
Meanwhile my wife always liked trucks better... I had sold a Titan when I bought the JK... and she always wanted to have a truck for the utility side of things. When the JT's came out I set up the mechanics and she picked the color. So we had a Sport max Tow ordered. I was nervous about a first year truck from fiat... so I didn't really want to put much into it until we decided if it would work for us. I put in a 3/4 inch rear spacer, front 1.5 inch spacer and picked out a set of launch edition rims and tires and fox shocks ..all for 1400 dollars and that has been about all of the mods.
Now it begins:
Currently waiting for all the parts to come in, but 3/4 of it is here.
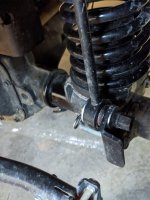
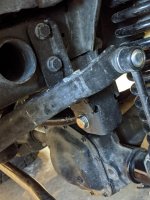
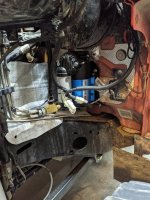
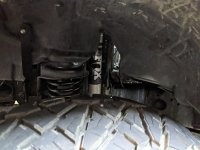
I went with the EVO overlander 2.5 lift... added the Fox shocks for a 3-4 inch lift. I'm keeping the rear spacer and dropping the front to 1 inch spacer... and using coil correction pads. They were out of track bars so I bought a Yeti steer-smarts one for the front and a Rock crawler for the rear. I bought a sway bar disconnect for the front... just a manual one. I also added a fox steering stabilizer and relocate kit, to get it up front the ground.
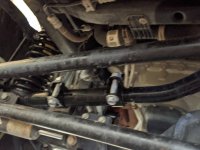
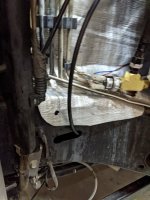
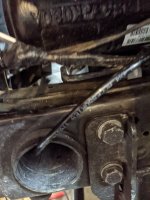
I went with the Artec skid plates because the trucks are long... the breakover scares my wife when it makes noise under there.... so now I tell her its just skid plates... and the Artec kit does a "tummy tuck" and raises the GC by 3/4 of an inch and covers everything in the middle really well. I got an Artec FAD skid too. And then a Rusty's rear Control arm frame side skid.
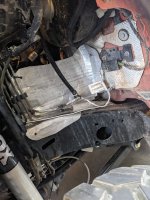
I have 4:88 spicer gear sets, ARB lockers front and rear, RCV with FAD front 32 spline axles. For the rear I had dutchman 35 spline axles made... I also have the Artec truss for the rear. Metal cloak rear diff cover, ARB for the front. Right now I'm still waiting for the RCV axles and the rebuild kit. The lockers and the rear axles are in!
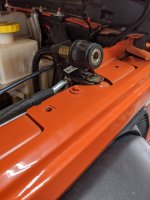
I have mounted the Rugged ridge snorkle... and color matched it to the truck, I did go with just the lower side mount. AFE filter.
I have the American adventure fender chop for a sport coming in to make room for tires. also on back order.
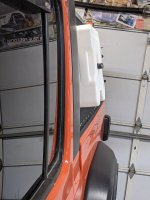
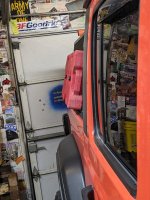
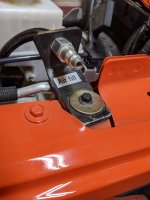
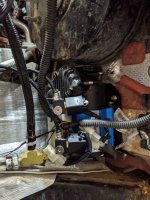
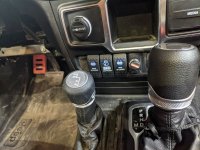
I have an ARB compressor that I will use with the Wayalife mount under the brake booster for onboard air and to activate lockers. All of that is in and I will install soon.
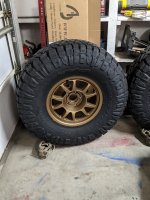
I went with the Method rims with Bead-grip tech... I do a lot of snow wheeling and getting down to 6-8psi without loosing a bead will be great! I went with a tire I have never tried... Yokohama 37's ATX.... still waiting on rims and tires (6 weeks now). I heard great reviews and that they are close to true size... loaded with 32psi they sit just above 36inches... so they are close to many 38's.
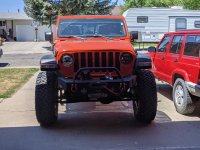
I got front and rear rugged ridge bumpers with discounts for under 500 for the pair... so it works for me.
I did a bunch of work on a strangers jeep and they gave me a broken Warn winch... I put a couple hundred into it and mounted it! It is an M8000- so a little small... but for free it will fill the gap!
I bought some rough country side steps to protect the paint and my wife wanted a step... they were dirt cheap in a freight return deal... so I don't know if they will make the build... they might need to work for a year or so... and then I'll look at frame mounted ones.
I got a cheap GPS, mostly to keep me from getting lost in cities. A CB... our club is still old school...
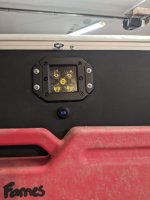
I never buy expensive lights... but for this build I did get the stealth light bar... which has been great... I like that it is inside...
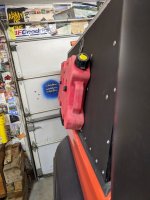
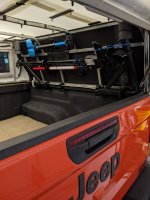
I bought some LOD bed skids to protect the rear.
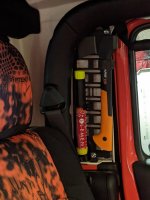
I bought a tazer mini for the adjustments.
Now to get all the parts in and put it together! I will do most of the work myself... I just don't do gears and lockers.
I think this will be a fun Jeep... the last one lasted me 12 years... so here we go again!
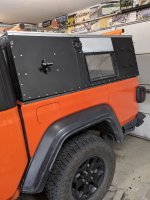
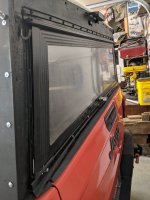
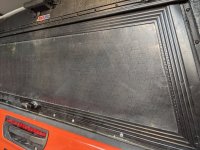
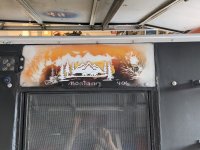
P.S.- I'm building my own topper too!


Meanwhile my wife always liked trucks better... I had sold a Titan when I bought the JK... and she always wanted to have a truck for the utility side of things. When the JT's came out I set up the mechanics and she picked the color. So we had a Sport max Tow ordered. I was nervous about a first year truck from fiat... so I didn't really want to put much into it until we decided if it would work for us. I put in a 3/4 inch rear spacer, front 1.5 inch spacer and picked out a set of launch edition rims and tires and fox shocks ..all for 1400 dollars and that has been about all of the mods.
Now it begins:
Currently waiting for all the parts to come in, but 3/4 of it is here.
I went with the EVO overlander 2.5 lift... added the Fox shocks for a 3-4 inch lift. I'm keeping the rear spacer and dropping the front to 1 inch spacer... and using coil correction pads. They were out of track bars so I bought a Yeti steer-smarts one for the front and a Rock crawler for the rear. I bought a sway bar disconnect for the front... just a manual one. I also added a fox steering stabilizer and relocate kit, to get it up front the ground.
I went with the Artec skid plates because the trucks are long... the breakover scares my wife when it makes noise under there.... so now I tell her its just skid plates... and the Artec kit does a "tummy tuck" and raises the GC by 3/4 of an inch and covers everything in the middle really well. I got an Artec FAD skid too. And then a Rusty's rear Control arm frame side skid.
I have 4:88 spicer gear sets, ARB lockers front and rear, RCV with FAD front 32 spline axles. For the rear I had dutchman 35 spline axles made... I also have the Artec truss for the rear. Metal cloak rear diff cover, ARB for the front. Right now I'm still waiting for the RCV axles and the rebuild kit. The lockers and the rear axles are in!
I have mounted the Rugged ridge snorkle... and color matched it to the truck, I did go with just the lower side mount. AFE filter.
I have the American adventure fender chop for a sport coming in to make room for tires. also on back order.
I have an ARB compressor that I will use with the Wayalife mount under the brake booster for onboard air and to activate lockers. All of that is in and I will install soon.
I went with the Method rims with Bead-grip tech... I do a lot of snow wheeling and getting down to 6-8psi without loosing a bead will be great! I went with a tire I have never tried... Yokohama 37's ATX.... still waiting on rims and tires (6 weeks now). I heard great reviews and that they are close to true size... loaded with 32psi they sit just above 36inches... so they are close to many 38's.
I got front and rear rugged ridge bumpers with discounts for under 500 for the pair... so it works for me.
I did a bunch of work on a strangers jeep and they gave me a broken Warn winch... I put a couple hundred into it and mounted it! It is an M8000- so a little small... but for free it will fill the gap!
I bought some rough country side steps to protect the paint and my wife wanted a step... they were dirt cheap in a freight return deal... so I don't know if they will make the build... they might need to work for a year or so... and then I'll look at frame mounted ones.
I got a cheap GPS, mostly to keep me from getting lost in cities. A CB... our club is still old school...
I never buy expensive lights... but for this build I did get the stealth light bar... which has been great... I like that it is inside...
I bought some LOD bed skids to protect the rear.
I bought a tazer mini for the adjustments.
Now to get all the parts in and put it together! I will do most of the work myself... I just don't do gears and lockers.
I think this will be a fun Jeep... the last one lasted me 12 years... so here we go again!
P.S.- I'm building my own topper too!
")