WxNerd2015's Never Ending Build

WxNerd2015

New member
Rubitrux Decals

Had a few minutes of extra time when I got home from work yesterday, so I decided I would get my Rubitrux decals that they sent onto my Jeep! I know it's not really an "install" of anything, but just figured I would share my process of getting them on!

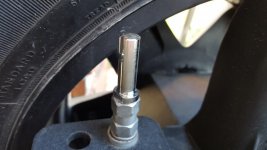
Here is the before picture:
20160322_161907.jpg

First, I grabbed some Windex and paper towel and cleaned the area I was going to be applying the decal to very thoroughly, and then made sure it was wiped completely dry as well.

Then, I line up a piece of painter's tape with the sport decal, which should be perfectly placed as it came from the factory, and either way, I want the new decal to line up properly with the existing ones. I also placed the tape marking off some of the space above the Sport decal so they would not end up too close.
20160322_162309.jpg

I then got my level out, and figured out what the "level position" was of the sport decal, and fine tuned the tape to match that.
20160322_162436.jpg
20160322_162445.jpg

From there, I then grabbed the decal, and lined up it's bottom edge with the top edge of the tape, and took a quick measurement to make sure the decal was properly spaced horizontally to line up right. I then peeled the backing off of the decal, and first lightly placed it using the cover on the front of it (the white paper, not sure what to call it?). After making sure it was still lined up properly, I then started in the middle of the decal (right in between the "I" and the "T"), and using my thumb, I pressed the decal on, working in small movements and always going from the middle to the outside to make sure that there were no bubbles getting trapped. I then took a plastic, flat edged applicator, and ran that over with some pressure a few times to make sure that the decal had set.
20160322_162747.jpg

The next step was to then grab the corner of the white paper (I started at the upper left), and slowly begin to pull the backing/cover off. I made sure to take my time to make sure that all of the decal was sticking and nothing pulling up. Once it was all pulled off, the finished product looked like this:
20160322_162920.jpg

And there ya have it! I went around and did the passenger side then too! And it looks perfect, just like it belongs there! And in my opinion, gives it a little more sporty look with the extra decal, but that is just personal taste/preference!
20160322_163029.jpg
20160322_164337.jpg
 

WxNerd2015

New member
New Stuff

Just ordered a couple small new editions to the Jeep from Amazon today! First, I park my Jeep in the garage, therefore, I have to take my CB antenna down every day when I get home, and put it back up every morning when I leave it I want to use it. Now, I am just fine with screwing the antenna in and out, but in the long run, I am sure it is not too good for the threads. So I came across a "push-n-twist quick disconnect" from Firestik, and for my pruposes, it seems like a good idea! So that should be here by tomorrow (gotta love prime 2 day free shipping!).

11J6p2wfbgL.jpg
http://www.amazon.com/FireStik-K-1A-Push-n-Twist-quick-disconnect/dp/B000UTQUAK?ie=UTF8&psc=1&redirect=true&ref_=oh_aui_detailpage_o00_s00

I also decided that I wanted to add just a little touch of color to the rig, so I grabbed a pack of the Firestik CB End caps in Red! I think they will add a nice little touch to the Jeep, and they are a quick an easy install!

FST-R.jpg
http://www.amazon.com/Firestik-Antenna-Tips-For-Fs/dp/B002U5Q9XA?ie=UTF8&psc=1&redirect=true&ref_=oh_aui_detailpage_o01_s00

I will post up some pics when both of these get here and I have em on!
 

WxNerd2015

New member
Goodies Added!

Well, had the time to get my two cheap Amazon finds on the Jeep! First off, I added on the Firestik quick disconnect! You can see the link in the post above, but here is how the quick disconnect came:

20160325_165610.jpg

The Installation was quick and easy for this. I screwed in and tightened down, with a wrench, the threaded end of the quick disconnect into the mount of the Jeep.

20160325_181719.jpg

Once the disconnect is tightened down, I then grabbed my antenna and tightened in the antenna to the top of the disconnect the same way.

20160325_181714.jpg

With the antenna tightened in, I then tested the separation of the quick disconnect, which could not really be done until everything was connected as this mount I think is more secure than just attaching the antenna. The mount is spring loaded, and it does require a bit of force to get it to compress, which I am very happy with, as I used to only hand tighten in my antenna as it had to come on and off a lot. Disconnect, here is what the mount and antenna look like:

20160325_181821.jpg
20160325_181751.jpg
20160325_181800.jpg

There is a grove on the side of the mount attached to the Jeep, and in the attachment on the antenna, there is a spring and a notch. The notch lines up with the groove on the mount and you push down (compressing the spring), twist clockwise, and then release, and to disconnect, you just do the reverse of that. Quite simple! Here are some additional pics:

20160325_181815.jpg
20160325_181808.jpg

I also changed the end cap on my Cb Antenna to a red end cap. Here is the before shot of the antenna end cap, as well as the new caps:

20160326_190836.jpg
20160326_115656.jpg

Changing these was quite simple as well. All you had to do was pull the existing cap off of the antenna, and then slide the new cap on! Simple as that! I think it looks cool too!

20160326_190933.jpg
20160326_191025.jpg
20160326_191030.jpg
 

Attachments

  • 20160325_181747.jpg
    20160325_181747.jpg
    50.6 KB · Views: 168
  • 20160325_181811.jpg
    20160325_181811.jpg
    34.9 KB · Views: 166

WxNerd2015

New member
Update

Just wanted to add a quick update on the lights I installed! Overall, I am so pleased and happy with these lights! They are absolutely amazing, and the improvement from stock is second to none! These have performed amazing in clear conditions, rain, fog, just about everything!

However, just wanted to share, today we had a spring snow storm moving through Michigan, with the temp sitting right about freezing, so it was a sticky/wet snow! I did some driving around with the lights on, and they performed good, however, where the light was not on (the high beam) there was a slight cover off ice that built on them. I was driving for about 30 minutes are so, and there was a thin layer of ice over most of the front, however, where the lights were lit (the low beam and fog), there was no build up of anything! This was just a simple test, and it wasn't too much of a snow storm, like in the middle winter, but still, just figured I would share!

20160402_174827.jpg
20160402_174830.jpg
 

WxNerd2015

New member
FINALLY! The flashlight is mounted!

Okay...okay...okay! I know this is just about one of the easiest installs to do, and easiest mods to the Jeep! But I have just been lazy and busy and have not gotten to it! So...FINALLY...without further ado...the my Mag-Lite LED 3D Cell Flashlight is mount on the side of my seat! I used the Mag-Lite wall mount brackets, the included screws, and washers and nuts. I first removed the plastic panel on the side of the seat, which was done by removing the torques screw as the front of the seat on the panel and then releasing the panel from it's clips and shift the panel backwards to get it off the back hook! I then drilled 4 holes in the plastic panel for the bracket to mount to, and I used the max size of washer that would fit to spread the load out as much as possible on the plastic and tightened the nuts down on the back of the washers. From there I then reinstalled the panel to the seat, and I was done! Extremely simple, and really cool looking! Very happy I did it! And I love the ACU Camo with the color of my Jeep! The Tan matches perfectly!

20160408_200518.jpg
20160408_200440.jpg
20160408_200508.jpg
20160408_200455.jpg
20160408_200524.jpg
 

WxNerd2015

New member
One More Small Touch!

Grabbed these off of Amazon the other day! The ARB Value Stem Caps! Just tired of my Plastic ones that keep cracking and falling off! I don't know what it is with them, but they just don't stay well! So anyways, picked up some nicer ones for like $10 or something like that and free shipping, and I think they look pretty nice! And having metal caps shouldn't crack like the plastic ones!

20160414_192641.jpg
20160414_192646.jpg
20160414_192802.jpg
20160414_192809.jpg
20160414_192827.jpg
20160414_192844.jpg
20160414_192855.jpg
 

WxNerd2015

New member
Freedom!

Finally winter seems to have left and this past weekend I was able to get at least the freedom panels off the Jeep fro the first time of the 2016 year! And man did it feel nice! Can't wait to get the soft top on soon!

20160415_141254.jpg
20160415_141225.jpg
20160415_141235.jpg
20160415_141241.jpg
 

WxNerd2015

New member
ARB Tire Pressure Gauge

Well, picked this up off of Amazon too! Though this was going to be new, however smelled like smoke and had dust and finger prints all over it, so be careful buying from Amazon on this, however, I had no issue wiping it down and its gonna get dusty/dirty anyways! The ARB Gauge is the Large Dial one, which was larger than I expected! (You can see the measurement below) This is really nice to use and extremely accurate! Plus, my small pen gauge I think is broken now, so this was a really nice replacement! Plus, the nozzle that goes on the valve stem secures tightly instantly, and you don't have to remove it to let air out if needed as well! I am impressed and happy with my $20 spent!

20160419_085021.jpg
20160419_085119.jpg
20160419_085038.jpg
20160419_085127.jpg
20160419_085134.jpg
 
Last edited:

WxNerd2015

New member
Tire Rotation Time!

Just got the tire rotated on Friday on the Jeep. Easy enough to do myself, but I go to Discount Tire because I like the extra set of eyes to check to make sure there are no issues there, as well as, I pass this every day to and from work, and they rotate for free, so why not? Got about 7/32nds left on the rears now and 5/32nds and 4/32nds left on the front.

20160520_153854.jpg
20160520_153857.jpg
20160520_153908.jpg

Looking at swapping in some new tires on there once fall rolls around! I want to get the Cooper Discoverer STT Pros, though not sure what size yet, as I am working on a deal for a 3.5" AEV lift as well. And deciding between spacers and stock wheels, or Level 8 Trackers in 16" size. So a bit to figure out there still, but saving up some money for this as these are a bit bigger costs, and just been enjoying the Jeep!
 

WxNerd2015

New member
Switched to Summer!

This weekend was finally a nice and warm and dry weekend which I was also free to be able to get the soft top out and switch up the tops on the Jeep! So I am now switched to summer and ready to enjoy it and get the top open easier now! So hard top off, and Trektop NX on!

Before (Hard top):

20160528_112129.jpg

Middle (No top):

20160528_113948.jpg

After (Trektop NX):

20160528_121447.jpg
 

WxNerd2015

New member
The Hidden Bestop Feature

Just wanted to share how I had my Trektop NX open the other day with some pictures, as Bestop doesn't advertise this, but it works out awesome! To run the Trektop NX as a full open top, just roll the back up on top of the sound bar, then flip the Sunrider open over it, and there ya have it! Check out the pics below!

20160531_165055.jpg
20160531_165101.jpg
20160531_165108.jpg
20160531_165112.jpg
20160531_165117.jpg
20160531_165139.jpg
20160531_165148.jpg
 
Last edited:

WxNerd2015

New member
Some Misc Gatherings Over the Last Few Weeks

Well, just figured I would share a few of the tools/stuff I have gathered for my Jeep over the past few weeks! I got the ARB Inflator with Gauge to use with the compressor in my garage, a ACU-Camo MagLite Mini LED Flashlight which can also be used as a lantern as well as if pointed straight down can be used in 50% power mode, a tire gauge with color scale, and Bestop Soft Top cleaners and Protectants for my Trektop!

20160601_170612.jpg
20160601_171031.jpg
20160601_171050.jpg
20160601_171225.jpg
20160601_171232.jpg
20160601_171245.jpg
20160601_171248.jpg
20160601_171314.jpg
20160601_171321.jpg
20160601_170930.jpg
20160601_170922.jpg
20160601_170629.jpg
20160601_170641.jpg
20160601_170707.jpg
20160601_170717.jpg
20160601_170723.jpg
20160601_170732.jpg
20160601_170858.jpg
20160601_170907.jpg
20160601_171325.jpg
 

WxNerd2015

New member
Bartact Console Cover

Just added in a Bartact Center Console Cover in the ACU Camo/ACU Camo color combination. Got tired of always having a console that was burning hot when I had the top open! And the ACU Cover goes with the Jeep color as well as the added flashlight too pretty well IMO! Install was as simple as slipping it over the console and making sure all corners are at where they should be! Took all of 20 seconds! Quick, easy, and cheap upgrade!

20160606_200558.jpg
20160606_200554.jpg
20160606_200548.jpg
20160606_200612.jpg
20160606_200604.jpg
20160607_150724.jpg
20160607_150847.jpg
20160607_150859.jpg
20160607_150856.jpg
20160607_151049.jpg
 

WxNerd2015

New member
New Research Find (Goes with Post #19)

Just adding this as a new post, however, I will also add to post #19 where the video and post actually is. I just happened to come across the full list of all possible trouble codes from Quadratec. This can be used with the video I showed in Post #19 on how to check your own engine trouble codes using the instrument cluster. Still pretty useful I think, and for most of us here, we would rather do it ourselves anyways, so this just makes those jobs a bit easier! Here is the link to that site:

http://www.quadratec.com/jeep_knowledgebase/article-139.htm

Also, just hit 40,000 miles yesterday on the Odometer! That's another 10k in the books, and still enjoying this rig every day more and more! And can't wait to see what the next 10k will bring me!
 

WxNerd2015

New member
It's Almost Time!!!!

The time has finally come and I have talked about it more than long enough, but the time is finally right and the "stars have aligned"...on Monday I am taking my Jeep in and getting the AEV 3.5" Lift installed along with the Teraflex HD Spare Tire Carrier for the Tailgate! I know some of you may get on me for not doing it myself, however, I had confidence in myself that I could do, but with things as important as the whole suspension system, and my fairly good, but still limited tool base, I would feel much better and more secure having it done right by a professional installer! So I am going through Unlimited Offroad in Fenton, Mi, who actually was the first licensed installer/dealer for the AEV Lift kits! They aren't too far from me, and they seem to have a good handle on what they are doing, plus, they offer a shop warranty on all the work that they do as well, which is a huge plus in my eyes! I am extremely excited for this, and I will be so ready to get out and do some real, and good, wheeling with this thing now!!

dualsportsc_tbl_3_1.jpg
JK Dualsport SC Suspension 3.5"

573a3bc4dd76a300892127a5.jpg
JK HD Hinged Carrier & Adjustable Spare Tire Mounting Kit

I will post my before and after pics once this starts, but i am very excited!
 

WxNerd2015

New member
In for the Enhancements!

Well, Jeep is in the shop now! Dropped er off this morning and should pick her back up tomorrow afternoon! Extremely excited for this! I can wait to get er back! And Unlimited Offroad, the shop I took it to, said that they will take lots of pics during the process, so I should have a bunch of pics and such to post once I get er back!
 
Top Bottom