Project "Thanos" Build

iRonin

Member
:thumb: bet its nice to see it sitting on the ground again! What shafts are you planning on running long term? I am assuming you aren't going to stay with factory rears? Glad to see things are working out for Thanos and yourself.

TF 30 spline chromos:
ImageUploadedByWAYALIFE1447272125.254228.jpg

Assembling them now I prolly won't do a play by play since I'm tryin to hustle but I'll post up more pics tonight.
 

iRonin

Member
Everything go alright with the install?

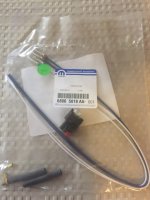
Yep! I was out this weekend for a festival so I ran outta time Thursday, so the jeep sat. I needed to buy a replacement ABS connector anyhow but I got that on tonight and Thanos is back on the road :)
 

iRonin

Member
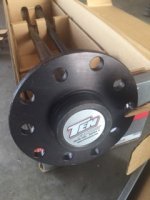
Motive Gear Ten Factory Axle Shafts (30 Spline, 4140 Chromoly)
November, 2015

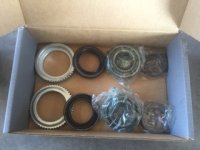
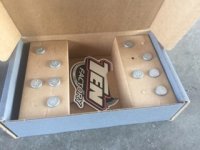
Building up the axles is straight forward enough, they pretty much give you everything ready to be pressed on:
ImageUploadedByWAYALIFE1447742377.416290.jpg
ImageUploadedByWAYALIFE1447742393.646216.jpg

The only bummer is that they do not include retainer plates, so you have to buy them separately or migrate them over from your old axles.

In my case it was migrate, so the job started with a 3 inch cutting wheel to the old axles to quickly slice through bits that are in the way:
ImageUploadedByWAYALIFE1447742781.931415.jpg

Then it was on the press to get the new tone rings on:
ImageUploadedByWAYALIFE1447742912.276072.jpg

Then the retainers I liberated from the old axles, followed by the axle seals:
ImageUploadedByWAYALIFE1447743042.497959.jpg

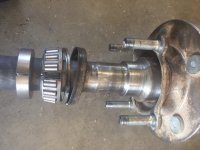
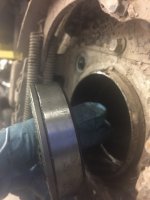
Next is the new shaft bearings. The style that shipped was the kind without a loose race, so in this pic you can see the orientation of how the bearing will seat into the axle tube when it's slid in:
ImageUploadedByWAYALIFE1447743109.438494.jpg

And so it gets pressed on with the shorter "lip" towards the outsides/bottom:
ImageUploadedByWAYALIFE1447743357.375188.jpg

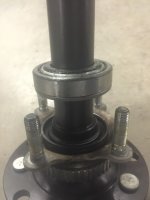
Finally, the bearing retainer ring gets pressed on to cap it all off:
ImageUploadedByWAYALIFE1447743381.890154.jpg

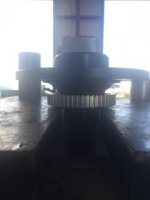
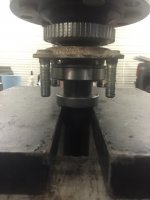
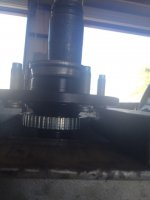
I also used the press as an easy way to seat all the wheel studs onto the hub. I just tapped them in a bit to get them straight then canted each bolt head onto the press plate with the press itself cheated over a bit to help. Couple pumps and it seats the bolt clean, then raise the press, rotate to the next bolt and repeat. Also, to keep the pretty "Ten Factory" sticker on the axle end from getting chewed up by the press, a pneumatic bearing/race driver head works nicely (silver plate just above the axle):
ImageUploadedByWAYALIFE1447743491.004741.jpg

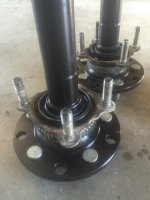
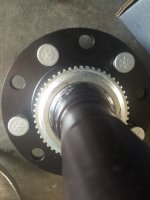
The hubs come drilled for 2 wheel patterns. For the standard JK 5x5 config, you press the studs into the inner set of holes:
ImageUploadedByWAYALIFE1447743739.108267.jpg

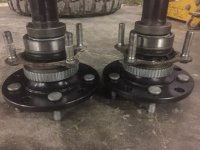
And with that, the axles were built and ready to mount:
ImageUploadedByWAYALIFE1447743849.326612.jpg

Full disclosure... I later found out that I did not press the tone rings on far enough to seat perfectly under the speed sensor, so a specialty press clamp was used to get them down more without disturbing the rest of the axle components. I thought I measured accurately and initially believed the tone rings only went on until they were flush with the bevel on the axle shaft, but I guess they needed to go 1/8-/1/4 further past the bevel to be correct. Lesson learned!

The last thing I did for the night (and weekend) was dial in the backlash since we moved to a new carrier. I was running tight with the existing shims migrated over. It was super close tho, so I made change with one of the driver side shims and moved the larger half to the other side, and it dialed in nice at .007".

Buttoning up the rest of the axle is when I discovered that the connector for the passenger brake connector was busted, and that the tone rings weren't on far enough, so I opted to leave the jeep at the shop since I needed to get going out of town for the weekend.

Sunday while I was out my good buddy did me a solid and pulled the axles and pressed the tone rings on more and got them square, and then today (Monday) I swung by the dealership and picked up a new connector ($30) and swapped it out:
ImageUploadedByWAYALIFE1447744696.961871.jpg

Finally it was wheels on and off the rack for a test drive. It's worth noting that when I turned the Jeep on, the ABS and Traction lights still came on as if there was an issue, and even after using my flashpaq to clear DTCs, they remained on. It was only after I got it on the road and driving about 50ft that the speed sensors took a "fresh reading" and then both lights turned off. :wings:

When they did, "The boys are back in town" started playing in my head, and I was soon on my way home. :beer:
 
Last edited:

hinrichs

Caught the Bug
Thanks for the guide on pressing together the rear shafts :thumb: Glad to see you are back up and running again.
 

iRonin

Member
Awesome! Glad to hear it!

Thanks for the guide on pressing together the rear shafts :thumb: Glad to see you are back up and running again.

Nice pics and write up.

Great job. ill have to book mark this for future reference.

Thanks y'all :) Happy to be on the road again as well. This last event convinced me to spend a few bucks on a couple of other upgrades, so next up are a couple of quick-hits: A new ram mount for my tablet so my cell phone can stop having to do everything on the trail, and some basic rock lights from Lux Lighting that intrigued me due to their 'magnetic' nature. :brows:
 

iRonin

Member
Great build thread bud! Nice Jeep!

Thank you sir!

Cant wait to see the lux lights, I keep eyeing them up but cant decide on a color.

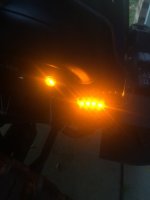
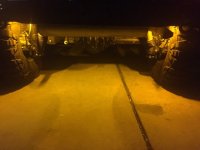
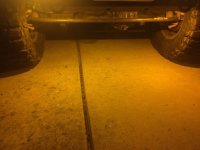
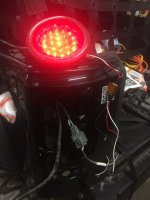
I rolled the dice on orange which is identical to blinker/side marker amber. I hooked one up real quick just to take a few demo/comparison pics. Trying to photograph LEDs is a PITA but you can see how bright they are next to the PS flare marker:

ImageUploadedByWAYALIFE1447947049.776103.jpg

In the front I plan on leaving enough slack such that they can face down at an angle on the 1/4 pounder when I'm night wheeling, but then be moved to just inside the bumper as an accent light the rest of the time:

ImageUploadedByWAYALIFE1447947343.811508.jpg

I dig em so far.

I was naive and went to Amazon and bought what I saw for $100, which was only 4 lights, no harness, no button. Yesterday I found their actual website and saw that the harness was another $89.... and that I could have gotten the lights for 15% off with a code (doh), and also saved by buying one of their package deals. So for about $220 I could have 8 lights, the install harness w/junction box and leads, and one of their rocker switches.

I think my plan will be to wire up my own fused harness to a rocker I already have, and then test these lights to see how they do wheeling in practice. I'm nervous that orange won't be the best option for functional rock lights anyhow, so worst case scenario they become permanent accent lights and I just buy one of the $220 kits in white.
 
Last edited:

hinrichs

Caught the Bug
White would make the most sense for true rock lights I feel, which I dont really see myself every needing as we cant wheel at night around here, but still they seem fun to me and something I want. Wish more people had them installed with a few colors so there was a better resource of all the different colors and such. I think amber could be better since its easier to see at night and less glare.
 

iRonin

Member
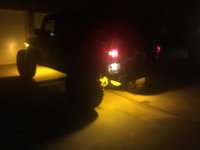
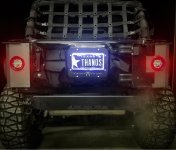
Welp, for only having 4 of em (out of what looks like a typical 8-12 install) these little guys are pretty decent:
ImageUploadedByWAYALIFE1448171038.057761.jpg

Fort/Back visibility:
ImageUploadedByWAYALIFE1448171067.046091.jpg
ImageUploadedByWAYALIFE1448171076.481583.jpg

At the very least a neat accent color, but I will probably go white for actual rock light use.
 
Last edited:

iRonin

Member
Project "Thanos" Build

Offroad Evolution Rear Corner Rockskins & Poison Spyder Tramp Stamp II
January, 2015

Hanging a 37" Mud Grappler, and before it a 35" Kelley, off the stock tire carrier for two years of wheeling had finally started taking its toll on the rear end, so it was time to move up some mods on the priority list.

While the stock tire carrier itself actually held up well (no cracks), it was actually my tailgate that began buckling outward and causing the entire assembly to wag a bit over bumps, so it was time to pull it.

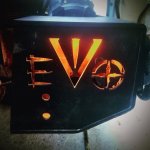
My ultimate plan is to have a more secure carrier, and whether I go off the shelf with the ORE enclosed/stinger style or follow through on plans to make a lower profile basket style a-la EVO1, either way it would require reinforcing the corners for mount points, so I went ahead and ordered the corner skins, and the tramp stamp (for now) so I'd have something to slap my plate on.

The Trampstamp is preeeetty straight forward so I didn't bother with install pics, but here you can see it in the "before" pic of the rear stripped down for the corners:
ImageUploadedByWAYALIFE1452611047.041594.jpg

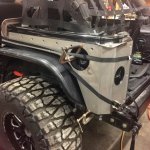
I started with the driver side. Full disclosure I had forgotten to bring painters tape, so lazy me was willing to give it a go raw-dog. It wasn't quite as tough as I imagined to get it squared up evenly, as you can see in this pic I was able to follow the body lines and suck it up close with a couple ratchet straps and 3 clamps:
ImageUploadedByWAYALIFE1452611066.214577.jpg

Steps:
1) I started with the upper strap to "hang" the skin onto the corner, but didn't crank down on it yet.
2) Then I slung on the lower strap to pull the bottom half closer to the body.
3) Then I started cranking down on the straps a bit at a time until the skins were snug, while making fine adjustments to their body-line alignment.
4) As each area got close to perfect, I pinned it down with a clamp and used them to make fine adjustments.

One area to focus on is the gap leading towards the tailgate opening:
ImageUploadedByWAYALIFE1452611712.703842.jpg

A buddy of mine reported trouble getting it to sit vertical and not tapering away as you follow the line down. This is where I used the lower corner clamp to adjust. By applying diagonal inward pressure on the skin that far down, it forces the lower taper in more without changing the upper taper.

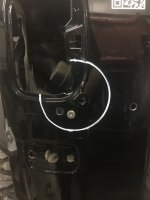
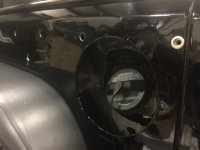
The next thing I did was outline the section of the rear body that needs to be cut away to make room for the round lights. I then also used the to-be-cut area as test material for my drilling and nutsert approach. Here you can see me running a couple test holes with my marked step-bit:
ImageUploadedByWAYALIFE1452612036.061582.jpg

And here you can see the cut area with a test nutsert fully seated:
ImageUploadedByWAYALIFE1452612243.325615.jpg

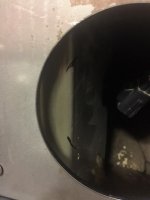
Note: The area you need to cut is a good 1" larger all the way around than the circle traced using the skin as a template, if you plan on using the Tucklites that are sold for this kit. The reason for this is that the lights install using a large double-bead grommet that has to insert and grab flush all the way around, and the channel for the grommet is only wide enough for the Rockskin plate material itself, not the skins + body sheet metal. I could not get my light to seat within the grommet (too tight) until I cut the body back wider.

Here I am testing the connections for the light itself:
ImageUploadedByWAYALIFE1452612679.769323.jpg

The instructions were slightly off on the coloring so the steps are:
1) Snip the connector off the old stock light housing. Try to cut the wires as close to the bulbs as possible to maximize the wire slack you are left with. Also, there is a short black jumper wire that is part of the original light that was only connected between the two bulbs- this can be discarded leaving you with just 4 wires.
2) Of the remaining wires, the White/Green will remain unused.
3) Connect the Black wire from the Trucklite harness to the White/Purple wire of the OE harness.
4) Connect the White wire from the Trucklite harness to the Black wire from the OE harness.
5) Finally, connect the Red wire from the Trucklite harness to the White/Yellow wire from the OE harness. (This is the one that is mislabeled in the instructions)

After confirming that all functions worked properly (idle, brake, turn) I secured the wires using 3 individual hear shrinks for each wire and a fatter shrink sleeve over all of them to tie it all together.

Then I drilled and ran my nutserts:
ImageUploadedByWAYALIFE1452613570.558604.jpg

And did a fitment test:
ImageUploadedByWAYALIFE1452613622.096842.jpg

The pic above shows the light not fully seated in the grommet. This was where I discovered that I needed to cut the hole wider, so I had to pull it all off again, cut, and repaint.

After finishing the drivers side I ended up taking a dinner break and while I was out, picked up some tape. Making the fine adjustments on the drivers side under tension left me with a few clear coat scratches so aimed to correct that lazy mistake :)
ImageUploadedByWAYALIFE1452613901.986326.jpg

The passenger side was the same basic process. I knew now to cut the body hole bigger, and while I didn't have to mess with a gas opening, I ran into this little issue with the tailgate reinforcement bracket behind the body panel:
ImageUploadedByWAYALIFE1452614015.202616.jpg

This plate was also blocking the tail light from seating all the way in, so I had to notch it between the two marks shown to clear the rear of the light housing.

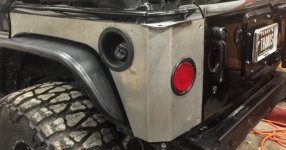
And here is the passenger side mounted with the light properly seated. Much quicker on the second side now that I had some experience!
ImageUploadedByWAYALIFE1452614107.995652.jpg

And here's the final shot before leaving the shop- diggin' the setup a lot!
ImageUploadedByWAYALIFE1452614196.376999.jpg

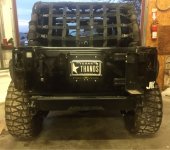
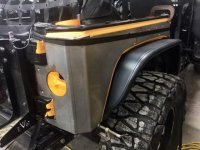
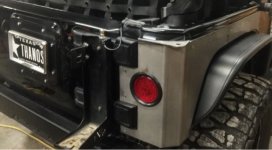
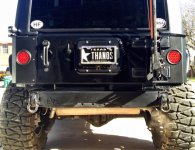
Update: The corners are back from HR shop and as always, Crosslink did a great job. Here's the final setup:
ImageUploadedByWAYALIFE1452709536.995664.jpg
 
Last edited:

Sithwindu

Member
Rear Corner Rockskins & PSC Trampstamp II
Hanging a 37" Mud Grappler, and before it a 35" Kelley, off the stock tire carrier for two years of wheeling had finally started taking its toll on the rear end, so it was time to move up some mods on the priority list.

While the stock tire carrier itself actually held up well (no cracks), it was actually my tailgate that began buckling outward and causing the entire assembly to wag a bit over bumps, so it was time to pull it.

My ultimate plan is to have a more secure carrier, and whether I go off the shelf with the ORE enclosed/stinger style or follow through on plans to make a lower profile basket style a-la EVO1, either way it would require reinforcing the corners for mount points, so I went ahead and ordered the corner skins, and the tramp stamp (for now) so I'd have something to slap my plate on.

The Trampstamp is preeeetty straight forward so I didn't bother with install pics, but here you can see it in the "before" pic of the rear stripped down for the corners:
View attachment 182040

I started with the driver side. Full disclosure I had forgotten to bring painters tape, so lazy me was willing to give it a go raw-dog. It wasn't quite as tough as I imagined to get it squared up evenly, as you can see in this pic I was able to follow the body lines and suck it up close with a couple ratchet straps and 3 clamps:
View attachment 182041

Steps:
1) I started with the upper strap to "hang" the skin onto the corner, but didn't crank down on it yet.
2) Then I slung on the lower strap to pull the bottom half closer to the body.
3) Then I started cranking down on the straps a bit at a time until the skins were snug, while making fine adjustments to their body-line alignment.
4) As each area got close to perfect, I pinned it down with a clamp and used them to make fine adjustments.

One area to focus on is the gap leading towards the tailgate opening:
View attachment 182042

A buddy of mine reported trouble getting it to sit vertical and not tapering away as you follow the line down. This is where I used the lower corner clamp to adjust. By applying diagonal inward pressure on the skin that far down, it forces the lower taper in more without changing the upper taper.

The next thing I did was outline the section of the rear body that needs to be cut away to make room for the round lights. I then also used the to-be-cut area as test material for my drilling and nutsert approach. Here you can see me running a couple test holes with my marked step-bit:
View attachment 182043

And here you can see the cut area with a test nutsert fully seated:
View attachment 182044

Note: The area you need to cut is a good 1" larger all the way around than the circle traced using the skin as a template, if you plan on using the Tucklites that are sold for this kit. The reason for this is that the lights install using a large double-bead grommet that has to insert and grab flush all the way around, and the channel for the grommet is only wide enough for the Rockskin plate material itself, not the skins + body sheet metal. I could not get my light to seat within the grommet (too tight) until I cut the body back wider.

Here I am testing the connections for the light itself:
View attachment 182046

The instructions were slightly off on the coloring so the steps are:
1) Snip the connector off the old stock light housing. Try to cut the wires as close to the bulbs as possible to maximize the wire slack you are left with. Also, there is a short black jumper wire that is part of the original light that was only connected between the two bulbs- this can be discarded leaving you with just 4 wires.
2) Of the remaining wires, the White/Green will remain unused.
3) Connect the Black wire from the Trucklite harness to the White/Purple wire of the OE harness.
4) Connect the White wire from the Trucklite harness to the Black wire from the OE harness.
5) Finally, connect the Red wire from the Trucklite harness to the White/Yellow wire from the OE harness. (This is the one that is mislabeled in the instructions)

After confirming that all functions worked properly (idle, brake, turn) I secured the wires using 3 individual hear shrinks for each wire and a fatter shrink sleeve over all of them to tie it all together.

Then I drilled and ran my nutserts:
View attachment 182049

And did a fitment test:
View attachment 182050

The pic above shows the light not fully seated in the grommet. This was where I discovered that I needed to cut the hole wider, so I had to pull it all off again, cut, and repaint.

After finishing the drivers side I ended up taking a dinner break and while I was out, picked up some tape. Making the fine adjustments on the drivers side under tension left me with a few clear coat scratches so aimed to correct that lazy mistake :)
View attachment 182051

The drivers side was the same basic process. I knew now to cut the body hole bigger, and while I didn't have to mess with a gas opening, I ran into this little issue with the tailgate reinforcement bracket behind the body panel:
View attachment 182052

This plate was also blocking the tail light from seating all the way in, so I had to notch it between the two marks shown to clear the rear of the light housing.

And here is the passenger side mounted with the light properly seated. Much quicker on the second side now that I had some experience!
View attachment 182053

And here's the final shot before leaving the shop- diggin' the setup a lot!
View attachment 182054

Right now the skins are off and at the powder coater.. I'll post some final pics when they are back and on :)

Looking good brotha!!! I'll be doing this soon as well (but the builder corners)
 

Sithwindu

Member
Thanks! So you gonna run fenderless in the rear or add your own flare?

Gonna run fender less and see how this fantastic state of Texas roads and weather treats me lol if it's too much I'll go to regular skins, fab some steel fenders, or fab these to run plastic lol
 
Top Bottom