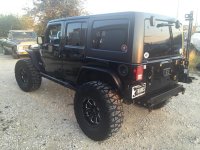
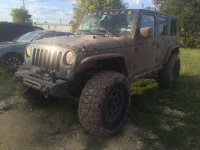
Project "Thanos" Build

iRonin

Member
Project is looking good! Did you talk them into a 10% discount on the Dynatrac ? (assuming you purchased from Northridge4x4).

We didn't explicitly work out a flat discount but per-se but monies were shaved off the price of most of the ancillary items like the programmer, regearing for the rear, etc. I just don't want to steer you into expectation; by that point Northridge had already seen thousands of my dollars, and for most of those purchases, the WAYALIFE keyword discount paid off :thumb:
 

iRonin

Member
Phase 3 Part 1

Phase 3 was/is all about getting to the next level of suspension/tires in preparation for a JKX candidate build. Upgrading to 37" tires meant my existing TeraFlex 2.5" setup wasn't going to cut it, and I wanted to move into the EVO LA kit that would (at least in part) bridge over to a future coil-over setup wherein I at least get to retain the control arms.

Offroad Evolution "Double D" Long Arm Kit (Part 1)
March 2015
Back in March I took advantage of a RR4x4 sale where they were tossing Bilstein shocks with the EVO long arm kit, so off came the OE control arms. and TeraFlex springs and shocks. By this point my wife had just got her own JK (2 door), so the old 2.5" TF lift actually re-purposed cleanly into becoming a 3" lift for her, and set her build up for my replaced 35" tires (pictured later).

As always, within a few days the shipment from Northridge arrived and it was time to get started:
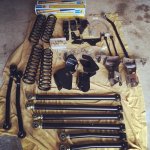
IMG_0144.jpg

This lift kit is not for the feint of heart, and "Dealing with Ambiguity" is absolutely one of those business terms that applies when taking on this project :D
I knew I had it coming through. I fully realized that the majority of folks with the kit probably had it installed at the EVO shop in Cali, or somewhere like Trail Jeeps, so I took it as a personal challenge to try and tackle this project on my own.

There are literally no instructions that come with the kit. I only had 2 external places to even reference when installing it - the original install thread on the JK/Wayalife forums from years ago where photos were taken of the first giveaway rig to have it installed, and then the product install notes by Offroad Vegan.

I had to adapt both of those resources to the other significant challenge I was facing beyond my own inexperience: Not welding the kit in, and not having luxury items like a plasma torch or air tools. In truth, I knew that I had access to folks that could help me if I needed it, so I approached it with the optimism and philosophy of at least not screwing anything up beyond repair :)

I decided to start with the front and just tackle what seemed like the bigger pita first. I had to use my driveway due to height and side-accessibility constraints within my garage, so I used straps and stands to elevate the front end and suspend the axle as close to ride height as possible to minimize droop. In this picture you can see that the first set of control arms have been removed in preparation for bracket cutting:
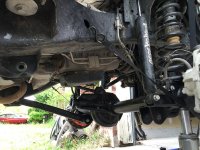
IMG_0157.jpg

With the arms removed, the inner ears of the original UCA and LCA brackets have to be removed and ground down to make room for the new long arm bracket. All the cool kids have plasma cutters that make this part easier. All I have is a a saw-zall. I went with Milwaukee "Diablo" series saw blades and found the shorter 4" Steel Demon Carbide blades to work best for my approach.

The problem with using a saw was that the brackets are tight, curved, and run right up along the frame rails, which meant running a big hand held device that moves like a jackhammer took a wee bit of finesse to carve them out. The second consideration is trying to cut as close to the welds as possible so that there's less material that needs to be ground down later. I ended up with an approach of cutting at the ear from two angles, and then bending the ear back to expose the last little bit needing to be cut:
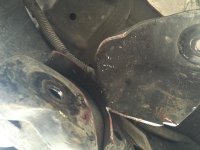
IMG_0160.jpg
IMG_0161.jpg

I tried my best to keep the cuts as smooth and clean as possible, and then after the main ear of material was removed, come back in with a second arc of a more straight forward cut to scale the left over trim back closer to the frame/welds:
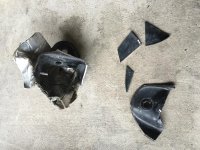
IMG_0173.jpg
IMG_0175.jpg

The next phase was to grind down the remaining bracket material to a smooth finish and clean up the bare metal with paint. The grinding was by far the worst part - laying down under my jeep meant despite my best efforts I had lots and lots of metal dust raining down on me constantly, and since I started on the passenger side, I had to be mindful of grinding angles that would send sparks towards the gas tank / fuel lines. I ended up buying one of those heavy welder blankets and tacking it up to serve as both a protective layer for the tank, and as a drape over me to catch all the metal shavings.

My best grind pic (below) comes from the drivers side, where you can see the inner LCA ear is completely gone and smoothed down to the frame. Slightly above it and to the right, you can see the remainder of the UCA mount post-cut and pre-grind. Again, no air tools, so I was basically using an angle grinder from harbor freight with 4" flapper wheels:
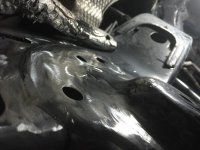
IMG_0370.jpg

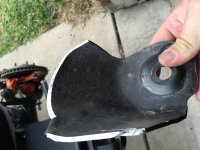
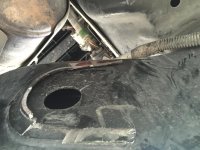
After grinding and painting the exposed areas, there was a little bit of time spent dry-fitting the brackets and figuring out which OE bolts were being reused, where additional holes needed to be drilled, etc. My underbelly was pretty well "clearanced" (as Eddie puts it) so I had to do a few things to really get the frame brackets to wedge flush up against the frame and the tranny crossmember:
View attachment 157756

I basically had to loosen up both sides of the cross member so I could pre-run the bolts through the back of the bracket, and then use another jack to support the combined bracket/crossmember in place:
View attachment 157758 View attachment 157759

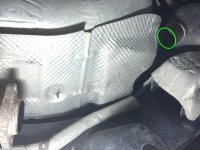
After that it was a matter of center punching the places where new holes are required and getting them drilled out. I actually avoided having to drop the gas tank and exhaust by using an elbow attachment with my drill. It was pretty late at night by the time I finally got everything fitted and bolted enough to crank everything down and get the first set of arms installed:
View attachment 157760

Last thing I went ahead and did for the night was do a test fit of the shock and spring. Shock was pretty easy but I had a couple issues with the Plush Ride coils (described later) so I snapped a pic of my progress and called it a night:
View attachment 157762

The next morning I dealt with the spring situation. The first issue was that the PR44 spring perch is drilled for center-screw bump stop pucks but the supplied set from EVO are the two-screw style. I was also wanting to just reuse the upper portion of the bump stop from TeraFlex but the snag there was that the top coil of the Plush Ride is too narrow to pass over the bump stop with it in place.

Since the combined length of the TF upper stop plus the lower puck that came with the PR44 was the same as what I would have gotten swapping things out and drilling, I ended up keeping the teraflex/dynatrac combo. For the upper clearance issue, I popped out the upper stop, slipped the coil up into the perch, and then ran the bump stop up through the coil from the bottom and into the hole. For some reason I was having a hard time getting it to pop into place without marring the shit out of my coil with a traditional pry-bar, so I used one of the brackets that came with the lift kit as a stopper, and just compressed the axle upwards until it popped in:
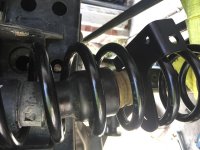
IMG_0228.jpg

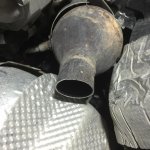
The driver side went much easier since I had the confidence and experience of working through everything on the passenger side first. The only extra bit I had to reckon with was the exhaust loop. I didn't have to drop my exhaust out, but the loop definitely had to go as there was no real way to get in behind it to cut/drill/grind/etc. So once again it was a quick stroke with the sawzall a few inches back from the header to get it out of there:
IMG_0363.jpg IMG_0367.jpg

I originally wanted to preserve the loop after reading about all that back-pressure exhaust science, but this turned out to be a bust. I even tried the Rugged Ridge's exhaust loop relocation solution which uses a different bend direction to make it more of a horizontal loop than a vertical one, but it was just too much material to try to jam into the space and still have room for the long arms to clear.

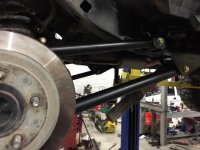
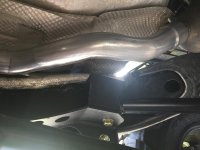
I also didn't want to just use cheap flex-hose tubing like offroad vegan had used, so I ultimately did a little local research and found a muffler shop that had a solid custom exhaust guy, and he ended up bending me a nice S-pipe and welding it in for $90. He made me feel better about uneven exhaust lengths and pointed out that Jeep may have been doing a bit of over-design in this area - pointing out that there are half a million dollar race tuned exotic cars that run uneven exhaust lengths and even back-pressure isn't enough of a concern for them. I guess well see; but the pipe he installed for me was nicely done regardless. Here you can see it with the bracket/arms dry-fitted on to check clearance just before the final assembly:
IMG_0393.jpg

This pretty much concluded the first half of getting the EVO long arm kit installed. I needed to pause after finishing the front to be able to drive the Jeep to Discount Tire to do the big swap out of my old tires onto my wife's rims and the new 37s mounted/balanced onto mine. So I went ahead and swapped out the basic rear components just to balance things out as best I could to make room for the 37s, swapping in the rear plush ride coils and bilstein shocks, and swapped in the longer rear swaybar links.

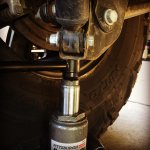
Incidentally, I figured out a cool trick for squishing in the swaybar link bushings by using the lower shock mount and a bottle jack:
IMG_0359.jpg
 
Last edited:

iRonin

Member
Phase 3 Part 2

37" Nitto T̶r̶a̶i̶l̶ Mud Grapplers
April 2015

Right about the time that I was obtaining the new suspension, I was also trying to get my hands on the de-facto JK Experience / Wayalife (at the time) 37" rubber that propels the big dogs up and around these insane obstacles. Go figure - my demand is shared by many, so much so that there appeared to be a national back-order on Trail Grapplers.

During my hunt, I ended up working with a specific Discount Tire here in town that did some additional hunting around from smaller shops in surrounding areas on my behalf. They found a shop that supposedly had 5 in stock- some mom-and-pop place down in Houston, so they called down to have someone put eyes on the set and confirm they actually had them. So they (Discount) lets me know, and I'm super stoked. They asked if I was for sure down to buy them, and I was, so I paid Discount the agreed (discounted) price and they in-turn cut a PO to the shop to secure them in my name.

At that point the only remaining logistic was delivery - shipping the tires up was going to cost a couple hundred. F-that, I was willing to go get them myself and make a day of it visiting some friends. Two problems - hunt took me right up to Easter, and my Jeep was on jack-stands in my driveway as I was grinding brackets off my frame :cheesy:

So I had to wait until after Easter, and in the mean time I got the front half of the suspension completed and installed the basic rear components (springs/shocks) on the rear to the point where I could at least get the front dialed in at the shop (alignment wise) and drive down to pick up the tires.

So that following Tuesday, I swung by the shop to get my front dialed in (as best they could, had some caster issues but that's a different story), and my Discount contact called down to the shop to have them physically pull the tires and set them aside for me to pick up in a few hours. To my dismay, Discount calls me back and is like "We have a small problem.. " :idontknow:

Turns out, whoever went back to check on the tires the first time thought they saw Trail Grapplers, but up close the tires were actually Terra Grapplers. :doh:

Bummed, and with the prospect that no ETA on the backlog was on the horizon, the manager at Discount tire was sympathetic to my cause and was willing to work with me on finding an alternative comparable tire even if it was a bit more. I recalled that Toyo had the family kin of the Trail Grapplers so I tried that first. I unfortunately didn't realize just how much more Open Country's are, so that was a nogo :cheesy:

Kicking the can around a bit, I actually came quite close to pulling the trigger on a set of Trepadors when I asked if they would be willing to do Mud Grapplers at the same rate (and the same rate on the replacement certificates). Discount manager was super cool and honored it. Ironically, I came close to being out of luck on those as well due to low availability - he had to bring together 2 from one store with 3 from another. So another couple days passed where I was starting to stress bit about my choice. Was the road noise going to be ridiculous? Was the reduced life of the MGs going to suck and should I have had some patience? Why don't the guys that have infinite income run em, are they just not as capable for rock crawling?

All of my paranoia, buyers remorse and irrational fears melted away the day the tires all finally arrived and it was time to get them mounted.

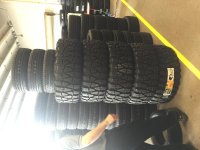
First, it's pretty crazy seeing them stacked next to a bunch of regular street tires. For a Discount Tire in suburban Austin, this was the first time many of the guys working in the garage had even seen tires this big so there were a few photos taken :D
IMG_0235.jpg

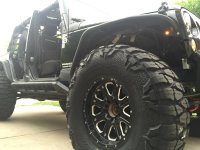
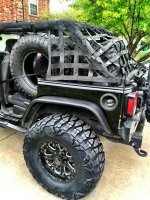
I got to chill out front-and-center in the waiting area while they installed them, and seeing the aggressive profile in person, tucked neatly under Thanos, had me feeling muuuuuuch better. But the moment that really cemented it for me was pulling out onto the open road for the first time, and the visceral feeling I got as the tires wound up this amazing sound like I was piloting a freaking B-17. I had an uncontrollable grin from ear to ear the entire ride home and to this day I am running doorless in 100+ degree weather in a barren field of fucks given because I enjoy the way they sound that much.
IMG_0240.jpg

Oh - and as for the old 35" Kelley Safari TSRs-

Tech: "You wanna keep these tires?"
Me: "Uh, yep, they're going on the wife's jeep, lets go ahead and load them up"
Tech: "Load them up? You have enough room ?"
Me: "Yep."

Turns out you can do 4 across the back seat (folded down) and then the spare horizontal in the back, secured with ratchet straps: :beer:
IMG_0242.jpg


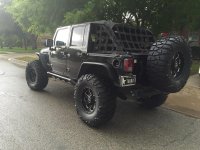
My days of riding around doorless would prove to be short lived though, as a couple days later the rain rolled in and forced me to curb my enthusiasm -
IMG_0266.jpg

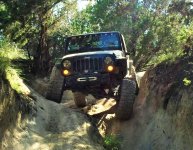
Flashing forward for a moment, I recently had the opportunity to try the Grapplers out on the trails at Hidden Falls for the first time, and man-o-man I was super happy with their performance:
10387692_10155778314675640_5963073283126800184_n.jpg

So now really the only outstanding question is tread life - a question I honestly have little concern over at this point considering how pleased I am with these puppies already :)
 

Sithwindu

Member
37" Nitto T̶r̶a̶i̶l̶ Mud Grapplers
April 2015

Right about the time that I was obtaining the new suspension, I was also trying to get my hands on the de-facto JK Experience / Wayalife (at the time) 37" rubber that propels the big dogs up and around these insane obstacles. Go figure - my demand is shared by many, so much so that there appeared to be a national back-order on Trail Grapplers.

During my hunt, I ended up working with a specific Discount Tire here in town that did some additional hunting around from smaller shops in surrounding areas on my behalf. They found a shop that supposedly had 5 in stock- some mom-and-pop place down in Houston, so they called down to have someone put eyes on the set and confirm they actually had them. So they (Discount) lets me know, and I'm super stoked. They asked if I was for sure down to buy them, and I was, so I paid Discount the agreed (discounted) price and they in-turn cut a PO to the shop to secure them in my name.

At that point the only remaining logistic was delivery - shipping the tires up was going to cost a couple hundred. F-that, I was willing to go get them myself and make a day of it visiting some friends. Two problems - hunt took me right up to Easter, and my Jeep was on jack-stands in my driveway as I was grinding brackets off my frame :cheesy:

So I had to wait until after Easter, and in the mean time I got the front half of the suspension completed and installed the basic rear components (springs/shocks) on the rear to the point where I could at least get the front dialed in at the shop (alignment wise) and drive down to pick up the tires.

So that following Tuesday, I swung by the shop to get my front dialed in (as best they could, had some caster issues but that's a different story), and my Discount contact called down to the shop to have them physically pull the tires and set them aside for me to pick up in a few hours. To my dismay, Discount calls me back and is like "We have a small problem.. " :idontknow:

Turns out, whoever went back to check on the tires the first time thought they saw Trail Grapplers, but up close the tires were actually Terra Grapplers. :doh:

Bummed, and with the prospect that no ETA on the backlog was on the horizon, the manager at Discount tire was sympathetic to my cause and was willing to work with me on finding an alternative comparable tire even if it was a bit more. I recalled that Toyo had the family kin of the Trail Grapplers so I tried that first. I unfortunately didn't realize just how much more Open Country's are, so that was a nogo :cheesy:

Kicking the can around a bit, I actually came quite close to pulling the trigger on a set of Trepadors when I asked if they would be willing to do Mud Grapplers at the same rate (and the same rate on the replacement certificates). Discount manager was super cool and honored it. Ironically, I came close to being out of luck on those as well due to low availability - he had to bring together 2 from one store with 3 from another. So another couple days passed where I was starting to stress bit about my choice. Was the road noise going to be ridiculous? Was the reduced life of the MGs going to suck and should I have had some patience? Why don't the guys that have infinite income run em, are they just not as capable for rock crawling?

All of my paranoia, buyers remorse and irrational fears melted away the day the tires all finally arrived and it was time to get them mounted.

First, it's pretty crazy seeing them stacked next to a bunch of regular street tires. For a Discount Tire in suburban Austin, this was the first time many of the guys working in the garage had even seen tires this big so there were a few photos taken :D
View attachment 159800

I got to chill out front-and-center in the waiting area while they installed them, and seeing the aggressive profile in person, tucked neatly under Thanos, had me feeling muuuuuuch better. But the moment that really cemented it for me was pulling out onto the open road for the first time, and the visceral feeling I got as the tires wound up this amazing sound like I was piloting a freaking B-17. I had an uncontrollable grin from ear to ear the entire ride home and to this day I am running doorless in 100+ degree weather in a barren field of fucks given because I enjoy the way they sound that much.
View attachment 159801

Oh - and as for the old 35" Kelley Safari TSRs-


Turns out you can do 4 across the back seat (folded down) and then the spare horizontal in the back, secured with ratchet straps: :beer:
View attachment 159802


My days of riding around doorless would prove to be short lived though, as a couple days later the rain rolled in and forced me to curb my enthusiasm -
View attachment 159804

Flashing forward for a moment, I recently had the opportunity to try the Grapplers out on the trails at Hidden Falls for the first time, and man-o-man I was super happy with their performance:
View attachment 159805

So now really the only outstanding question is tread life - a question I honestly have little concern over at this point considering how pleased I am with these puppies already :)

I gotta say Iv had my mud grapplers for about 2 years now. Also had a cummute to work of about at least 40 miles a day 12 days on 2 days off. And Iv done 3 trips to hidden falls in about a year. And holy hell I love these tires!! I must admit I think it's time to replace them, still good for on road but they are looking a little worn for off reading. For as much as Iv driven in these 2 years, I think the tread life was decent! You'll at least get 2 years out of it
 

iRonin

Member
I gotta say Iv had my mud grapplers for about 2 years now. Also had a cummute to work of about at least 40 miles a day 12 days on 2 days off. And Iv done 3 trips to hidden falls in about a year. And holy hell I love these tires!! I must admit I think it's time to replace them, still good for on road but they are looking a little worn for off reading. For as much as Iv driven in these 2 years, I think the tread life was decent! You'll at least get 2 years out of it

Nice man thanks for the feedback- two years is juuuuust enough time for me to be prepping for 40s by that time haha
 

DWiggles

Caught the Bug
So much work for the long arm! But seemed totally worth it this weekend! Any chance you want to do it again on my jeep? I was blown away with how your jeep rode. I'm pricing things out now...
 

iRonin

Member
So much work for the long arm! But seemed totally worth it this weekend! Any chance you want to do it again on my jeep? I was blown away with how your jeep rode. I'm pricing things out now...

I am happy to provide "been there done that" consultation services but hours of grinding builds...um....character and I don't want to rob you of that personal growth experience...yeah...that's the ticket :cheesy:
 

Jackal01

New member
I am happy to provide "been there done that" consultation services but hours of grinding builds...um....character and I don't want to rob you of that personal growth experience...yeah...that's the ticket :cheesy:


Would :beer: persuade you???? It sure as hell persuades me! I won't be doing mine until the Spring/Summer anyway.

I would really like someone that has been there. I'll do the heavy lifting...just need an adviser on standby. :yup:
 

DWiggles

Caught the Bug
I am happy to provide "been there done that" consultation services but hours of grinding builds...um....character and I don't want to rob you of that personal growth experience...yeah...that's the ticket :cheesy:

Bahaha so diplomatic! A simple "no" would have worked to... haha

Of course I'm kidding, it will be GREAT to know if I get stuck I can ask someone whose been there, done that. :yep:
 
Last edited:

iRonin

Member
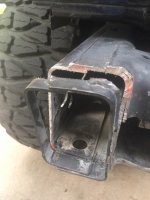
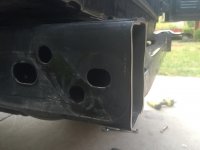
EVO rear fascia came in yesterday; so today I'll be pulling the D's off the back, finally cutting my frame-horns flush, and mounting the new addition.

Gonna try using the GoPro chesty to time lapse the process too and see how it does :)

Excited to have a new project to work on, it's been a minute since I've had to cut / grind on Thanos :)
View attachment 171409

Oh, also picked up a set of Rancho/Spiderwebshade doors for the front. Absolutely love them but I'll probably wait until the rears to post em up.
 

Jegar

New member
Just saw this thread -- I love reading the story behind your awesome beast! What's it going to take to get you to head up a newbie Run deaux???? [emoji120]🏻 ([emoji481][emoji482][emoji482][emoji482])
 

iRonin

Member
Just saw this thread -- I love reading the story behind your awesome beast!

Thanks I hope you enjoy it!

What's it going to take to get you to head up a newbie Run deaux???? [emoji120]🏻 ([emoji481][emoji482][emoji482][emoji482])

Haha! Time and a smaller group (or more help) - rolling 18 deep down a trail I could only spot back 5-6 Jeeps before I had to run my butt back to the front to move my rig forward lol
 

iRonin

Member
All done :) didn't get to start the process until dusk so by the time I was cutting sanding and panting it was already getting dark, but here are some shots from the install plus a couple final ones from today after taking Thanos to get washed...

Here's the dry fit after pulling off all the existing hardware. I was using this as a guide for how far back I should cut the frame horns:
ImageUploadedByWAYALIFE1446161865.606908.jpg

ImageUploadedByWAYALIFE1446161958.503696.jpg

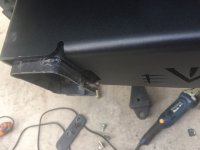
Most of the way through the first cut:
ImageUploadedByWAYALIFE1446161998.558556.jpg

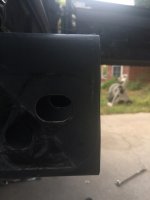
Cut done, grinding to get the edge as level as possible with the flapper:
ImageUploadedByWAYALIFE1446162075.768573.jpg

Not too bad for freehand angle grinding:
ImageUploadedByWAYALIFE1446162096.621609.jpg

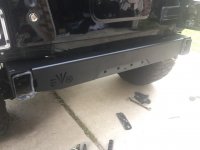
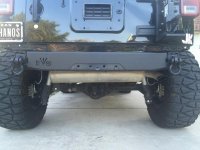
All done!!
ImageUploadedByWAYALIFE1446162274.533670.jpg

Shot from just now outside the shop:
ImageUploadedByWAYALIFE1446162309.171530.jpg

Fun install for sure, love the finished look. Now we can start doing some mock-ups for the custom carrier!
 

DWiggles

Caught the Bug
All done :) didn't get to start the process until dusk so by the time I was cutting sanding and panting it was already getting dark, but here are some shots from the install plus a couple final ones from today after taking Thanos to get washed...

Here's the dry fit after pulling off all the existing hardware. I was using this as a guide for how far back I should cut the frame horns

Most of the way through the first cut:

Cut done, grinding to get the edge as level as possible with the flapper:

Not too bad for freehand angle grinding

All done!!

Shot from just now outside the shop:

Fun install for sure, love the finished look. Now we can start doing some mock-ups for the custom carrier!

Sweet! Looks awesome man! Can't wait to see what you're planning for the tire carrier...
 

JK_Dave

Caught the Bug
You could almost be my twin! Looking good sir. I also appreciate the time you took to layout your build thread. :thumb:
 

iRonin

Member
Sweet! Looks awesome man! Can't wait to see what you're planning for the tire carrier...

For the longest time I was going to just rock the EVO carrier (it's still my favorite off-the-shelf for sure) but after seeing EVO1's and a few others with similar designs that poke out through the tail gate, I really fell in love with the idea of doing something similar which still allows for the hardtop.

So once the corner skins come in, we'll start doing mock-ups for tab placements and bends and then see what's possible :)

You could almost be my twin! Looking good sir. I also appreciate the time you took to layout your build thread. :thumb:

Thanks man, I just swing by yours - glad to see another black beauty representing the dark side :)
 

iRonin

Member
Whelp, it was a decent run, but after ~2 years of wheelin on 35s and 37s I finally busted what I hope is just a rear axle shaft. Wheeling out at Hidden Falls during Freaks at the Falls was super slick with all the rain which meant rolling the dice on needing more skinny pedal.

Thankfully with just a couple tugs over a few remaining obstacles Thanos was able to limp through the remainder of Carnage Canyon and made it back to camp under its own power. Now at the shop, it's time to pop the cover and see if it's as expected. But first, a little power wash so I'm not trying to work in this mess:

ImageUploadedByWAYALIFE1447078746.251856.jpg

Here's the link to the track and others from the weekend:
https://www.gaiagps.com/public/IGVZw2DRnPjs1DN2kd7L32bK

Great times overall and I heard the event raised $5800 for charity- I walked away with a $100 gift certificate to Rebel Offroad from the raffle- hmmm I wonder what that should go towards :)
 
Top Bottom