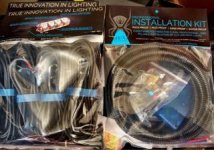
You are using an out of date browser. It may not display this or other websites correctly.
You should upgrade or use an alternative browser.
You should upgrade or use an alternative browser.
Project "Thanos" Build
- Thread starter iRonin
- Start date
DWiggles
Caught the Bug
ATTACH]182040[/ATTACH]
ATTACH]182041[/ATTACH]
ATTACH]182042[/ATTACH]
ATTACH]182043[/ATTACH]
ATTACH]182044[/ATTACH]
ATTACH]182046[/ATTACH]
ATTACH]182049[/ATTACH]
ATTACH]182050[/ATTACH]
ATTACH]182051[/ATTACH]
ATTACH]182052[/ATTACH]
ATTACH]182053[/ATTACH]
ATTACH]182054[/ATTACH]
Looks AWESOME George! Cant wait to see what you decide to do about actually carrying a spare! Thanos just keeps getting more and more awesome!! :thumb:
mudmobeeler
Caught the Bug
Jeep is lookin good. :thumb:
Ddays
Hooked
Nice write up. Glad I wasn't the only one that cut the light opening too small the first time! Are you using backup lights? I cribbed how I did mine off of someone's build thread (can't remember whose it was) and its super easy. Just wired in some eagle eyes & mounted on the lower pinch seam under the skins. Those truck lites are a pain to install - I coated mine in dish soap & they go in real easy that way...
iRonin
Member
Project "Thanos" Build
None yet, that's what I'm doing next. I was going to follow the standard path of mounting a pair of rigids to the fascia, but having discovered the magnetic lighting by Lux, I may actually go with a pair of their whites mounted through the frame horns near the D-rings as a clean low profile solution. I'll check out that eagle eyes approach too, thanks for the heads up
The skins came back from PC today- I'll be updating the original post with a proper after pic but here are a couple poser shots from my favorite local flex spot:
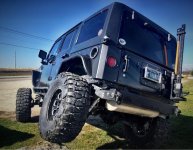
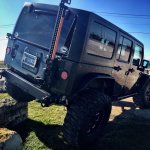
Nice write up. Glad I wasn't the only one that cut the light opening too small the first time! Are you using backup lights? I cribbed how I did mine off of someone's build thread (can't remember whose it was) and its super easy. Just wired in some eagle eyes & mounted on the lower pinch seam under the skins.
None yet, that's what I'm doing next. I was going to follow the standard path of mounting a pair of rigids to the fascia, but having discovered the magnetic lighting by Lux, I may actually go with a pair of their whites mounted through the frame horns near the D-rings as a clean low profile solution. I'll check out that eagle eyes approach too, thanks for the heads up
The skins came back from PC today- I'll be updating the original post with a proper after pic but here are a couple poser shots from my favorite local flex spot:


Last edited:
iRonin
Member
This past weekend one of the local clubs here (Austin Jeep People) hosted their 3rd annual Polar Bear Run. The basic format being a fund raiser where they pair up newbies with trail guides and tail gunners and run trails out at Hidden Falls Adventure Park. We show people what even their stock jeeps are capable of, take lots of pics, do a lot of meeting and greeting, and then later eat BBQ and raffle off a bunch of donated stuff. I was out Saturday and Sunday - Saturday I started out as a volunteer tail gunner for a newbie group, and then after lunch I hit the trails with good friends I've been wheeling with for a couple years now.
Here's the video from the newbie run footage:
And here's a quick vid I threw together for the afternoon run with my buddies:
It's always crazy how the videos just don't do the steepness of some obstacles justice. Even more difficult to capture is that here in TX we don't really have massive boulders to put things into scale, just a bunch of really deep creek beds and waterfall ledges that bring their own sets of challenges!
Last edited:
Sithwindu
Member
Project "Thanos" Build
Nice brotha!!!! That last obstacle was second level of wildcat correct? I heard wildscat changed a lot!
This past weekend one of the local clubs here (Austin Jeep People) hosted their 3rd annual Polar Bear Run. The basic format being a fund raiser where they pair up newbies with trail guides and tail gunners and run trails out at Hidden Falls Adventure Park. We show people what even their stock jeeps are capable of, take lots of pics, do a lot of meeting and greeting, and then later eat BBQ and raffle off a bunch of donated stuff. I was out Saturday and Sunday - Saturday I started out as a volunteer tail gunner for a newbie group, and then after lunch I hit the trails with good friends I've been wheeling with for a couple years now.
I'm still working on the newbie run video, but here's a quick vid I threw together for the afternoon run with my buddies:
It's always crazy how the videos just don't do the steepness of some obstacles justice. Even more difficult to capture is that here in TX we don't really have massive boulders to put things into scale, just a bunch of really deep creek beds and waterfall ledges that bring their own sets of challenges!
Nice brotha!!!! That last obstacle was second level of wildcat correct? I heard wildscat changed a lot!
iRonin
Member
Nice brotha!!!! That last obstacle was second level of wildcat correct? I heard wildcat changed a lot!
The mud has made Wildcat interesting for sure but what you're seeing there is the last wall obstacle at the end of "East". The left line is "doable" with enough lift, skinny pedal, and a rear locker. I tried it but my rear is still open (ordering my rear axle this week hopefully!) and the top part of the shelf is dug out from people humping the wall, so my front locker wasn't helping me any and I would have had to really give it hell to get up it, so I did the right line. The right line is easier to get up, but you have to be mindful of the loose rocks at the base, and the tree on the far right that the slope wants to throw you towards as you come up. Last time I did this obstacle I was on 35s still and 3" of lift, so I was slapping hard on the break-over. Felt much better this time making it over clean
iRonin
Member
iRonin
Member
Phase 4: Lux Lighting Systems Rock Lights
Lux Lighting Systems Rock Lights
Jan 2016
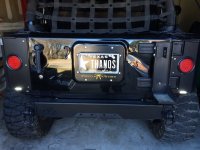
Weather finally warmed up a bit this week so I took the opportunity to install the Lux rock lights. The two bits of extra credit here were that I already had a set of Amber colored ones that I tested out originally, and that since I installed the EVO rear corner skins, I haven't had reverse lights for a minute.
So the kit I ordered was 8 white rock lights plus the pre wired install kit/switch. Two of the lights would serve as back up lights, and the ambers were to be re-purposed as accent lighting.
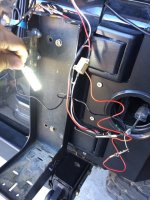
I started with the rear back-up lights. I undid the temp harness I made for the Trucklites, and then connected a couple of leads to test it out:
After verifying the correct wires, I re-ran the lines behind the corner skins and then into the body behind the tail lights via the larger opening from the skins install.
Tested them out and they worked well!
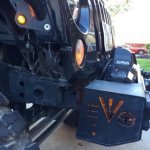
Next I moved on to getting the accent lights set up in the front bumper. Goal was to have a back-lit effect going whenever the side markers are on. Ended up integrating it with the PSC flare markers.
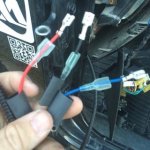
Next I laid out the relay harness and ran the switch end through the firewall to the A-pillar switch plate:
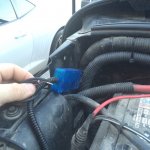
I decided to mount the junction box over on the battery side, the harness still had plenty of slack to make it to the switch plate:
 l
l
Next I placed the lights where I think they would work, and ran them up to the box directly without routing just to work out the best coverage-
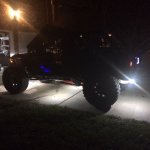
And then moved on to the long tedious process of running the lines officially. I forgot to take pictures but for the center and rear lights, I used a coat hanger and fish-routed the lines up to the front inside the frame rails. With the junction box being located on the passenger side, I ran out of cable length on the rear driver light, so I patched in some of the excess cable from one of the front lights.
The junction box has 3 terminals, so with 6 rock lights in play I wired them as 3 pairs: Front, Middle, Rear:
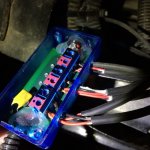
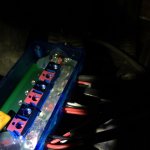
I then took a page out of the junction box's design book and ran a bead of low temp hot glue to "set" all the terminals and provide some security and vibration dampening:
The box also comes with a strip of industrial Velcro on the back, so with everything wired up I cleaned the sidewall of the engine bay, screwed on the cover, and mounted the box:
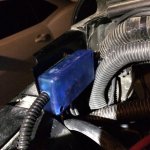
The final product:
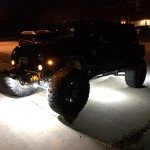
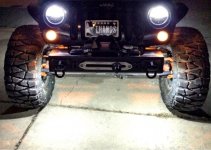
I really dig how well the ambers work as a bumper accent!
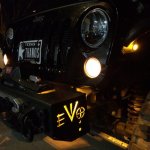
Good times. Can't wait to get out and night wheel this thing now
Lux Lighting Systems Rock Lights
Jan 2016
Weather finally warmed up a bit this week so I took the opportunity to install the Lux rock lights. The two bits of extra credit here were that I already had a set of Amber colored ones that I tested out originally, and that since I installed the EVO rear corner skins, I haven't had reverse lights for a minute.
So the kit I ordered was 8 white rock lights plus the pre wired install kit/switch. Two of the lights would serve as back up lights, and the ambers were to be re-purposed as accent lighting.
I started with the rear back-up lights. I undid the temp harness I made for the Trucklites, and then connected a couple of leads to test it out:

After verifying the correct wires, I re-ran the lines behind the corner skins and then into the body behind the tail lights via the larger opening from the skins install.
Tested them out and they worked well!

Next I moved on to getting the accent lights set up in the front bumper. Goal was to have a back-lit effect going whenever the side markers are on. Ended up integrating it with the PSC flare markers.

Next I laid out the relay harness and ran the switch end through the firewall to the A-pillar switch plate:

I decided to mount the junction box over on the battery side, the harness still had plenty of slack to make it to the switch plate:
 l
lNext I placed the lights where I think they would work, and ran them up to the box directly without routing just to work out the best coverage-

And then moved on to the long tedious process of running the lines officially. I forgot to take pictures but for the center and rear lights, I used a coat hanger and fish-routed the lines up to the front inside the frame rails. With the junction box being located on the passenger side, I ran out of cable length on the rear driver light, so I patched in some of the excess cable from one of the front lights.
The junction box has 3 terminals, so with 6 rock lights in play I wired them as 3 pairs: Front, Middle, Rear:

I then took a page out of the junction box's design book and ran a bead of low temp hot glue to "set" all the terminals and provide some security and vibration dampening:

The box also comes with a strip of industrial Velcro on the back, so with everything wired up I cleaned the sidewall of the engine bay, screwed on the cover, and mounted the box:

The final product:


I really dig how well the ambers work as a bumper accent!

Good times. Can't wait to get out and night wheel this thing now
Last edited:
projectMMTB
New member
Looks great! How many lux lights did you use? I've been wanting to get them but haven't known what would look best
swampdog
New member
Looks great! How many lux lights did you use? I've been wanting to get them but haven't known what would look best
His post said 8
iRonin
Member
Awesome, the 1/4 pounder lights up like a jackolantern. I dig it
Haha that's exactly what I said :beer:
That's awesome! The amber lights look sick!
Thank you! I'm super impressed by how much light those little guys crank out.
His post said 8Looks great! How many lux lights did you use? I've been wanting to get them but haven't known what would look best
Right, the kit I bought came with 8, but I used 2 of them as back-up lights, so what you see in the pictures is just 6 rock lights: 2 front, 2 side, 2 rear. I spaced the middle ones as evenly as I could for coverage but I could definitely see a case for running a extra set on the sides for a JKU (all 8) whereas for a 2 door, I would say 6 is plenty.
I'm ok with the side coverage for now, the more important areas for me were the front and rear lighting. The beauty of it is, if later down the road I end up getting actual back up lights ( kinda want to do some flush-mounts in the bumper), I can just move the other two back under the jeep all easy-peasy-like and shift the existing side set up further.

iRonin
Member
Rear Axle on Order!
Been a hectic new year so far, but a quick update that I officially have one of the new Dynatrac XD60s on order
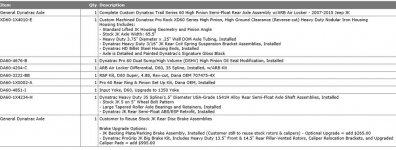
I also picked up one of these little guys from Drake but haven't decided where to mount it yet:
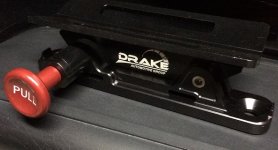
These two upgrades come with a sense of excitement because with a locked rear and a fire extinguisher, my 2 year evolution of a stock Sahara will be just a sport cage away from qualifying for the JKX. Super convenient that there happens to be a giveaway going on for the kind I was planning on getting - so I think I'll ride it out and see if it's in the cards to win
Been a hectic new year so far, but a quick update that I officially have one of the new Dynatrac XD60s on order

I also picked up one of these little guys from Drake but haven't decided where to mount it yet:

These two upgrades come with a sense of excitement because with a locked rear and a fire extinguisher, my 2 year evolution of a stock Sahara will be just a sport cage away from qualifying for the JKX. Super convenient that there happens to be a giveaway going on for the kind I was planning on getting - so I think I'll ride it out and see if it's in the cards to win
Sithwindu
Member
Been a hectic new year so far, but a quick update that I officially have one of the new Dynatrac XD60s on order
View attachment 187361
I also picked up one of these little guys from Drake but haven't decided where to mount it yet:
View attachment 187363
These two upgrades come with a sense of excitement because with a locked rear and a fire extinguisher, my 2 year evolution of a stock Sahara will be just a sport cage away from qualifying for the JKX. Super convenient that there happens to be a giveaway going on for the kind I was planning on getting - so I think I'll ride it out and see if it's in the cards to win
Congrats on the prorock xd!!! Can't wait to see more updates?! You gonna make the jeep Experiance in March at hidden falls? Mel wades event?
mudmobeeler
Caught the Bug
Super convenient that there happens to be a giveaway going on for the kind I was planning on getting - so I think I'll ride it out and see if it's in the cards to win
I hope you lose, cause I wanna win! LOL.
Jeeps lookin good.


