If there's just one thing that the all new Jeep Renegade could have really used right from the factory, it's a set of tougher all terrain or mud terrain tires. While the Renegade itself is more than capable of getting out and doing some light wheeling, the street tires it comes with have thin sidewalls and really, just lack the kind of tread that you really need to get you to where you want to be. That being said, there's literally next to nothing when it comes to a more aggressive tread in a size that will fit especially on a Trailhawk's 17" wheel and attempting to run anything bigger will require you to run a small lift. Well, thanks to the guys over at Daystar, we now have a 1.5" lift option available to us and it will allow you to run a tire that is approximately 2" taller than stock. In this write-up, you'll get to see all is needed to install this lift on a Jeep Renegade Trailhawk but if you have a Sport, Latitude or Limited, it'll be basically the same thing only with fewer steps.
What you will need
• KJ09168BK - Daystar Jeep Renegade 1.5" Lift Kit
• 10, 13, 16, 17, 18, 22mm Socket & Wrench
• E-14, E-16, E-18, E-20 Reverse Torx Socket
• Torx T-40 Bit
• 7/16" Socket
• 3/8" Drive Ratchet
• 1/2" Drive Ratchet
• 3/8" Drive Ratchet Extension
• 3 lb. Hammer
• Needle Nose Pliers
• Flathead Screwdriver
• Phillips Screwdriver
• Panel Trim Pry Tool
• Vice Grips
• Pry Bar
• Angle Grinder w/ Cutoff Wheel
• Flat File
• Floor Jack
• (2) Jack Stands
• Wheel Chocks
• Marker
• Black frame paint
Installation Instructions
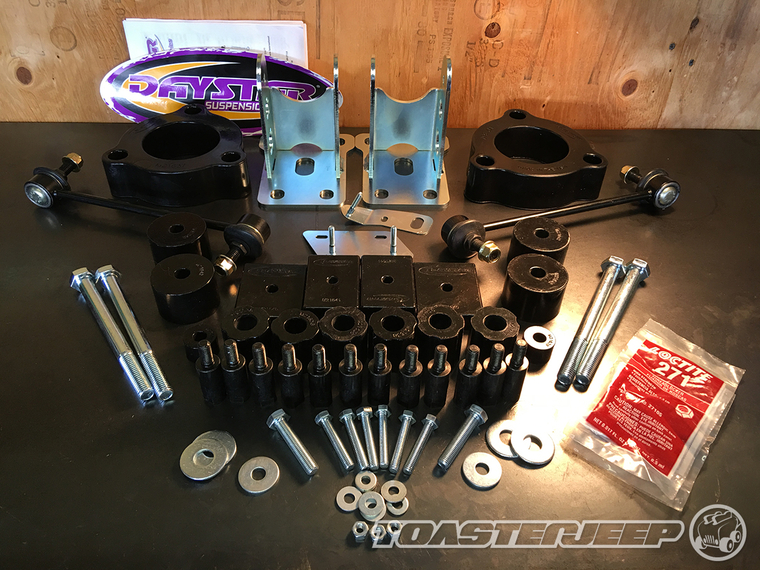
Here's a shot of everything you will get with your new Daystar Jeep Renegade 1.5" lift kit. Be sure to verify that you have all the parts listed in the bill of materials before you begin this installation.
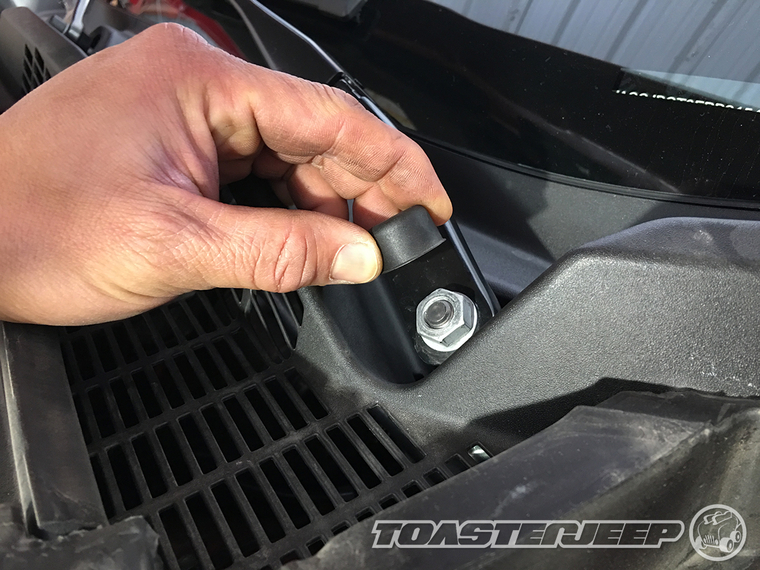
1. Park your Jeep Renegade on level ground and engage the parking brake. Then, open the hood and remove the windshield wiper caps cover the retaining nuts.
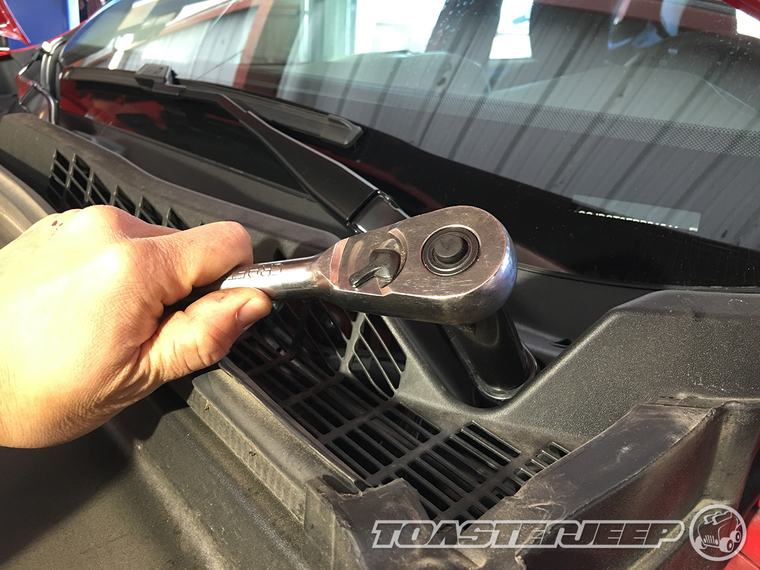
2. Using a 17mm socket, remove the nuts securing your windshield wipers in place.
3. Use a marker or grease pencil to mark the position of the windshield wipers and then remove them from the splined stud. This can take some effort to do and you may find it necessary to working the wiper arm back and forth as you pull up on it to free it from the stud.
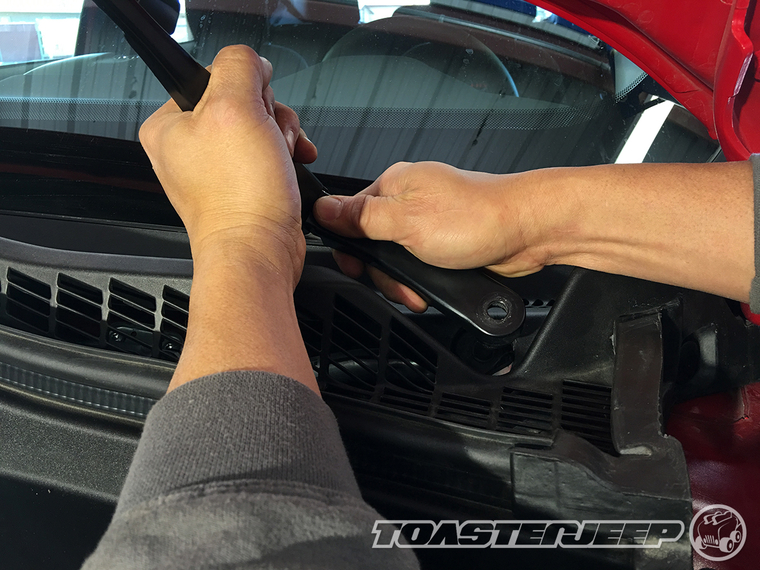
4. Once removed, mark the wiper arms to help remind you where they belong.
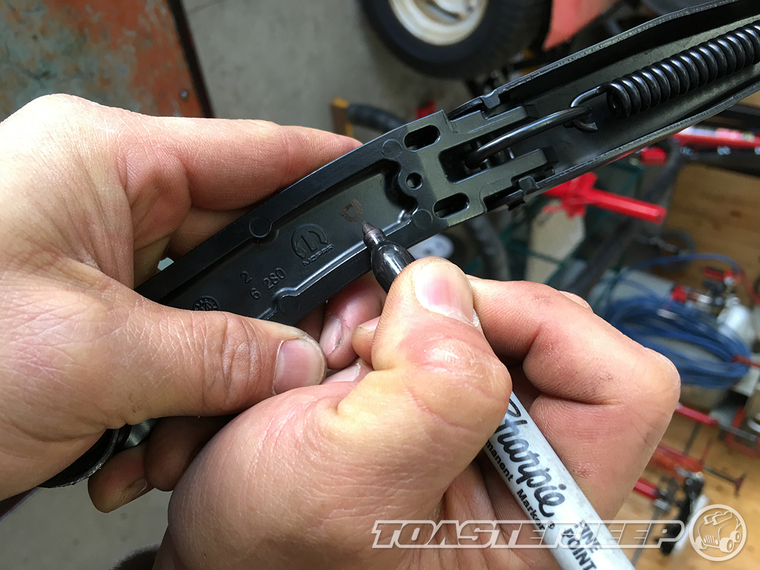
5. There are 3 push tabs securing the cowl cover in place. To remove them, you will need to use a flathead screw driver to lift up the locking pin as shown.
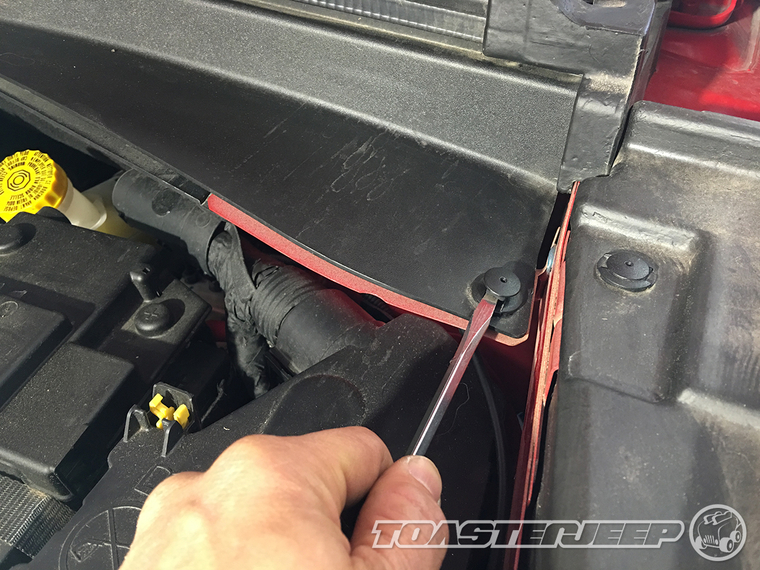
6. With the help of a panel trim pry tool, remove the 3 push tabs.
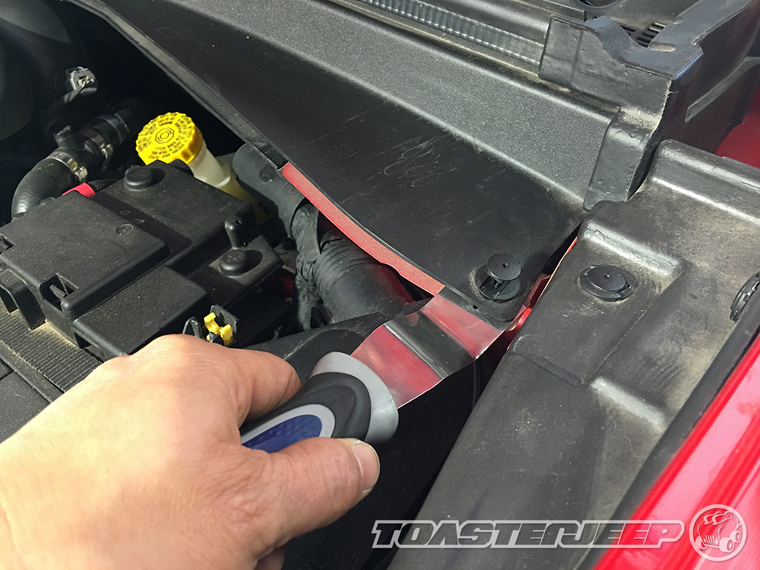
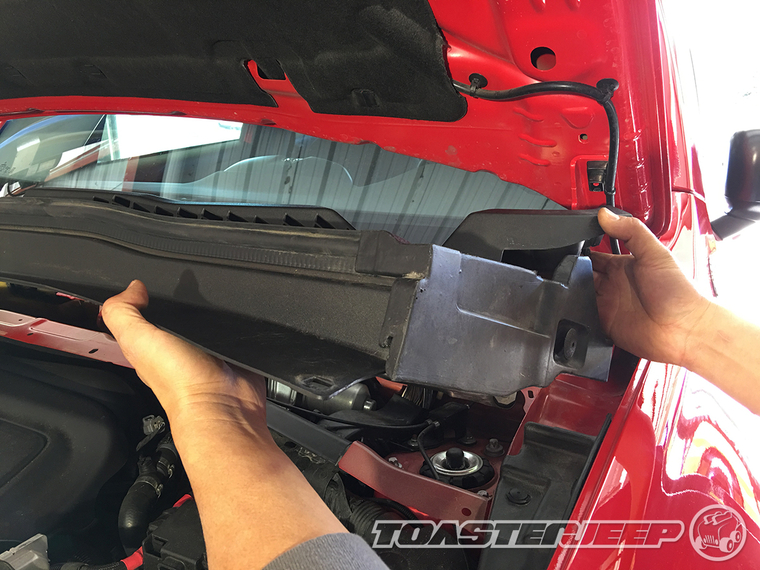
7. On each side of cowl cover, you will find a push tab securing the foam filler panel in place. Use a panel trim pry tool to pull the pins out.
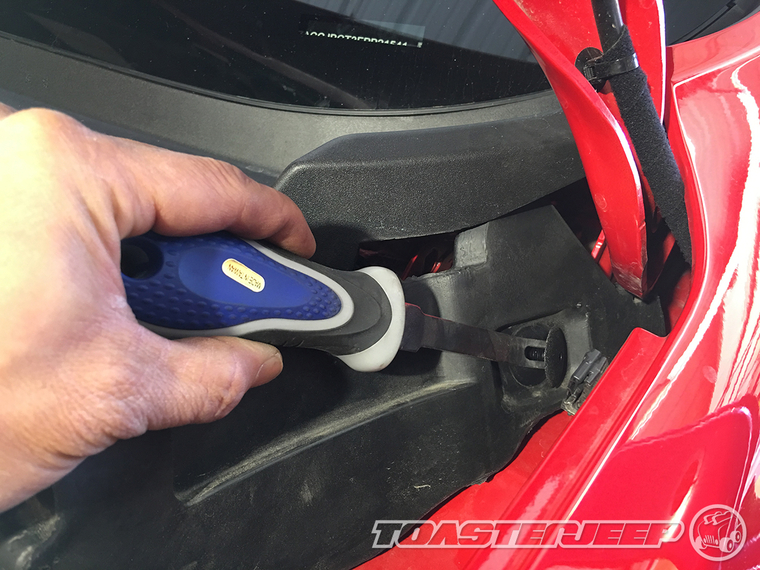
8. You can now carefully remove the cowl cover and set it aside.
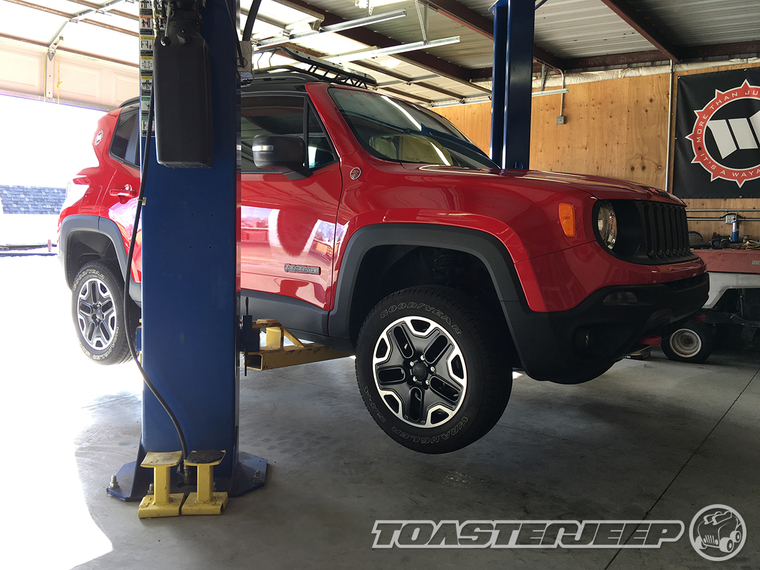
9. While we used a lift to help make it easier to photograph this install, all you will need is a floor jack, a pair of jack stands and wheel chocks. To begin your install, simply place the wheel chocks up against your rear tires, lift the front of your Renegade until the tires are off the ground and then set it back down on jack stands positioned under the frame rails and just behind the front tires.
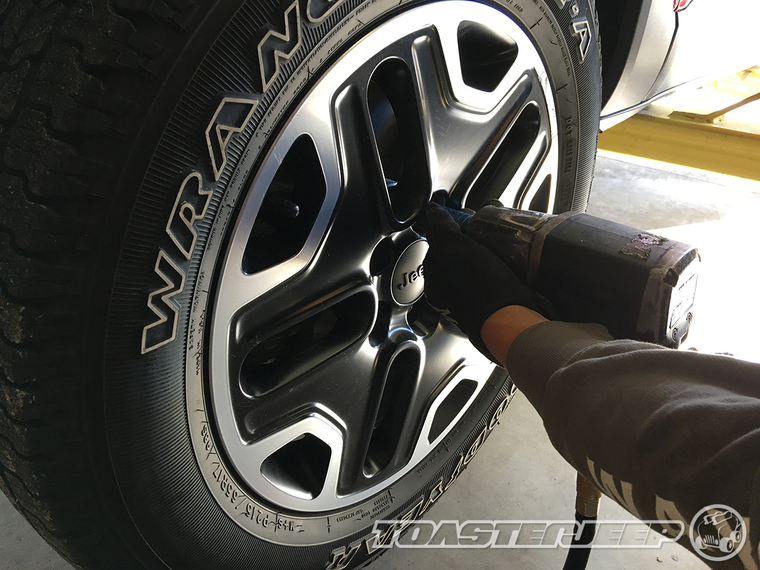
10. Using a 17mm socket, remove the lug bolts securing the front wheels to your Renegade.
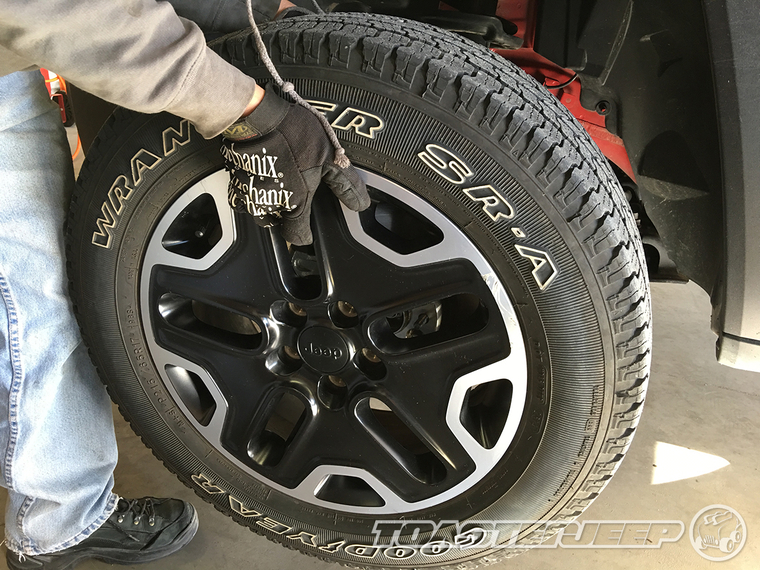
11. Remove your wheels and then lay them flat under the frame rails of your Renegade for extra safety.
12. Starting on the driver side of your Renegade, remove the sway bar link from the strut. To do this, you will need a Torx T-40 bit to hold the sway bar stud in place while you use an 18mm box wrench to remove the nut.
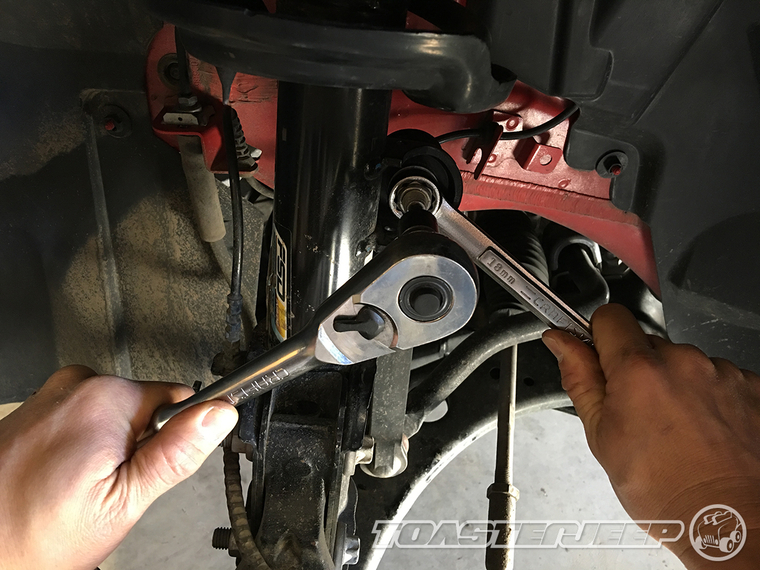
13. Using a 17mm socket, loosen but do not remove the nut securing the tie-rod to the steering knuckle.
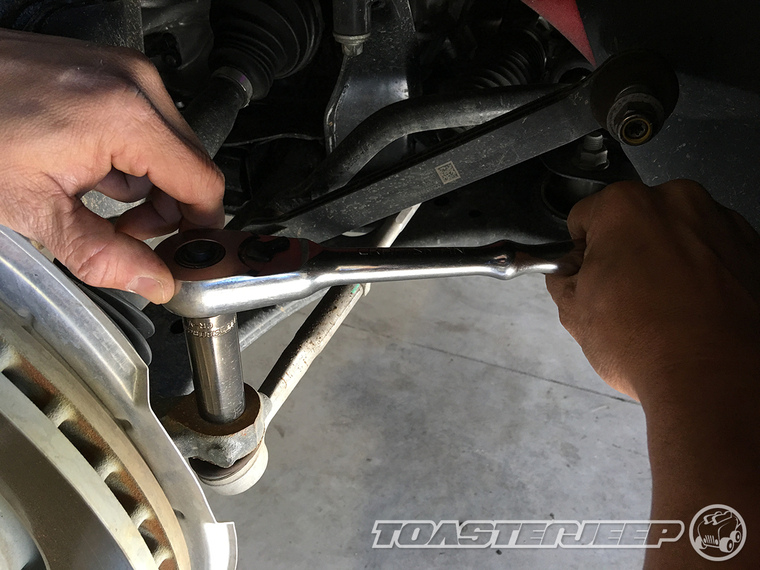
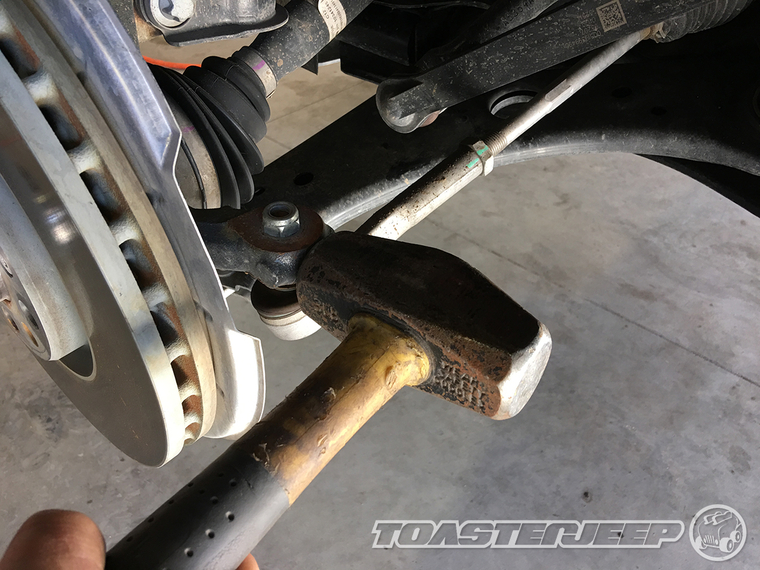
14. Strike the end of the steering knuckle with a 3 lb. hammer to help ring out the tie-rod end's tapered stud. Once free, remove the nut and rotate the tie-rod out of the way.
15. As before, use a Torx T-40 bit and an 18mm box wrench to remove the sway bar link from the sway bar arm.
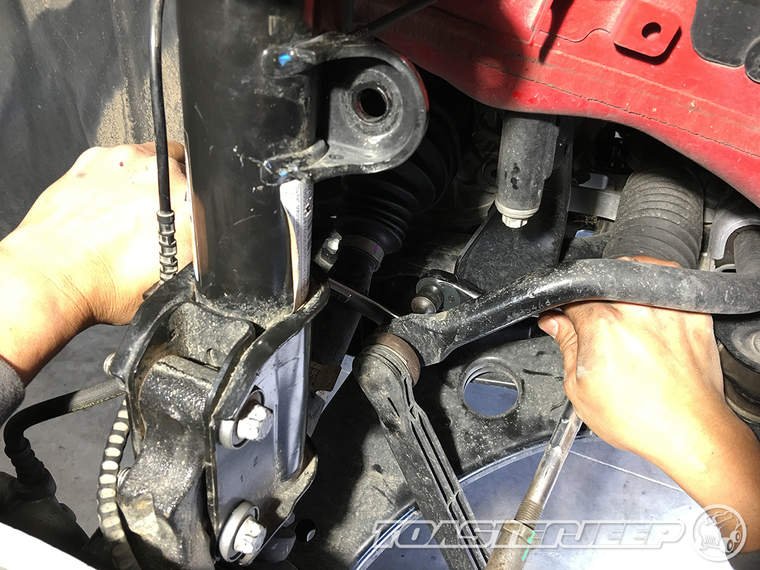
16. Use needle nose pliers to remove the spring clip securing the brake line to the mount on the strut body.
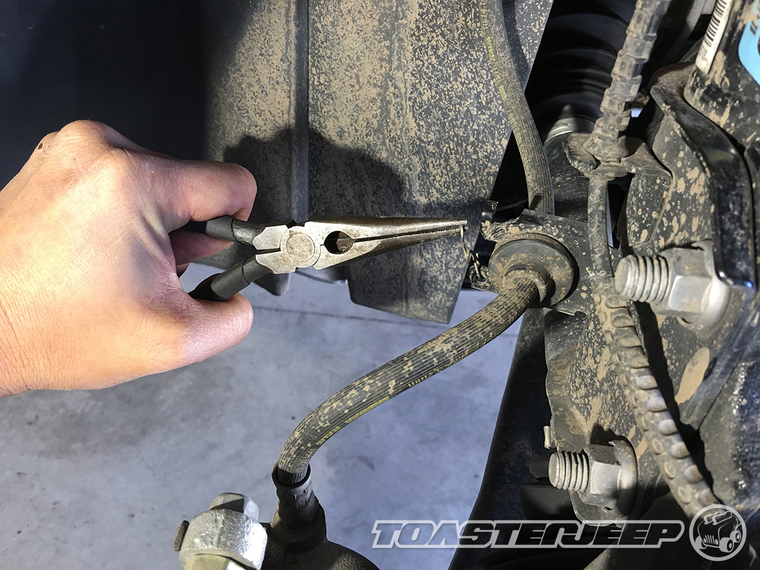
17. Pull the brake line free of its mount on the strut body.
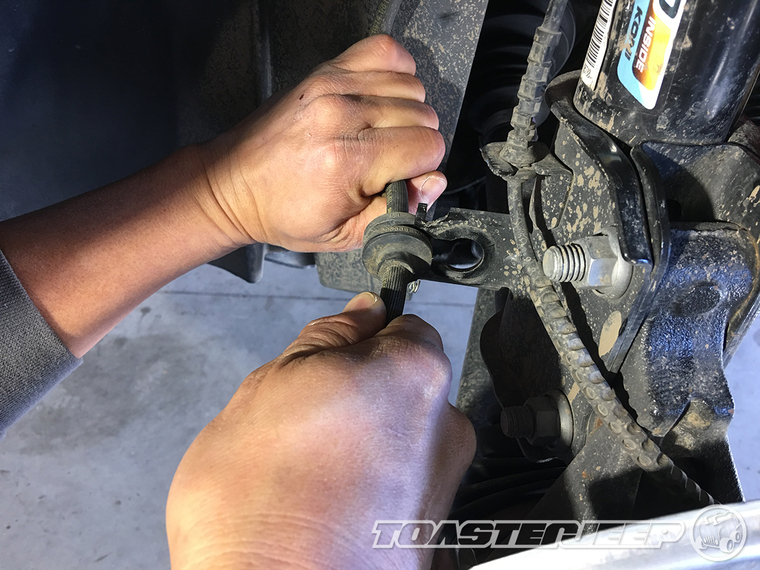
18. Remove the speed sensor line from its mount on the strut body.
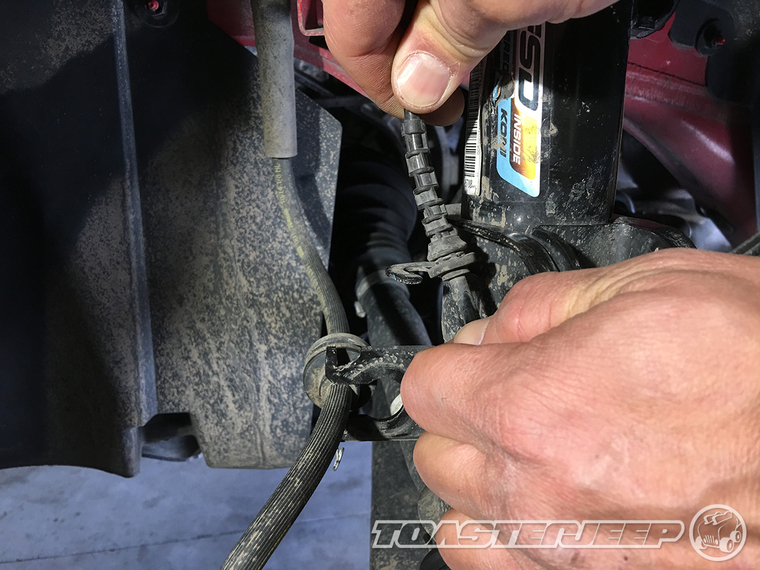
19. Using an E-18 reverse Torx socket and a 16mm box wrench, remove the 2 bolts securing the strut to the steering knuckle.
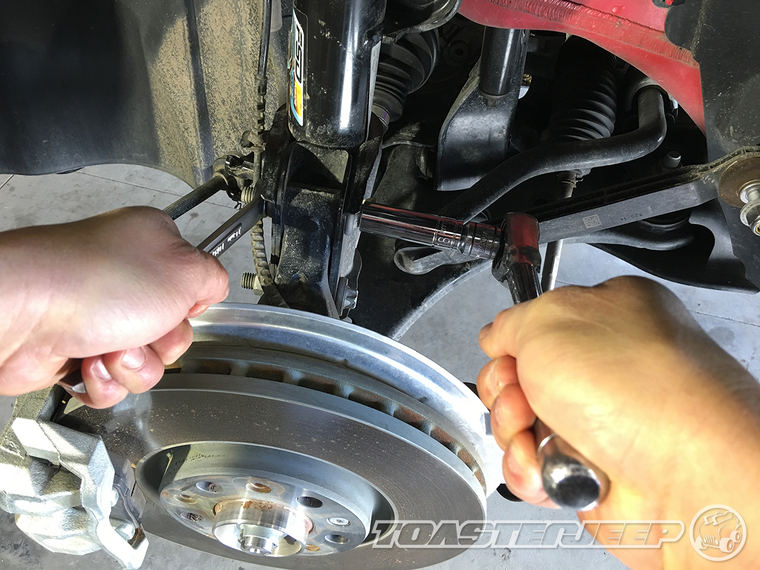
20. To help prevent damaging the CV joints, use a floor jack to support the base of the steering knuckle assembly.
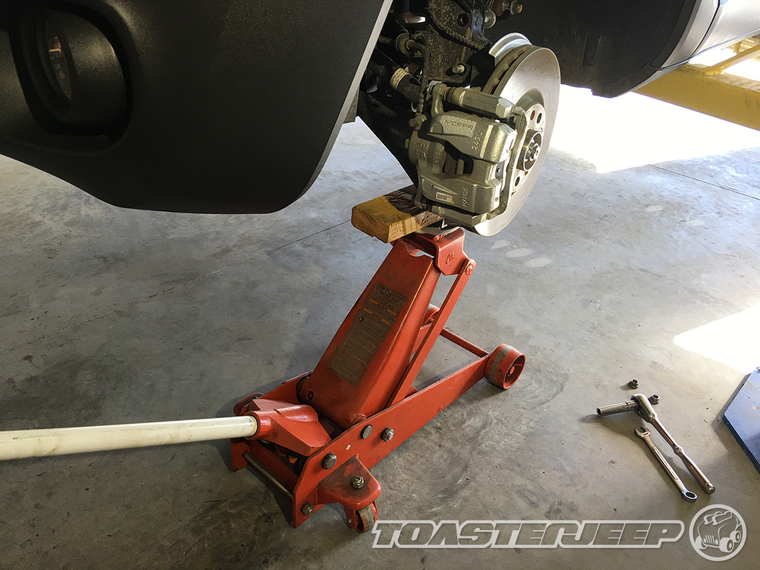
21. Using an E-14 reverse Torx socket and a ratchet extension, remove the 3 bolts securing the strut to the body of your Renegade.
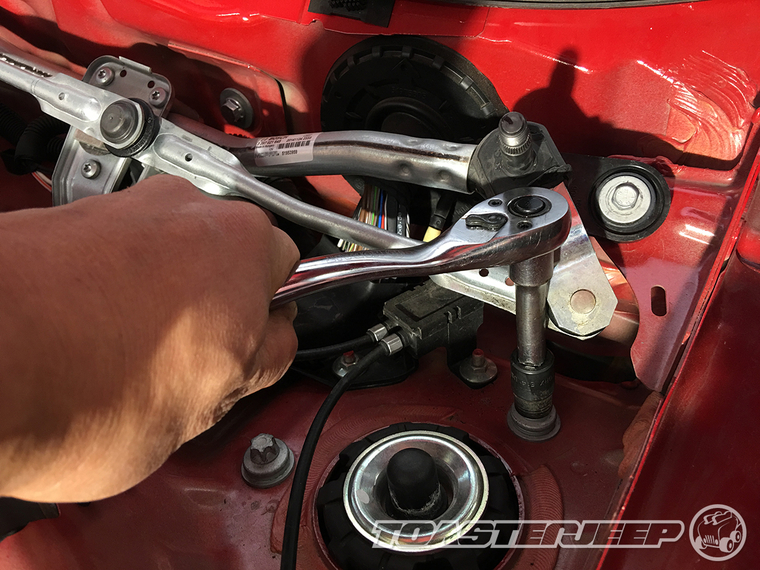
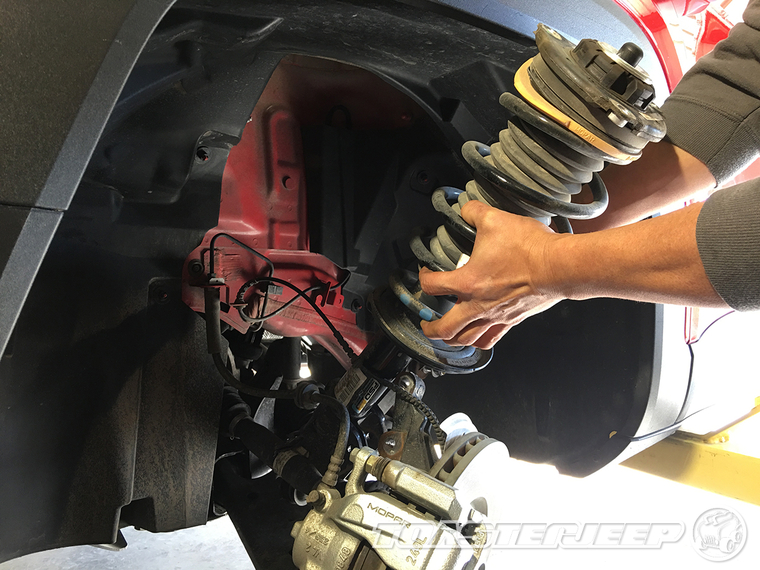
22. You can now carefully remove the strut assembly from your Renegade.
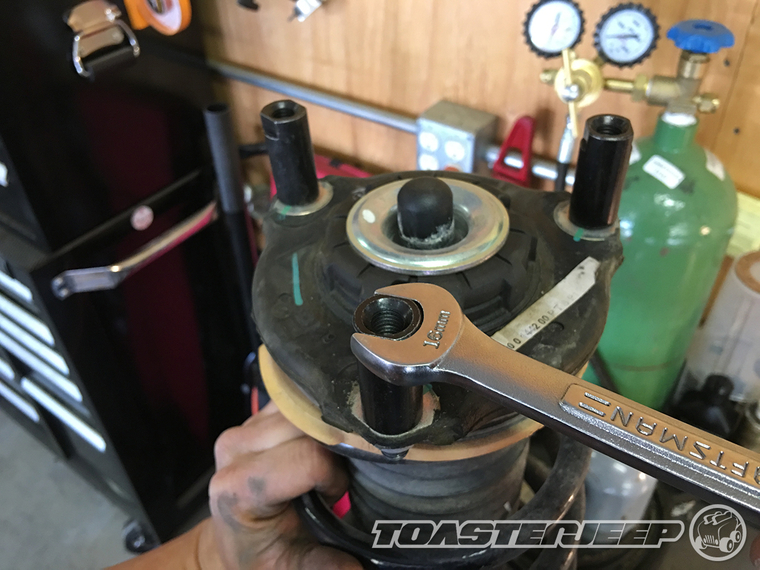
23. Apply red thread locker to the threads of the stud extenders provided with the kit.
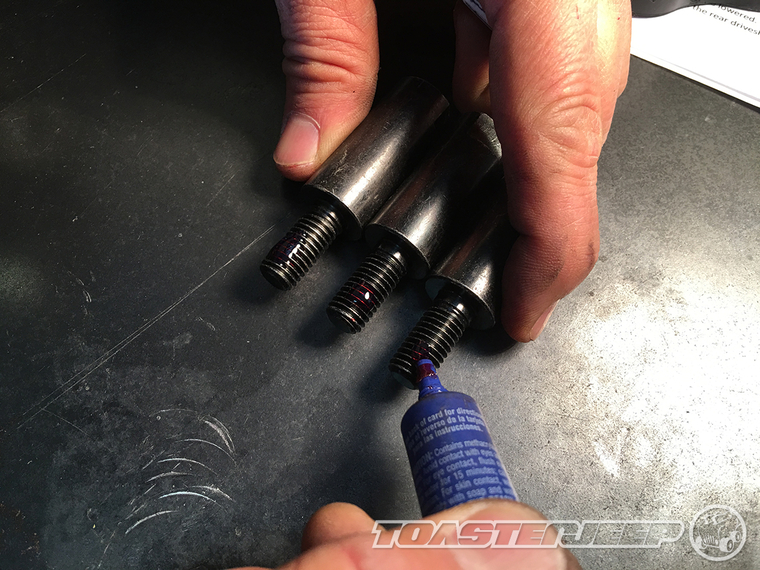
24. Use a 16mm wrench to install them onto the top of the strut assembly.
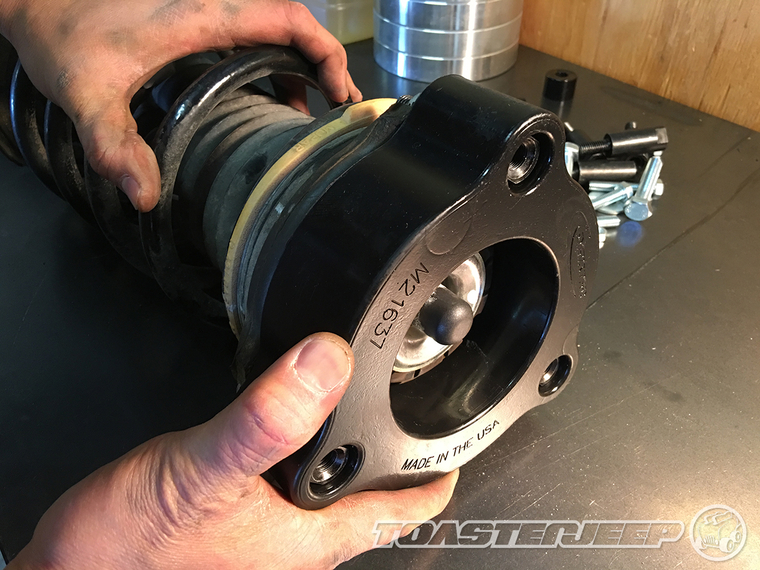
25. Install the Daystar polyurethane spacer on top of the strut assembly.
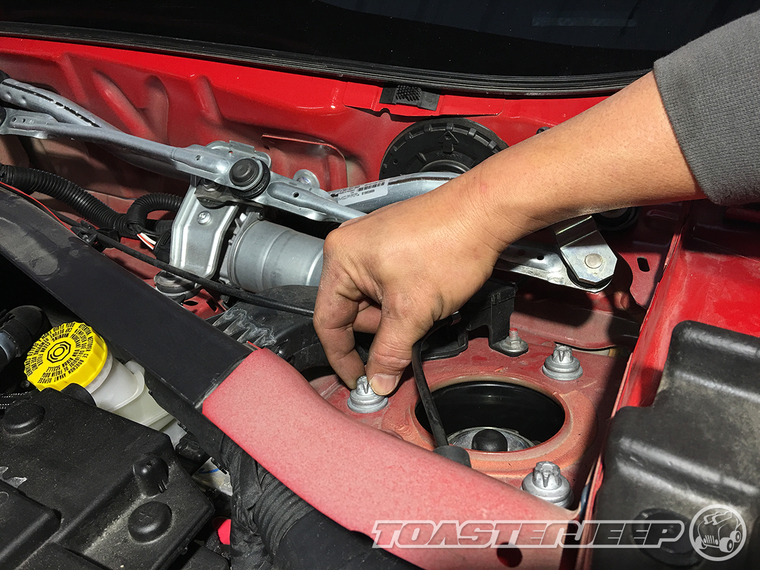
26. Reinstall the strut assembly and loosely secure just the top bolts to help hold it in place.
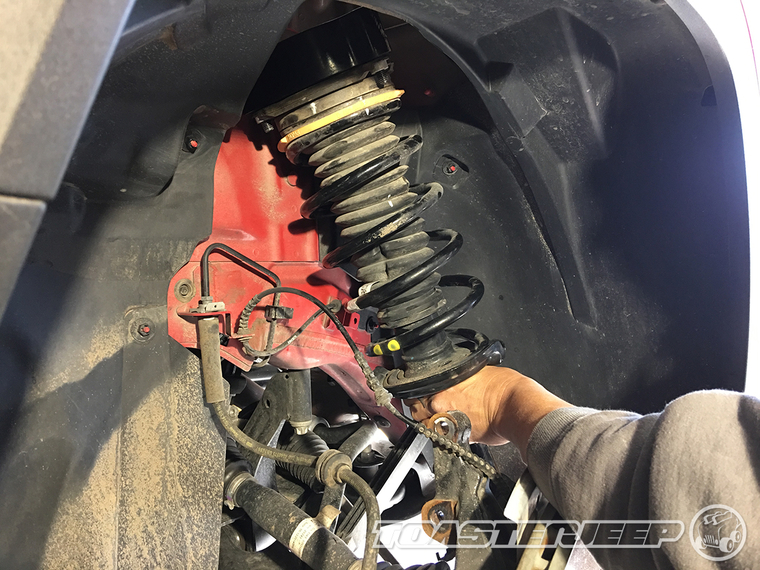
27. Secure the strut assembly to the steering knuckle using the factory bolts and then, using an E-18 reverse Torx socket and a 16mm socket, tighten them to 90 ft. lbs. of torque.
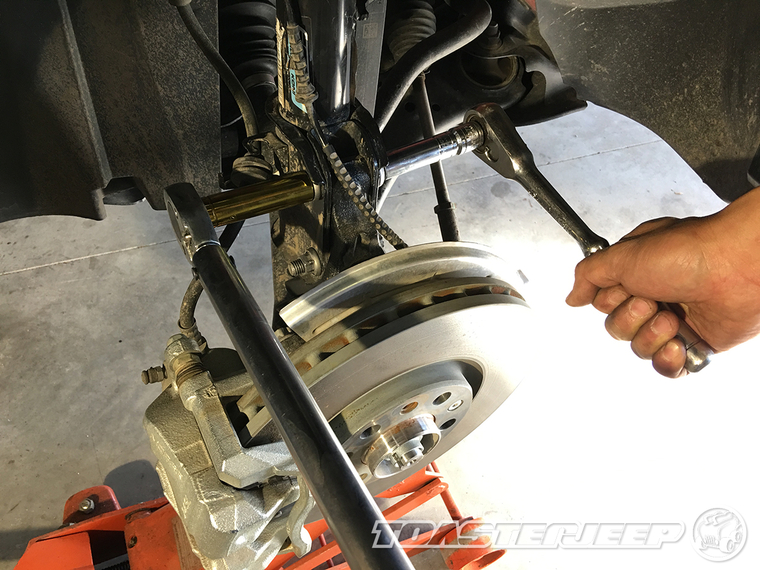
28. Usingn E-14 reverse Torx socket, tighten the 3 upper strut bolts to 70 ft. lbs. of torque.
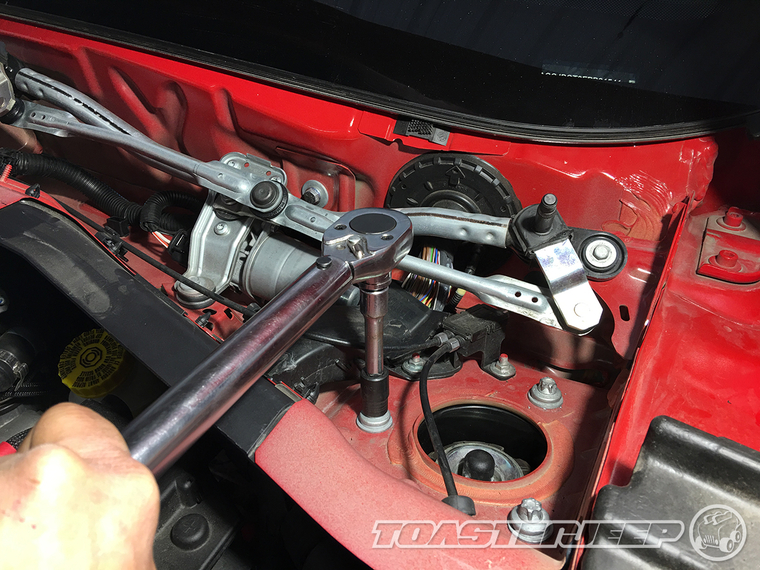
29. Reconnect the speed sensor wire to the mount on the strut.
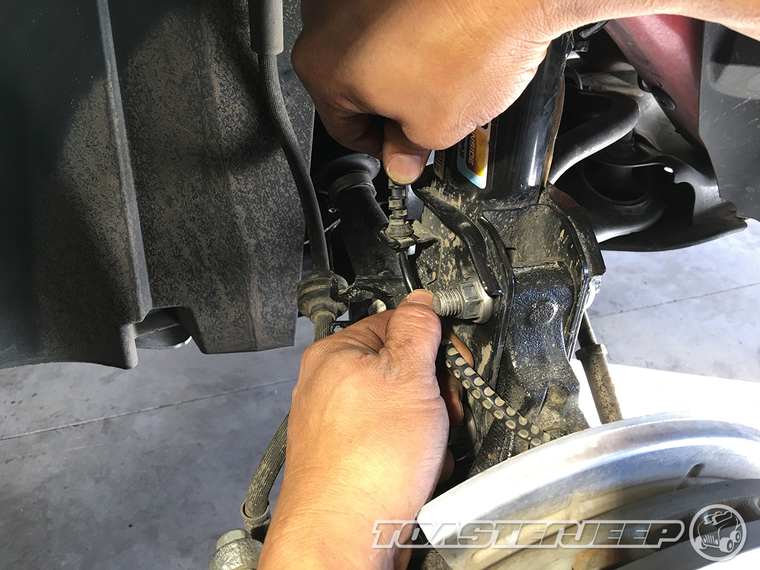
30. Reconnect the brake line to the strut mount.
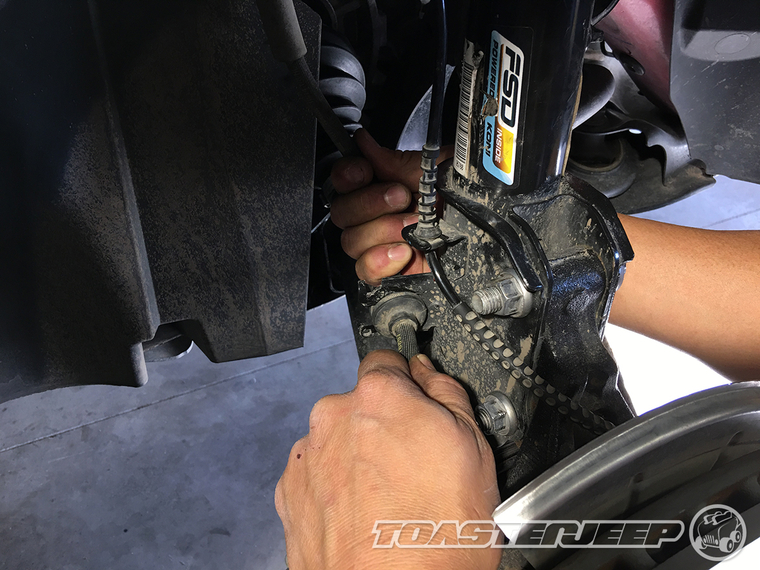
31. Secure the brake line in place using the factory retaining spring.
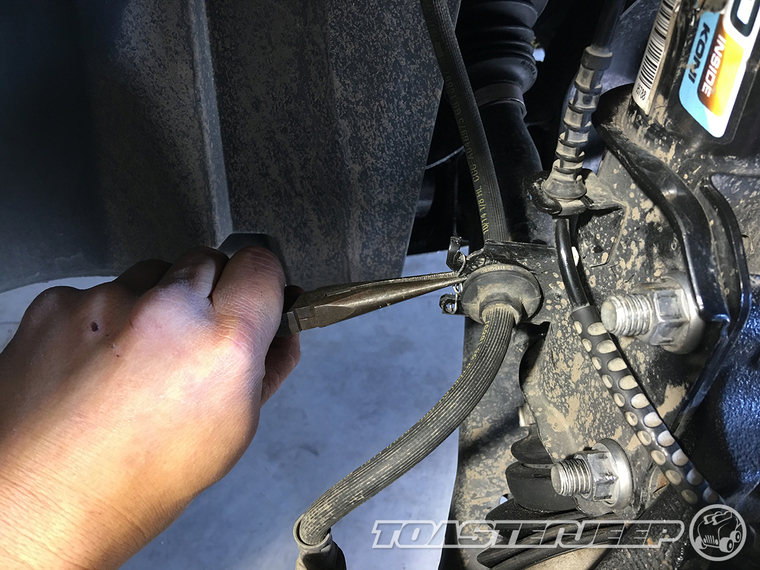
32. Using an 18mm wrench to hold the studs in place and a 17mm wrench to fasten the nut, install the new sway bar link provided with the kit onto the sway bar arm.
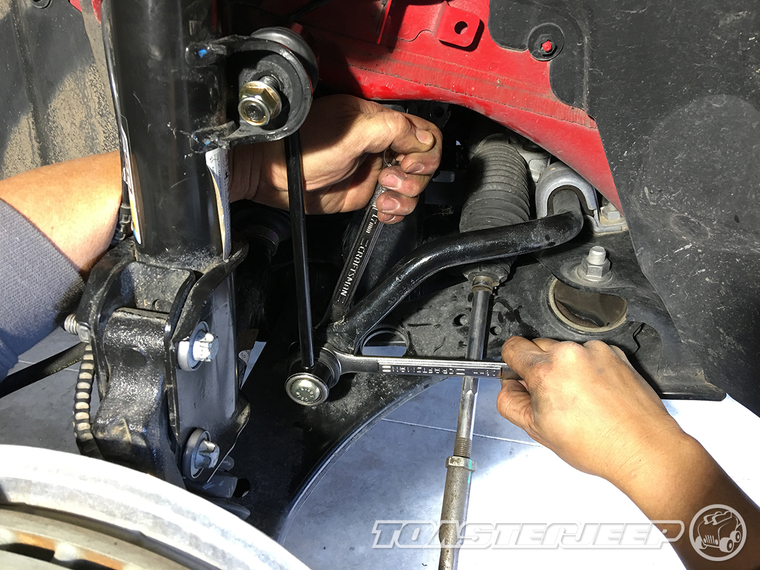
33. Again, using an 18mm wrench to hold the studs in place and a 17mm wrench to fasten the nut, install the new sway bar link onto the strut mount.
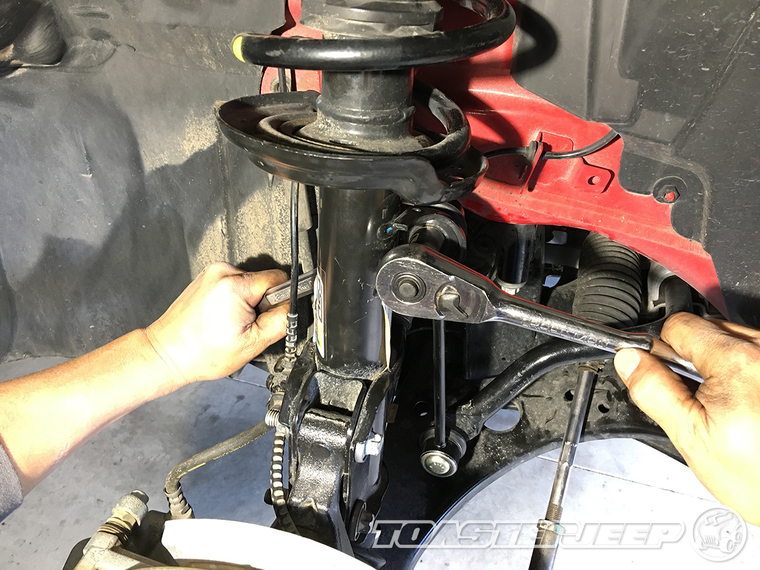
34. Using a 17mm socket, reinstall the tie-rod onto the steering knuckle and then secure it in place using the factory nut. You will need to tighten this nut to 75 ft. lbs. of torque.
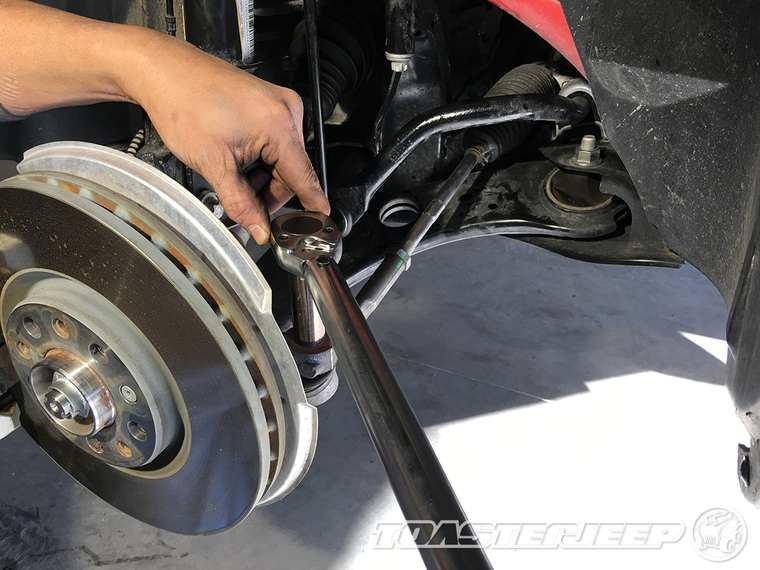
35. Repeat steps 12-34 on the passenger side of your Renegade and then reinstall your wheels making sure to tighten the lug bolts to 90 ft. lbs. of torque. Remove the jack stands and set your Renegade back on the ground.
36. Reinstall the cowl cover.
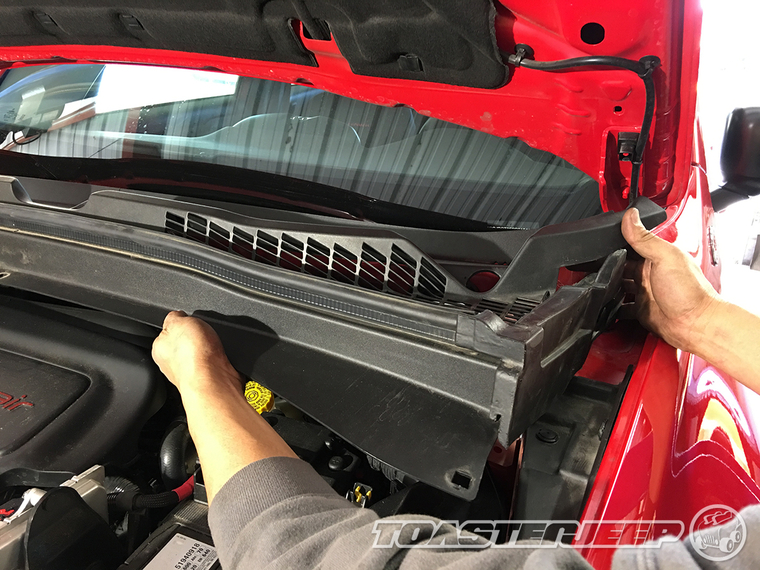
37. Secure the cowl cover in place using the 3 factory push pins on top and the 2 on the sides.
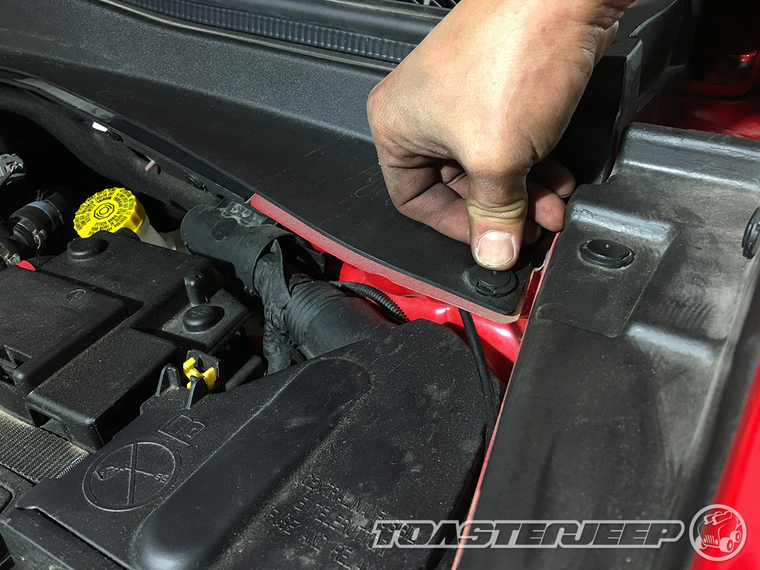
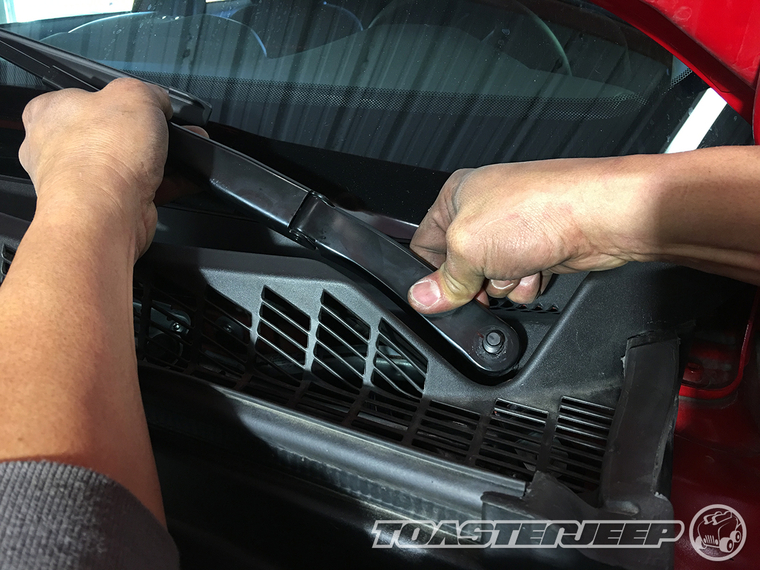
38. Carefully align your windshield wiper arms to the marks you made on the threaded studs and reinstall them.
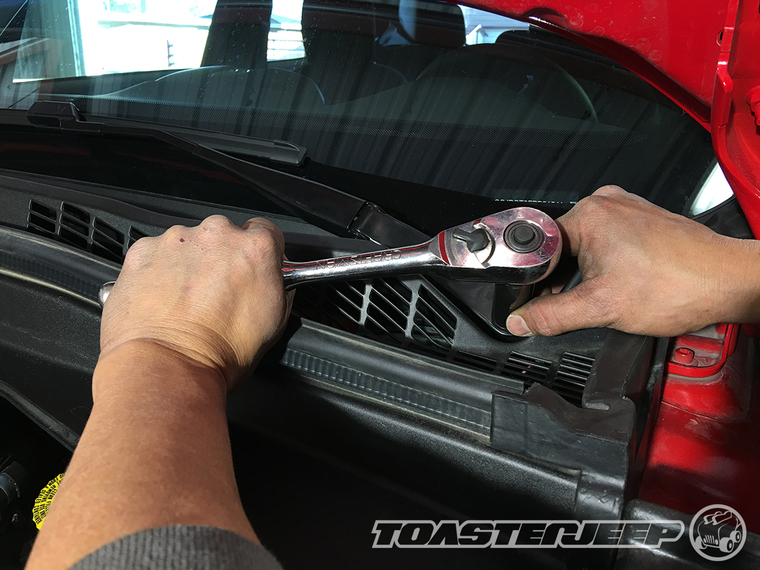
39. Use a 17mm socket to secure the wiper arms in place and then reinstall the black plastic caps onto the nuts.
40. If you have a Trailhawk, you will need a 13mm socket to remove the 4 nuts securing your carrier bearing skid plate in place.
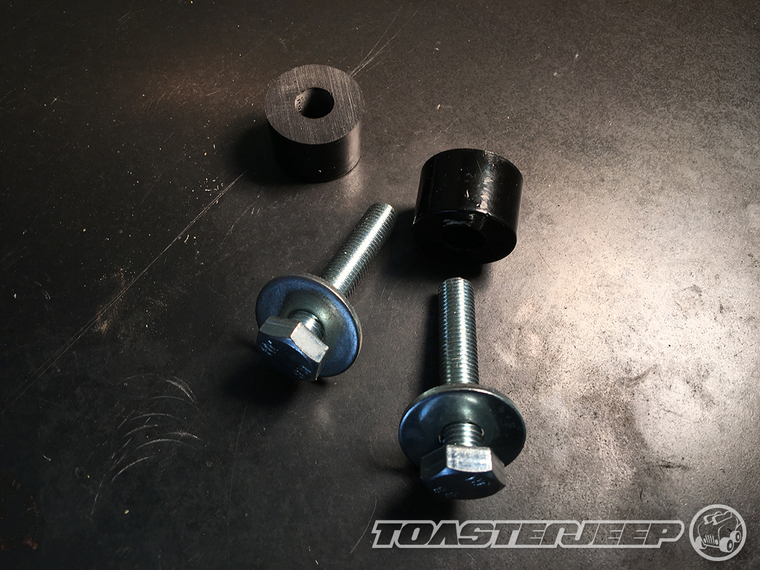
41. Located the 2 round spacers marked M21639 as well as 2 of the 10mm bolts and flat washers provided with the kit.
42. Using an E-14 reverse Torx socket, loosen but do not remove 1 of the 2 carrier bearing bolts securing it to the bottom of your Renegade.
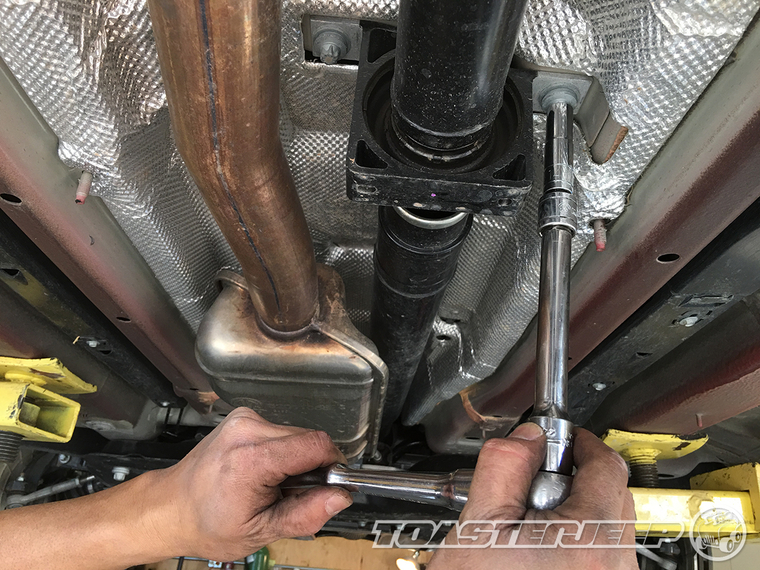
43. Using an E-14 reverse Torx socket, completely remove the other bolt, slip in one of the M24639 round spacers between the carrier bearing bracket and the bottom of your Renegade and then, loosely secure the bracket in place with the provided 10mm bolt and flat washer.
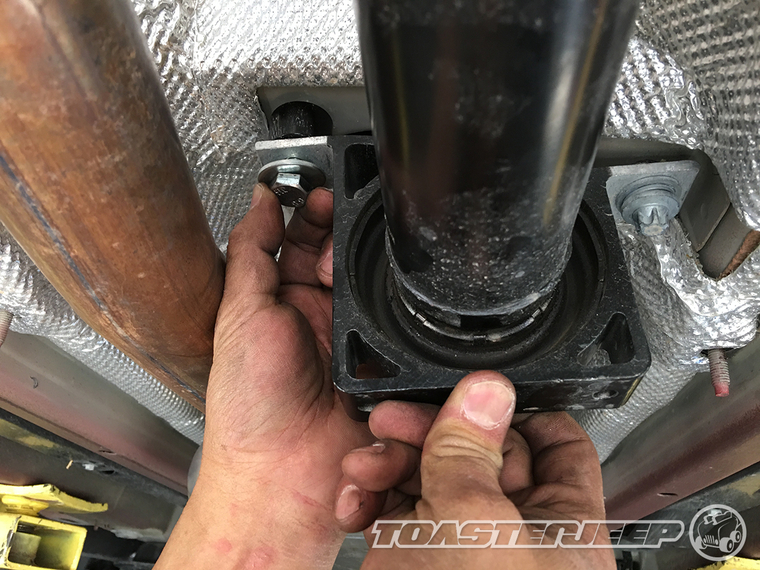
44. Completely remove the first bolt and then as before, slip in the remaining M24639 round spacer and secure the bracket in place with the provided 10mm bolt and flat washer. Use a 17mm socket to tighten the bolts in place.
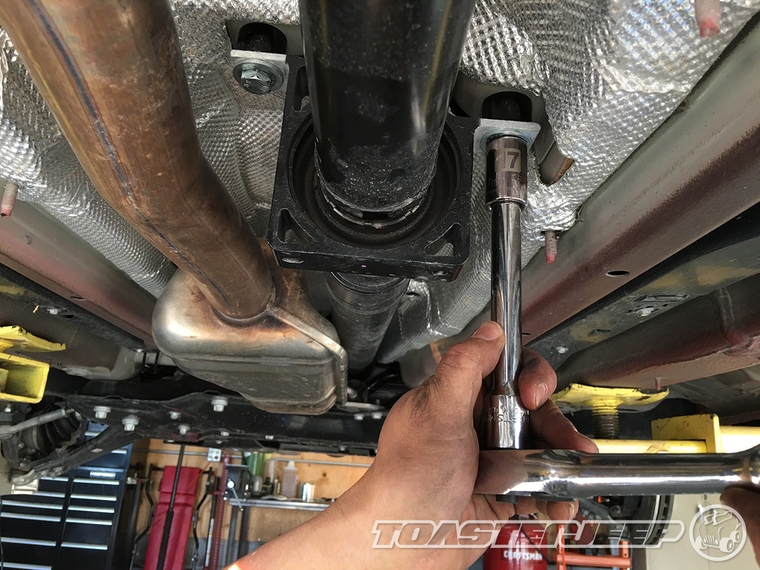
45. Chock your front wheels, lift the rear end of your Renegade until the tires are off the ground and then set it back down on jack stands positioned under the frame rails and just in front of your rear tires. Using a 17mm socket, remove the lug bolts securing the front wheels to your Renegade.
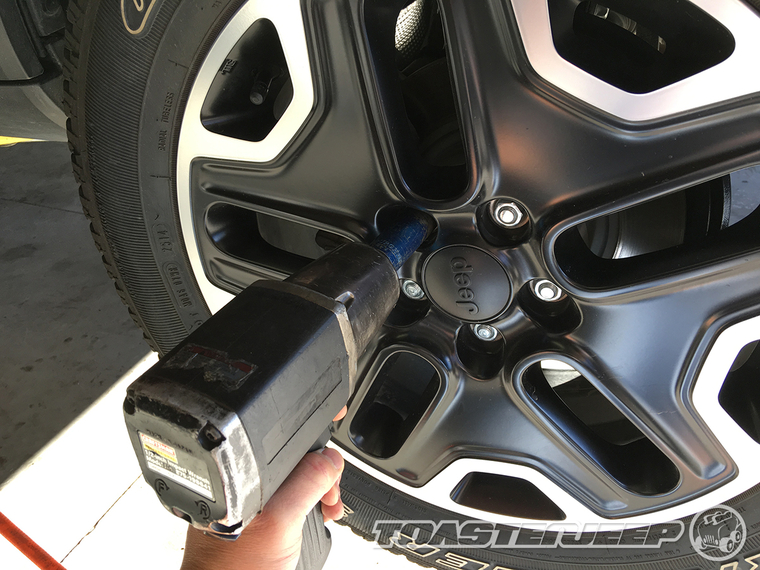
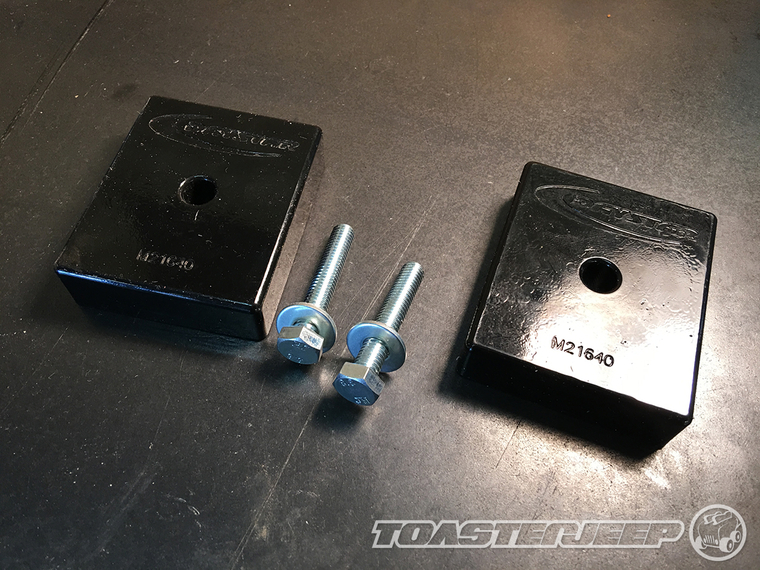
46. Locate the 2 rectangular spacers marked M21640 as well as 2 of the 8mm bolts and washers.
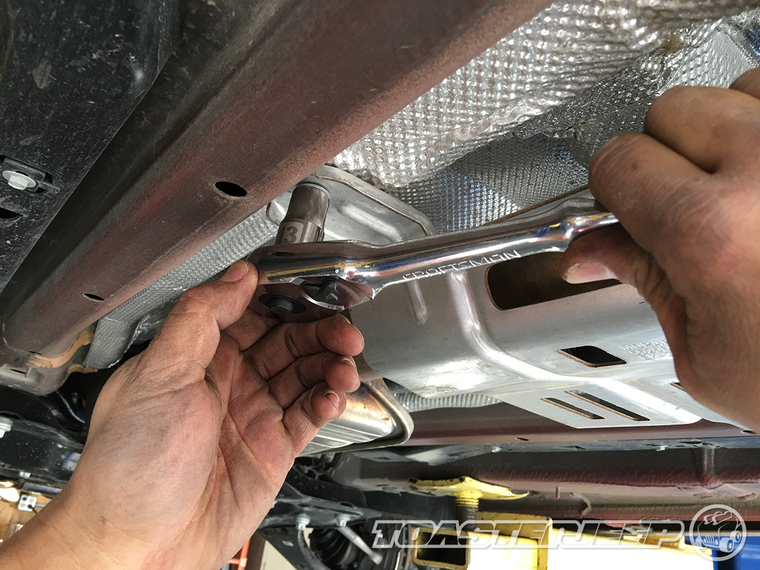
47. Starting on the driver side, use a 13mm socket and a ratchet extension to remove the bolt securing the muffler hanger to the bottom of your Renegade.
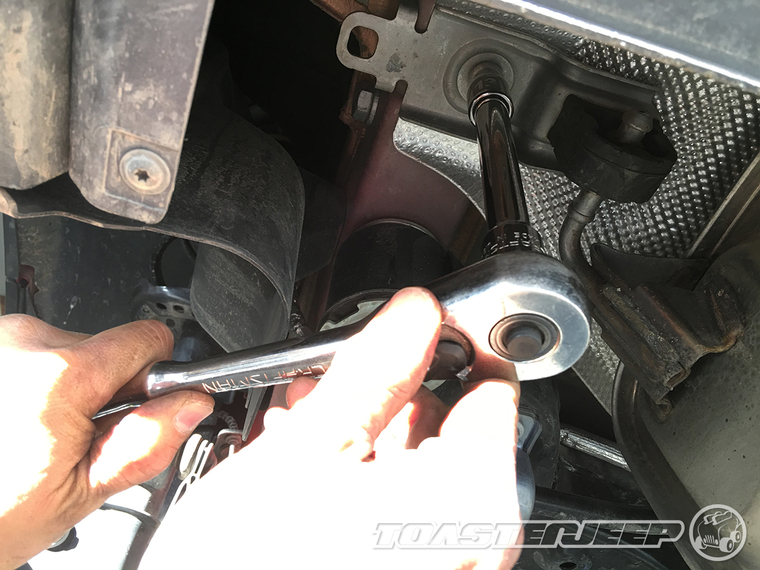
48. Slip 1 of the spacers marked M21640 on top of the muffler hanger bracket and secure it in place using the 8mm bolt and washer provided with the kit. You will need a 13mm socket for this job.
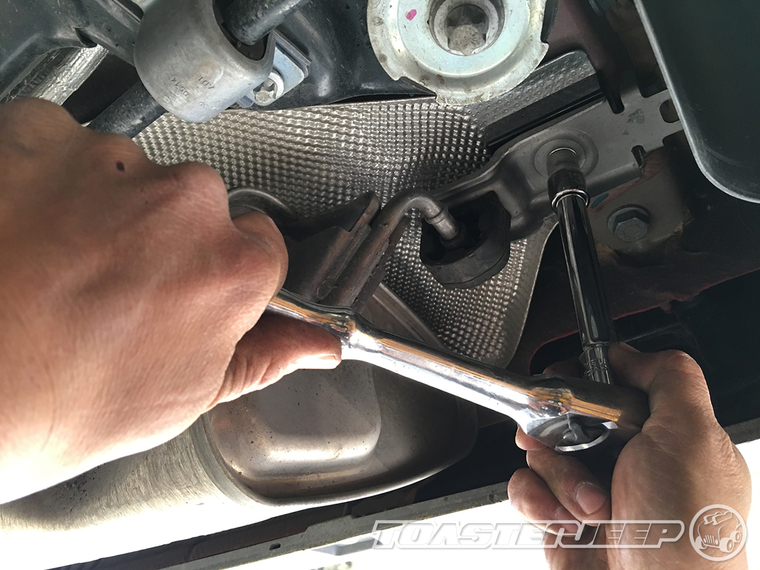
49. Repeat steps 47-48 on the passenger side of your Renegade.
What you will need
• KJ09168BK - Daystar Jeep Renegade 1.5" Lift Kit
• 10, 13, 16, 17, 18, 22mm Socket & Wrench
• E-14, E-16, E-18, E-20 Reverse Torx Socket
• Torx T-40 Bit
• 7/16" Socket
• 3/8" Drive Ratchet
• 1/2" Drive Ratchet
• 3/8" Drive Ratchet Extension
• 3 lb. Hammer
• Needle Nose Pliers
• Flathead Screwdriver
• Phillips Screwdriver
• Panel Trim Pry Tool
• Vice Grips
• Pry Bar
• Angle Grinder w/ Cutoff Wheel
• Flat File
• Floor Jack
• (2) Jack Stands
• Wheel Chocks
• Marker
• Black frame paint
Installation Instructions
Here's a shot of everything you will get with your new Daystar Jeep Renegade 1.5" lift kit. Be sure to verify that you have all the parts listed in the bill of materials before you begin this installation.
1. Park your Jeep Renegade on level ground and engage the parking brake. Then, open the hood and remove the windshield wiper caps cover the retaining nuts.
2. Using a 17mm socket, remove the nuts securing your windshield wipers in place.
3. Use a marker or grease pencil to mark the position of the windshield wipers and then remove them from the splined stud. This can take some effort to do and you may find it necessary to working the wiper arm back and forth as you pull up on it to free it from the stud.
4. Once removed, mark the wiper arms to help remind you where they belong.
5. There are 3 push tabs securing the cowl cover in place. To remove them, you will need to use a flathead screw driver to lift up the locking pin as shown.
6. With the help of a panel trim pry tool, remove the 3 push tabs.
7. On each side of cowl cover, you will find a push tab securing the foam filler panel in place. Use a panel trim pry tool to pull the pins out.
8. You can now carefully remove the cowl cover and set it aside.
9. While we used a lift to help make it easier to photograph this install, all you will need is a floor jack, a pair of jack stands and wheel chocks. To begin your install, simply place the wheel chocks up against your rear tires, lift the front of your Renegade until the tires are off the ground and then set it back down on jack stands positioned under the frame rails and just behind the front tires.
10. Using a 17mm socket, remove the lug bolts securing the front wheels to your Renegade.
11. Remove your wheels and then lay them flat under the frame rails of your Renegade for extra safety.
12. Starting on the driver side of your Renegade, remove the sway bar link from the strut. To do this, you will need a Torx T-40 bit to hold the sway bar stud in place while you use an 18mm box wrench to remove the nut.
13. Using a 17mm socket, loosen but do not remove the nut securing the tie-rod to the steering knuckle.
14. Strike the end of the steering knuckle with a 3 lb. hammer to help ring out the tie-rod end's tapered stud. Once free, remove the nut and rotate the tie-rod out of the way.
15. As before, use a Torx T-40 bit and an 18mm box wrench to remove the sway bar link from the sway bar arm.
16. Use needle nose pliers to remove the spring clip securing the brake line to the mount on the strut body.
17. Pull the brake line free of its mount on the strut body.
18. Remove the speed sensor line from its mount on the strut body.
19. Using an E-18 reverse Torx socket and a 16mm box wrench, remove the 2 bolts securing the strut to the steering knuckle.
20. To help prevent damaging the CV joints, use a floor jack to support the base of the steering knuckle assembly.
21. Using an E-14 reverse Torx socket and a ratchet extension, remove the 3 bolts securing the strut to the body of your Renegade.
22. You can now carefully remove the strut assembly from your Renegade.
23. Apply red thread locker to the threads of the stud extenders provided with the kit.
24. Use a 16mm wrench to install them onto the top of the strut assembly.
25. Install the Daystar polyurethane spacer on top of the strut assembly.
26. Reinstall the strut assembly and loosely secure just the top bolts to help hold it in place.
27. Secure the strut assembly to the steering knuckle using the factory bolts and then, using an E-18 reverse Torx socket and a 16mm socket, tighten them to 90 ft. lbs. of torque.
28. Usingn E-14 reverse Torx socket, tighten the 3 upper strut bolts to 70 ft. lbs. of torque.
29. Reconnect the speed sensor wire to the mount on the strut.
30. Reconnect the brake line to the strut mount.
31. Secure the brake line in place using the factory retaining spring.
32. Using an 18mm wrench to hold the studs in place and a 17mm wrench to fasten the nut, install the new sway bar link provided with the kit onto the sway bar arm.
33. Again, using an 18mm wrench to hold the studs in place and a 17mm wrench to fasten the nut, install the new sway bar link onto the strut mount.
34. Using a 17mm socket, reinstall the tie-rod onto the steering knuckle and then secure it in place using the factory nut. You will need to tighten this nut to 75 ft. lbs. of torque.
35. Repeat steps 12-34 on the passenger side of your Renegade and then reinstall your wheels making sure to tighten the lug bolts to 90 ft. lbs. of torque. Remove the jack stands and set your Renegade back on the ground.
36. Reinstall the cowl cover.
37. Secure the cowl cover in place using the 3 factory push pins on top and the 2 on the sides.
38. Carefully align your windshield wiper arms to the marks you made on the threaded studs and reinstall them.
39. Use a 17mm socket to secure the wiper arms in place and then reinstall the black plastic caps onto the nuts.
40. If you have a Trailhawk, you will need a 13mm socket to remove the 4 nuts securing your carrier bearing skid plate in place.
41. Located the 2 round spacers marked M21639 as well as 2 of the 10mm bolts and flat washers provided with the kit.
42. Using an E-14 reverse Torx socket, loosen but do not remove 1 of the 2 carrier bearing bolts securing it to the bottom of your Renegade.
43. Using an E-14 reverse Torx socket, completely remove the other bolt, slip in one of the M24639 round spacers between the carrier bearing bracket and the bottom of your Renegade and then, loosely secure the bracket in place with the provided 10mm bolt and flat washer.
44. Completely remove the first bolt and then as before, slip in the remaining M24639 round spacer and secure the bracket in place with the provided 10mm bolt and flat washer. Use a 17mm socket to tighten the bolts in place.
45. Chock your front wheels, lift the rear end of your Renegade until the tires are off the ground and then set it back down on jack stands positioned under the frame rails and just in front of your rear tires. Using a 17mm socket, remove the lug bolts securing the front wheels to your Renegade.
46. Locate the 2 rectangular spacers marked M21640 as well as 2 of the 8mm bolts and washers.
47. Starting on the driver side, use a 13mm socket and a ratchet extension to remove the bolt securing the muffler hanger to the bottom of your Renegade.
48. Slip 1 of the spacers marked M21640 on top of the muffler hanger bracket and secure it in place using the 8mm bolt and washer provided with the kit. You will need a 13mm socket for this job.
49. Repeat steps 47-48 on the passenger side of your Renegade.
