HighwayTrout's build

Damn new job must pay well [emoji6]


Looks good !


Thanks!
Same gig. Just different part of the state.

So I have a question for you. This shock is loose. Per the instructions I have about an 1/8th of an inch of the top stud protruding the nut. The rubber bushings are hardly compressed. I also added the EVO shock relocation brackets. It just looks weird and the shock being loose like that is I'm sure wrong.

Anything you can think of that I missed or did out of order?
http://youtu.be/z8Ve0lnALxc
 

piginajeep

The Original Smartass
I'm not familiar with the instructions , but I would say it needs to be tight. Just don't over torque it .
 

MTG

Caught the Bug
Thanks!
Same gig. Just different part of the state.

So I have a question for you. This shock is loose. Per the instructions I have about an 1/8th of an inch of the top stud protruding the nut. The rubber bushings are hardly compressed. I also added the EVO shock relocation brackets. It just looks weird and the shock being loose like that is I'm sure wrong.

Anything you can think of that I missed or did out of order?
http://youtu.be/z8Ve0lnALxc

Needs tightened. The bushing should be bulging a little.
 
Let's go off topic for a bit....

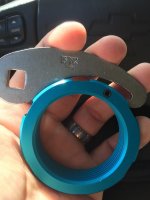
So I haven't given up on finding the proper spanner wrench to tighten the King bump stop lock rings.

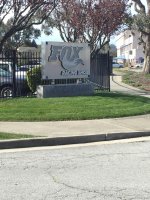
Thinking it was bad form to ask a competing company I was reluctant to see if the local big company could help. Anyway I tried all the local motorcycle shops with no luck and finally just drove over to Fox headquarters which is just a few miles from home.

I was greeted in the lobby and the receptionist sent a message to the shop with my inquiry. A few minutes later the service manager walks up and asks me to sign in and put on a name tag. I must say they went way above and beyond by rolling out the red carpet. I got a personal tour of the place and got to see a bunch of behind the scenes in both the motor sports and mountain bike production areas as well as some one off builds. Along the way the manager stops and asks different workers if they have a spanner. Eventually we find one that has a few extra and the manager just puts one in my shirt pocket.

ImageUploadedByWAYALIFE1455914615.266115.jpg .


ImageUploadedByWAYALIFE1455914640.595509.jpg .


Not using the proper tool has been keeping me up at night. Yes I have a sickness for collecting tools. This sickness much like the Jeep bug leads you down rabbit holes to see places and meet people you'd never would have otherwise.

Thanks for reading!
 
Nothing new.
I sort of put the Jeep on the back burner for a few days.

Found a few spare minutes to hang out in the garage today. Mounted one more tire and torqued everything down. The kid had fun with my new Tech Angle torque wrench with its beeps and buzzes.

ImageUploadedByWAYALIFE1459920250.224664.jpg .
 
Last edited:

Trail JK

Active Member
Thanks! Still need to find the courage to cut my painted flares like yours so they actually fit.
lol

It's a lot easier than you think. Once you do it you'll wonder why you waited so long. Just use painters tape to make sure you have a straight line and the shape you want. We cut ours with the grinder and then you just sand the edges. Good luck!
 
Gimme gimme shock treatment...
ImageUploadedByWAYALIFE1460529213.601337.jpg .


See. Now I can show my wife I have a use for the rusty junk tools I bring home from garage sales. This old heavy duty pipe cutter worked like a charm.
ImageUploadedByWAYALIFE1460529364.683453.jpg .

ImageUploadedByWAYALIFE1460529505.883999.jpg .


To be continued.
 

DWiggles

Caught the Bug
Looking good man! Cant wait to hear what you think about the King Shocks with air bumps and the Plush springs! seems like a pretty unique combo :thumb:
 
One of the best things about this build is having my old man around just bullshiting and turning wrenches.

Picture of the dude getting frustrated I was taking so long so he got down there and got with it.
ImageUploadedByWAYALIFE1460616126.748072.jpg

ImageUploadedByWAYALIFE1460616476.017171.jpg .
 
I didn't take a single picture while working on the rear of the Jeep. lol

Today's progress was rear everything (springs, shocks, links, bump extensions, brake lines,....)

Also took the Rubicon rock rails off and chopped them with a chop saw. Quick and easy. Tons of dirt in my eyes from laying underneath and taking off all the nuts. lol

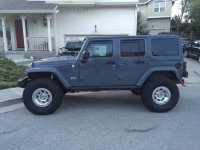
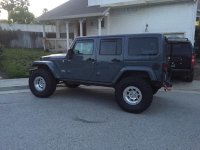
So after bleeding the brakes and reattaching the front drive line and all the little cables, breathers and stuff dropped it on all fours. Wishing I took measurements before/after. Very happy how it turned out. Need to make some minor changes and put the rear bumper back on(maybe).

ImageUploadedByWAYALIFE1460616999.976503.jpg .

ImageUploadedByWAYALIFE1460617071.326914.jpg .


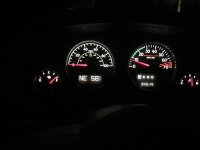
After a quick test lap around the block I drove around town to see how things felt. Happy to report the steering wheel was dead center and no stability control lights or anything came on during the test drive. ImageUploadedByWAYALIFE1460617190.817477.jpg .

Felt great. Little bit of wondering on the road. Most likely the tires ride out of the grooves on the pavement. And I left the steering stabilizer off. Most likely won't run one until I buckle down and get a PSC system installed.
Still need to dial in the air pressure I have them at 20 psi at the moment. I set the AEV procal to 35 1/4" tire size measured ground to top of tread near the edge. (Not the top center of the tire)

Any input would be great for tire pressure and size with 37" Trail Grapplers.
 
Last edited:
Top Bottom