When it comes to fog lights, I know there are a lot of people out there who have different opinions as to what the best color light to have is, how bright it should be and so on. Of course, if you're running a set of LED headlights and LED daytime running lights (DRL) on your Jeep Renegade like I am, it only makes sense to have the fog lights converted to LED as well if only to have the light they put out match everything else, or at least to me anyway. That being said, this write-up will show you just how easy it is to convert your factory H11 incandescent fog light bulbs to a set of LED bulbs. For my purposes, I found that OPT7 makes H11 LED bulbs and being that I used their H13 LED bulbs to convert my headlights, I decided to use them for my fog lights as well.
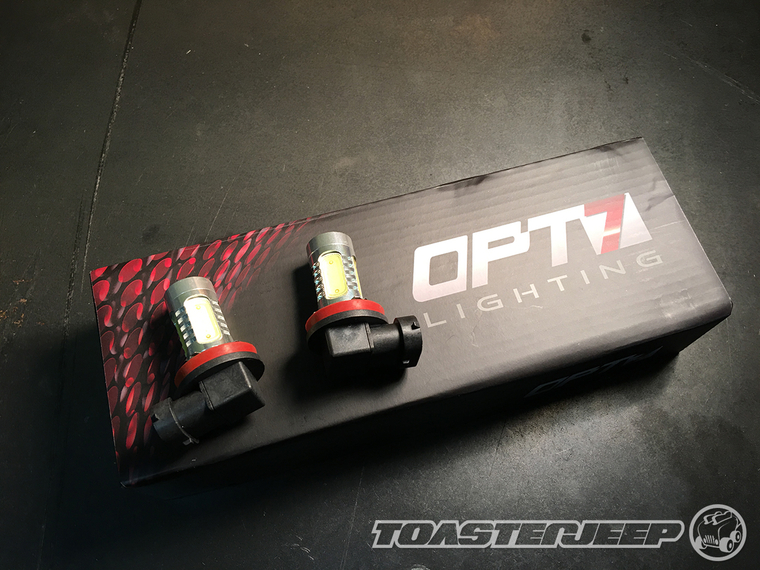
Here's a shot of what the OPT7 H11 Nova Plasma LED bulbs look like.
What you will need
• OPT7 H11 Nova Plasma LED Fog Light Bulbs - 6000K Cool White - Plug-n-Play (Pack of 2)
• Phillips Screwdriver
Instructions
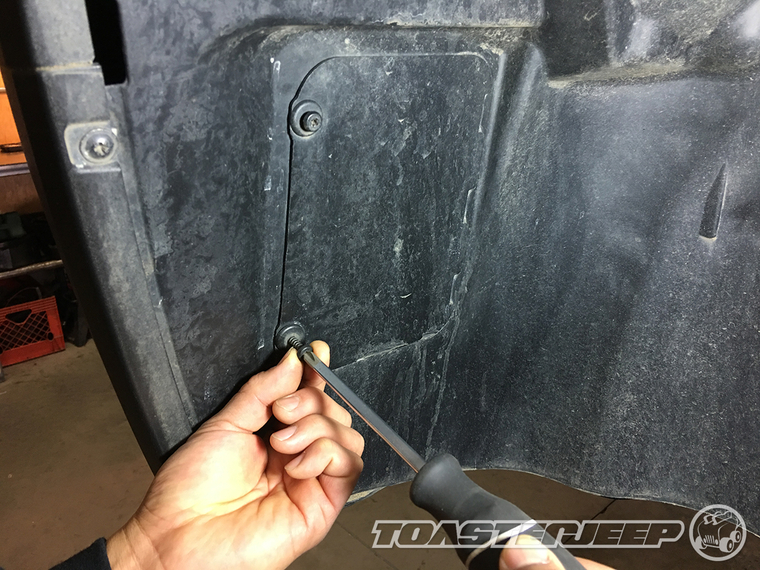
1. Park your Renegade and turn your steering wheel to the left and until it is at a full lock. Then, use a phillips screwdriver to loosen the 2 plastic screws securing the fender liner access panel in place.
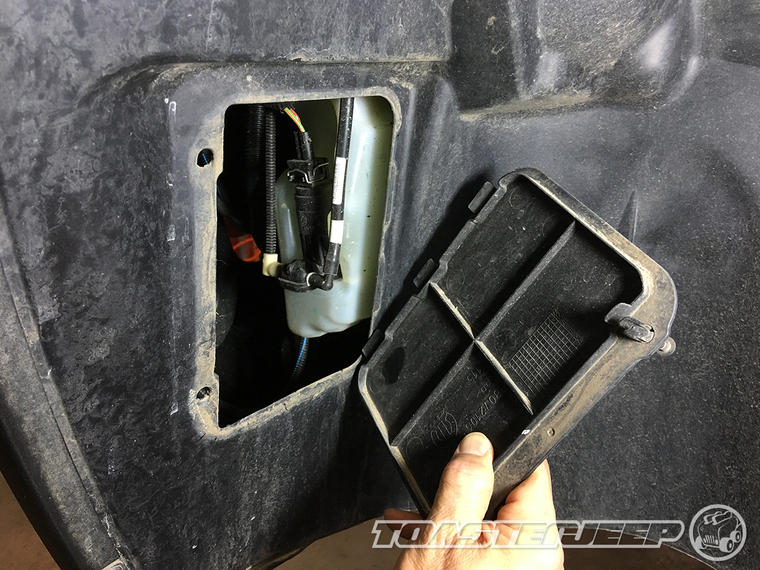
2. With the screws loosed, you should be able to simply pry off the fender liner access panel.
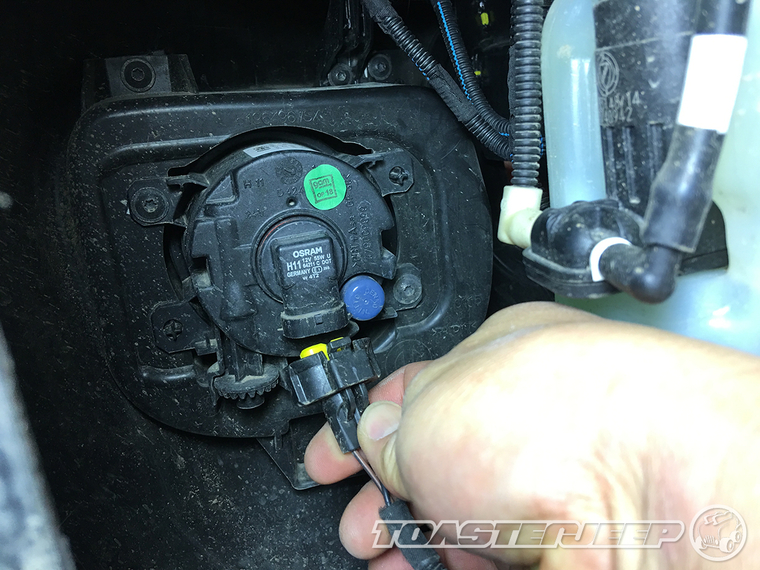
3. Reach into the access port, gently pull the locking tab on the plug and pull down to remove it as shown.
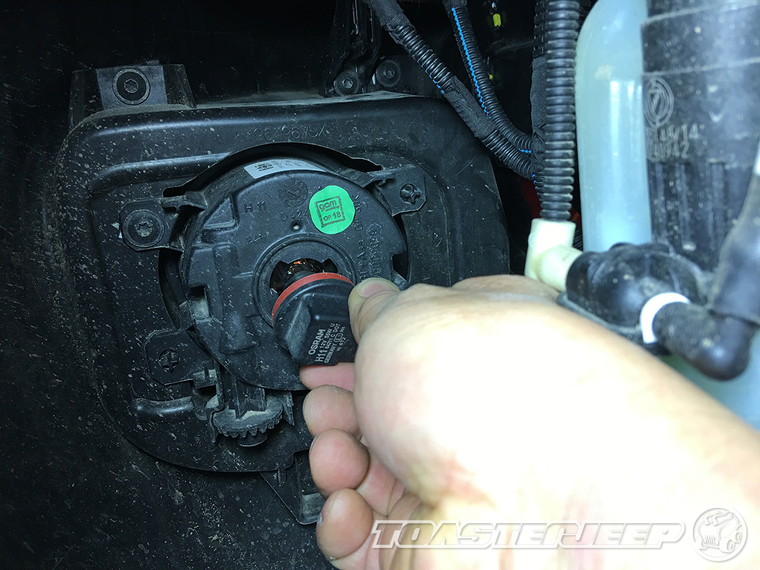
4. Firmly hold the bulb and rotate it counter-clockwise until it's unlocked and then remove it from the fog light housing.
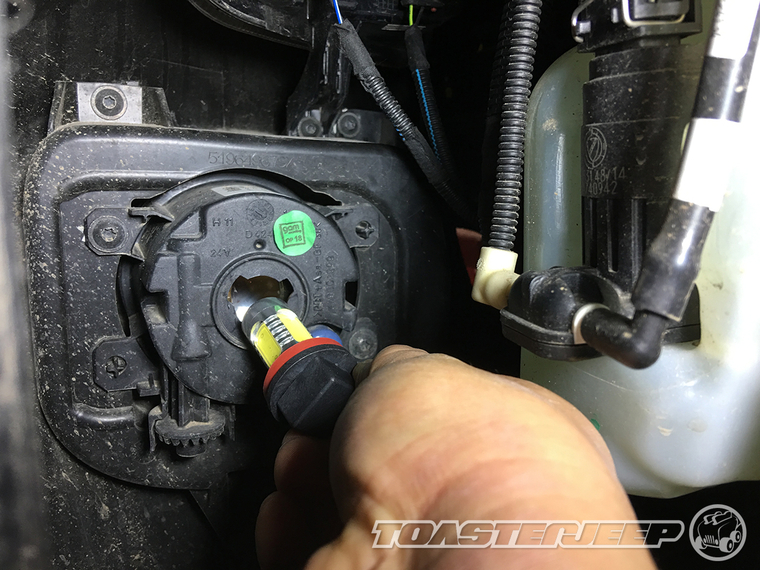
5. Carefully reinstall the new H11 LED bulb back into the fog light housing and then rotate it clockwise until it locks in place.
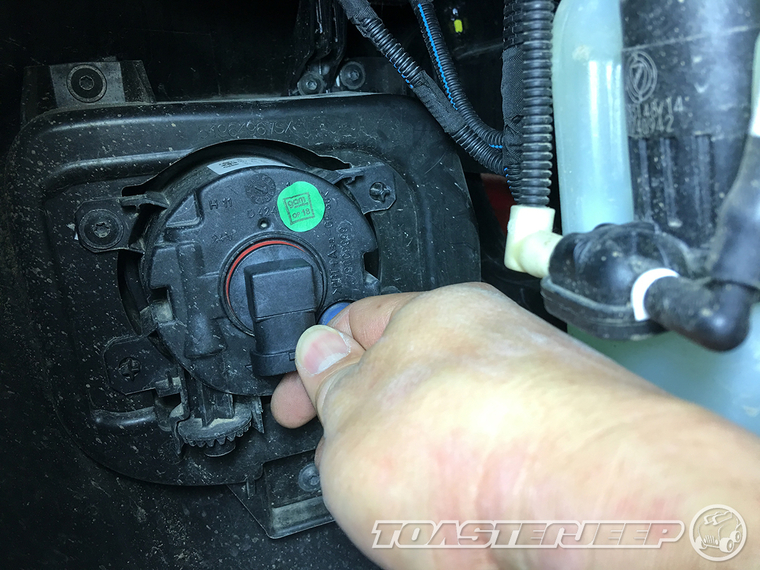
6. Plug the wiring harness into the new H11 LED bulb.

7. Reinstall the fender liner access panel and then, using a phillips screwdriver, lock it in place by tightening the 2 plastic screws.
8. Repeat steps 1-7 on the passenger side of your Renegade.
For comparison sake, here's a shot of what the factory Renegade fog light and DRL with standard incandescent bulbs looks like when on.
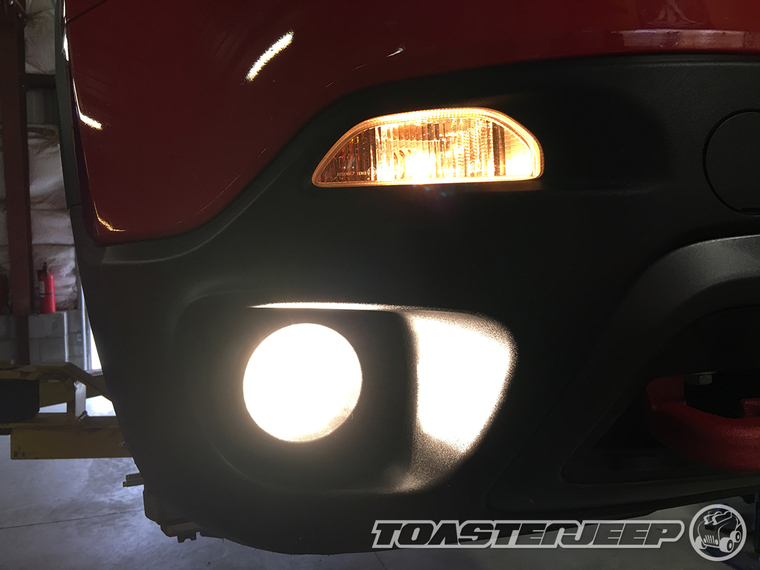
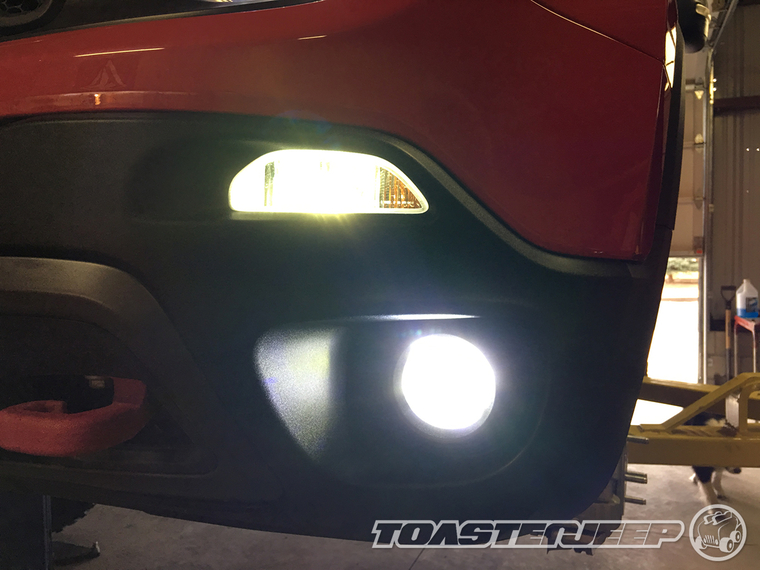
And here's what a Renegade fog light with an OPT7 H11 Nova Plasma LED bulb and a DRL running an LED bulb looks like when on.
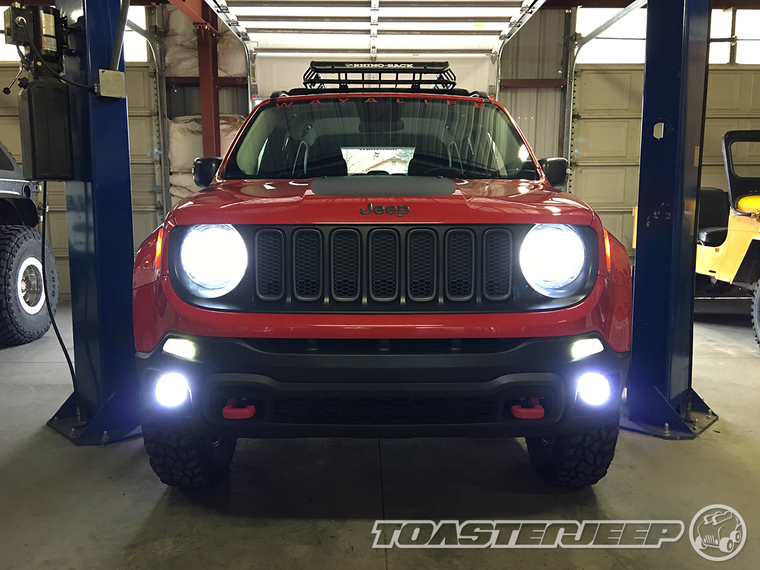
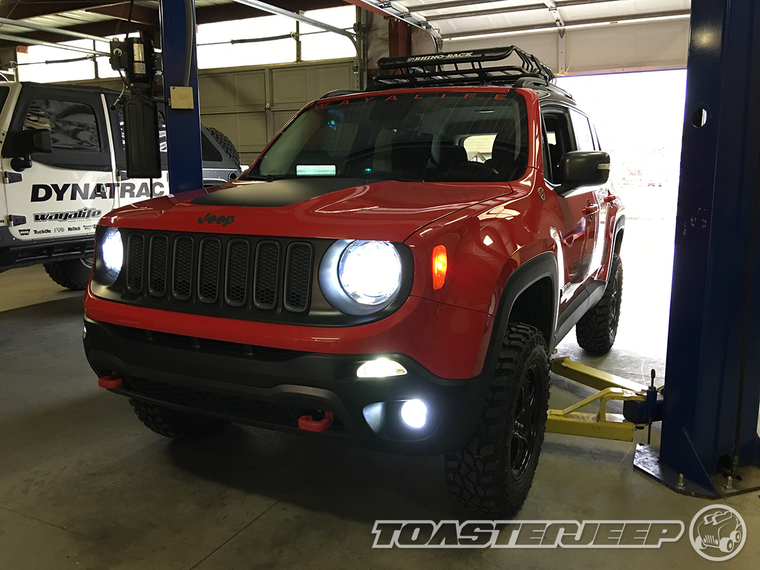
Here are a couple of shots of what your Renegade can look like with LED headlights, day time running lights and fog lights.
Okay, so now that I've got these installed, this is what I can tell you. Looking right at them, they are really bright and shiny and maybe, a bit too bright and shiny as they are kind of hard to look at. Using them in conjunction to my new LED headlight bulbs, I'd be concerned that on coming traffic might find it difficult to look at. Of course, to make things worse, they don't even put out a whole lot of "actual" light. In fact, they offer so little actual light that it's really kind of disappointing.
I should clarify that that much like the head lights, the OPT7 H11 bulbs NEED to be aligned vertically and perpendicular to the ground when installed. This is because the reflectors in the housing are also aligned vertically and the light emitting from the LED bulb needs to hit them directly to provide the best results. The problem is, the H11 fog light bulbs are a part of the socket and the socket locks into the light housing in a specific way. Once locked in, the LEDs sit at an angle and almost horizontal or parallel to the ground. This is why it's so bright to look at and this is why it doesn't put much light out on the ground. What I will need to do is to see if I can either modify the bulb or the way it mounts in the housing and see if I can make it work.
SEE UPDATES BELOW
Here's a shot of what the OPT7 H11 Nova Plasma LED bulbs look like.
What you will need
• OPT7 H11 Nova Plasma LED Fog Light Bulbs - 6000K Cool White - Plug-n-Play (Pack of 2)
• Phillips Screwdriver
Instructions
1. Park your Renegade and turn your steering wheel to the left and until it is at a full lock. Then, use a phillips screwdriver to loosen the 2 plastic screws securing the fender liner access panel in place.
2. With the screws loosed, you should be able to simply pry off the fender liner access panel.
3. Reach into the access port, gently pull the locking tab on the plug and pull down to remove it as shown.
4. Firmly hold the bulb and rotate it counter-clockwise until it's unlocked and then remove it from the fog light housing.
5. Carefully reinstall the new H11 LED bulb back into the fog light housing and then rotate it clockwise until it locks in place.
6. Plug the wiring harness into the new H11 LED bulb.
7. Reinstall the fender liner access panel and then, using a phillips screwdriver, lock it in place by tightening the 2 plastic screws.
8. Repeat steps 1-7 on the passenger side of your Renegade.
For comparison sake, here's a shot of what the factory Renegade fog light and DRL with standard incandescent bulbs looks like when on.
And here's what a Renegade fog light with an OPT7 H11 Nova Plasma LED bulb and a DRL running an LED bulb looks like when on.
Here are a couple of shots of what your Renegade can look like with LED headlights, day time running lights and fog lights.
Okay, so now that I've got these installed, this is what I can tell you. Looking right at them, they are really bright and shiny and maybe, a bit too bright and shiny as they are kind of hard to look at. Using them in conjunction to my new LED headlight bulbs, I'd be concerned that on coming traffic might find it difficult to look at. Of course, to make things worse, they don't even put out a whole lot of "actual" light. In fact, they offer so little actual light that it's really kind of disappointing.
I should clarify that that much like the head lights, the OPT7 H11 bulbs NEED to be aligned vertically and perpendicular to the ground when installed. This is because the reflectors in the housing are also aligned vertically and the light emitting from the LED bulb needs to hit them directly to provide the best results. The problem is, the H11 fog light bulbs are a part of the socket and the socket locks into the light housing in a specific way. Once locked in, the LEDs sit at an angle and almost horizontal or parallel to the ground. This is why it's so bright to look at and this is why it doesn't put much light out on the ground. What I will need to do is to see if I can either modify the bulb or the way it mounts in the housing and see if I can make it work.
SEE UPDATES BELOW
