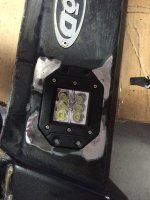
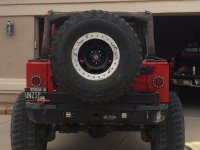
Rigids in LoD Rear Bumper

Sharkey

Word Ninja
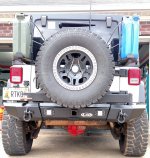
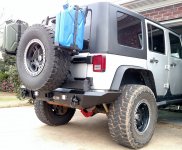
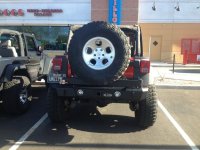
This story just gets better. So, after totally bullshitting about what would and would not work in the LoD bumper, and after admitting being wrong about whether the bumper can be ordered with square holes (so they could sell their stock instead of doing a special order), the vendor agreed to send out flush mount Rigids.

Shipping confirmation received and all seemed well and then BAM, confirmation also received that the vendor charged the 'ole credit card for the flush mount lights WITHOUT AUTHORIZATION TO DO SO!!!

Houston, we have a problem!
 

MTG

Caught the Bug
This story just gets better. So, after totally bullshitting about what would and would not work in the LoD bumper, and after admitting being wrong about whether the bumper can be ordered with square holes (so they could sell their stock instead of doing a special order), the vendor agreed to send out flush mount Rigids.

Shipping confirmation received and all seemed well and then BAM, confirmation also received that the vendor charged the 'ole credit card for the flush mount lights WITHOUT AUTHORIZATION TO DO SO!!!

Houston, we have a problem!

Ruh-roh. :grayno:
 

onbelay

New member
I hate to bring up such an old thread, but I literally have not been able to find any other related threads on the Internet. I am trying to retrofit the Rigid D2 flush mount into my LOD Signature Gen 2 rear bumper (Jeep JK). From what I can tell, there is slightly more than 3" of room between the frame cross member and the inside surface of the bumper. The D2 requires 3 3/16" (slightly more than what I have from what I can tell).

Did you end up doing this install? If so, did you have to make any modifications to the crossmember or shim the flush mount?

I appreciate any help or advice you can offer. Thanks!
 

WJCO

Meme King
I hate to bring up such an old thread, but I literally have not been able to find any other related threads on the Internet. I am trying to retrofit the Rigid D2 flush mount into my LOD Signature Gen 2 rear bumper (Jeep JK). From what I can tell, there is slightly more than 3" of room between the frame cross member and the inside surface of the bumper. The D2 requires 3 3/16" (slightly more than what I have from what I can tell).

Did you end up doing this install? If so, did you have to make any modifications to the crossmember or shim the flush mount?

I appreciate any help or advice you can offer. Thanks!

If it is too tight, could you just space the bumper away from the Jeep by 3/16" with washers?
 

onbelay

New member
If it is too tight, could you just space the bumper away from the Jeep by 3/16" with washers?

It's a really good idea, except for the bumper has side plates that bolt to the frame rails, and we drilled 1/2" holes into the frame to accommodate the bolts. I'd hate to drill another huge hole in the frame rail! Thanks for the idea; we might just do that if we cannot find a less aggressive solution.
 

TonyT

Caught the Bug
There's not enough room behind the bumper to put in the non-flushmount LED's. I went from the regular lights supplied on my GEN2 LOD Signature Series Rear bumper to some knock-off flush mount LEDs I bought for $30 off a supplier I found on Craigslist. They fit fine without needed to alter the crossmember. Way brighter, less power draw, cheap, and they should hold up to the elements better.

I just clearanced the cut-outs enough to insert the body of the lights in and then drilled the screw holes. I bought the nuts and bolts from the local hardware store.

Before:
FAE1EEC5-F946-4037-83CE-D697B43C1DC0-337-0000002549EAE090_zpsed3d8981.jpg

I wasn't paying attention and cut off too much, so I globbed on some metal with my welder and got out the grinder to smooth it flat.
A4C0FCB0-7F40-473C-8734-3D5FBA7919B0_zpsqkhbcryr.jpg
8D837985-DA6D-49FE-8E06-9FB701B2AB17_zpsjawrsljd.jpg

After:
192419F8-B50E-4E31-9912-C594CAC90F35_zpsjsqhk7bo.jpg
 
Last edited:

onbelay

New member
There's not enough room behind the bumper to put in the non-flushmount LED's. I went from the regular lights supplied on my GEN2 LOD Signature Series Rear bumper to some knock-off flush mount LEDs I bought for $30 off a supplier I found on Craigslist. They fit fine without needed to alter the crossmember. Way brighter, less power draw, cheap, and they should hold up to the elements better.

I just clearanced the cut-outs enough to insert the body of the lights in and then drilled the screw holes. I bought the nuts and bolts from the local hardware store.

After:
View attachment 240836

Thanks! So there is hope. I'm curious if these lights have the same depth as the flush-mount Rigids. At this point I'm going to probably just buy them & see how far back they go. I sent the Rigid bezel template to a friend with a CNC machine, and he's going to make me some shims/spacers if needed. I'd prefer not adding to the 1/4" thick bezel, but it is what it is. I'll post back here if/when this is finished.

Thanks for the help!

-Dawn
 

GraniteCrystal

New member
General question on this situation: these turn on with your reverse lights? Aren't these crazy bright and will blind anyone behind you? Ever an issue?
 

TonyT

Caught the Bug
General question on this situation: these turn on with your reverse lights? Aren't these crazy bright and will blind anyone behind you? Ever an issue?

I suppose they could be wired as reverse lights, but I just have them switched like the rest of my aux lighting. They are rarely used, but have come in really handy in a few situations. The $50 halogen bulb lights my bumper came with back in 2012 were dirty from dust and water penetrating the lenses and haven't worked in a long time.
 

wayoflife

Administrator
Staff member
General question on this situation: these turn on with your reverse lights? Aren't these crazy bright and will blind anyone behind you? Ever an issue?

There are lots of guys who do it and it's fine. Not like you're going to be turning them on while driving on the highway.
 

onbelay

New member
General question on this situation: these turn on with your reverse lights? Aren't these crazy bright and will blind anyone behind you? Ever an issue?

I did a write-up on a 3-way switch for these reverse lights a LOOONG time ago on JKF. Basically the switch let's me have the lights constantly off, constantly on, or triggered when the backup lights turn on ("triggered" as in the lights are wired straight to the battery and a relay is triggered).

My previous lights were 55w halogen, but i imagine these will be brighter. They're located on the bumper, not high up like the tail lights, so hopefully it's not too offensive! Good question though.
 

onbelay

New member
Sorry I didn't see this thread sooner Dawn. Yes, I did install the flush mounts and no, I did not have to make any modifications at all. Here are some pics from the Building of Meanst thread (that's the Jeep that I did the install on).

View attachment 44928
View attachment 44929
View attachment 44930
View attachment 45909
View attachment 45910

Thank you so much! Really appreciate that. I just placed the order; went with the flood pattern because I could find it for almost $100 cheaper than the diffused.

Again, thanks, and I apologize for bringing up this thread. Hope you're doing well; I know it's been a long time since I've been on the boards. Finishing up my PhD. Husband is halfway through medical school. We don't get to Jeep much, but we're slowly building up the JK for a Rubicon run. :)

-DM
 

Sharkey

Word Ninja
No worries. Congrats on the continued education. I think the floods are the better choice. IMHO the diffused are too diffused. There is good spread close but also a lot of wasted light. Make sure to post up pics of your spread lights. :beer:
 

onbelay

New member
Finished

OK, this took some time, but here it is.

1. Removed powder coat. Paint stripper was more or less ineffective, so we had to use an angle grinder + flap wheel (80 grit), dremel, and orbital sander (80 grit, 150 grit, 220 grit final).

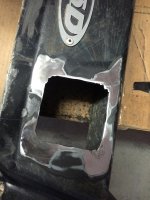
2. Squared out the existing round holes to accommodate the Rigid D2s.

3. Cut up the bolt-on safety chain plate, and welded it to the bumper just below the tow hitch. The previous location hung below the bumper and could catch on things. As for the weld, the powder coat inside the bumper caught fire and we had to stop welding to put it out. Hence the bead is uneven at the very top.

4. Primed and painted with Eastwood Extreme Chassis Black primer & epoxy paint. EXTREMELY happy with the results; looks like it was powdercoated!

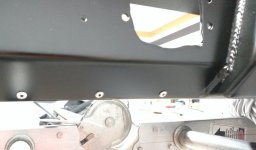
5. Riveted angle brackets to the inside of the bumper to serve as zip-tie points.

6. Customized the wiring harness -- we don't like excess wires. Also took four short lengths of black 10AWG, twisted the ends together, crimped inside of a 4AWG copper lug, then soldered. Bolted to frame and ensured ground continuity. Used two of the wires for ground (relay and lights), and two are left over for future grounding projects.

7. Sanded the LOD logo, clearcoated, and riveted back to bumper.

8. Not related: ran two extra 10AWG circuits each on the driver and passenger side, with split look. These will serve for future power needs (e.g. for our ARB freezer, 12v accessory socket, rear roof lights, and so on).

Anyhow, here are some pictures before, during, and after the install. Enjoy! Thanks for the help along the way.

Before. See the tow chain plate below the bumper, just past the muffler? Not good:
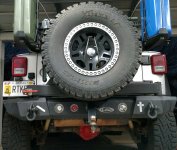
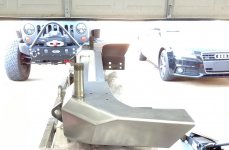
Before.jpg

Measuring:
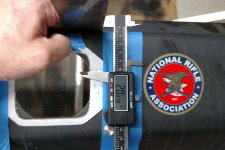
Measuring.jpg

Cut outs:
Cuts.jpg

Sanding complete:
Sanded.jpg

Safety chain plate welded on. Again, pardon the broken bead on top; had to stop to put out a fire.
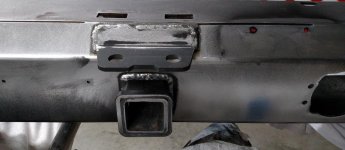
Safety Chain Plate.jpg

Riveted angle brackets:
RIvets_Rear.jpg

Riveted angle brackets:
Rivets_front.jpg

Wiring:
Wires.jpg

Pre-installation:

Finished.jpg

Done!
Installed_left.jpg

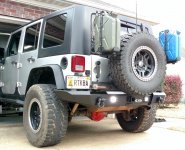
Installed_rear.jpg

Installed_righjt.jpg
 
Last edited:
Top Bottom