Harley74
New member
CLIP:
View attachment 180203
MAGAZINE:
View attachment 180206
GUNS:
View attachment 180207
PISTOL:
View attachment 180208
So endeth the lesson.
Thanks for the lesson
CLIP:
View attachment 180203
MAGAZINE:
View attachment 180206
GUNS:
View attachment 180207
PISTOL:
View attachment 180208
So endeth the lesson.
Thanks for the lesson
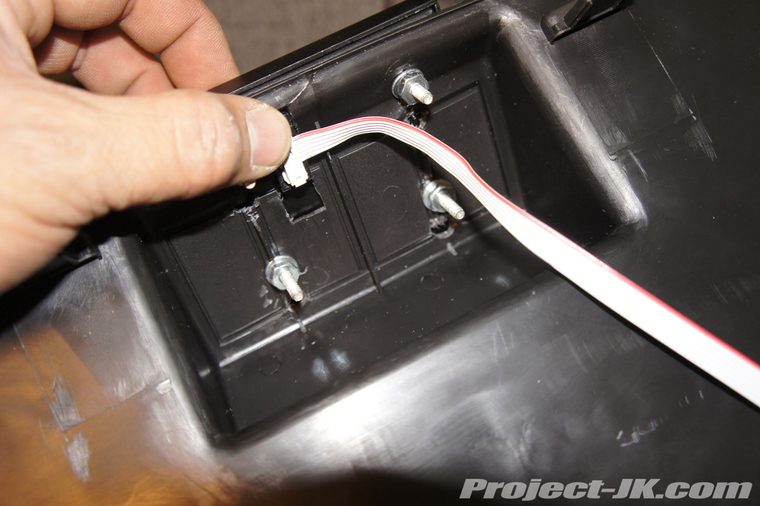
So, last October, WOLette and I stumbled upon a booth over at the Off Road Expo that was selling a really cool custom switch panel. After talking to the sales rep, we found that not only was it small, thin, backlit and devoid of bulky wiring, relays or fuses, it was also totally customizable, programmable, super easy to install, designed to make wiring a snap and was also available in 4, 6, 8, 10 and even 12 switch configuration. Needless to say, we had been wanting to clean up the rats nest of wires under Moby's hood for quite some time now and so, we decided to order one up.
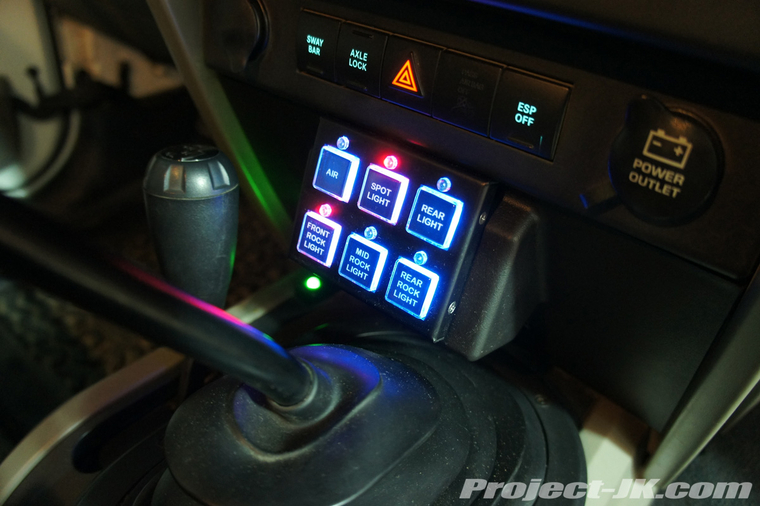
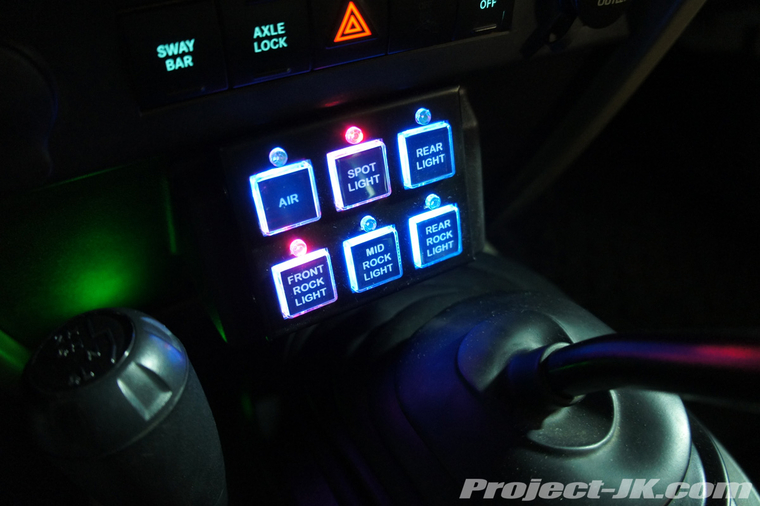
For our purposes, we already have our lockers tied in to the factory switches and so, we decided to get a panel with a 6 switch configuration. While there are up to 6 different switch programs you can chosen from, we decided to just have them all be simple ON and OFF with a push of the same button. The power module comes ready to be installed using an existing stud and nut located under the passenger side foot well. The actual switch panel can be mounted anywhere in your JK and is connected to the power module using a thin ribbon cable. We decided to try and use a Daystar switch panel to mount our switch panel and, this is how it all looked when all was said and done (please note, the buttons look brighter than they actually are due to the exposure of the camera):
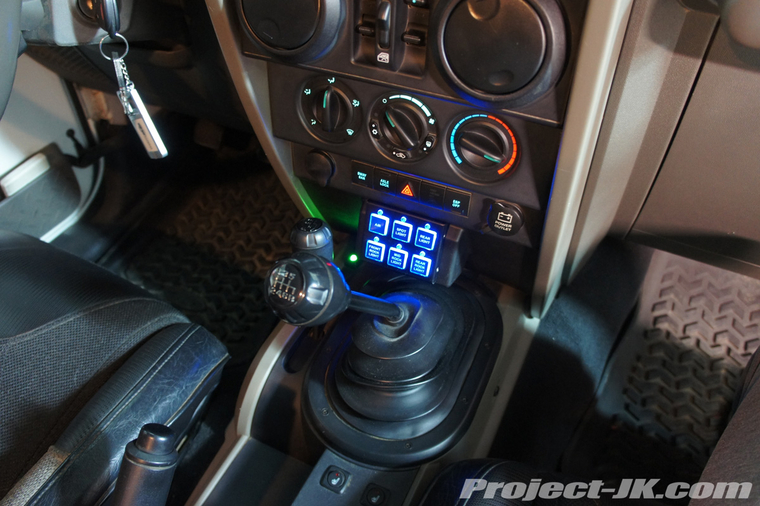
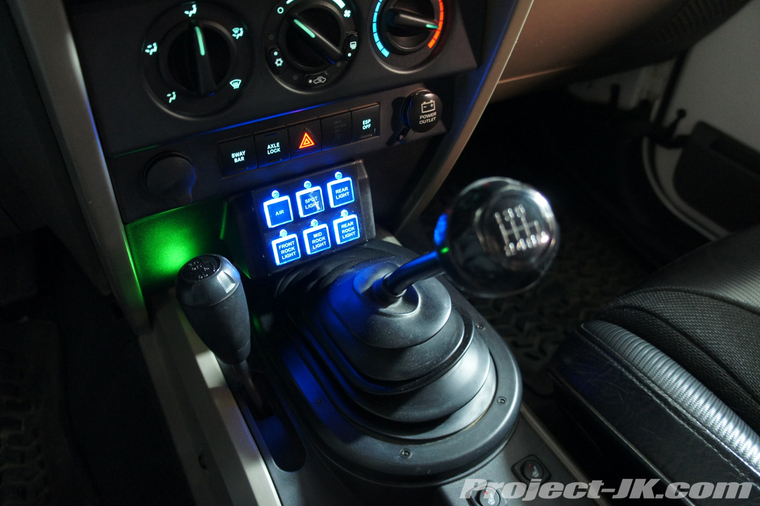
Being that we do have an ARB compressor for our lockers, we decided to make a switch for it and then give the rest to the various lights we have installed. If we didn't have our lockers tied into the factory switch, I would have dedicated 2 of these for them or, gotten an 8 switch panel. Anyway, here's a shot of how we configured our buttons and labled them:
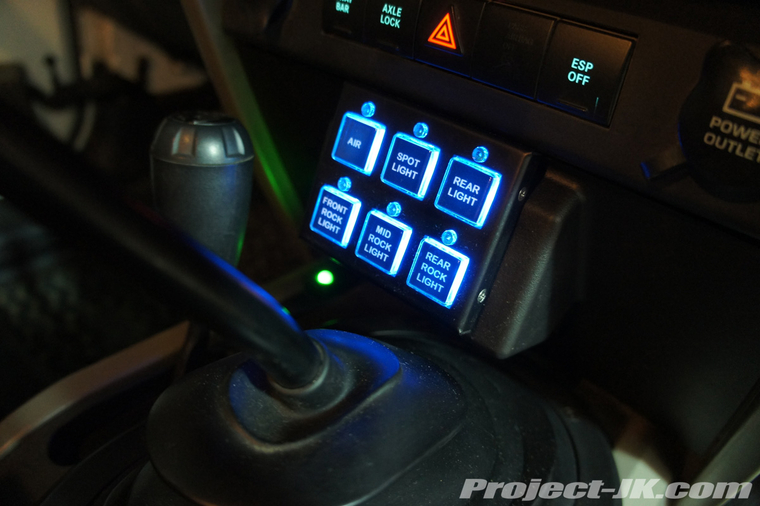
Here's a shot of what the switches look like when they are on...
Here what the power module looks like installed and wired up...
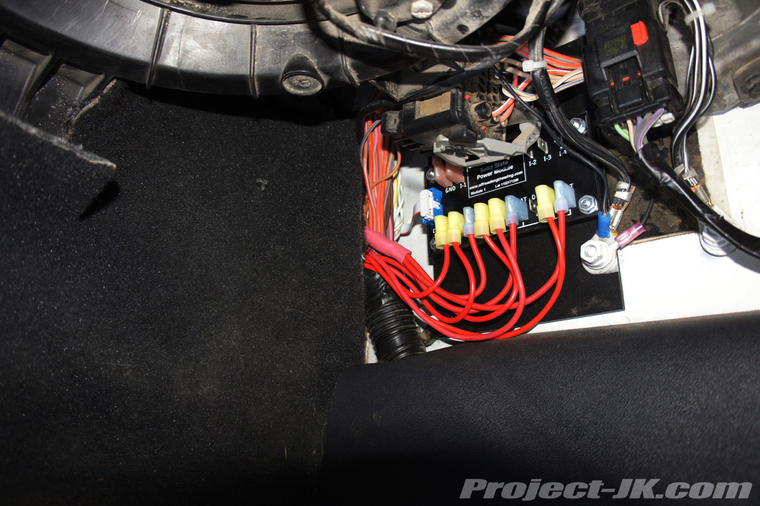
Here you can see just how thin and small the ribbon cable is that connects the power module to the actual switch panel. Had the Daystar panel not worked, I would have just installed this directly on the factory panel or along the center console under the hand brake...
Like I said, installation was a piece of cake and wiring was now easier to do than ever before. I think the hardest part of this install was cleaning up the mess I had under the hood first so that I could have a clean slate to work with. In retrospect, I might have gotten an 8 switch panel so that I could make 2 of the buttons operate my winch - IN for one button and OUT for the other. I will try to get a complete write-up done for this as soon as possible but, it'll most likely be after the holidays. :yup:
Not to make this into a firearm thread, it's just one of those things that irritates the shit out of me.
Maybe this is why:
Understandable
View attachment 180896View attachment 180897
I got my RamMount last night and this thing is pretty stout. I can shake on the mounting pole and it barely vibrates. It does take up some space on the passenger side.
That looks clean.
What is that name of that? It's super clean !
I wanna know too
I just took these photos to show off my new pistol mount, it's magnetic, so not make/model specific and VERY strong. Made by COJO, ~$30
The grab bar came today and it looks sweet. Looks great in the Jeep and the RAM mount seems that it is gonna work great.
View attachment 178274
View attachment 178276
View attachment 178277
View attachment 178278
View attachment 178279
View attachment 178280
View attachment 178281
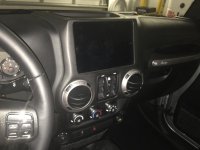
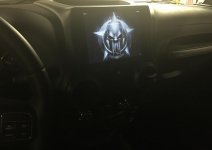
iPad mini in dash. Head unit behind the iPad mini. Controls switch-pros 8100
iPad mini in dash. Head unit behind the iPad mini. Controls switch-pros 8100
Another option for a RAM mount, borrowed from Grubbicon's build thread -
 [emoji106][emoji106][emoji106][emoji106]