What was done to your rig this week?

100% improvement! Where did the replacement panel come from? I assume that it was not simply hidden under the monster woofer?
Ebay. I searched for Jeep JK Wrangler Passenger Rear Quarter Trim Panel.

My Rubicon is a 2012. My brother has a 2010 he removed the subwoofer from. He didn’t need a panel. This was behind the subwoofer-
Resized_20231004_124136.jpeg
 
Working on the 2015, 103,000 miles.
Since I was this far into it, oil cooler and small parts around it got replaced. The OEM looked fine, the engine was dry no signs of oil but, with 103k miles I don't want to go through this shit again. Replaced plugs and coils.
I really, really wish they would pile more shit hoses and wires and Christmas tree pins in hard-to-reach places, what a fucking joke. Excuse the swearing I literally just got done and still on the Tourette's High lol
20231107_163001.jpg
 
Working on the 2015, 103,000 miles.
Since I was this far into it, oil cooler and small parts around it got replaced. The OEM looked fine, the engine was dry no signs of oil but, with 103k miles I don't want to go through this shit again. Replaced plugs and coils.
I really, really wish they would pile more shit hoses and wires and Christmas tree pins in hard-to-reach places, what a fucking joke. Excuse the swearing I literally just got done and still on the Tourette's High lol
About to break into mine for plugs and coils, was wondering if I should go ahead and swap out the oil cooler too. Did you replace with an OEM version? I'm at 73,000 miles....I already had to break into it a couple times for injectors and a rocker arm...it isn't fun that for sure.
 
About to break into mine for plugs and coils, was wondering if I should go ahead and swap out the oil cooler too. Did you replace with an OEM version? I'm at 73,000 miles....I already had to break into it a couple times for injectors and a rocker arm...it isn't fun that for sure.
I replaced it with the all aluminum Dorman brand.
There are cheaper all aluminum versions out there but, I would stay away from them.
 
It stopped raining so I thought I'd take a quick 30 minutes and replace the PCV valve on the 2015 JK 3.6.... 2 hours later ...what a PIA

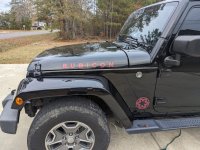
I'm convinced Jeep purposely engineered the passenger side with an oversized battery box and routed the hoses on the passenger side to block easy access and deter DIY.

Couldn't pull the hose free from the PCV valve because it was too tight a fit for my hand and it wouldn't allow for a straight pull up to remove the hose, I crawled underneath and with a long 1/2" wood dowel pushed up on the edge of the hose to remove it - it popped off easily with a straight push up. A hose spoon pick type tool probably would've made it much easier than crawling underneath; while I was under there I looked to see if I could get to either of the T25 screws holding the pcv valve and it was a big no. At this point, I'm pretty sure I heard my neighbors shut their solid doors when I started swearing LOL

I had a relatively small flex head 1/4" long ratchet and managed to break the screw loose after numerous tries, finally got it using one hand.
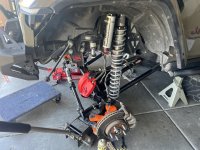
I used my finger to hold the ratchet head on the bolt and once I got the ratchet to grab a tooth, I was able to break it loose then was able to unscrew it out slowly with my fingers. Had to remove the wheel and fender to access the bottom screw - also a PIA getting a T25 torx to stay in place.

I would recommend getting a stubby 1/4-inch micro ratchet combo socket and bit driver with a short draw of 90-teeth or more (shorter in length than the Mopar hardtop ratchet tool) as there is no space between the firewall and the valve bolt to use normal tools, only enough space to use one hand to hold the T25 on the bolt and turn the ratchet.

I replaced the PCV with a Dorman PCV and it came with 8.8- 8mm hex head flange bolts, if you get the Mopar pcv valve and it has the T25 screws, do yourself a favor, head to Ace Hardware and replace the T25 with the proper sized hex head flange 8.8 bolt or just order the Dorman valve.

The hex head made it much easier to hold onto and get them finger started, also made it much easier to get a socket to stay on and tighten them; doesn't take much to tighten them. Again, a ratchet with 90-teeth or better would make it easier and faster to tighten than a standard 72-tooth ratchet.

I figure it took 1.5 hours to remove, most of that time trying to get that upper T25 screw off and about 30 minutes to reassemble everything.

Have fender clips on hand unless someone has a better suggestion on how to access the lower bolt.

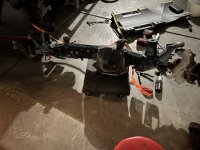
This is going to make replacing the rear leaking axle shaft a cake walk (y)
 
Replaced my silver Rubicon stickers with red ones to match the others. Wife cut them for me.
 

Attachments

  • PXL_20231112_221549701.jpg
    PXL_20231112_221549701.jpg
    257.5 KB · Views: 13
Switched out the front axle and dialed in the alignment. May have to due some adjustments to the bump stops though. I think there may be some clearance problems with the oil filter and upper control arm.
 

Attachments

  • IMG_6191.jpeg
    IMG_6191.jpeg
    189.7 KB · Views: 11
  • IMG_6193.jpeg
    IMG_6193.jpeg
    186.2 KB · Views: 11
  • IMG_6206.jpeg
    IMG_6206.jpeg
    250.5 KB · Views: 11
  • IMG_6207.jpeg
    IMG_6207.jpeg
    240 KB · Views: 11
  • IMG_6210.jpeg
    IMG_6210.jpeg
    252.8 KB · Views: 11
Top Bottom