What's Involved in Re-gearing a JK, Doing your own re-gear DIY

WJCO

Meme King
Nice write up, D. I wish I lived close to you. I’d help you wrench on shit.
Sent from my iPhone using WAYALIFE mobile app

Thanks. That would be fun. Always a project around here.

Nice write up! It’s very helpful to me in deciding that I will not do this alone. [emoji23]

As I get older, my patience has dwindled! [emoji15] A co-worker worked in a transmission shop swapping out gears for eight years. We are going to tackle mine together in the future.

Being that you have a friend familiar with this, you'll be just fine.

Nice wright up.

I will keep this handy.

Thanks for taking the time to share this. It is a time consuming job, and even more with all the pictures and posting.

Congratulations

That sounds like a successful install.

Thanks again for taking the time to share the details.

Thanks. I would have like to photographed more, but I'm limited to two hands. Some of those photos were actually still shots from videos. If you have any other questions though, I'll try to answer them.
 

WJCO

Meme King
WJCO, great job documenting this procedure! While I have never had the need to do this, I do have a couple of possible suggestions:

Prior to installing the outer races (like the night before) freeze to shrink them and/or use a heat gun to warm the differential housing to subsequently make installation easier.

Thanks. I actually read your comment last night and put the pinion races in the freezer early this morning before I did the front axle. I installed them around 1pm and it made it so much easier. Great tip.
 
Last edited:

sipafz

Caught the Bug
Thanks. I actually read your comment last night and put the pinion races in the freezer early this morning. I installed them around 1pm and it made it so much easier. Great tip.

Good to hear that it helped! Reading through the tool list, I checked all the boxes so now I’m second guessing my planed move to 33’s and thinking maybe gears and 35’s. Thanks buddy!
 

sparks

Member
^ Yeah, that's pretty accurate. The rear took me 8 hours yesterday, but I went slow because it's been years since I did a set and I probably was more meticulous than I should have been. Along with taking some photos, that added some time. I setup the rear 4 times before I got the pattern acceptable. I really would have liked a better pattern but it just didn't happen. That happens sometimes. It was centered enough so I went with it.

Today I did the front and it took about 5 hours. My first shim setting resulted in perfection so I really lucked out.

We just got back from about 100 mile road test and no noises nor vibrations nor leaks so I'm really happy it went this smoothly.

Thanks for the detailed info. Glad it went well for you
 

jesse3638

Hooked
Great write up though I don't ever plan on doing this myself..haha. I've always wondered what went into it. Trial an error like that would definitely try my patience.

Sent from my 2PYB2 using WAYALIFE mobile app
 

WJCO

Meme King
Thanks for the detailed info. Glad it went well for you

No problem. Another 70 miles or so yesterday and all is good. Which makes me happy.

Holy hell Doug - that's an amazing write-up you did there!! Great job :thumb:

Thank you. I wasn't sure I was even going to do a write-up but being I was there, I figured why not. I tried to capture more but it was tricky. Just glad to be done with the job.

It looks like he has been taking lessons from the master

Lol. Always more to learn. I never really liked doing them when I was a tech and thought I'd never do a set again after I quit. A part of me is still wondering why I put myself through this recent torture.

Great write up though I don't ever plan on doing this myself..haha. I've always wondered what went into it. Trial an error like that would definitely try my patience.

Sent from my 2PYB2 using WAYALIFE mobile app

Thanks. That's the most frustrating part. Especially when you keep changing shims and don't appear to be getting anywhere.
 

VeruGE*144

Caught the Bug
Great write up man. I would not even think of attempting this myself lol. Maybe one day when I don’t have to have the Jeep ready the next day for the wife to drive around town. Seems like a lot of work, I would love to learn how to do this someday though


Sent from my iPhone using WAYALIFE mobile app
 

Slimebones

Active Member
Nice write up. Must feel real rewarding to pull this off successfully. Don't have to wonder about whether someone else may have skipped a step or overlooked something or got distracted. This way you know exactly what was done. Good job.
 

MSJKU11

Caught the Bug
Wow, great writeup. Although I will probably never do this myself or was a fun read.

Sent from my SAMSUNG-SM-G930A using Tapatalk
 
Add one note we experienced with a Rubicon: front one requires differential lock sensor to be removed before removing pinion. We broke the actuator off. Need to use something to hold plunger out while installing carrier. We pulled plunger out, cut a rubber washer in half and to size, tied a string to it for removal. I agree it is time consuming, tedious but rewarding when all over.


Sent from my iPad using WAYALIFE mobile app
 

WJCO

Meme King
Great write up man. I would not even think of attempting this myself lol. Maybe one day when I don’t have to have the Jeep ready the next day for the wife to drive around town. Seems like a lot of work, I would love to learn how to do this someday though


Sent from my iPhone using WAYALIFE mobile app

Nice write up. Must feel real rewarding to pull this off successfully. Don't have to wonder about whether someone else may have skipped a step or overlooked something or got distracted. This way you know exactly what was done. Good job.

Wow, great writeup. Although I will probably never do this myself or was a fun read.

Sent from my SAMSUNG-SM-G930A using Tapatalk

great write up. I don't ever see myself tackling this job, but I do like to know the process. Thanks!

Thank you.

Add one note we experienced with a Rubicon: front one requires differential lock sensor to be removed before removing pinion. We broke the actuator off. Need to use something to hold plunger out while installing carrier. We pulled plunger out, cut a rubber washer in half and to size, tied a string to it for removal. I agree it is time consuming, tedious but rewarding when all over.


Sent from my iPad using WAYALIFE mobile app

Good tip. I was just talking to someone the other day that was telling me he did something similar on his Rubicon with the string.
 

Saharaunlmtd

Caught the Bug
Add one note we experienced with a Rubicon: front one requires differential lock sensor to be removed before removing pinion. We broke the actuator off. Need to use something to hold plunger out while installing carrier. We pulled plunger out, cut a rubber washer in half and to size, tied a string to it for removal. I agree it is time consuming, tedious but rewarding when all over.


Sent from my iPad using WAYALIFE mobile app

If the Rubicon axle is not on a Rubicon, is the sensor essential to the locker operation?

The reason I ask is; I’m dropping my JK off to be regeared this weekend and I don’t exactly have an ORE in my neck of the woods so the shop might not be 100% familiar with the Rubicon e-locker.


Sent from my iPhone using WAYALIFE mobile app
 

TRLJNKY

New member
Great write up and good timing. Just was about to start researching this and see if I wanted to attempt it. I prefer doing things myself if at all possible. I already hate the fact that I dont have access to wiTech and have to take my shit in haha. Thanks WJCO.
 
If the Rubicon axle is not on a Rubicon, is the sensor essential to the locker operation?

The reason I ask is; I’m dropping my JK off to be regeared this weekend and I don’t exactly have an ORE in my neck of the woods so the shop might not be 100% familiar with the Rubicon e-locker.


Sent from my iPhone using WAYALIFE mobile app

I have no idea if Sahara comes with electric lockers, if yes, it matters. The actuator has an internal spring and must be held out while installing the carrier. It's simple if they know. Just discuss with them.

If the Rubicon axles were swapped in: The sensor is an indicator for the differential being locked. Not knowing how the locker was wired; If you do not have any indication the electric locker is locked, it wouldn't matter.


Sent from my iPad using WAYALIFE mobile app
 
Last edited:

Saharaunlmtd

Caught the Bug
I have no idea if Sahara comes with electric lockers, if yes, it matters. The actuator has an internal spring and must be held out while installing the carrier. It's simple if they know. Just discuss with them.

If the Rubicon axles were swapped in: The sensor is an indicator for the differential being locked. Not knowing how the locker was wired; If you do not have any indication the electric locker is locked, it wouldn't matter.


Sent from my iPad using WAYALIFE mobile app

Thanks. It was swapped in. I tried to wire in an indicator light when I did the swap but it never worked and wasn’t a concern.


Sent from my iPhone using WAYALIFE mobile app
 

nbunga

Caught the Bug
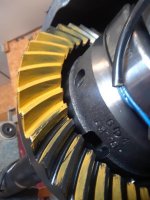
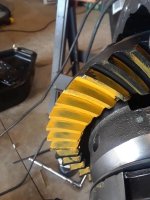
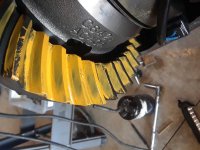
Well thanks to WJCO I've decided to tackle regearing myself. Figured I'd do the front first since it's a take off Rubicon axle and it's not on the Jeep yet. Everything is going smooth so far. Just painted the gears to check the pinion depth and want to see other opinions on the markings. I'm finding it hard to actually see very defined marks.
20180716_165309.jpg 20180716_165237.jpg 1531774837186.jpg
 
Top Bottom